转载请注明出处:
http://blog.csdn.net/aa464971/article/details/78250259
Github地址:
https://github.com/dengyuhan/SpringSample
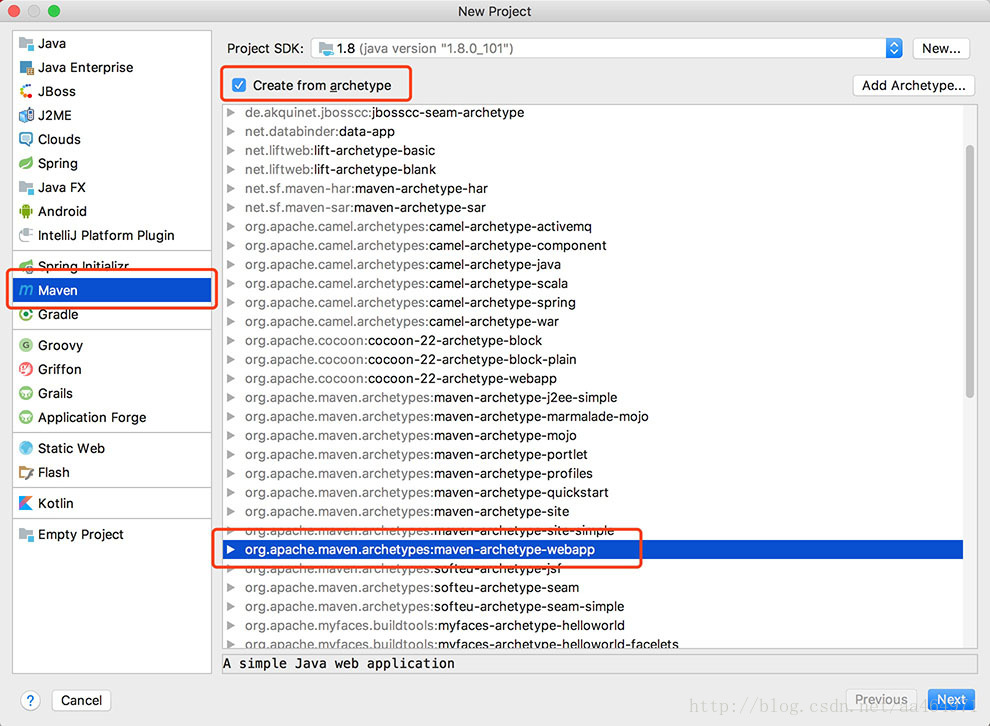
创建新项目
- 创建一个新项目,
Maven-Create from archetype,选中maven-archetype-webapp这个archetype
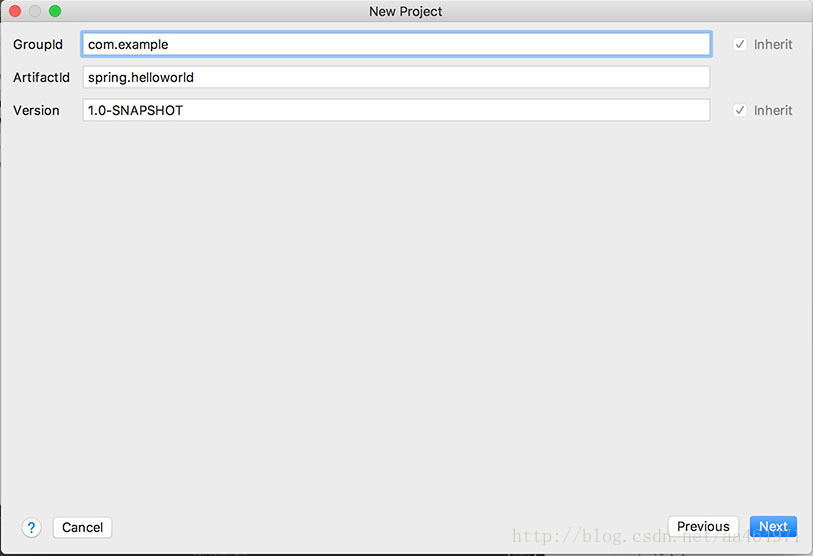
- 输入GroupId和ArtifactId
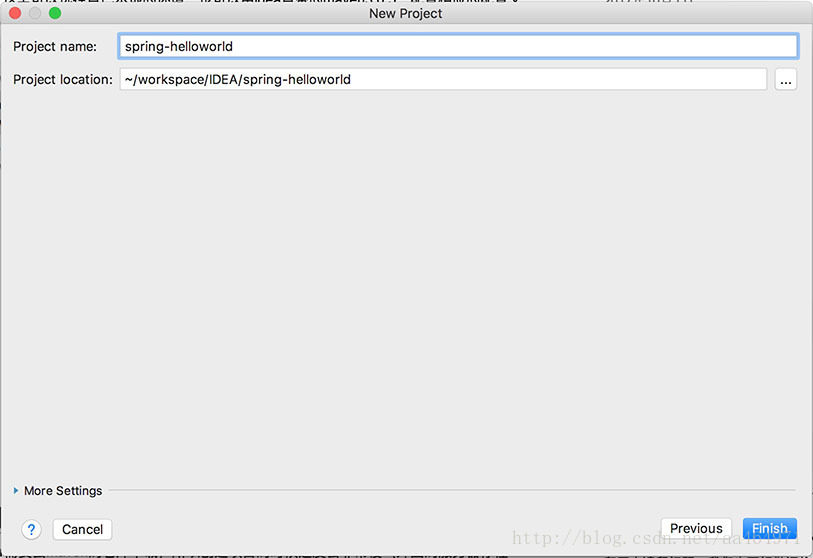
- 输入项目名称并选择项目存放的路径
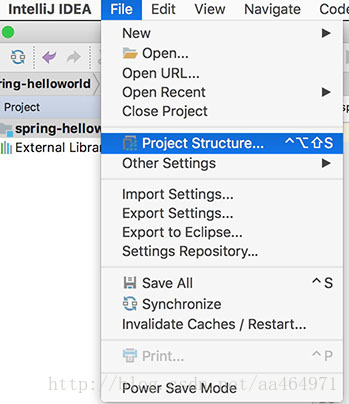
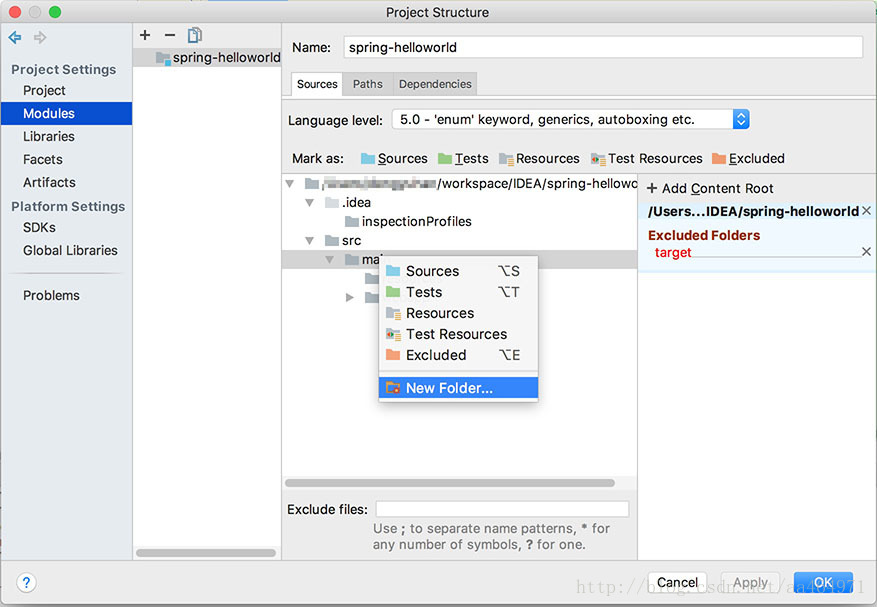
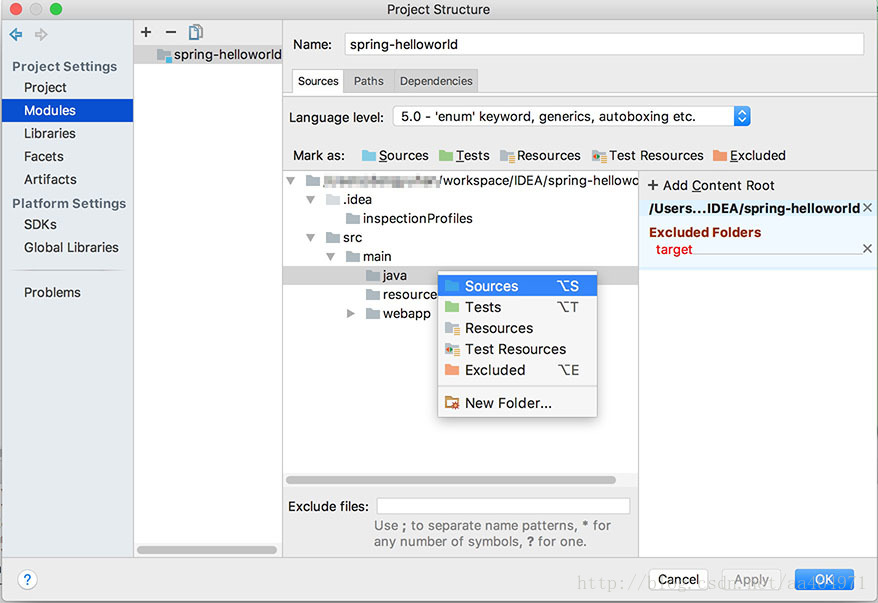
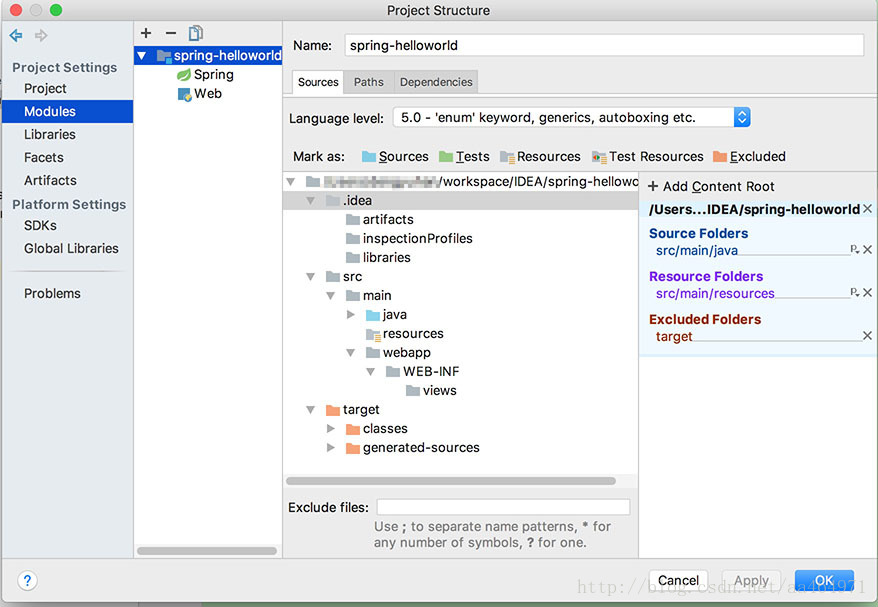
配置项目结构
- 进入项目结构配置界面,
File-Project Structure
- 选中
Modules; - 在
main下创建java文件夹; - 在
webapp-WEB-INF下创建views文件夹
- 标记
java文件夹为Sources - 标记
resources文件夹为Resources
- 最终的项目结构如图
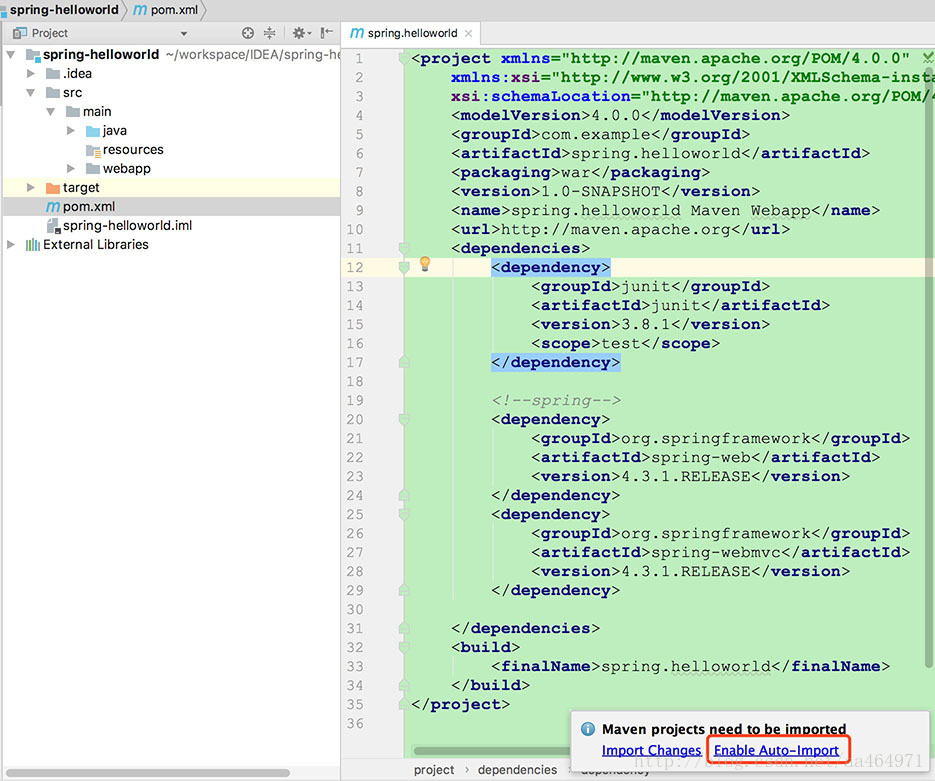
引入Spring
打开pom.xml,引入Spring
<!--jstl-->
<dependency>
    <groupId>javax.servlet.jsp.jstl</groupId>
    <artifactId>jstl-api</artifactId>
    <version>1.2</version>
</dependency>

<!--spring-->
<dependency>
    <groupId>org.springframework</groupId>
    <artifactId>spring-web</artifactId>
    <version>4.3.1.RELEASE</version>
</dependency>
<dependency>
    <groupId>org.springframework</groupId>
    <artifactId>spring-webmvc</artifactId>
    <version>4.3.1.RELEASE</version>
</dependency>- 1
- 2
- 3
- 4
- 5
- 6
- 7
- 8
- 9
- 10
- 11
- 12
- 13
- 14
- 15
- 16
- 17
- 18
如果提示是否需要开启自动导入,选择Enable Auto-Import,否则更改了pom.xml不会自动更新
配置web.xml
<web-app>
    <context-param>
        <param-name>contextConfigLocation</param-name>
        <param-value>/WEB-INF/dispatcher-servlet.xml</param-value>
    </context-param>
    <listener>
        <listener-class>org.springframework.web.context.ContextLoaderListener</listener-class>
    </listener>
    <servlet>
        <servlet-name>dispatcher</servlet-name>
        <servlet-class>org.springframework.web.servlet.DispatcherServlet</servlet-class>
        <load-on-startup>1</load-on-startup>
    </servlet>
    <servlet-mapping>
        <servlet-name>dispatcher</servlet-name>
        <url-pattern>/</url-pattern>
    </servlet-mapping>
</web-app>- 1
- 2
- 3
- 4
- 5
- 6
- 7
- 8
- 9
- 10
- 11
- 12
- 13
- 14
- 15
- 16
- 17
- 18
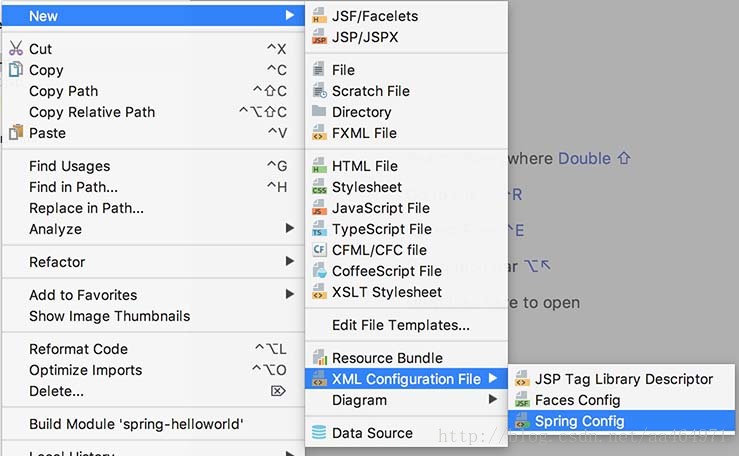
配置Spring
在WEB-INF下新建dispatcher-servlet.xml
<?xml version="1.0" encoding="UTF-8"?>
<beans xmlns="http://www.springframework.org/schema/beans"
    xmlns:xsi="http://www.w3.org/2001/XMLSchema-instance"
    xmlns:context="http://www.springframework.org/schema/context"
    xmlns:mvc="http://www.springframework.org/schema/mvc"
    xsi:schemaLocation="http://www.springframework.org/schema/beans http://www.springframework.org/schema/beans/spring-beans.xsd http://www.springframework.org/schema/context http://www.springframework.org/schema/context/spring-context.xsd http://www.springframework.org/schema/mvc http://www.springframework.org/schema/mvc/spring-mvc.xsd">

    <!--扫描包路径-->
    <context:component-scan base-package="com.example" />

    <!-- 开启注解 -->
    <context:annotation-config />
    <mvc:annotation-driven />

    <!-- 静态资源(js、image等)的访问 -->
    <mvc:default-servlet-handler />

    <!--ViewResolver 视图解析器-->
    <!--用于支持Servlet、JSP视图解析-->
    <bean id="jspViewResolver"
        class="org.springframework.web.servlet.view.InternalResourceViewResolver">
        <property name="viewClass" value="org.springframework.web.servlet.view.JstlView" />
        <property name="prefix" value="/WEB-INF/views/" />
        <property name="suffix" value=".jsp" />
    </bean>

</beans>- 1
- 2
- 3
- 4
- 5
- 6
- 7
- 8
- 9
- 10
- 11
- 12
- 13
- 14
- 15
- 16
- 17
- 18
- 19
- 20
- 21
- 22
- 23
- 24
- 25
- 26
- 27
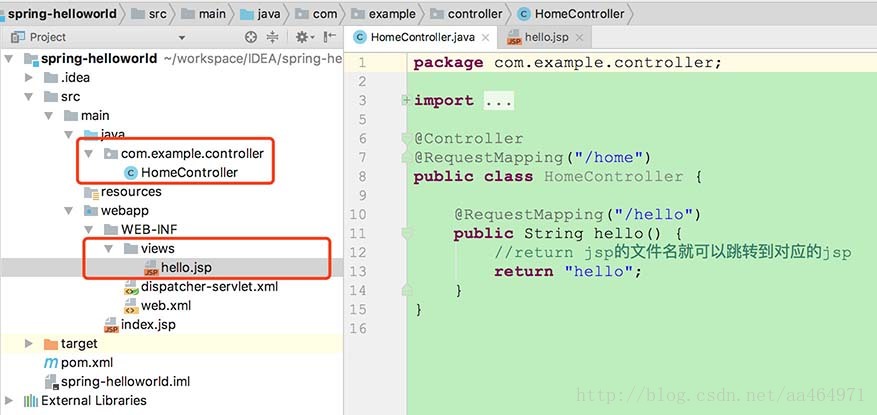
配置访问路径与视图
- 创建一个类命名HomeController,并注解
@Controller,这个类就会被当成Controller - 再加上访问路径的注解
@RequestMapping("/home") - 在HomeController内创建一个hello方法,在方法上注解
@RequestMapping("/hello"),这样当访问http://localhost:8080/spring-helloworld/home/hello的时候,就会执行这个方法 - 最后
return "hello",这样执行完hello方法后会跳转到hello.jsp(hello.jsp需要建在WEB-INF-views下)
配置Tomcat

添加一个Tomcat服务 + - Tomcat Server - Local

切换到Deployment,+ - Artifact...添加当前项目的war,并设置项目访问路径为spring-helloworld

运行Tomcat

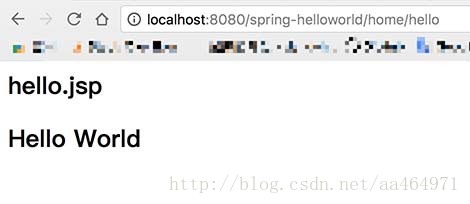
运行完成后,在浏览器访问http://localhost:8080/spring-helloworld/home/hello,就进入到hello.jsp了
*关于使用JSP
如果需要在jsp使用el表达式和taglib,那还需要在pom.xml引入相应的库
<dependency>
    <groupId>javax.el</groupId>
    <artifactId>javax.el-api</artifactId>
    <version>3.0.0</version>
</dependency>
<dependency>
    <groupId>taglibs</groupId>
    <artifactId>standard</artifactId>
    <version>1.1.2</version>
</dependency>- 1
- 2
- 3
- 4
- 5
- 6
- 7
- 8
- 9
- 10
并且在jsp的第一行加入isELIgnored = false,否则el表达式不会生效
<%@page isELIgnored="false" %>