1. go hello world
创建文件夹gotest,在其中创建test1.go文件,并写入
package main

import (

	"fmt"
)

func main() {
	fmt.Println("hello world")
}
运行命令
go run test1.go
可以看到输出hello world

2. cli 命令行的使用
代码如下:
package main

import (
	"fmt"
	"log"
	"os"

	"github.com/urfave/cli/v2"
)

func main() {

	app := &cli.App{
		Name:  "hello",
		Usage: "hello world example",
		Action: func(c *cli.Context) error {
			fmt.Println("hello world")
			return nil
		},
	}

	err := app.Run(os.Args)
	if err != nil {
		log.Fatal(err)
	}
	// fmt.Println("hello world")
}
运行:go build -o test1
可能会运行错误,找不到包。此时可以通过生成go.mod文件来管理包
生成go.mod文件
go mod init gotest //其中gotest是go文件所在文件夹的名称
扫描二维码关注公众号,回复: 16425817 查看本文章

注意:
在上面中,我们通过 go mod init xxx命令生成了go.mod文件之后,这只是一个空的文件, 其中依赖的各种包还没有生成。
可以使用以下2种命令获取:
<1> go get 包名 例如:go get github.com/urfave/cli/v2
如果依赖包比较多,那么 go get 就比较麻烦了。可以使用另外一个命令:
<2> go mod tidy 这个命令将会扫描所有我们写的.go文件中import到的库包,并生成对应的记录到go.mod文件里。
2.1 cli.Context
package main

import (
	"fmt"
	"log"
	"os"

	"github.com/urfave/cli/v2"
)

func main() {

	app := &cli.App{
		Name:  "hello",
		Usage: "hello world example",
		Action: func(c *cli.Context) error {
			// fmt.Println("hello world")
			fmt.Printf("Hello %s", c.Args().Get(0))
			return nil
		},
	}

	err := app.Run(os.Args)
	if err != nil {
		log.Fatal(err)
	}
	// fmt.Println("hello world")
}
运行结果:
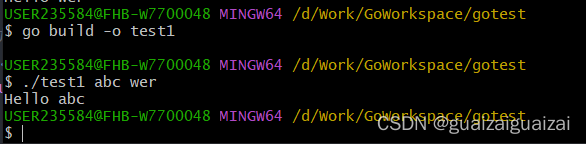
c.Args() //可以获取运行命令后的参数列表,是一个切片,cCtx.Args().Get(0)是获取第一个位置的参数,第二个第三个依次类推
fmt包输出函数
func Print(a ...interface{}) (n int, err error)
func Printf(format string, a ...interface{}) (n int err error)
func Printfln(a ...interface{}) (n int, err error)
参考:
https://juejin.cn/post/7098296317394288671