第一阶段:利用训练好的文件(如:bvlc_alexnet.npy),测试图片。
文件链接:https://pan.baidu.com/s/1QwBcuVr0u82ba5m5VnZyNg 密码:92u9
内容如下:
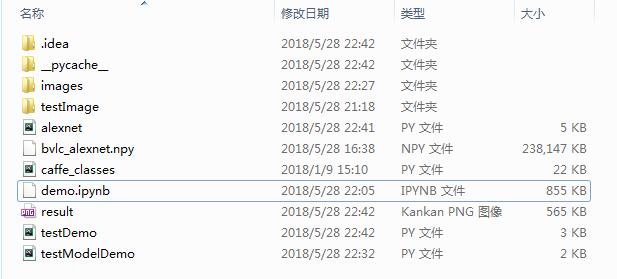
举例说明:
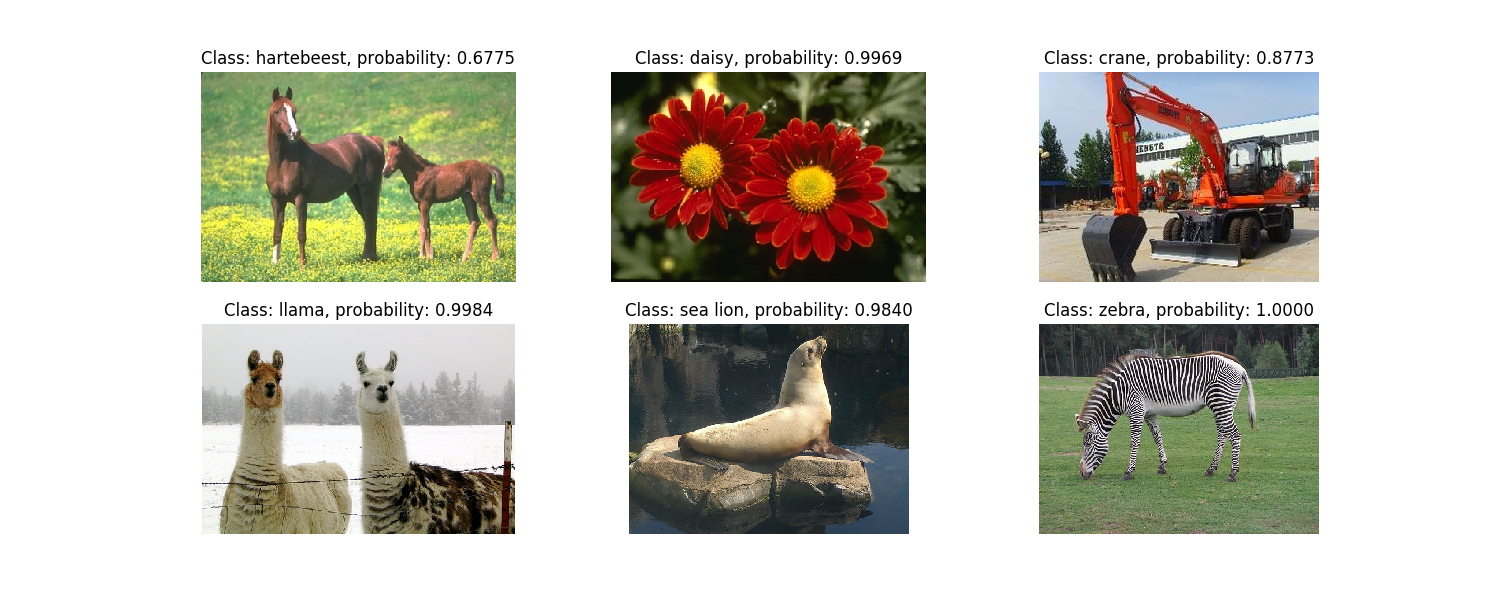
测试图像集:

测试结果:
代码:
import os
import cv2
import numpy as np
import tensorflow as tf
import matplotlib.pyplot as plt
from alexnet import alexNet
from caffe_classes import class_names

## 只用将测试的图片放入images文件夹中即可
########################## step1 ##########################
# mean of imagenet dataset in BGR
imagenet_mean = np.array([104., 117., 124.], dtype=np.float32)

# add path of testImages
current_dir = os.getcwd()
image_dir = os.path.join(current_dir, 'images')


########################## step2 ##########################
#placeholder for input and dropout rate
x = tf.placeholder(tf.float32, [1, 227, 227, 3])
keep_prob = tf.placeholder(tf.float32)

#create model with default config ( == no skip_layer and 1000 units in the last layer)
model = alexNet(x, keep_prob, 1000, [])

#define activation of last layer as score
score = model.fc3

#create op to calculate softmax
softmax = tf.nn.softmax(score)

########################## step3 ##########################
# step2: load all images
img_files = [os.path.join(image_dir, f) for f in os.listdir(image_dir) if f.endswith('.png')]
imgs = []
for f in img_files:
    imgs.append(cv2.imread(f))
# plot images
fig = plt.figure(figsize=(15, 6))
for i, img in enumerate(imgs):
    fig.add_subplot(2, 3, i + 1)
    plt.imshow(cv2.cvtColor(img, cv2.COLOR_BGR2RGB))
    plt.axis('off')

########################## step4 ##########################
with tf.Session() as sess:
    # Initialize all variables
    sess.run(tf.global_variables_initializer())

    # Load the pretrained weights into the model
    # model.load_initial_weights(sess)
    model.loadModel(sess)  # load model
    # Create figure handle
    fig2 = plt.figure(figsize=(15, 6))

    # Loop over all images
    for i, image in enumerate(imgs):
        # Convert image to float32 and resize to (227x227)
        img = cv2.resize(image.astype(np.float32), (227, 227))

        # Subtract the ImageNet mean
        img -= imagenet_mean

        # Reshape as needed to feed into model
        img = img.reshape((1, 227, 227, 3))

        # Run the session and calculate the class probability
        probs = sess.run(softmax, feed_dict={x: img, keep_prob: 1})

        # Get the class name of the class with the highest probability
        class_name = class_names[np.argmax(probs)]

        # Plot image with class name and prob in the title
        fig2.add_subplot(2, 3, i + 1)
        plt.imshow(cv2.cvtColor(image, cv2.COLOR_BGR2RGB))
        plt.title("Class: " + class_name + ", probability: %.4f" % probs[0, np.argmax(probs)])
        plt.axis('off')
        plt.savefig('result.png')
其中from alexnet import alexNet,alexnet.py的 代码为:
import tensorflow as tf
import numpy as np
# define different layer functions
# we usually don't do convolution and pooling on batch and channel
def maxPoolLayer(x, kHeight, kWidth, strideX, strideY, name, padding = "SAME"):
    """max-pooling"""
    return tf.nn.max_pool(x, ksize = [1, kHeight, kWidth, 1],
                          strides = [1, strideX, strideY, 1], padding = padding, name = name)

def dropout(x, keepPro, name = None):
    """dropout"""
    return tf.nn.dropout(x, keepPro, name)

def LRN(x, R, alpha, beta, name = None, bias = 1.0):
    """LRN"""
    return tf.nn.local_response_normalization(x, depth_radius = R, alpha = alpha,
                                              beta = beta, bias = bias, name = name)

def fcLayer(x, inputD, outputD, reluFlag, name):
    """fully-connect"""
    with tf.variable_scope(name) as scope:
        w = tf.get_variable("w", shape = [inputD, outputD], dtype = "float")
        b = tf.get_variable("b", [outputD], dtype = "float")
        out = tf.nn.xw_plus_b(x, w, b, name = scope.name)
        if reluFlag:
            return tf.nn.relu(out)
        else:
            return out

def convLayer(x, kHeight, kWidth, strideX, strideY,
              featureNum, name, padding = "SAME", groups = 1):
    """convolution"""
    channel = int(x.get_shape()[-1])
    conv = lambda a, b: tf.nn.conv2d(a, b, strides = [1, strideY, strideX, 1], padding = padding)
    with tf.variable_scope(name) as scope:
        w = tf.get_variable("w", shape = [kHeight, kWidth, channel/groups, featureNum])
        b = tf.get_variable("b", shape = [featureNum])

        xNew = tf.split(value = x, num_or_size_splits = groups, axis = 3)
        wNew = tf.split(value = w, num_or_size_splits = groups, axis = 3)

        featureMap = [conv(t1, t2) for t1, t2 in zip(xNew, wNew)]
        mergeFeatureMap = tf.concat(axis = 3, values = featureMap)
        # print mergeFeatureMap.shape
        out = tf.nn.bias_add(mergeFeatureMap, b)
        return tf.nn.relu(tf.reshape(out, mergeFeatureMap.get_shape().as_list()), name = scope.name)

class alexNet(object):
    """alexNet model"""
    def __init__(self, x, keepPro, classNum, skip, modelPath = "bvlc_alexnet.npy"): # 模型bvlc_alexnet.npy
        self.X = x
        self.KEEPPRO = keepPro
        self.CLASSNUM = classNum
        self.SKIP = skip
        self.MODELPATH = modelPath

        #build CNN
        self.buildCNN()

    def buildCNN(self):
        """build model"""
        conv1 = convLayer(self.X, 11, 11, 4, 4, 96, "conv1", "VALID")
        lrn1 = LRN(conv1, 2, 2e-05, 0.75, "norm1")
        pool1 = maxPoolLayer(lrn1, 3, 3, 2, 2, "pool1", "VALID")

        conv2 = convLayer(pool1, 5, 5, 1, 1, 256, "conv2", groups = 2)
        lrn2 = LRN(conv2, 2, 2e-05, 0.75, "lrn2")
        pool2 = maxPoolLayer(lrn2, 3, 3, 2, 2, "pool2", "VALID")

        conv3 = convLayer(pool2, 3, 3, 1, 1, 384, "conv3")

        conv4 = convLayer(conv3, 3, 3, 1, 1, 384, "conv4", groups = 2)

        conv5 = convLayer(conv4, 3, 3, 1, 1, 256, "conv5", groups = 2)
        pool5 = maxPoolLayer(conv5, 3, 3, 2, 2, "pool5", "VALID")

        fcIn = tf.reshape(pool5, [-1, 256 * 6 * 6])
        fc1 = fcLayer(fcIn, 256 * 6 * 6, 4096, True, "fc6")
        dropout1 = dropout(fc1, self.KEEPPRO)

        fc2 = fcLayer(dropout1, 4096, 4096, True, "fc7")
        dropout2 = dropout(fc2, self.KEEPPRO)

        self.fc3 = fcLayer(dropout2, 4096, self.CLASSNUM, True, "fc8")

    def loadModel(self, sess): #加载模型函数
        """load model"""
        wDict = np.load(self.MODELPATH, encoding = "bytes").item()
        #for layers in model
        for name in wDict:
            if name not in self.SKIP:
                with tf.variable_scope(name, reuse = True):
                    for p in wDict[name]:
                        if len(p.shape) == 1:
                            #bias
                            sess.run(tf.get_variable('b', trainable = False).assign(p))
                        else:
                            #weights
                            sess.run(tf.get_variable('w', trainable = False).assign(p))
另外一种演示代码:
import os
from alexnet import alexNet
import cv2
import tensorflow as tf
import numpy as np
import caffe_classes

if __name__=="__main__":
    # step1:参数设置
    dropoutPro = 1
    classNum = 1000
    skip = []

    # step2:测试图像加载
    testPath = "testImage"  # 测试图像路径
    testImg = []
    for f in os.listdir(testPath):
        testImg.append(cv2.imread(testPath + "/" + f))

    # step3:加载模型
    imgMean = np.array([104, 117, 124], np.float)
    x = tf.placeholder("float", [1, 227, 227, 3])
    model = alexNet(x, dropoutPro, classNum, skip)
    score = model.fc3
    softmax = tf.nn.softmax(score)

    with tf.Session() as sess:
        sess.run(tf.global_variables_initializer())
        model.loadModel(sess)  # 加载模型

        for i, img in enumerate(testImg):
            # 图像预处理
            test = cv2.resize(img.astype(np.float), (227, 227))  # resize成网络输入大小
            test -= imgMean  # 去均值
            test = test.reshape((1, 227, 227, 3))  # 拉成tensor
            maxP = np.argmax(sess.run(softmax, feed_dict={x: test}))
            res = caffe_classes.class_names[maxP]  # 取概率最大类的下标
            print(res)
            # font = cv2.FONT_HERSHEY_SIMPLEX
            font = cv2.FONT_HERSHEY_COMPLEX
            cv2.putText(img, res, (int(img.shape[0] / 20), int(img.shape[1] / 20)), font, 0.6, (0, 0, 255), 1)  # 绘制类的名字
            # 照片/添加的文字/左上角坐标/字体/字体大小/颜色/字体粗细
            cv2.imshow("demo", img)
            cv2.waitKey(3000)  # 显示3秒
第二阶段:如何加载tflearn中的AlexNet训练出来的模型,做测试:
首先,从博客https://blog.csdn.net/diamonjoy_zone/article/details/69951804,可知,TFLearn 是一个构建在 TensorFlow 之上的模块化和透明的深度学习库。它为 TensorFlow 提供高层次 API,目的是便于快速搭建试验环境,同时保持对 TensorFlow 的完全透明和兼容性。
它的特点:
- 容易使用和易于理解的高层次 API 用于实现深度神经网络,附带教程和例子;
- 通过高度模块化的内置神经网络层、正则化器、优化器等进行快速原型设计;
- 对 TensorFlow 完全透明,所有函数都是基于 tensor,可以独立于 TFLearn 使用;
- 强大的辅助函数,训练任意 TensorFlow 图,支持多输入、多输出和优化器;
- 简单而美观的图可视化,关于权值、梯度、特征图等细节;
- 无需人工干预,可使用多 CPU、多 GPU;
- 高层次 API 目前支持最近大多数深度学习模型,像卷积网络、LSTM、BiRNN、BatchNorm、PReLU、残差网络、生成网络、增强学习。
在 tflearn/examples/images/alexnet.py 下学习如何用 TFLearn 实现 AlexNet 用于 Oxford 17 类鲜花 数据集分类任务,运行代码alexnet.py:
from __future__ import division, print_function, absolute_import

import tflearn
from tflearn.layers.core import input_data, dropout, fully_connected
from tflearn.layers.conv import conv_2d, max_pool_2d
from tflearn.layers.normalization import local_response_normalization
from tflearn.layers.estimator import regression

import tflearn.datasets.oxflower17 as oxflower17
X, Y = oxflower17.load_data(one_hot=True, resize_pics=(227, 227))

# Building 'AlexNet'
network = input_data(shape=[None, 227, 227, 3])
network = conv_2d(network, 96, 11, strides=4, activation='relu')
network = max_pool_2d(network, 3, strides=2)
network = local_response_normalization(network)
network = conv_2d(network, 256, 5, activation='relu')
network = max_pool_2d(network, 3, strides=2)
network = local_response_normalization(network)
network = conv_2d(network, 384, 3, activation='relu')
network = conv_2d(network, 384, 3, activation='relu')
network = conv_2d(network, 256, 3, activation='relu')
network = max_pool_2d(network, 3, strides=2)
network = local_response_normalization(network)
network = fully_connected(network, 4096, activation='tanh')
network = dropout(network, 0.5)
network = fully_connected(network, 4096, activation='tanh')
network = dropout(network, 0.5)
network = fully_connected(network, 17, activation='softmax')
network = regression(network, optimizer='momentum',
                     loss='categorical_crossentropy',
                     learning_rate=0.001)

# Training
model = tflearn.DNN(network, checkpoint_path='model_alexnet',
                    max_checkpoints=1, tensorboard_verbose=2)
model.fit(X, Y, n_epoch=1000, validation_set=0.1, shuffle=True,
          show_metric=True, batch_size=64, snapshot_step=200,
          snapshot_epoch=False, run_id='alexnet_oxflowers17')
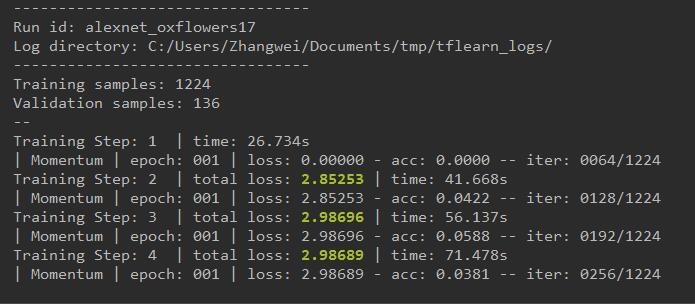
运行结果:
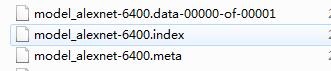
得到的模型为:
那么如何加载使用模型做预测呢?https://www.cnblogs.com/hellcat/p/6925757.html
未完待续。。。
参考代码:
1、【深度学习】使用TensorFlow实现AlexNet:https://github.com/hjptriplebee/AlexNet_with_tensorflow
2、基于TensorFlow微调AlexNet:GitHub代码
3、(很详细)AlexNet网络详解及TensorFlow实现代码:https://github.com/stephen-v/tensorflow_alexnet_classify
参考文献:
1、(很详细)AlexNet网络详解及TensorFlow实现代码:http://www.cnblogs.com/vipyoumay/p/7686230.html
2、AlexNet网络详解及TensorFlow实现代码2:https://blog.csdn.net/op07p6aaqo9u71/article/details/78295819
3、https://blog.csdn.net/taoyanqi8932/article/details/71081390
4、用训练好的caffemodel来分类:https://blog.csdn.net/dcxhun3/article/details/52021296
5、(六)TensorFlow学习之旅——深入理解AlexNet:https://blog.csdn.net/btbujhj/article/details/73302970
6、【深度学习】使用TensorFlow实现AlexNet:https://blog.csdn.net/accepthjp/article/details/69999309
7、基于TensorFlow微调AlexNet:https://blog.csdn.net/two_vv/article/details/76769860