ListView是Android应用程序中非常常见的UI元素。它用于显示由分隔符分隔的项目列表,可以无限滚动。它通常用于显示一组相关项目。
将ListView添加到布局:
<ListView
  android:id="@+id/recipe_list_view"
  android:layout_width="match_parent"
  android:layout_height="wrap_content />
以下是ListView中使用的关键XML属性:
android:divider:在列表项之间绘制可绘制或颜色。
android:dividerHeight:分频器的高度。
android:entries:可以在此处传递数组资源以显示为List。
android:footerDividersEnabled:设置为false时,ListView末尾没有分隔符。
android:headerDividersEnabled:设置为false时,ListView顶部不会有分隔符
android:clickable:这使ListView行可单击。如果您要从Activity设置ListView,则不需要设置此属性
android:listSelector:单击列表视图行时,设置背景颜色。
通过在strings.xml文件中定义数组,我们可以在没有任何Java代码的情况下填充ListView中的条目:
 <string-array name="Colors">
        <item name="color">Red</item>
        <item name="color">Orange</item>
        <item name="color">Yellow</item>
        <item name="color">Green</item>
        <item name="color">Blue</item>
        <item name="color">White</item>
        <item name="color">Black</item>
        <item name="color">Purple</item>
        <item name="color">Pink</item>
        <item name="color">Gray</item>
        <item name="color">Cyan Blue</item>
        <item name="color">Magenta</item>
    </string-array>
现在,ListView在布局中填充为:
<?xml version="1.0" encoding="utf-8"?>
<android.support.constraint.ConstraintLayout xmlns:android="http://schemas.android.com/apk/res/android"
    xmlns:app="http://schemas.android.com/apk/res-auto"
    xmlns:tools="http://schemas.android.com/tools"
    android:layout_width="match_parent"
    android:layout_height="match_parent"
    tools:context=".MainActivity">

    <ListView
        android:layout_width="wrap_content"
        android:layout_height="wrap_content"
        android:entries="@array/Colors"
        app:layout_constraintBottom_toBottomOf="parent"
        app:layout_constraintLeft_toLeftOf="parent"
        app:layout_constraintRight_toRightOf="parent"
        app:layout_constraintTop_toTopOf="parent" />

</android.support.constraint.ConstraintLayout>
将width设置为wrap_content会将ListView行包装到其内容中。
以下是它在屏幕上的显示方式:
设置选择器和分频器颜色
使用以下ListView标记:
<ListView
        android:layout_width="match_parent"
        android:layout_height="wrap_content"
        android:divider="@color/colorPrimary"
        android:dividerHeight="1dp"
        android:entries="@array/Colors"
        android:listSelector="@android:color/holo_green_dark"
        android:clickable="true"
        app:layout_constraintBottom_toBottomOf="parent"
        app:layout_constraintLeft_toLeftOf="parent"
        app:layout_constraintRight_toRightOf="parent"
        app:layout_constraintTop_toTopOf="parent" />
上面的代码使ListView可选。但是要在每个ListView行上添加逻辑,请单击我们需要使用适配器。
适配器
ListView类本身无法填充条目。适配器负责填充ListView中的数据。我们有内置的适配器类(如上所述),每个行都有内置的布局。我们也可以创建自己的自定义适配器类。
适配器具有自己的一组内置方法。以下两个是最重要的:
getView():我们可以在此方法中的适配器中扩展我们自己的布局。
notifyDataSetChanged()如果数据已更改或新数据可用,则调用适配器上的方法。
要在ListView上设置适配器,我们使用该方法setAdapter()。
适配器的类型
适配器有四种主要类型:
BaseAdapter - 顾名思义,这个摘要由所有其他适配器扩展。使用此作为父类创建自定义适配器时,您需要覆盖上面提到的所有方法getCount(),getId()等等。
ArrayAdapter - 使用提供的数组填充ListView。它被定义为:
var arrayAdapter = ArrayAdapter<String>(context,layout,array);
第一个参数是上下文,后跟列表行的布局资源。
布局必须具有TextView。第三个参数是数组。
对于ArrayAdapter,您只需要覆盖该getView()方法。因为ArrayAdapter自己计算数组的大小,所以不需要getCount()。
ListAdapter - 与ArrayAdapter不同,这是一个接口。因此它只能用于具体的适配器类。具体适配器类是ListActivity和ListFragment。
SimpleCursorAdapter - 当需要从数据库填充数据时使用。在它的构造函数中,我们必须指定每一行的布局以及包含需要显示的字段的Cursor实例。当我们涉及数据库时,我们将研究这个问题。
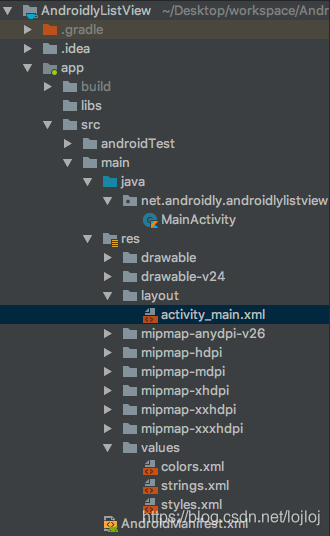
项目结构
代码
activity_main.xml布局代码如下:
<?xml version="1.0" encoding="utf-8"?>
<android.support.constraint.ConstraintLayout xmlns:android="http://schemas.android.com/apk/res/android"
    xmlns:app="http://schemas.android.com/apk/res-auto"
    xmlns:tools="http://schemas.android.com/tools"
    android:layout_width="match_parent"
    android:layout_height="match_parent"
    tools:context=".MainActivity">

    <ListView
        android:layout_width="wrap_content"
        android:layout_height="wrap_content"
        android:entries="@array/Colors"
        app:layout_constraintBottom_toBottomOf="parent"
        app:layout_constraintLeft_toLeftOf="parent"
        app:layout_constraintRight_toRightOf="parent"
        app:layout_constraintTop_toTopOf="parent" />

</android.support.constraint.ConstraintLayout>
MainActivity.kt类的代码如下:
package net.androidly.androidlylistview

import android.support.v7.app.AppCompatActivity
import android.os.Bundle
import android.widget.ArrayAdapter
import kotlinx.android.synthetic.main.activity_main.*
import org.jetbrains.anko.toast

class MainActivity : AppCompatActivity() {

    override fun onCreate(savedInstanceState: Bundle?) {
        super.onCreate(savedInstanceState)
        setContentView(R.layout.activity_main)

        var colorArrays = resources.getStringArray(R.array.Colors)
        var arrayAdapter = ArrayAdapter(this, android.R.layout.simple_list_item_1, colorArrays)

        listView.adapter = arrayAdapter

        listView.setOnItemClickListener { adapterView, view, position: Int, id: Long ->

            toast(colorArrays[position])
        }
    }
}
在上面的代码中,我们显示了一个toast消息。我们通过添加Anko commons依赖项来达到该速记Toast功能build.gradle。
resources.getStringArray(R.array.Colors) 将存储在资源文件中的字符串数组转换为Kotlin数组。
android.R.layout.simple_list_item_1是一个内置布局,仅承载TextView
setOnItemClickListener是单击任何ListView行时触发的Kotlin函数。在这里我们可以实现我们的逻辑 函数内的四个参数是:
adapterView:选择发生的父视图。它的ListView在这里。
view:ListView中的选定视图(行)
position:适配器中行的位置。这是一个Int。
id:所选项的行ID。这很长。
我们可以从adapterView获取它,而不是使用数组检索值:
val selectedString = adapterView.getItemAtPosition(position) as String
getItemAtPosition返回该索引处的列表视图行。在这种情况下,该行是TextView。
实际应用程序的输出如下:
我们可以通过在drawable文件夹中创建一个drawable选择器来更改默认项目的按颜色。
list_selector.xml
<?xml version="1.0" encoding="utf-8"?>
<selector xmlns:android="http://schemas.android.com/apk/res/android">

    <item android:drawable="@color/colorAccent" android:state_pressed="true"/>
    <item android:drawable="@android:color/transparent"/>

</selector>
在ListView XML标记内添加以下属性:
android:listSelector="@drawable/list_selector"