背景
项目因为某些原因需要服务器自启动来执行脚本, 因此需要在ubuntu服务器上面实现自启动功能.
步骤
ubuntu作为服务器使用时,常常需要在机器重启时能自动启动我们开发的服务。
Ubuntu 18.04不再使用initd管理系统,改用systemd,包括用systemctl命令来替换了service和chkconfig的功能。
systemd 默认读取 /etc/systemd/system 下的配置文件,该目录下的文件会链接/lib/systemd/system/下的文件。
不同于以往的版本,ubuntu18.04默认不带/etc/rc.local文件,我们需要通过配置来让rc.local.service生效。
然后我们就可以像以前那样,直接把启动脚本写入/etc/rc.local文件,这样机器启动时就会自动运行它。
因此我们在做自启动配置时, 需要区分系统是在ubuntu18.04之前还是之后uanme -a:

ubuntu18.04之前
-
将启动脚本复制到
/etc/init.d目录mv test.sh /etc/init.d sudo chmod 755 /etc/init.d/test.sh -
将该脚本放倒启动列表中去
cd /etc/init.d
sudo update-rc.d test.sh defaults 100
# 其中数字100是脚本启动的顺序号。当有多个脚本的时候,可以设定启动的顺序。
ubuntu18.04之后
-
第一步:检查系统目录
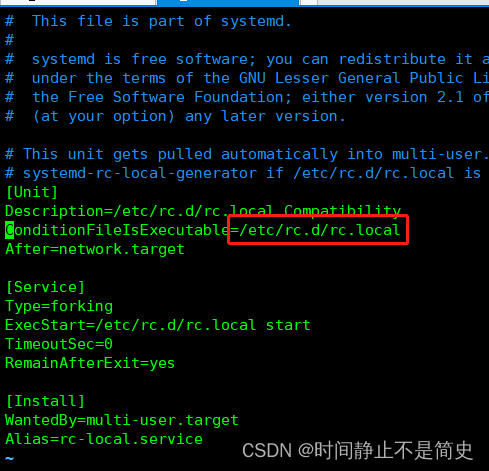
/lib/systemd/system/rc-local.service,如果没有自己新建,文件内容为(如果文件存在本身是没有[Install]项的,需要自己添加进去)# SPDX-License-Identifier: LGPL-2.1+ # # This file is part of systemd. # # systemd is free software; you can redistribute it and/or modify it # under the terms of the GNU Lesser General Public License as published by # the Free Software Foundation; either version 2.1 of the License, or # (at your option) any later version. # This unit gets pulled automatically into multi-user.target by # systemd-rc-local-generator if /etc/rc.local is executable. [Unit] Description=/etc/rc.local Compatibility Documentation=man:systemd-rc-local-generator(8) ConditionFileIsExecutable=/etc/rc.local After=network.target [Service] Type=forking ExecStart=/etc/rc.local start TimeoutSec=0 RemainAfterExit=yes GuessMainPID=no [Install] WantedBy=multi-user.target Alias=rc-local.service -
etc目录下的文件也需要进行如上修改,检查
/etc/systemd/system/rc-local.service,如果没有该文件则新增该文件# SPDX-License-Identifier: LGPL-2.1+ # # This file is part of systemd. # # systemd is free software; you can redistribute it and/or modify it # under the terms of the GNU Lesser General Public License as published by # the Free Software Foundation; either version 2.1 of the License, or # (at your option) any later version. # This unit gets pulled automatically into multi-user.target by # systemd-rc-local-generator if /etc/rc.local is executable. [Unit] Description=/etc/rc.local Compatibility Documentation=man:systemd-rc-local-generator(8) ConditionFileIsExecutable=/etc/rc.local After=network.target [Service] Type=forking ExecStart=/etc/rc.local start TimeoutSec=0 RemainAfterExit=yes GuessMainPID=no [Install] WantedBy=multi-user.target Alias=rc-local.service ``` -
创建/etc/rc.local脚本文件,并写入想要运行的脚本命令(注意脚本格式!!!)
vim /etc/rc.local
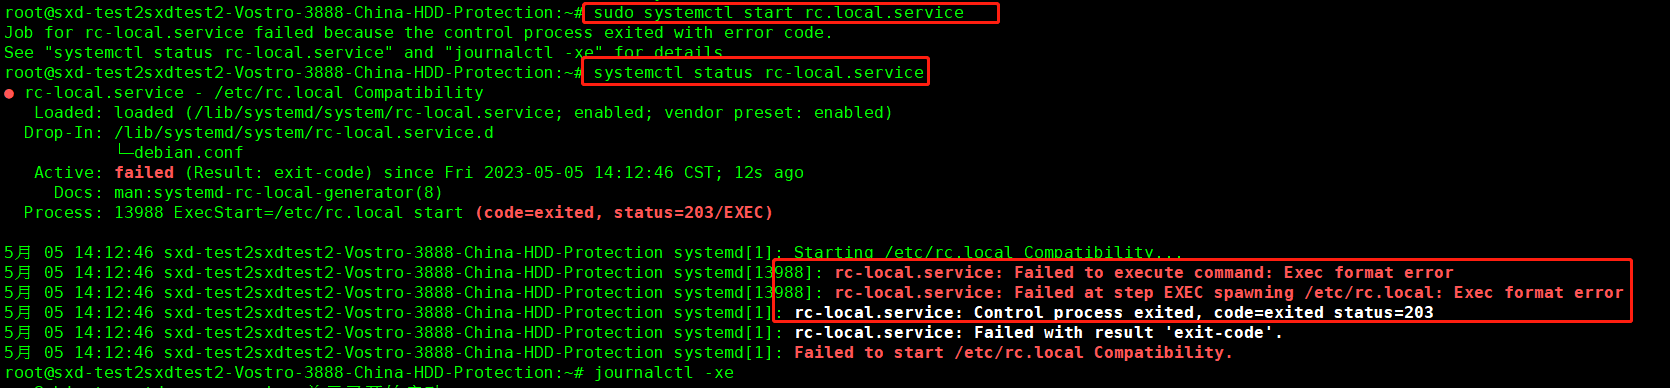
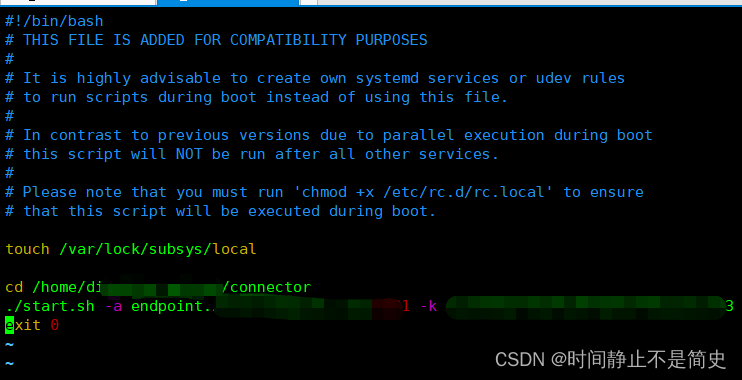
这里需要注意, 脚本开头一定要加#! /bin/bash, 作用是表示此脚本使用/bin/bash来解释执行, 否则在后续执行该脚本时, 则会出现rc-local.service: Failed at step EXEC spawning /etc/rc.local: Exec format error, (又是一个多么痛的领悟~)
同时也应注意: 脚本末尾需要加exit 0, 它是一个Shell脚本中的语句,表示脚本执行到此结束并以成功的状态退出 -
给rc.local执行的权限
扫描二维码关注公众号,回复: 16766289 查看本文章
sudo chmod +x /etc/rc.local -
启用服务
sudo systemctl enable rc-local
sudo systemctl start rc-local.service
sudo systemctl status rc-local.service
-
重启电脑看效果
通过重启reboot后查看脚本启动的应用是否能够正常运行

补充: centOS配置
下面是本人使用自己centOS系统配置后自启动的过程
-
根据系统文件配置, 找到对应启动脚本, 系统文件所在位置
/lib/systemd/system/rc-local.service
-
编辑启动脚本
vim /etc/rc.d/rc.local
-
授予脚本可执行权限 chmod +x /etc/rc.d/rc.local
-
重启后测试软件是否启动

参考博客
https://blog.csdn.net/u011473714/article/details/122554757
https://blog.csdn.net/weixin_44654533/article/details/87190638
https://blog.csdn.net/weixin_43859729/article/details/117932090