一、前置工作
第一步:创建一个maven项目
第二步:在resource中创建一个名字叫做spring-config.xml的文件,并把以下代码复制粘贴
<?xml version="1.0" encoding="UTF-8"?>
<beans xmlns="http://www.springframework.org/schema/beans"
xmlns:xsi="http://www.w3.org/2001/XMLSchema-instance"
xmlns:content="http://www.springframework.org/schema/context"
xsi:schemaLocation="http://www.springframework.org/schema/beans http://www.springframework.org/schema/beans/spring-beans.xsd http://www.springframework.org/schema/context https://www.springframework.org/schema/context/spring-context.xsd">
//com.java.demo改成你自己的包名字
<content:component-scan base-package="com.java.demo"></content:component-scan>
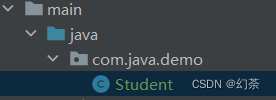
</beans>第三步:创建com.java.com这个包,及其相应的内容,列如我创建一个学生类
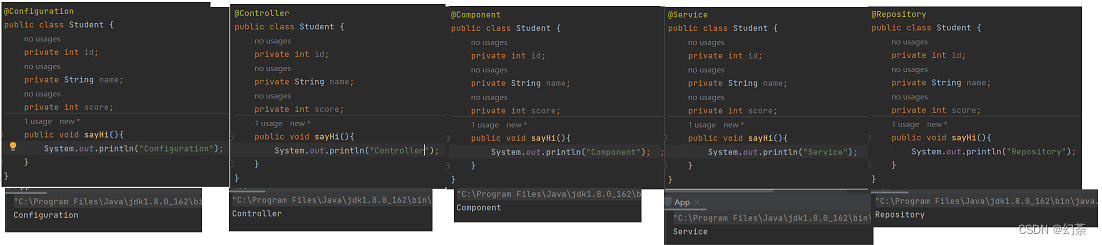
二、五大注解的简析
五大注解,分别是
controller
Service
Resopsitory
Component
Configuration
简单来说,他们就是作为一个标识,每一个都表示不同的意思
但我们只是使用的话,他们的效果是近乎一样的
我们都只需要在类前面加上响应的注解,然后在主函数利用ApplicationContext获取注解,并调用对应方法,就可以打印
三、主方法
public class App {
    public static void main(String[] args) {
//一定要写自己的xml名字
        ApplicationContext context = new ClassPathXmlApplicationContext("spring-config.xml");
//利用反射获取对象
        Student student = context.getBean("student", Student.class);
//调用对象方法
        student.sayHi();
    }
}
四、如何使用bean
我们根据上面三个步骤,已经可以使用五大注解的方式来简单的的获取和调用对象了,现在我们需要对对象的内容进行注入,并获取注入了属性之后的对象
属性注入:
@Component//要使用bean必须加上五大注解之一
public class Student {
    @Autowired//使用Autowired进行属性注入
    private Student s1;
    private int id;
    private String name;
    private int score;

    @Override//这个是方便检查结果
    public String toString() {
        return "Student{" +
                "s1=" + s1 +
                ", id=" + id +
                ", name='" + name + '\'' +
                ", score=" + score +
                '}';
    }
//伪代码,进行属性注入
    public Student func(){
        Student student = new Student();
        student.name = "张三";
        student.id = 10;
        student.score = 100;
        return student;
    }

}

setter注入
@Component//必须配合五大注解使用
public class Student {
    private Student s1;

    private int id;
    private String name;
    private int score;

    @Override
    public String toString() {
        return "Student{" +
                "s1=" + s1 +
                ", id=" + id +
                ", name='" + name + '\'' +
                ", score=" + score +
                '}';
    }
//这里使用Autowired,是因为我这个伪代码中有set这个赋值操作
//所以setter注入就是要在set方法加上注解
    @Autowired
    public Student func(){
        Student student = new Student();
        student.name = "张三";
        student.id = 10;
        student.score = 100;
        return student;
    }

}

构造方法注入
构造注入是指,在构造调用者实例的同时,完成被调用者的实例化。即使用构造器设置依赖关系。
Spring调用类的有参数构造方法,创建对象同时给属性赋值