环境 : ubuntu20
fisco : 2.8.0
java:1.8
solidity: 0.6.10
前言
这篇将讲解如何使用WeBASE的导出功能,来部署和调用合约。
请提前启动fisco节点和webase-front
合约编写和部署
我们准备一个简单的合约HelloWorld.sol
pragma solidity>=0.4.24 <0.6.11;

contract HelloWorld {


    string name;

    constructor() public {


        name = "Hello, World!";
    }

    function get() public view returns (string memory) {


        return name;
    }

    function set(string memory n) public {


        name = n;
    }
}
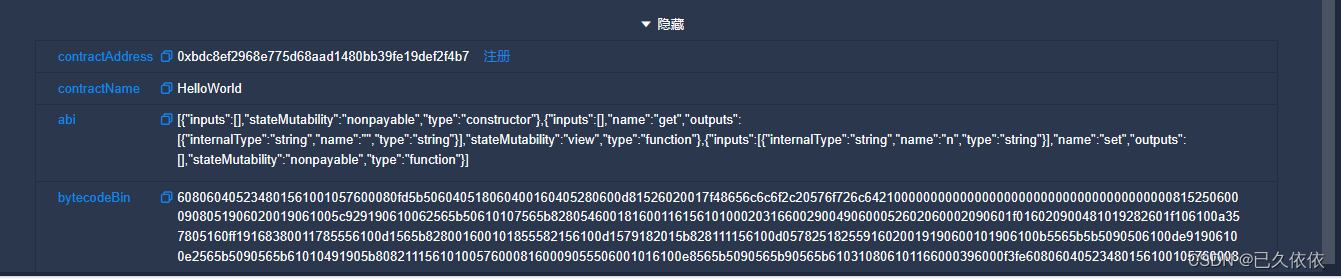
编写完我们将其进行部署得到合约地址
导出java项目
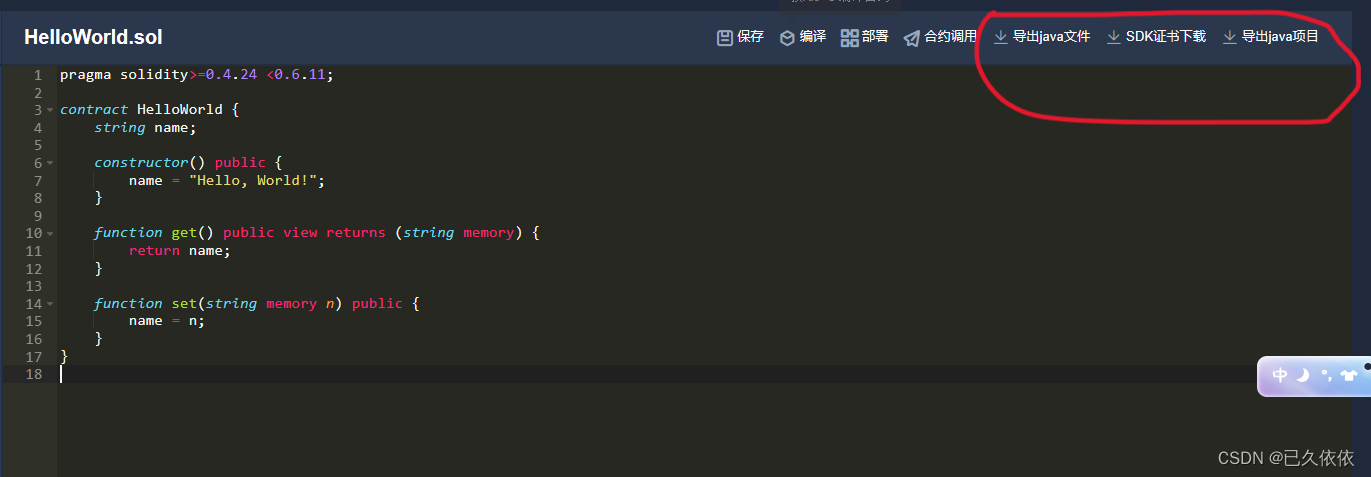
在webase-front右上角的功能区有三个功能按钮
导出java文件:此功能是根据合约,导出一个java文件,里面包含abi,bin属性,部署合约,调用合约等方法,但是这不是完整的项目,还需要自己配置好springboot项目和导入相关依赖包
SDK证书下载: 此功能是下载节点的sdk证书,因为调用合约相关功能的时候需要与节点连接,然后需要证书进行连接
导出java项目 : 此功能是导出一个完整springboot项目,里面有配置好的pom.xml ,我们这次使用此功能来使用javaSDK
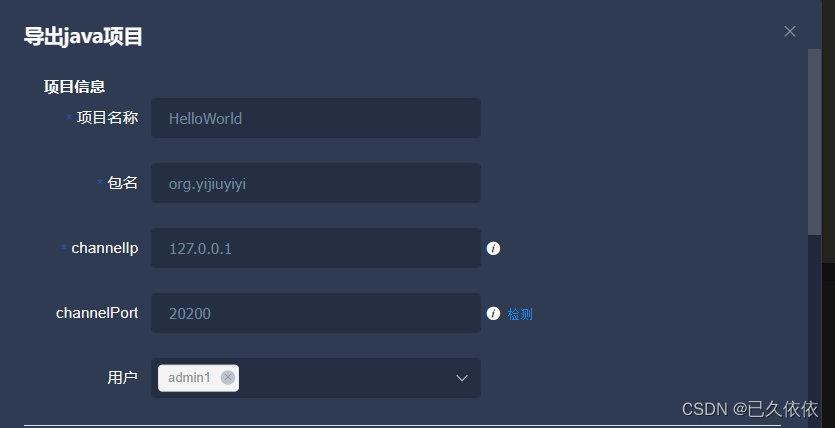
项目名称和包名需要自定义
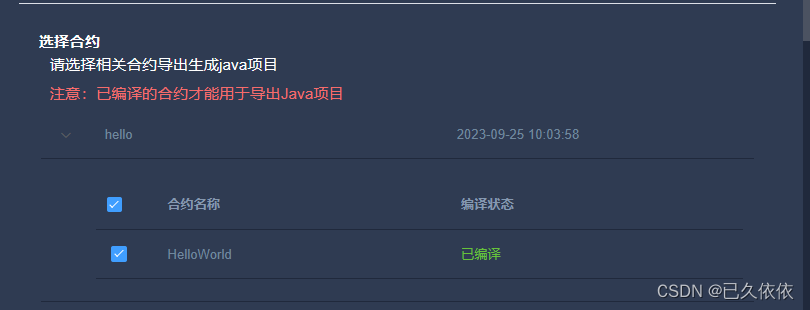
这里需要编译好合约才能进行部署,刚刚我们已经部署好了
点击确认,会下载一个zip压缩包,里面是一个gradle构建的SpringBoot项目

我们将其解压并使用idea打开此项目
分析导出项目的内容
若本地有gradle环境,可以去Settings里面配置好,没有的话,项目会默认帮你下载一个gradle环境应用在此项目
- 分析一下项目的目录结构
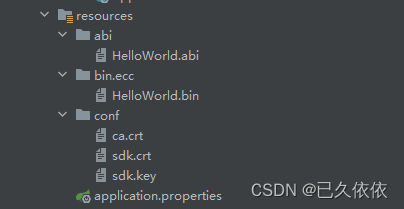
在resources的资源文件夹下,有abi和bin文件,conf文件夹放置着连接节点的sdk文件。
application.properties文件的字段解释
### Required, node's {ip:port} to connect.
system.peers=127.0.0.1:20200  # 节点地址
### Required
system.groupId=1  # 群组id
### Optional. Default will search conf,config,src/main/conf/src/main/config
system.certPath=conf,config,src/main/resources/conf,src/main/resources/config  # 项目配置文件存放的路径
### Optional. If don't specify a random private key will be used
system.hexPrivateKey=14681fb9c2e4774ab61ce97afb3a522b09d2c09b01647ad1b8ab807a60968f16 # 私钥文件【刚刚导出项目中选中的用户私钥】
### Optional. Please fill this address if you want to use related service
system.contract.helloWorldAddress=0xbdc8ef2968e775d68aad1480bb39fe19def2f4b7 # 合约地址
### ### Springboot server config
server.port=8080 # web项目启动端口
server.session.timeout=60
banner.charset=UTF-8
spring.jackson.date-format=yyyy-MM-dd HH:mm:ss
spring.jackson.time-zone=GMT+8

这里的java文件有点多,我就挑重点的说
service文件夹是HelloWorldService.java
@Service
@NoArgsConstructor
@Data
public class HelloWorldService {


  public static final String ABI = org.yijiuyiyi.HelloWorld.utils.IOUtil.readResourceAsString("abi/HelloWorld.abi");

  public static final String BINARY = org.yijiuyiyi.HelloWorld.utils.IOUtil.readResourceAsString("bin/ecc/HelloWorld.bin");

  public static final String SM_BINARY = org.yijiuyiyi.HelloWorld.utils.IOUtil.readResourceAsString("bin/sm/HelloWorld.bin");

  @Value("${system.contract.helloWorldAddress}")
  private String address; // 合约地址

  @Autowired
  private Client client;  // 这个是Fisco的Client ,调用方法都需要放置其对象,Client对象在项目初始化的时候已经装配好交给spirng进行管理了

  AssembleTransactionProcessor txProcessor;

  @PostConstruct
  public void init() throws Exception {


    this.txProcessor = TransactionProcessorFactory.createAssembleTransactionProcessor(this.client, this.client.getCryptoSuite().getCryptoKeyPair());
  }


//合约里面对应着set方法
  public TransactionResponse set(HelloWorldSetInputBO input) throws Exception {


    return this.txProcessor.sendTransactionAndGetResponse(this.address, ABI, "set", input.toArgs());
  }
// 合约里面对应着get方法
  public CallResponse get() throws Exception {


    return this.txProcessor.sendCall(this.client.getCryptoSuite().getCryptoKeyPair().getAddress(), this.address, ABI, "get", Arrays.asList());
  }
}
config文件夹下有个SdkBeanConfig.java,里面有个client()方法,其注入的Bean就是对应着HelloWorldService.java的Client对象
@Configuration
@Slf4j
public class SdkBeanConfig {


    @Autowired
    private SystemConfig config;

    @Bean
    public Client client() throws Exception {


        String certPaths = this.config.getCertPath();
        String[] possibilities = certPaths.split(",|;");
        for(String certPath: possibilities ) {


            try{


                ConfigProperty property = new ConfigProperty();
                configNetwork(property);
                configCryptoMaterial(property,certPath);

                ConfigOption configOption = new ConfigOption(property);
                Client client = new BcosSDK(configOption).getClient(config.getGroupId());

                BigInteger blockNumber = client.getBlockNumber().getBlockNumber();
                log.info("Chain connect successful. Current block number {}", blockNumber);

                configCryptoKeyPair(client);
                log.info("is Gm:{}, address:{}", client.getCryptoSuite().cryptoTypeConfig == 1, client.getCryptoSuite().getCryptoKeyPair().getAddress());
                return client;
            }
            catch (Exception ex) {


                log.error(ex.getMessage());
                try{


                    Thread.sleep(5000);
                }catch (Exception e) {

    }
            }
        }
        throw new ConfigException("Failed to connect to peers:" + config.getPeers());
    }

    public void configNetwork(ConfigProperty configProperty) {


        String peerStr = config.getPeers();
        List<String> peers = Arrays.stream(peerStr.split(",")).collect(Collectors.toList());
        Map<String, Object> networkConfig = new HashMap<>();
        networkConfig.put("peers", peers);

        configProperty.setNetwork(networkConfig);
    }

    public void configCryptoMaterial(ConfigProperty configProperty,String certPath) {


        Map<String, Object> cryptoMaterials = new HashMap<>();
        cryptoMaterials.put("certPath", certPath);
        configProperty.setCryptoMaterial(cryptoMaterials);
    }

    public void configCryptoKeyPair(Client client) {


        if (config.getHexPrivateKey() == null || config.getHexPrivateKey().isEmpty()){


            client.getCryptoSuite().setCryptoKeyPair(client.getCryptoSuite().createKeyPair());
            return;
        }
        String privateKey;
        if (!config.getHexPrivateKey().contains(",")) {


            privateKey = config.getHexPrivateKey();
        } else {


            String[] list = config.getHexPrivateKey().split(",");
            privateKey = list[0];
        }
        if (privateKey.startsWith("0x") || privateKey.startsWith("0X")) {


            privateKey = privateKey.substring(2);
            config.setHexPrivateKey(privateKey);
        }
        client.getCryptoSuite().setCryptoKeyPair(client.getCryptoSuite().createKeyPair(privateKey));
    }
}
编写Controller层来测试方法
我们new 一个TestController.java 测试一下合约的两个方法是否能成功调用
如下
import org.fisco.bcos.sdk.transaction.model.dto.CallResponse;
import org.fisco.bcos.sdk.transaction.model.dto.TransactionResponse;
import org.springframework.beans.factory.annotation.Autowired;
import org.springframework.web.bind.annotation.GetMapping;
import org.springframework.web.bind.annotation.PostMapping;
import org.springframework.web.bind.annotation.RestController;
import org.yijiuyiyi.HelloWorld.model.bo.HelloWorldSetInputBO;
import org.yijiuyiyi.HelloWorld.service.HelloWorldService;

@RestController
public class TestController {


    @Autowired
    private HelloWorldService helloWorldService;

    @PostMapping("/set")
    public  TransactionResponse  set(@RequestBody HelloWorldSetInputBO dto) throws Exception {


        TransactionResponse result = helloWorldService.set(dto);

        return result;
    }

    @GetMapping("/get")
    public  CallResponse  get() throws Exception {


        CallResponse response = helloWorldService.get();

        return response;
    }
}
测试过程
启动项目

使用postman测试set方法
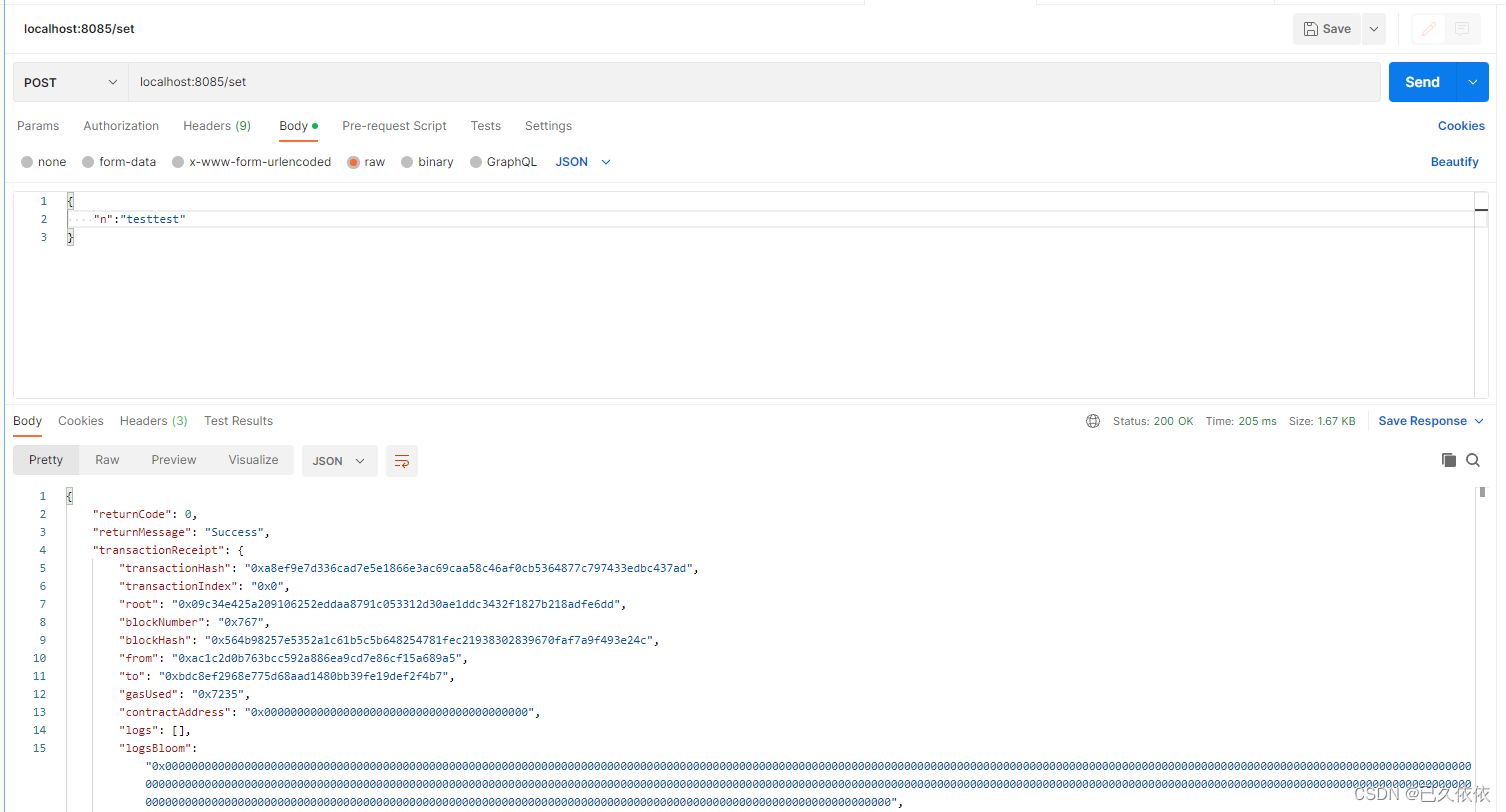
返回的数据是
{


    "returnCode": 0,
    "returnMessage": "Success",
    "transactionReceipt": {


        "transactionHash": "0xa8ef9e7d336cad7e5e1866e3ac69caa58c46af0cb5364877c797433edbc437ad",
        "transactionIndex": "0x0",
        "root": "0x09c34e425a209106252eddaa8791c053312d30ae1ddc3432f1827b218adfe6dd",
        "blockNumber": "0x767",
        "blockHash": "0x564b98257e5352a1c61b5c5b648254781fec21938302839670faf7a9f493e24c",
        "from": "0xac1c2d0b763bcc592a886ea9cd7e86cf15a689a5",
        "to": "0xbdc8ef2968e775d68aad1480bb39fe19def2f4b7",
        "gasUsed": "0x7235",
        "contractAddress": "0x0000000000000000000000000000000000000000",
        "logs": [],
        "logsBloom": "0x00000000000000000000000000000000000000000000000000000000000000000000000000000000000000000000000000000000000000000000000000000000000000000000000000000000000000000000000000000000000000000000000000000000000000000000000000000000000000000000000000000000000000000000000000000000000000000000000000000000000000000000000000000000000000000000000000000000000000000000000000000000000000000000000000000000000000000000000000000000000000000000000000000000000000000000000000000000000000000000000000000000000000000000000000000000",
        "status": "0x0",
        "statusMsg": "None",
        "input": "0x4ed3885e000000000000000000000000000000000000000000000000000000000000002000000000000000000000000000000000000000000000000000000000000000087465737474657374000000000000000000000000000000000000000000000000",
        "output": "0x",
        "txProof": null,
        "receiptProof": null,
        "message": null,
        "statusOK": true
    },
    "contractAddress": "0x0000000000000000000000000000000000000000",
    "values": "[]",
    "events": "{}",
    "receiptMessages": "Success",
    "returnObject": [],
    "returnABIObject": [],
    "valuesList": []
}
使用postman测试get方法
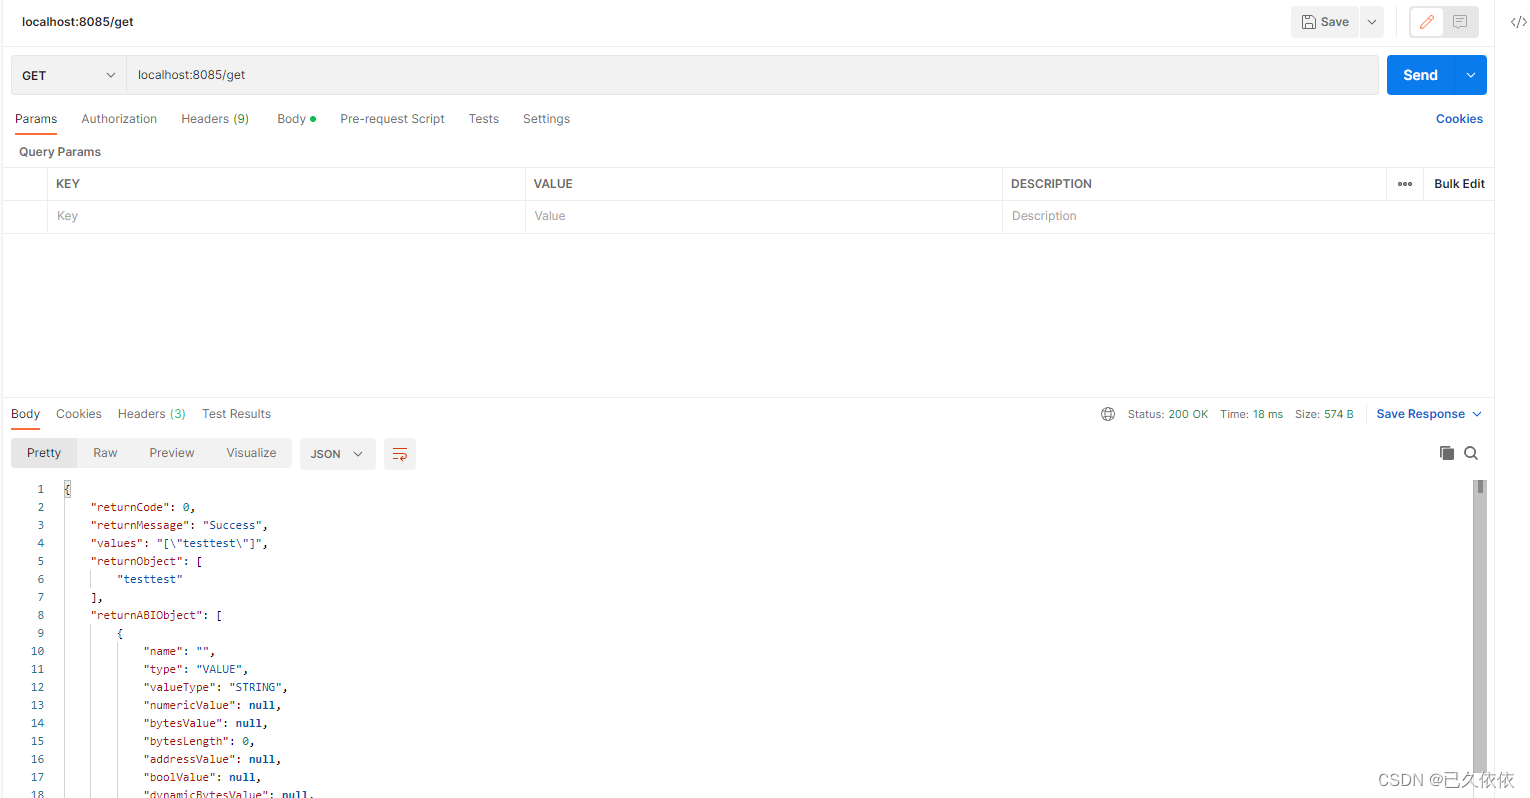
返回数据
{


    "returnCode": 0,
    "returnMessage": "Success",
    "values": "[\"testtest\"]",
    "returnObject": [
        "testtest"
    ],
    "returnABIObject": [
        {


            "name": "",
            "type": "VALUE",
            "valueType": "STRING",
            "numericValue": null,
            "bytesValue": null,
            "bytesLength": 0,
            "addressValue": null,
            "boolValue": null,
            "dynamicBytesValue": null,
            "stringValue": {


                "value": "testtest",
                "typeAsString": "string"
            },
            "listType": null,
            "listValues": null,
            "listLength": 0,
            "listValueType": null,
            "structFields": null,
            "dynamic": true
        }
    ]
}
可以看到,两个方法成功调用,通常调用完合约方法,都需要将其数据进行处理,比如对其交易状态进行判断即可,或者提取出需要展示的数据,不需要把所有交易数据展示出来。
结语
这种方法调用合约比较方便,只需要使用WeBASE帮我们配置来项目文件即可,下篇我将介绍第二种方法来使用JavaSDK调用合约。