https://arvrjourney.com/hololens-2-marker-tracking-with-vuforia-engine-and-mrtk-fb582c8f8ac0
Working with the HoloLens Sample in Unity | Vuforia Library
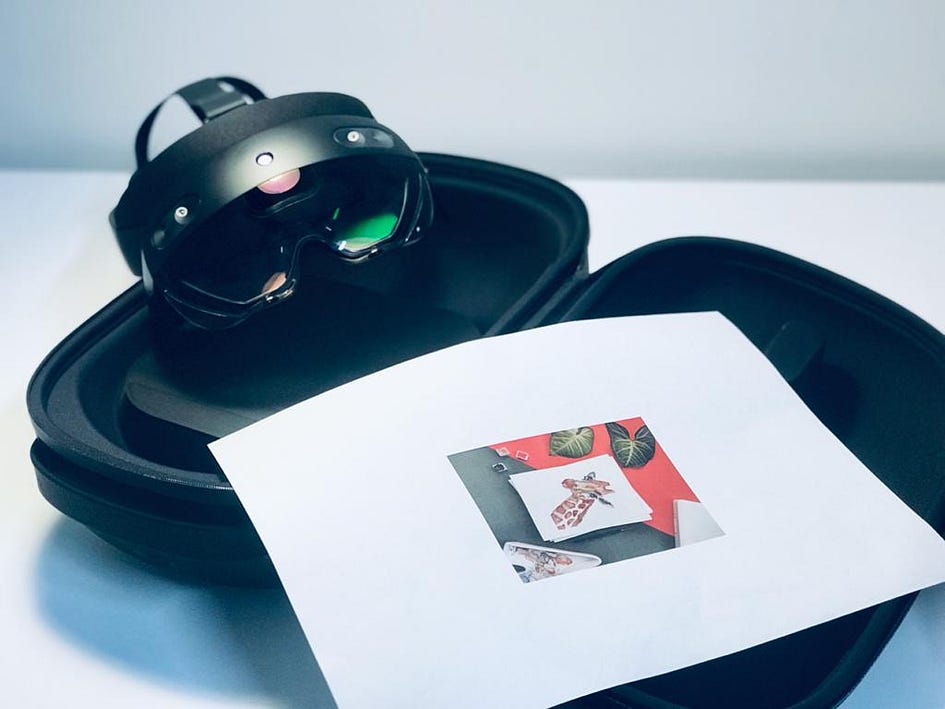
It has been some time since I wrote my last article. I decided to break the silence by compiling another beginner guide for people who are interested in getting into the field of AR/VR and XR. This article is centered around an easy but important task in AR, that is AR marker tracking. This is definitely not a new topic, rather an area that has evolved over time. In this article, I will guide you on how to set up AR marker tracking with HoloLens 2 without writing a single line of code, but with configurations. If you follow the article until the end you will be able to develop a HoloLens application that recognizes any 2D marker and popup a hologram as shown in Figure 1 below. So let’s get started!
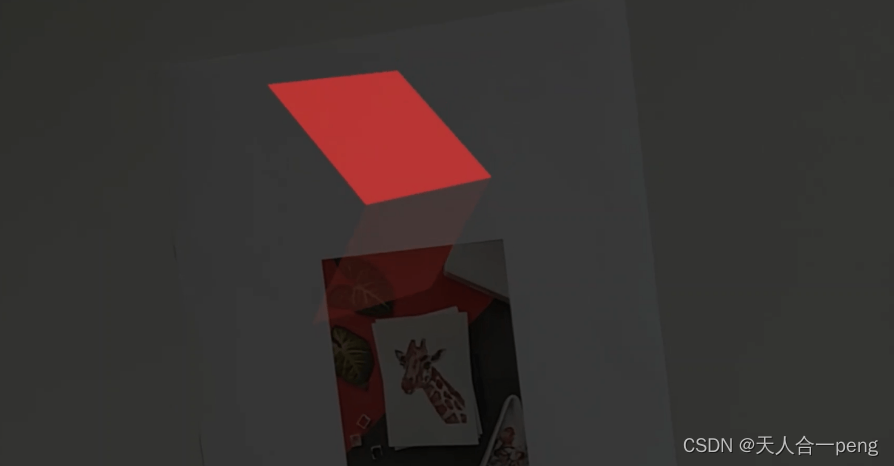
Figure 1
Prerequisites
- Windows Computer.
- Unity version 2019.4.X installed with the Universal Windows Platform (UWP) support. If you have Unity installed without this module you can add a new module using Unity Hub easily.
- A HoloLens 2 device (or you can use the computer webcam as well).
- Unity Mixed reality Tool Kit (MRTK). Download the Microsoft.MixedReality.Toolkit.Unity.Foundation unity package. The other packages are optional. Download from here.
- Visual Studio 2019 community version installed with ‘Desktop development with C++’ and ‘Universal Windows Platform (UWP) development’. You can tick these two workloads during the installation process or after using Visual Studio Installer (This is only required if you want to build your application to HoloLens, otherwise optional).
Firstly, open a new Unity 3D project (Refer Figure 2) and go to File → Build Settings… (or Press Ctrl + Shift + B) to open the build settings window. On the pop-up window, select the Universal Windows Platform (UWP) under the platform section and HoloLens under the Target Device as shown in Figure 3 below. Then hit ‘Switch Platforms’.
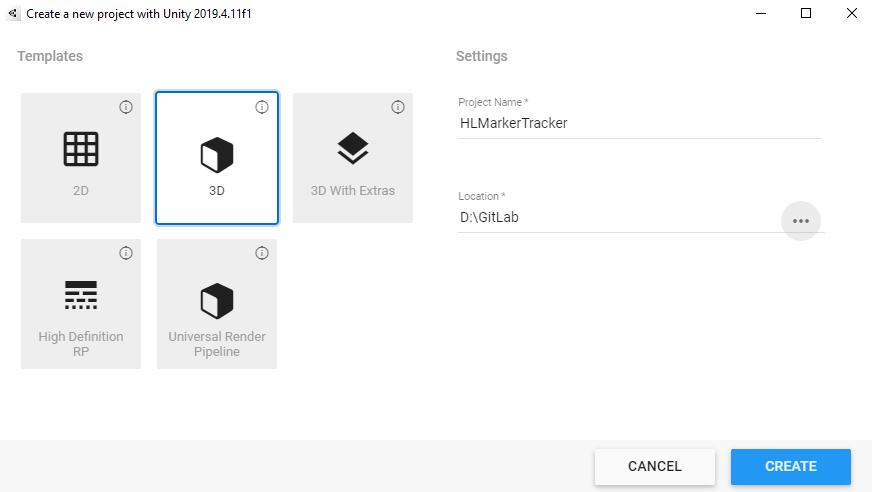
Figure 2
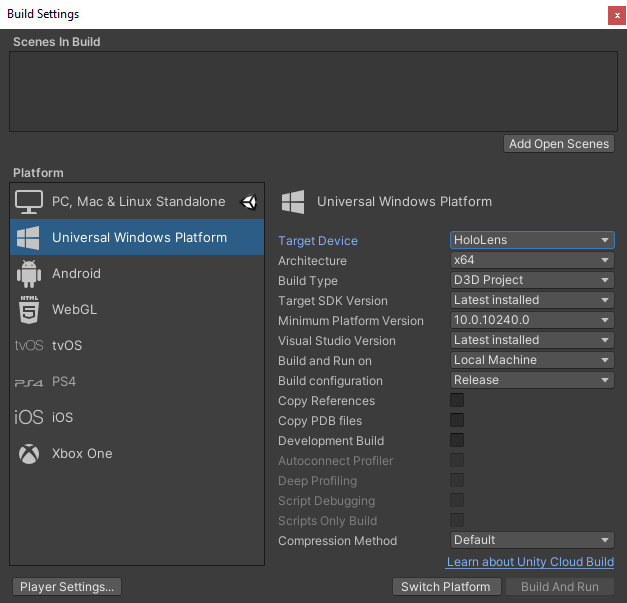
Figure 3
Secondly, we have to install Vuforia Engine Package. As usual, go to Window → Package Manager to add a new Unity package. The only difference here is, Vuforia Engine Package is installed from Git URL with a tag. Therefore, in the Package Manager window, click on the add (+) icon and select ‘Add package from git URL…’. See Figure 4 below.
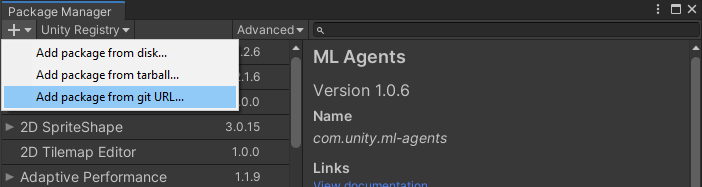
Figure 4
Then enter the following URL to install the Vuforia Engine Unity package and click Add. git+https://git-packages.developer.vuforia.com#9.7.4 Please note that there will be no visual feedback or pop up screen with a loading bar or a message while the package is importing. This will happen in the background. It may take some time to complete, depending on the speed of your internet connection. So give it a good 3 to 4 minutes and take a walk and come back. Maybe it will not take that long if you have very fast internet connectivity. After a few minutes select the ‘In Project’ option to see that package has successfully installed. See Figure 5 below.
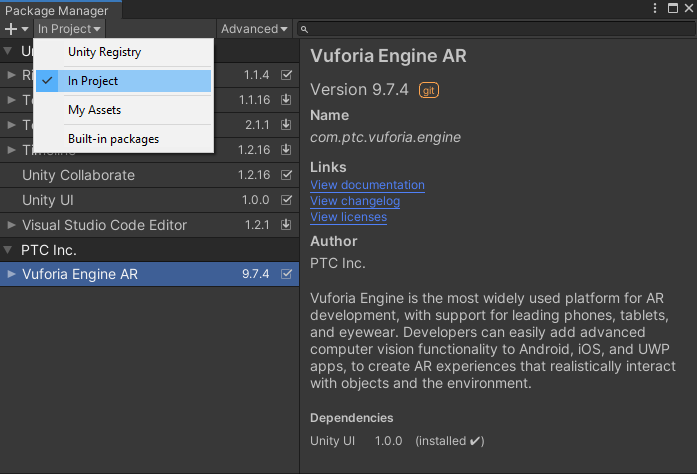
Figure 5
Alright, now we have to install the MRTK foundation package. I have given the download path under the prerequisites. As mentioned, Microsoft.MixedReality.Toolkit.Unity.Foundation.2.5.4.unitypackage is required and others are optional. After downloading it, come back to Unity and go to Assets → Import Package → Custom Package… Select the downloaded MRTK foundation unitypackage file and click open. After resolving the packages there will be a pop-up window as in Figure 6. Click ‘All’ and then ‘Import’.

Figure 6
Once the import is complete there will be a prompt as shown in Figure 7. Click ‘Apply’ to finish the installation. Next, there is a set of configurations that need to make.
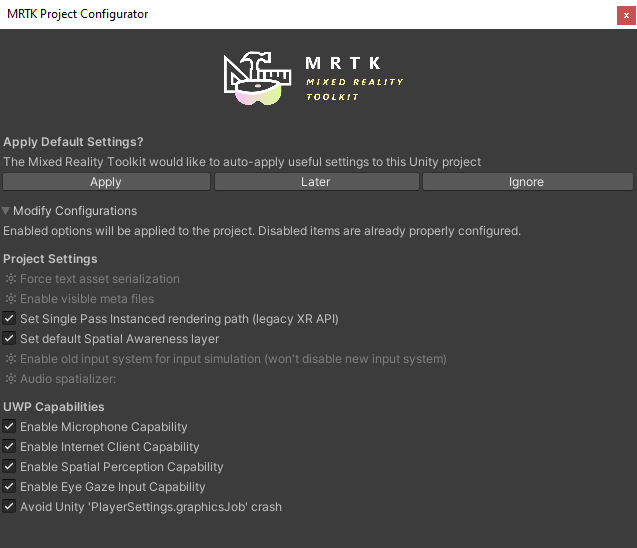
Figure 7
Well, if you want to make these configurations faster go to Mixed Reality Toolkit →Utilities → Configure Unity Project. I like to do it manually. To do it manually, go to Edit → Project Settings… You will get the Project Settings window on your screen. Select Player. Select the UWP icon tab and under that go to XR Settings and enable the ‘Virtual Reality Supported’ option. You might get a window similar to Figure 7 above. If so hit the ‘Apply’ button again. Under Virtual Reality SDKs (When you click +, you will see these SDKs) ensure that Window Mixed Reality is included in the list and select that. The Depth Format should set to 16-bit depth and enable Depth Buffer Sharing. Ensure that the Stereo Rendering Mode is set to ‘Single Pass Instanced’. See Figure 8 and add the changes as in the figure.
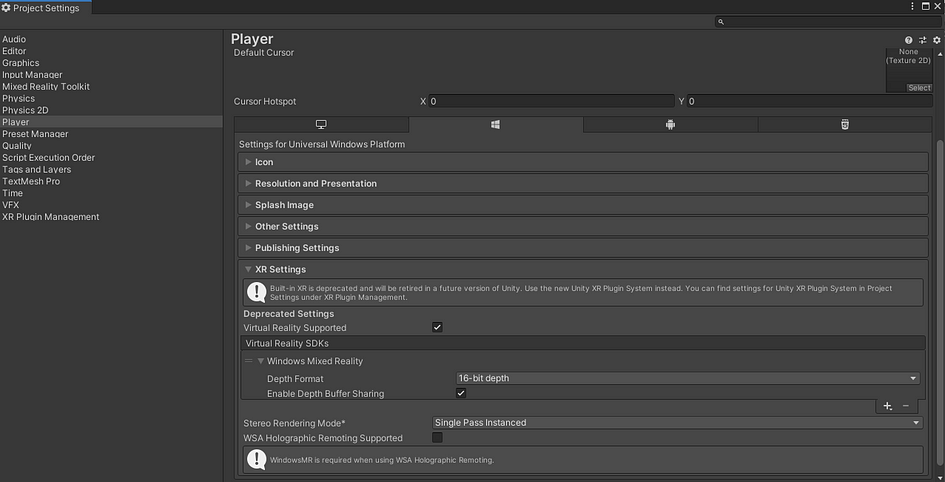
Figure 8
Next, go to ‘Publishing Settings’ (above the XR Settings) and find the ‘Capabilities’ section under that. Under ‘Capabilities’ ensure that Internet Client, WebCam, Microphone, and SpatialPerception are selected. Further, under ‘Supported Device Families’, ensure that ‘Holographic’ is selected. See Figure 9 to get an idea about these settings.
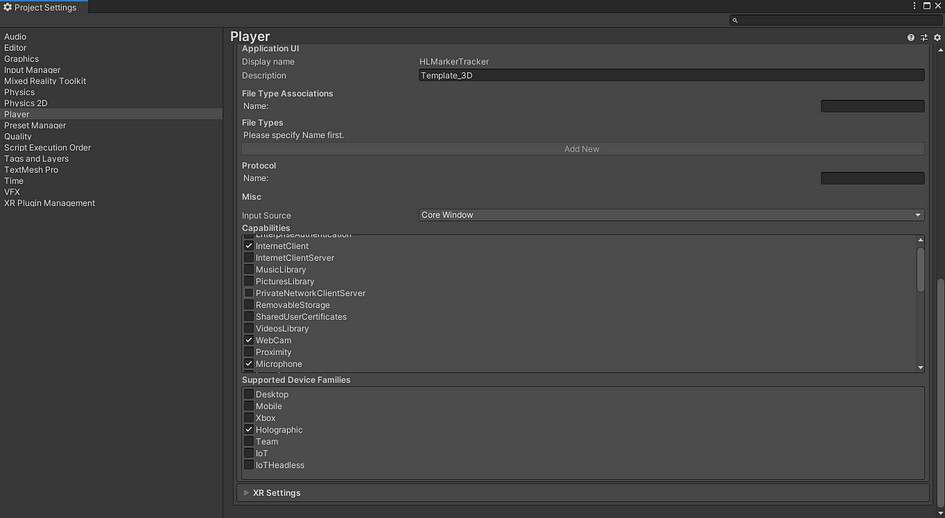
Figure 9
Finally, go to the ‘Resolution and Presentation’ section and disable ‘Run in Background’. So that Vuforia pauses when the app is put into the background and can access the camera again when the app is resumed. Further ensure that in the Default Orientation dropdown, ‘Landscape Left’ is selected. See Figure 10 below. After completing these configs close the Project Settings window.
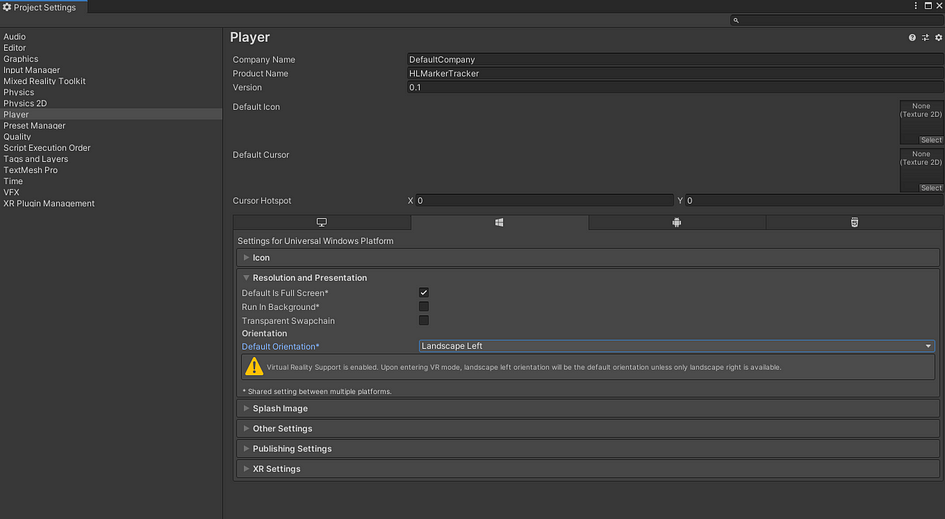
Figure 10
Now let’s start configuring our Unity scene. Go to the Mixed Reality Toolkit menu and click on ‘Add to Scene and Configure…’ as shown in Figure 11 below.

Figure 11
Next, while ‘MixedrealityToolkit’ game object is selected, go to the inspector panel. On the inspector window, under the MixedREalityToolkit component, set the configuration profile to the ‘DefaultXRSDKConfigurationProfile’. See Figure 12 below.
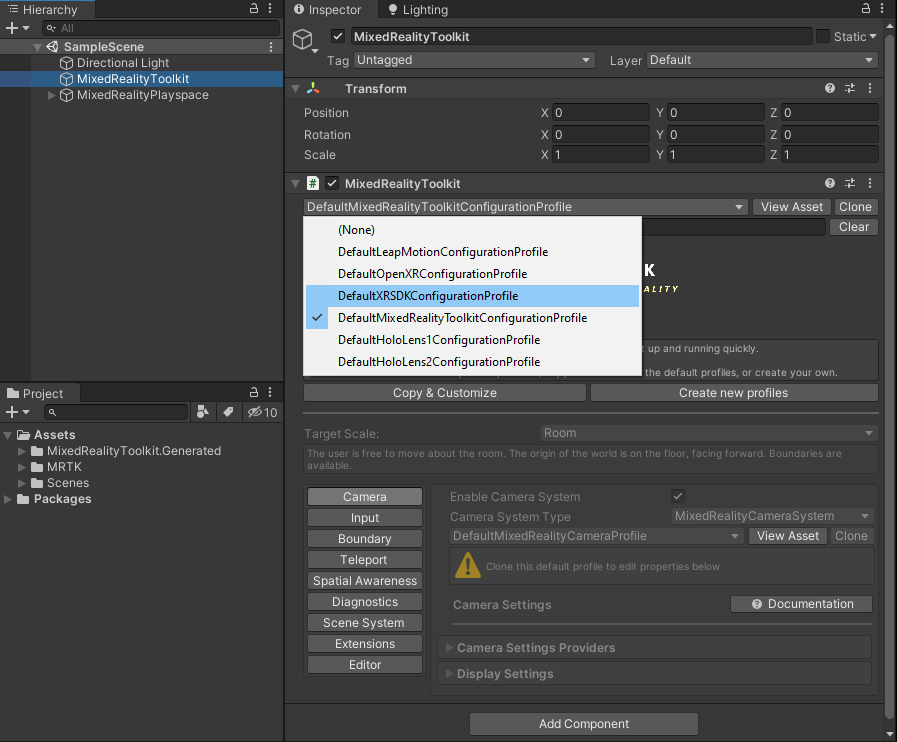
Figure 12
After that, expand the ‘MixedRealityPlaySpace’ game object in the Hierarchy panel. Find the Main Camera game object. While the Main Camera game object is selected, go to the inspector panel. Under that, click ‘Add Component’ and type ‘Vuforia Behaviour’ and click on it to add the component. See Figure 13 below.
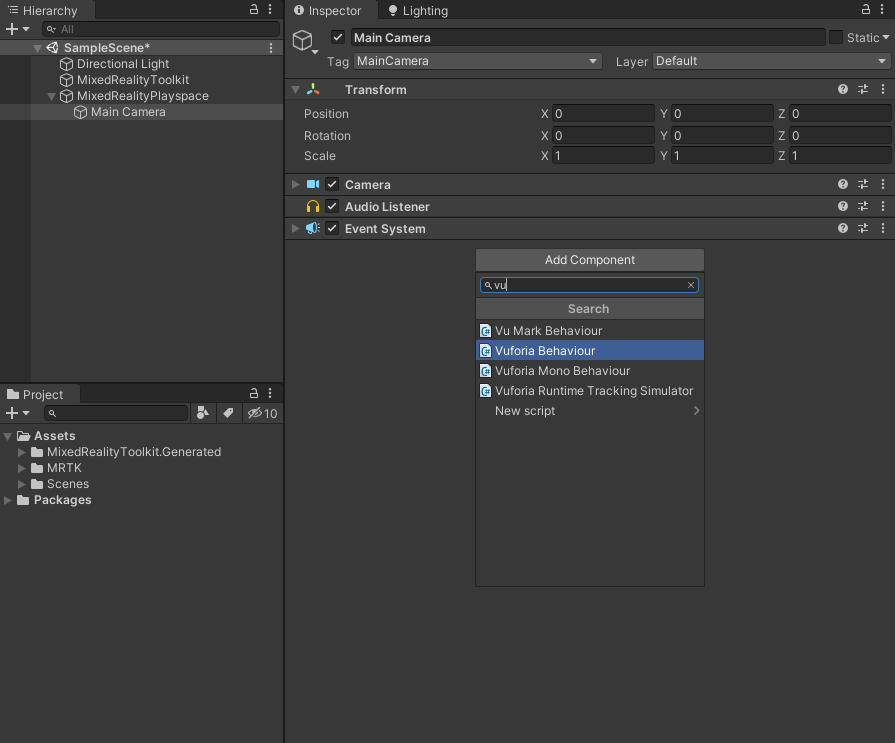
Figure 13
Now go back to the Hierarchy panel and right-click on it. Find the ‘Vuforia Engine’ option and click on ‘Image Target’. See Figure 14 below.
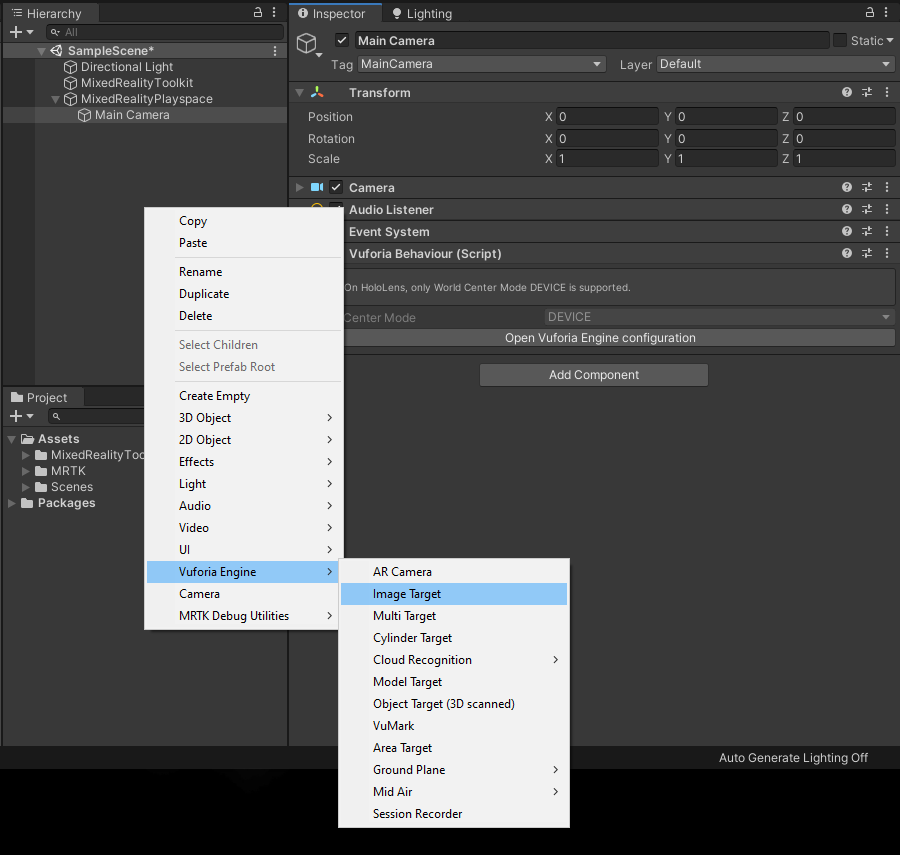
Figure 14
This will add the ‘Image Target’ game object to the Hierarchy panel. While this game object is selected, once again go to the inspector and under the ‘Image Target Behaviour’ component → Type, select the ‘From Database’ option. If you get a prompt saying there is no database select the ‘Import’ option and it will set the default Vuforia Target database. See Figure 15 below.

Figure 15
Alright, we are almost there. Now we have to do a few more steps to set up Vuforia. Select the Main Camera game object again and on the inspector, under the Vuforia Behaviour component. Then click the ‘Open Vuforia Engine’ configuration button. Under that, you will see a button called ‘Add License’. Click on that. See Figure 16 below.
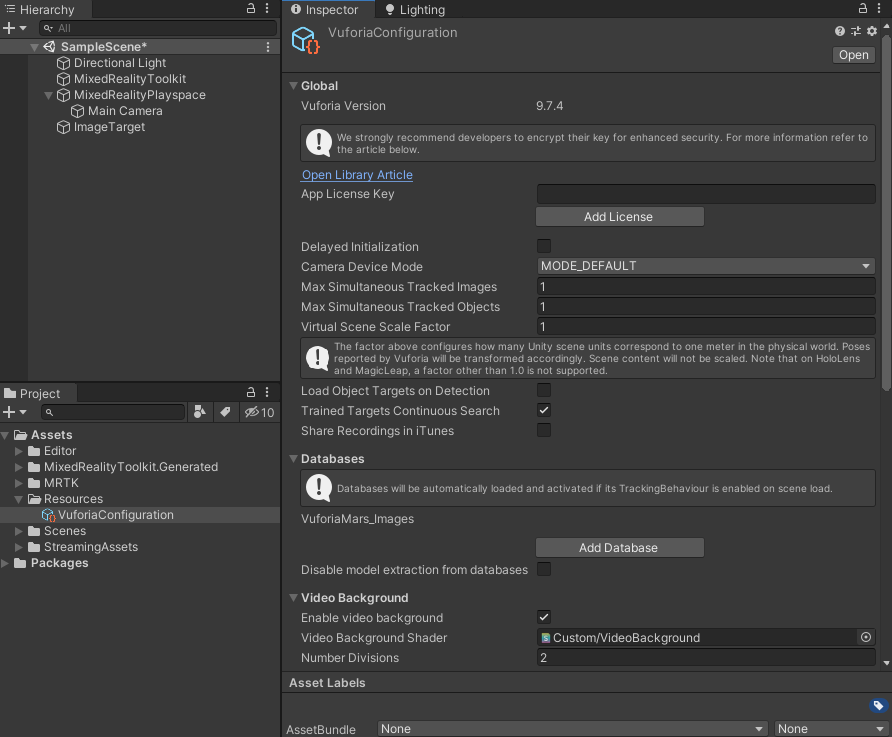
Figure 16
You will be directed to the Vuforia Developer Portal as shown in Figure 17. If you do not have an account, please create one, it is free! However, keep in mind that if you are going to use this library for commercial applications, then you have to purchase their subscription. But for this tutorial, the free account is sufficient.
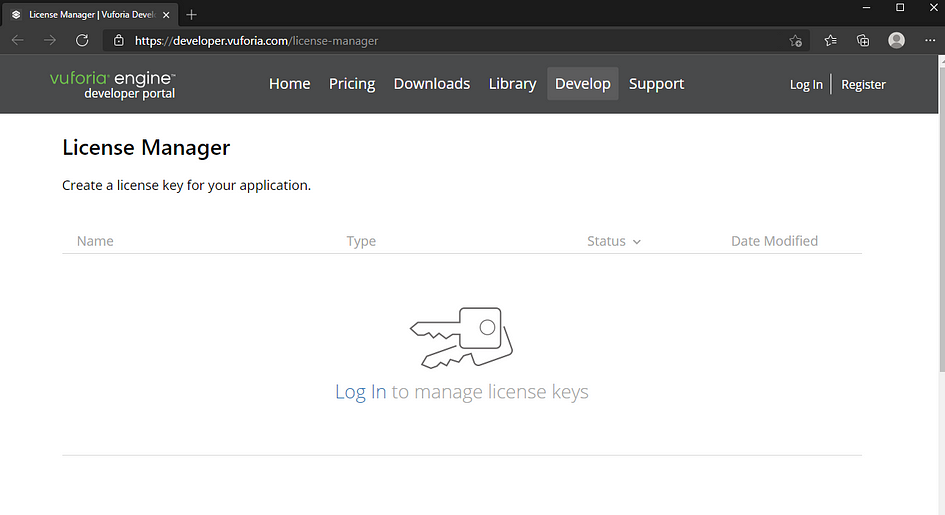
Figure 17
Alright, assuming that you successfully created an account, I am going to show you the rest of the steps. Once you log in, you will see an interface similar to Figure 18. Click on ‘Get Development Key’ and enter a License name and click ‘Confirm’ (Figure 19). Then you will be redirected to the Figure 18 page. Click on your newly created License name and copy the license key and go back to Unity and paste it under the App license key as shown in Figure 16.

Figure 18
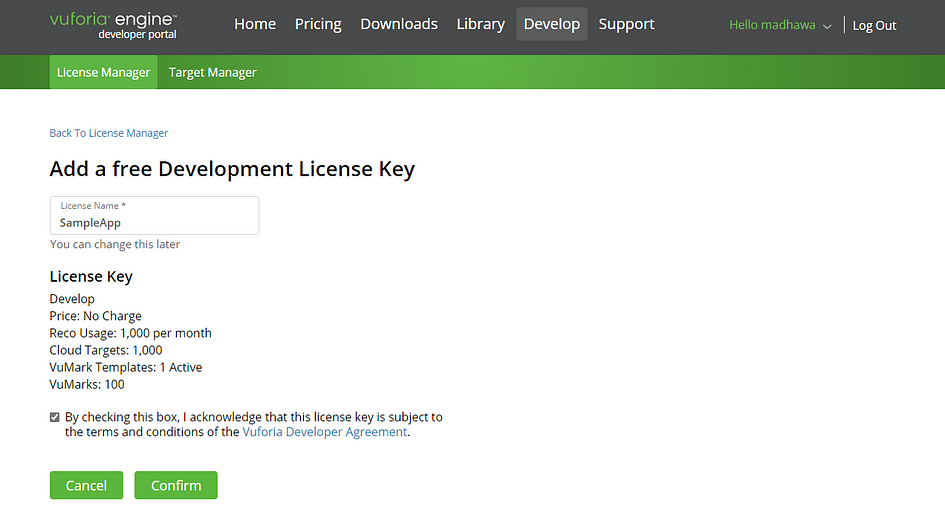
Figure 19
Alright, now you added the license. One last step before we test the application. Go to the Hierarchy panel on the Unity editor and select the ‘Image Target’ game object. While ‘Image target’ is selected, click on the ‘Add Target’ button under ‘Image Target Behaviour Component’. You will be redirected to the Vuforia Developer Portal as shown in Figure 20.
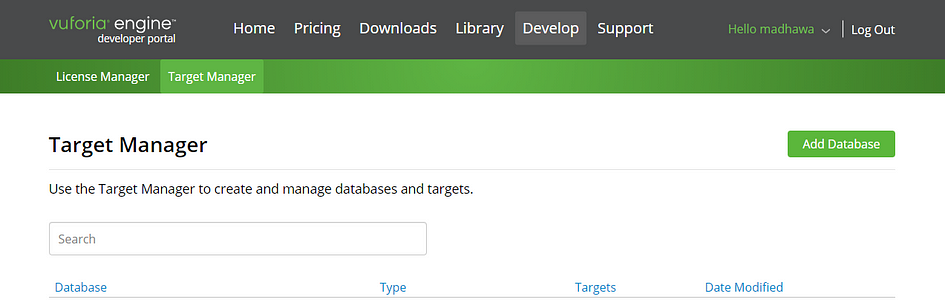
Figure 20
Now we are going to create our marker database. Click on ‘Add Database’ and give it a name and select ‘Device’ as shown in Figure 21 below. Next click on the database name you created (I have named mine as SampleDb) and you will be redirected to the page as shown in Figure 22.
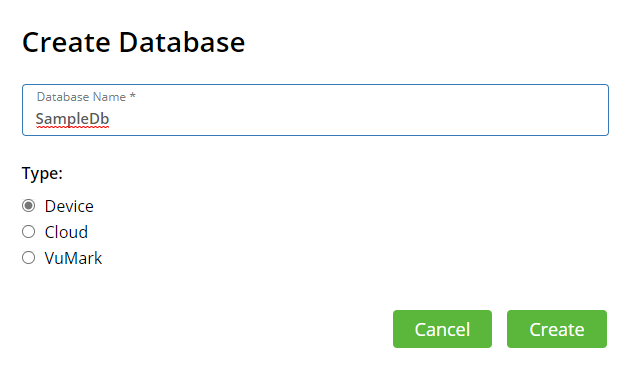
Figure 21
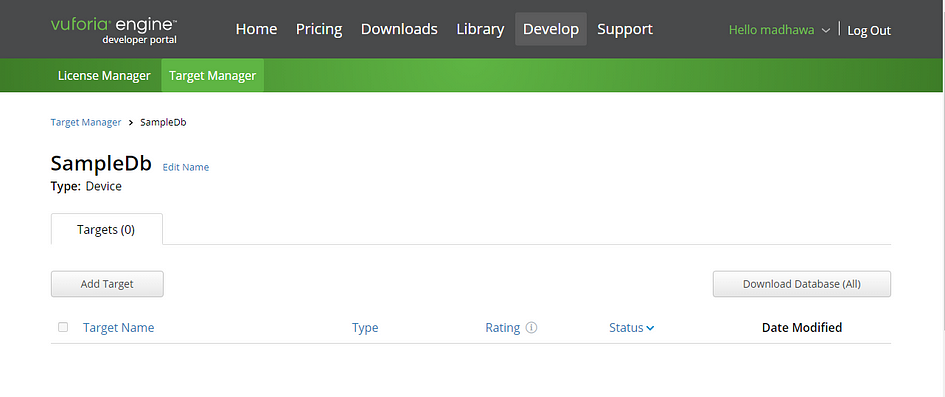
Figure 22
Click ‘Add Target’ and follow the instruction to upload your Target image(or we call it a marker). Make sure you provide the width of your target. You can see my target marker in Figure 24 below. Once you upload your marker, Vuforia will give it a rating. See Figure 25. That shows how confidently Vuforia can identify your marker. 5 starts are the best.

Figure 24: Photo Credits — Ekrulila at https://www.pexels.com/photo/painting-of-giraffe-3246665/
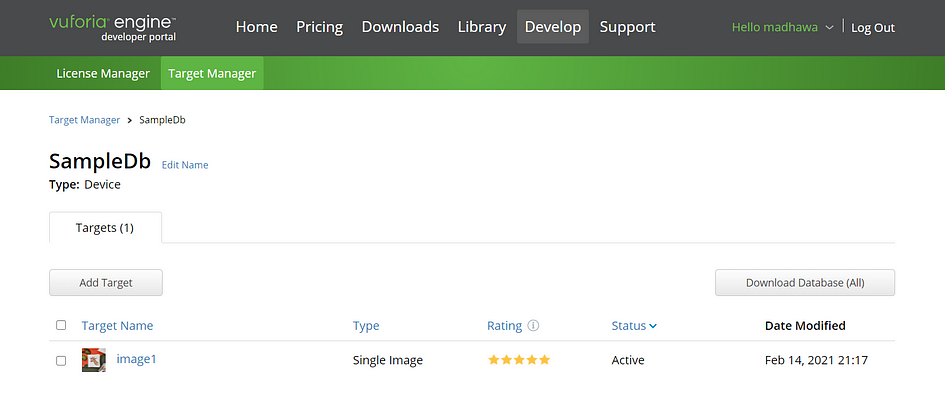
Figure 25
After you finish these steps, select the database and click ‘Download Database’. Then select the ‘Unity Editor’ option as shown in Figure 26. Now you should have <database_name>.unitypackage file.

Figure 26
Now, go back to Unity and import the target database that you downloaded from the Vuforia developer portal. To do that, go to Assets → Import packages → Custom Package… and selected the <database_name>.unitypackage file. After you import the database successfully, select the ‘Target Image’ game object and go to the inspector panel. In the inspector panel, under the ‘Image Target Behaviour’ component click on the dropdown under ‘Database’. You should see the newly added database name. See figure 27 below.
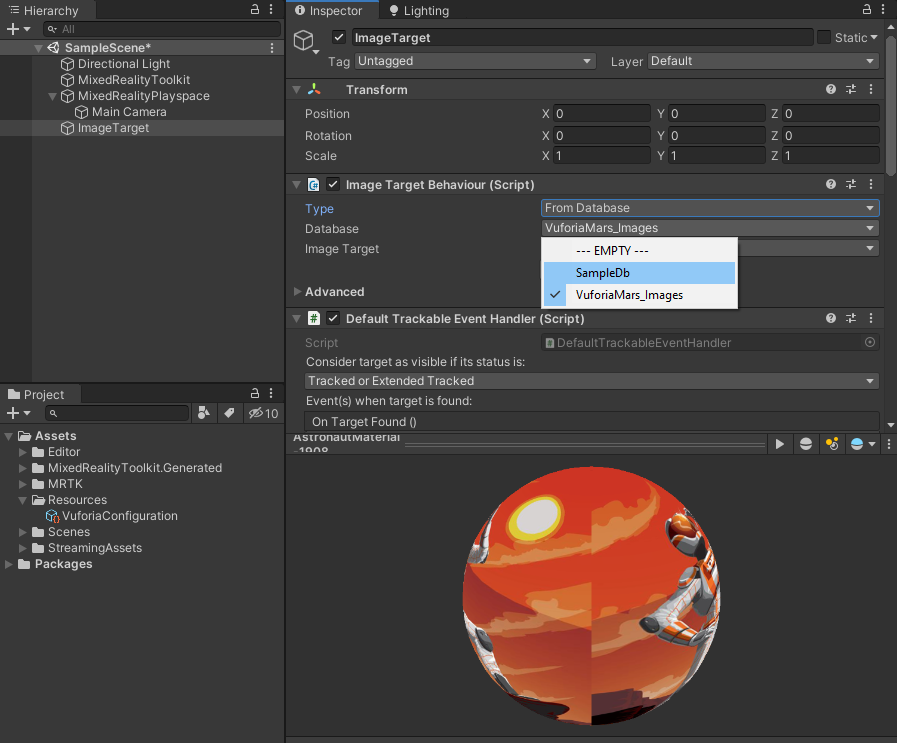
Figure 27
After selecting the database, select the Image Target if you have more than one marker in your database. For this article, I only have a single marker. See Figure 28 below.

Figure 28
If you are getting this far, then congratulations, you have successfully configured everything. One final step, which is to add the hologram that you need to show when HoloLens detect the target marker. To do that, go to the Hierarchy panel and right-click on the ‘Image Target’ game object, and create any 3D object you like. For this article, I simply created a cube and added a red color material to it. See Figure 29. Feel free to use your creativity and you can add videos, 3D models (created from other software such as Blender and downloaded from the internet), and even animations. I am not going to discuss those as this article is already getting longer.
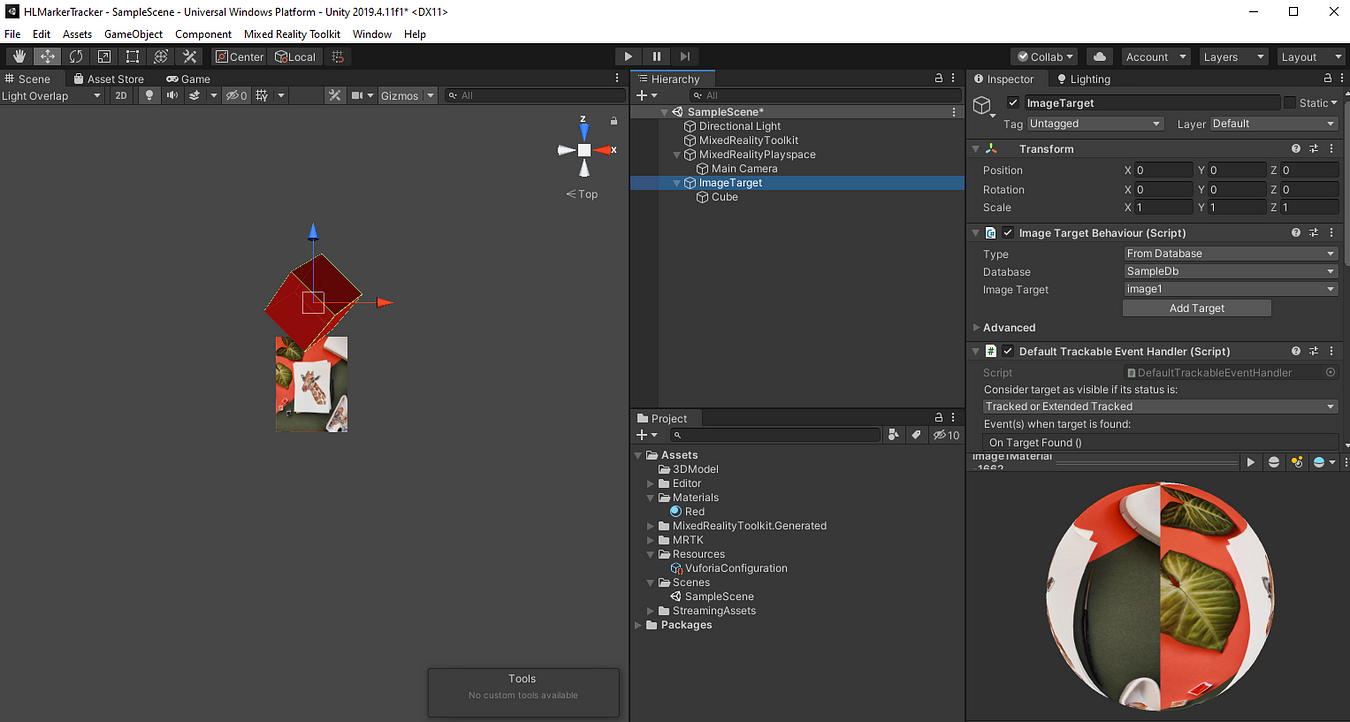
Figure 29
Now save the scene and hit the play button on Unity to test the application. If you have a webcam, it should automatically turn on and you can bring your marker in front of your webcam. See Figure 30.
Optionally, to rotate the cube as in Figure 30, you need to add a small C# script. If you like to try it, attach the sample script below (See Script1) to the cube. If you do not add this script you should still be able to see a static cube.

Script1 Figure 30
If you want to build this to HoloLens go to File → Build Settings… and click ‘Add Open Scenes’ and hit Build. Select a directory to save the build files. You will get a .sln file after a successful build. See my very brief article on How to build your AR Application to your HoloLens 2 which will guide you to install this into HoloLens 2 and test it out. Good luck! Please feel free to leave your comments and suggestions on this article. If this article helps you and want to thank me, consider buying me a virtual coffee by clicking the ‘Buy me a coffee’ button below.