一 概述:
最近一直致力于android自定义VIew的学习,主要在看《android群英传》,还有CSDN博客鸿洋大神和wing大神的一些文章,写的很详细,自己心血来潮,学着写了个实现了类似卫星效果的一个自定义的View,分享到博客上,望各位指点一二。写的比较粗糙,见谅。(因为是在linux系统下写的,效果图我直接用手机拍的,难看,大家讲究下就看个效果,勿喷)。
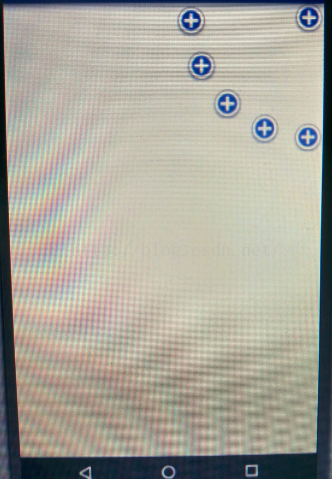
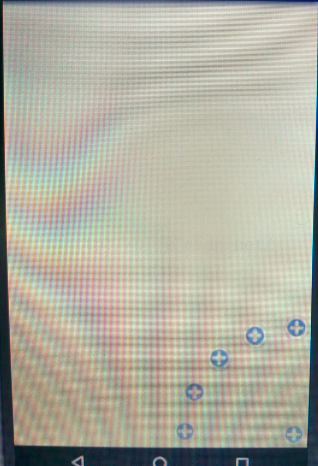
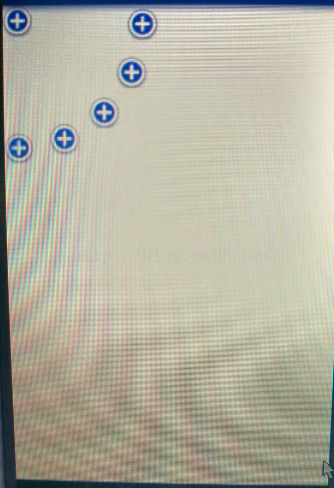
先来看个效果图,有点不忍直视:

自定义VIew准备:
(1)创建继承自View的类;
(2)重写构造函数;
(3)定义属性。
(4)重写onMeasure(),onLayout()方法。
好了,废话不说了,准备上菜。
二 相关实现
首先是自定义的View,重写构造函数,我这里是直接继承的VIewGroup,贴上代码:
            public MoonView(Context context) {
               this(context,null);
            }

            public MoonView(Context context, AttributeSet attrs) {
               this(context, attrs,0);
            }

            public MoonView(Context context, AttributeSet attrs, int defStyleAttr) {
              super(context, attrs, defStyleAttr);
            }
这里需要读取自定义的属性,所以调用含三个参数的构造函数。
自定义的属性,我这里知定义了两个,一个是菜单弧形的半径,还有个是菜单在屏幕的位置,这里可以设置在左上角,左下角,右上角,右下角。代码如下:
<?xml version="1.0" encoding="utf-8"?>
<resources>

    <declare-styleable name="MoonAttrs">
        <attr name="mRadius" format="integer"></attr><!--菜单圆形半径-->
        <attr name="mPosition"><!--卫星菜单屏幕所在位置-->
            <enum name="leftTop" value="-2"></enum><!--左上角-->
            <enum name="leftBottom" value="-1"></enum><!--左下角-->
            <enum name="rightTop" value="-3"></enum><!--右上角-->
            <enum name="rightBottom" value="-4"></enum><!--右下角-->
        </attr>
    </declare-styleable>

</resources>
然后在布局文件里面引用自定义的View,配置属性:
<?xml version="1.0" encoding="utf-8"?>
<com.example.liujibin.testmyview3.myView.MoonView
    xmlns:android="http://schemas.android.com/apk/res/android"
    xmlns:custom="http://schemas.android.com/apk/res/com.example.liujibin.testmyview3"
    android:orientation="vertical"
    android:layout_width="match_parent"
    android:layout_height="match_parent"
    custom:mRadius="400"
    custom:mPosition="rightBottom"
    >

    <ImageView
        android:layout_width="wrap_content"
        android:layout_height="wrap_content"
        android:background="@mipmap/sapi_icon_add_account"/>
    <ImageView
        android:layout_width="wrap_content"
        android:layout_height="wrap_content"
        android:background="@mipmap/sapi_icon_add_account"/>
    <ImageView
        android:layout_width="wrap_content"
        android:layout_height="wrap_content"
        android:background="@mipmap/sapi_icon_add_account"/>
    <ImageView
        android:layout_width="wrap_content"
        android:layout_height="wrap_content"
        android:background="@mipmap/sapi_icon_add_account"/>
    <ImageView
        android:layout_width="wrap_content"
        android:layout_height="wrap_content"
        android:background="@mipmap/sapi_icon_add_account"/>

    <ImageView
        android:layout_width="wrap_content"
        android:layout_height="wrap_content"
        android:background="@mipmap/sapi_icon_add_account"/>


</com.example.liujibin.testmyview3.myView.MoonView> public MoonView(Context context, AttributeSet attrs, int defStyleAttr) {
super(context, attrs, defStyleAttr);
//获取相关属性
TypedArray ta = context.getTheme().obtainStyledAttributes(attrs, R.styleable.MoonAttrs,
defStyleAttr,0);
mRaius = ta.getInt(R.styleable.MoonAttrs_mRadius,500);
position = ta.getInt(R.styleable.MoonAttrs_mPosition,-1);
}做完以上的准备工作,我们就可以对组件进行测量,布局。
    @Override
    protected void onMeasure(int widthMeasureSpec, int heightMeasureSpec) {
        super.onMeasure(widthMeasureSpec, heightMeasureSpec);
        count = getChildCount()-1;
        angle = 90/(count-1);

        int count = getChildCount();
        for(int i =0;i< count;i++){
            measureChild(getChildAt(i),widthMeasureSpec,heightMeasureSpec);
        }
}首先先把中心点固定好位置:
    @Override
    protected void onLayout(boolean b, int i, int i1, int i2, int i3) {
        if(isChanged){
            layoutBottom();
        }
    }
private void layoutBottom(){
View view = getChildAt(0);
switch (position){
case -1:
btml = 0;
btmt = getMeasuredHeight() - view.getMeasuredHeight();
btmr = view.getMeasuredWidth();
btmb = getMeasuredHeight();
break;
case -2:
btml = 0;
btmt = 0;
btmr = view.getMeasuredWidth();
btmb = view.getMeasuredHeight();
break;
case -3:
btml = getMeasuredWidth() - view.getMeasuredWidth();
btmt = 0;
btmr = getMeasuredWidth();
btmb = view.getMeasuredHeight();
break;
case -4:
btml = getMeasuredWidth() - view.getMeasuredWidth();
btmt = getMeasuredHeight() - view.getMeasuredHeight();
btmr = getMeasuredWidth();
btmb = getMeasuredHeight();
break;
}
btmWidth = view.getMeasuredWidth();
btmHeight = view.getMeasuredHeight();
view.setOnClickListener(this);
view.layout(btml,btmt,btmr,btmb);
}现在开始给剩下的按钮布局,并隐藏按钮:
    @Override
    protected void onLayout(boolean b, int i, int i1, int i2, int i3) {
        if(isChanged){
            layoutBottom();
            int count = getChildCount();
            for(int k = 0;k < count - 1;k++){
                View view = getChildAt(k+1);
                int childWidth = view.getMeasuredWidth();
                int childHeight = view.getMeasuredHeight();
                int childX = (int)(mRaius*(Math.sin(angle*(k)*Math.PI/180)));
                int childY = (int)(mRaius*(Math.cos(angle*(k)*Math.PI/180)));


                int left = 0;
                int top = 0;
                int right = 0;
                int bottom = 0;
                switch(position){
                    case -1:
                        left = childX+btmWidth/2-childWidth/2;
                        top =getMeasuredHeight() - (childY+childHeight/2+btmHeight/2);
                        right = childX+btmWidth/2+childWidth/2;
                        bottom =getMeasuredHeight() - (childY + btmHeight/2) + childHeight/2;
                        break;
                    case -2:
                        left = childX+btmWidth/2-childWidth/2;
                        top =childY-childHeight/2+btmHeight/2;
                        right = childX+btmWidth/2+childWidth/2;
                        bottom = childY + btmHeight/2 + childHeight/2;
                        break;
                    case -3:
                        left = getMeasuredWidth() - (childX+btmWidth/2+childWidth/2);
                        top =childY-childHeight/2+btmHeight/2;
                        right = getMeasuredWidth() - (childX+btmWidth/2+childWidth/2)+childWidth;
                        bottom = childY + btmHeight/2 + childHeight/2;
                        break;
                    case -4:
                        left = getMeasuredWidth() - (childX+btmWidth/2+childWidth/2);
                        top =getMeasuredHeight() - (childY+childHeight/2+btmHeight/2);
                        right = getMeasuredWidth() - (childX+btmWidth/2+childWidth/2)+childWidth;
                        bottom =getMeasuredHeight() - (childY + btmHeight/2) + childHeight/2;
                        break;
                }
                view.layout(left,top,right,bottom);
                view.setVisibility(View.GONE);
            }

        }
    }
    @Override
    public void onClick(View view) {
        if(isChanged){
            int count = getChildCount();
            for(int i = 0;i < count - 1;i++){
                View childView = getChildAt(i+1);
                int childX = (int)(mRaius*(Math.sin(angle*(i)*Math.PI/180)));
                int childY = (int)(mRaius*(Math.cos(angle*(i)*Math.PI/180)));
                int childWidth = view.getMeasuredWidth();
                int childHeight = view.getMeasuredHeight();
                int left = 0;
                int top = 0;
                TranslateAnimation ta = null;
                switch(position){
                    case -1:
                        left = childX+btmWidth/2-childWidth/2;
                        top =getMeasuredHeight() - (childY+childHeight/2+btmHeight/2);
                        ta = new TranslateAnimation(-(left+childView.getMeasuredWidth()),0,getMeasuredHeight()-top,0);
                        break;
                    case -2:
                        left = childX+btmWidth/2-childWidth/2;
                        top =childY-childHeight/2+btmHeight/2;
                        ta = new TranslateAnimation(-(left+childView.getMeasuredWidth()),0,-top,0);
                        break;
                    case -3:
                        left = getMeasuredWidth() - (childX+btmWidth/2+childWidth/2);
                        top =childY-childHeight/2+btmHeight/2;
                        ta = new TranslateAnimation(getMeasuredWidth()-(left+childView.getMeasuredWidth()),0,-top,0);
                        break;
                    case -4:
                        left = getMeasuredWidth() - (childX+btmWidth/2+childWidth/2);
                        top =getMeasuredHeight() - (childY+childHeight/2+btmHeight/2);
                        ta = new TranslateAnimation(getMeasuredWidth()-(left+childView.getMeasuredWidth()),0,getMeasuredHeight()-top,0);
                        break;
                }

                ta.setDuration(500);
                childView.setAnimation(ta);
                childView.setVisibility(View.VISIBLE);
            }
            isChanged = false;
        }else{
            int count = getChildCount();
            for(int i = 0;i < count - 1;i++){
                View childView = getChildAt(i+1);
                int childX = (int)(mRaius*(Math.sin(angle*(i)*Math.PI/180)));
                int childY = (int)(mRaius*(Math.cos(angle*(i)*Math.PI/180)));
                int childWidth = view.getMeasuredWidth();
                int childHeight = view.getMeasuredHeight();
                int left = 0;
                int top = 0;
                TranslateAnimation ta = null;
                switch(position){
                    case -1:
                        left = childX+btmWidth/2-childWidth/2;
                        top =getMeasuredHeight() - (childY+childHeight/2+btmHeight/2);
                        ta = new TranslateAnimation(0,-(left+childView.getMeasuredWidth()),0,getMeasuredHeight()-top);
                        break;
                    case -2:
                        left = childX+btmWidth/2-childWidth/2;
                        top =childY-childHeight/2+btmHeight/2;
                        ta = new TranslateAnimation(0,-(left+childView.getMeasuredWidth()),0,-top);
                        break;
                    case -3:
                        left = getMeasuredWidth() - (childX+btmWidth/2+childWidth/2);
                        top =childY-childHeight/2+btmHeight/2;
                        ta = new TranslateAnimation(0,getMeasuredWidth()-(left+childView.getMeasuredWidth()),0,-top);
                        break;
                    case -4:
                        left = getMeasuredWidth() - (childX+btmWidth/2+childWidth/2);
                        top =getMeasuredHeight() - (childY+childHeight/2+btmHeight/2);
                        ta = new TranslateAnimation(0,getMeasuredWidth()-(left+childView.getMeasuredWidth()),0,getMeasuredHeight()-top);
                        break;
                }

                ta.setDuration(500);
                childView.setAnimation(ta);
                childView.setVisibility(View.GONE);
            }
            isChanged = true;
        }
}四个角落效果如下:
源码下载地址:http://download.csdn.net/detail/liujibin1836591303/9675863