1. 概述
通过了解springboot加载配置,可以更方便地封装自定义Starter。
在SpringBoot中,可以使用以下6种方式读取 yml、properties配置:
- 使用@Value注解:读取springboot全局配置文件单个配置。
- 使用Environment接口:通过Environment接口动态获取配置。(将yml全部数据封装到Environment对象)
- 使用@ConfigurationProperties注解:在配置类上使用@ConfigurationProperties注解并指定加载配置项的前缀,就可以批量读取配置注入自定义类的成员变量中。(自定义类需要提供setter方法)
- 使用PropertySource注解:加载properties文件配置,然后在字段上使用@Value获取配置。
- 配置PropertySourcesPlaceholderConfigurer的Bean加载自定义yml文件,然后在字段上使用@Value获取配置。
- Java原生方式获取配置。(IO流)
环境准备:
1、创建maven项目(不需要任何archetype模板构建)
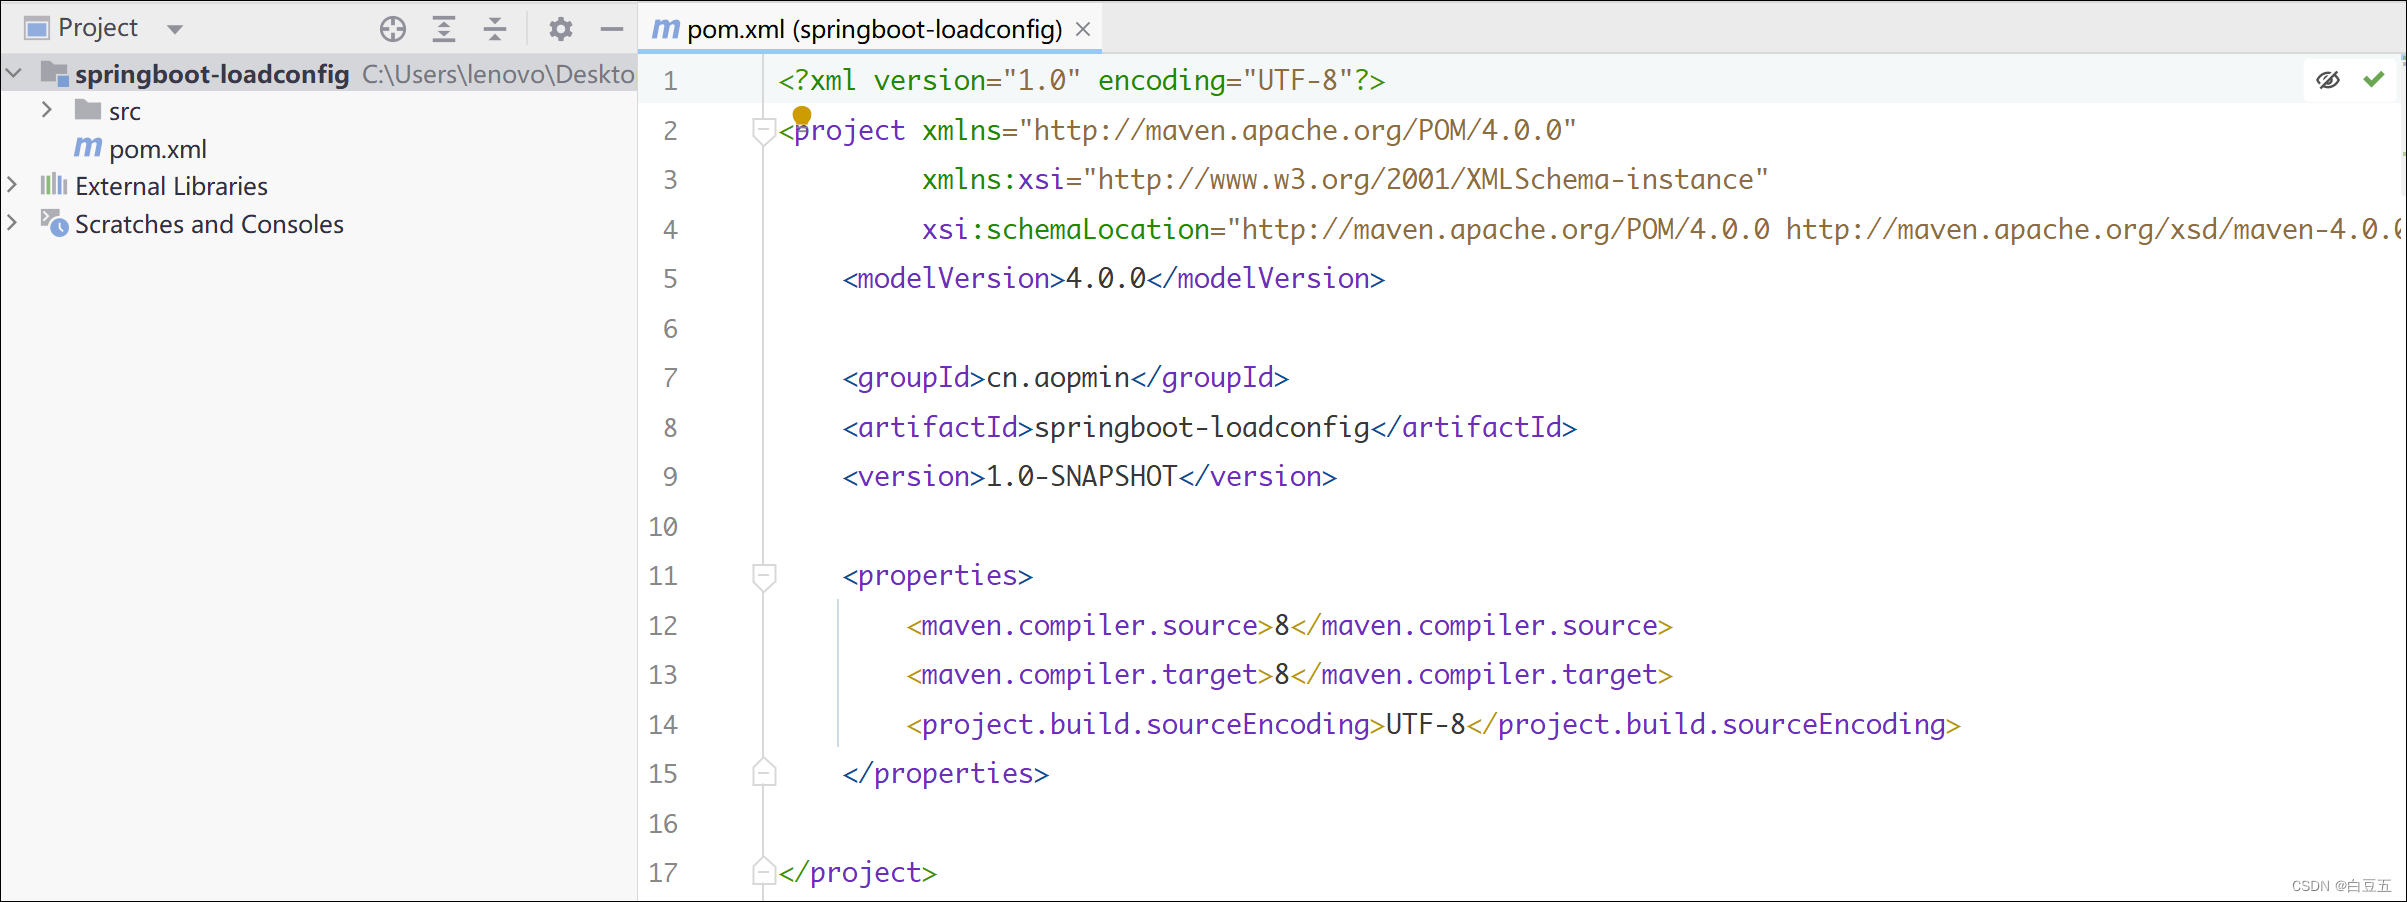
2、引入依赖:
<?xml version="1.0" encoding="UTF-8"?>
<project xmlns="http://maven.apache.org/POM/4.0.0"
         xmlns:xsi="http://www.w3.org/2001/XMLSchema-instance"
         xsi:schemaLocation="http://maven.apache.org/POM/4.0.0 http://maven.apache.org/xsd/maven-4.0.0.xsd">
    <modelVersion>4.0.0</modelVersion>

    <groupId>cn.aopmin</groupId>
    <artifactId>springboot-loadconfig</artifactId>
    <version>1.0.0</version>

    <!--父工程-->
    <parent>
        <groupId>org.springframework.boot</groupId>
        <artifactId>spring-boot-starter-parent</artifactId>
        <version>2.4.5</version>
        <relativePath/> <!-- lookup parent from repository -->
    </parent>

    <properties>
        <maven.compiler.source>8</maven.compiler.source>
        <maven.compiler.target>8</maven.compiler.target>
        <project.build.sourceEncoding>UTF-8</project.build.sourceEncoding>
    </properties>

    <dependencies>
        <!-- SpringBoot配置元数据的注解处理器,可以让自定义配置实现自动补全和校验功能 -->
        <dependency>
            <groupId>org.springframework.boot</groupId>
            <artifactId>spring-boot-configuration-processor</artifactId>
            <optional>true</optional>
        </dependency>
        <!-- web起步依赖 -->
        <dependency>
            <groupId>org.springframework.boot</groupId>
            <artifactId>spring-boot-starter-web</artifactId>
        </dependency>
        <!-- junit -->
        <dependency>
            <groupId>org.springframework.boot</groupId>
            <artifactId>spring-boot-starter-test</artifactId>
            <scope>test</scope>
        </dependency>
        <!-- lombok -->
        <dependency>
            <groupId>org.projectlombok</groupId>
            <artifactId>lombok</artifactId>
        </dependency>
    </dependencies>

    <build>
        <plugins>
            <plugin>
                <groupId>org.springframework.boot</groupId>
                <artifactId>spring-boot-maven-plugin</artifactId>
                <configuration>
                    <excludes>
                        <exclude>
                            <groupId>org.springframework.boot</groupId>
                            <artifactId>spring-boot-configuration-processor</artifactId>
                        </exclude>
                    </excludes>
                </configuration>
            </plugin>
        </plugins>
    </build>
</project>
3、编写启动类:
package cn.aopmin;

import org.springframework.boot.SpringApplication;
import org.springframework.boot.autoconfigure.SpringBootApplication;

@SpringBootApplication
public class LoadConfigApplication {


    public static void main(String[] args) {


        SpringApplication.run(LoadConfigApplication.class, args);
    }
}
2. 使用@Value注解读取单个配置
1、编写application.yml文件配置:
student:
  name: jack
  age: 20

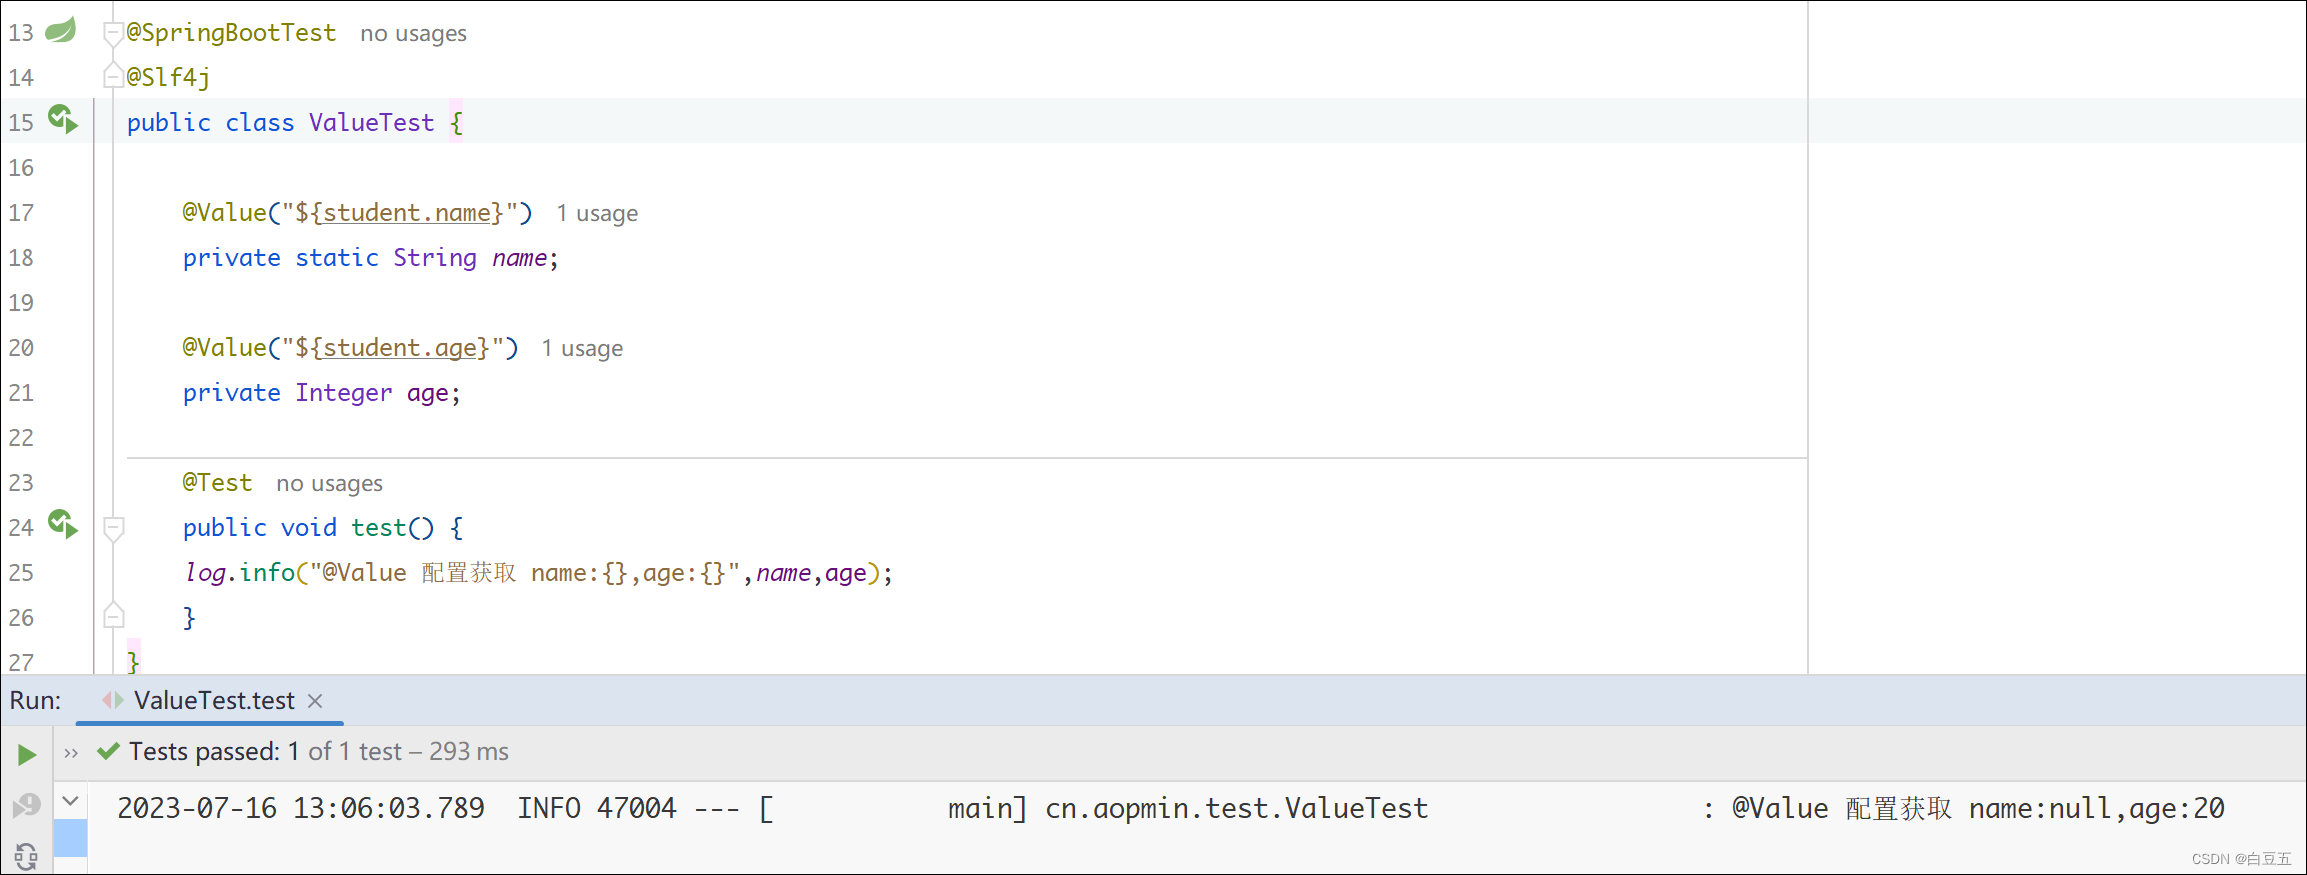
2、使用@Value读取配置:
@SpringBootTest
@Slf4j
public class ValueTest {


    @Value("${student.name}")
    private String name;

    @Value("${student.age}")
    private Integer age;

    @Test
    public void test() {


    log.info("@Value 配置获取 name:{},age:{}",name,age);
    }
}

@Value注意事项:
①@Value注解只能读取单个配置进行赋值,无法读取整个配置文件批量赋值。当使用@Value注解读取配置时,确保配置在yml中存在,否则启动程序时就会报错。注解中属性名引用方式如下:
@Value("${一级属性名.二级属性名...}")
② 当使用@Value注解引用属性时,可以在属性名称后面使用冒号(:default-value)的形式添加默认值。这样,如果在配置文件中找不到对应的属性,就会使用默认值。如果在配置文件中找到了属性,其值将会覆盖默认值。
//可以使用各种类型的默认值,包括字符串、数字、布尔值等
@Value("${student.name:aopmin}")
private String name;

@Value("${student.age:18}")
private Integer age;
//表示一个空字符串作为默认值
@Value("${student.name:}")
private String name;
③ @Value注解只能用于被Spring管理的Bean中使用,,如使用@Component、@Service、@Controller等注解修饰的类,或者使用Java配置编写的@Configuration类中。
④ @Value注解可以用于字段、构造函数参数、方法参数和方法上。当将它放在方法上时,Spring容器初始化时会调用该方法,并将配置属性的值作为方法的参数传递进去。
@Component
public class MyBean {


    private String myProperty;

    @Autowired
    public MyBean(@Value("${my.property}") String myProperty) {


        this.myProperty = myProperty;
    }

    @Value("${another.property}")
    public void setAnotherProperty(String anotherProperty) {


        // do something with anotherProperty...
    }

    @Value("${yet.another.property}")
    public void processValue(String value) {


        // do something with value...
    }

}

/*
@Value注解被用于构造函数参数、setter方法和普通方法上。容器初始化时,会将配置属性的值作为参数传递到构造函数、setter方法和普通方法中。
*/
⑤ @Value注解不能在static修饰的字段上使用。因为@Value注解是通过访问Spring容器中的上下文来解析属性值并注入到目标字段中的。由于static字段不属于对象实例,无法通过实例访问容器,所以在静态字段上使用@Value注解是无效的。
3. 使用@ConfigurationProperties注解批量绑定
1、编写application.yml文件配置:
student:
  name: jack
  age: 20
2、使用@ConfigurationProperties批量绑定:
package cn.aopmin.pojo;

import lombok.Data;
import org.springframework.boot.context.properties.ConfigurationProperties;
import org.springframework.stereotype.Component;

/**
 * 参数配置类   (需要提供setter方法)
 *
 * @author 白豆五
 * @version 2023/07/16
 * @since JDK8
 */

@Component
@Data
//将这个类与配置文件前缀为student的配置绑定,然后把yml、properties中关于student的配置信息注入到当前类的成员变量中
@ConfigurationProperties(prefix = "student")
public class StudentProperties {


    private String name;
}
3、测试
@SpringBootTest
public class ConfigurationPropertiesTest {


    @Autowired
    private StudentProperties studentProperties;

    @Test
    public void test() {


        System.out.println("读取配置: name==="+studentProperties.getName());
    }
}

@ConfigurationProperties注意事项:
- 确保添加了@EnableConfigurationProperties注解:为了使@ConfigurationProperties生效,需要在主配置类上添加@EnableConfigurationProperties(value=xxxxProperties.class)注解,开启@ConfigurationProperties注解自动装配功能。
- 配置文件中的属性名与类字段名的映射规则:默认情况下,@ConfigurationProperties会将配置文件中的属性名与类字段名进行映射。例如,配置文件中的属性student.name会自动映射到类字段name上。如果配置文件中的属性名与类字段名不一致,可以使用@Value注解或通过setter方法来指定映射关系。
- 类必须是Spring管理的Bean:被@ConfigurationProperties注解标记的类必须是由Spring容器管理的Bean,因此需要确保该类被@Component或其他相关注解标记,以便Spring能够扫描并创建该类的实例。
- 支持类型转换:@ConfigurationProperties支持自动类型转换,将配置文件中的字符串值转换为目标字段的类型。例如,将字符串转换为整数、布尔值等。如果无法进行类型转换,会抛出异常。
- 默认值和可选属性:可以为@ConfigurationProperties注解的字段设置默认值,以防止配置文件中缺少对应的属性。可以使用":“符号指定默认值,例如@Value(”${my.property:default-value}")。另外,可以使用required属性来指定某个属性是否为必需的。
- 配置项的验证和校验:可以使用JSR-303/349规范的注解对@ConfigurationProperties注解的字段进行验证和校验。例如,使用@NotBlank、@Min、@Max等注解来限制属性值的有效性。
4. 使用Environment动态获取配置
1、编写application.yml文件配置:
student:
  name: jack
  age: 20
2、使用Environment动态获取配置:(将Environment对象自动装配,然后调用getProperty()方法获取指定属性值)
package cn.aopmin.test;

import lombok.extern.slf4j.Slf4j;
import org.junit.jupiter.api.Test;
import org.springframework.boot.test.context.SpringBootTest;
import org.springframework.core.env.Environment;

import javax.annotation.Resource;

/**
 * Environment是springboot核心的环境配置接口,它提供了一些方法用于访问应用程序配置属性。
 * 包括系统属性、操作系统环境变量、命令行参数、以及配置文件中定义的属性等等
 *
 * @author 白豆五
 * @version 2023/07/16
 * @since JDK8
 */
@Slf4j
@SpringBootTest
public class EnvironmentTest {


    @Resource
    private Environment env;

    @Test
    public void test() {


        String name = env.getProperty("student.name");
        // 逻辑处理...(也可以控制某一个bean是否生效)
        log.info("Environment配置读取: name:{}", name);
    }}
除了自动装配方式,也可以从spring容器中获取bean:
@Slf4j
@SpringBootTest
public class EnvironmentTest2 implements EnvironmentAware {


    private Environment env;

    @Test
    public void test() {


        String name = env.getProperty("student.name");
        log.info("Environment配置读取: name:{}", name);
    }

    @Override
    public void setEnvironment(Environment environment) {


        // 逻辑处理...(也可以控制某一个bean是否生效)
        this.env = environment;
    }
}
Aware是Spring框架提供的一组特殊接口,可以让Bean从Spring容器中拿到一些资源信息。
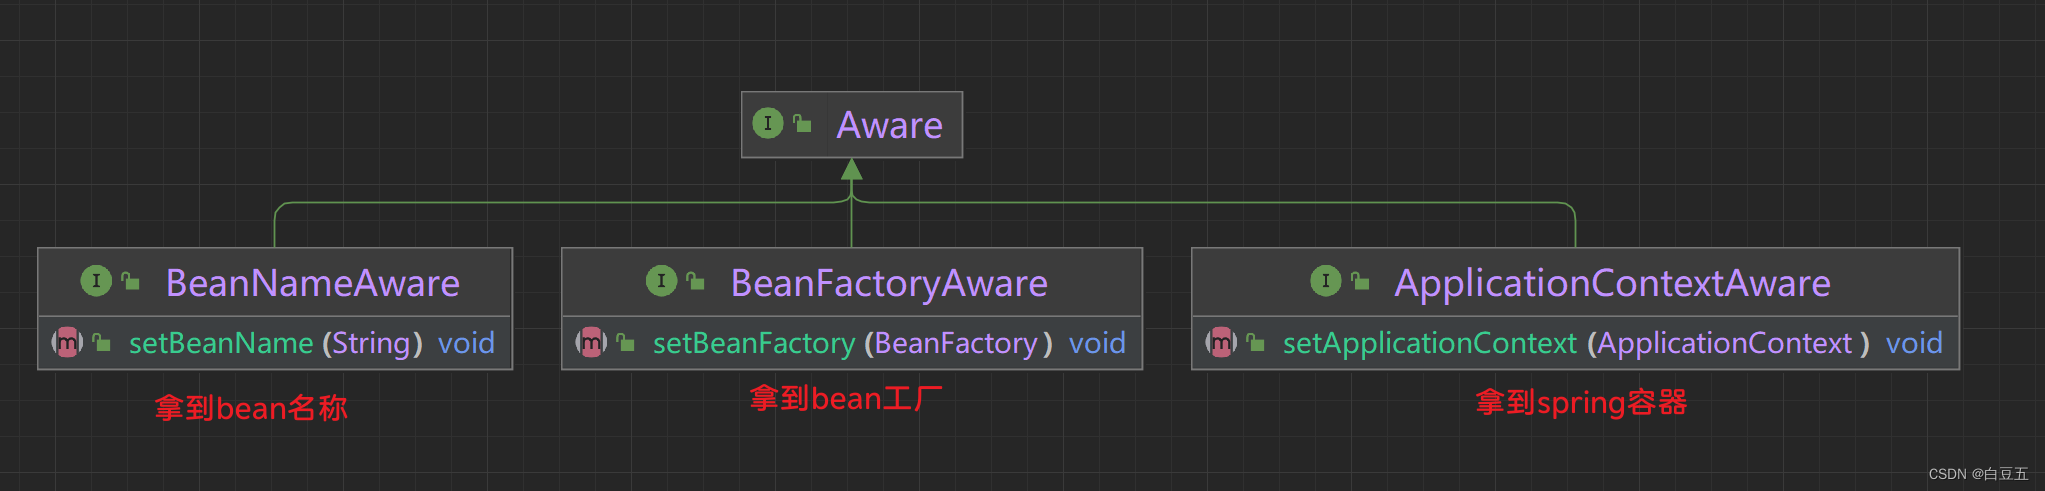
Aware接口是一种回调机制,当Bean被实例化并注册到Spring容器中时,容器会自动调用Bean中实现了特定Aware接口的方法,将相应的资源或信息传递给Bean。
以下是几个常用的Aware接口:
-
ApplicationContextAware:通过实现该接口,Bean可以访问ApplicationContext对象,从而获取Spring容器的相关信息。
-
BeanFactoryAware:通过实现该接口,Bean可以访问BeanFactory对象,从而获取Bean在容器中的相关信息。
-
EnvironmentAware:通过实现该接口,Bean可以访问Environment对象,从而获取环境相关的配置属性,比如系统属性、环境变量等。
-
ResourceLoaderAware:通过实现该接口,Bean可以访问ResourceLoader对象,从而获取资源加载器,用于加载类路径下的资源文件。
-
MessageSourceAware:通过实现该接口,Bean可以访问MessageSource对象,从而获取国际化消息。
5.使用@PropertySources注解获取外部配置
前3种都是从springboot全局配置文件中获取配置,如果获取外部自定义文件就不可以啦,我们可以通过@PropertySources注解获取==.properties==文件配置。
1、在resources目录下创建student.properties文件:
student.id=1001
student.name=白豆五
2、在配置类中使用@PropertySources注解绑定配置:
package cn.aopmin.pojo;

import lombok.Data;
import org.springframework.beans.factory.annotation.Value;
import org.springframework.context.annotation.Configuration;
import org.springframework.context.annotation.PropertySource;

/**
 * 绑定自定义properties配置
 *
 * @author 白豆五
 * @version 2023/07/16
 * @since JDK8
 */
@Data
@Configuration
@PropertySource(value = "classpath:student.properties", encoding = "UTF-8")
public class PropertySourcesConf {


    @Value("${student.id}")
    private Integer id;
    @Value("${student.name}")
    private String name;
}
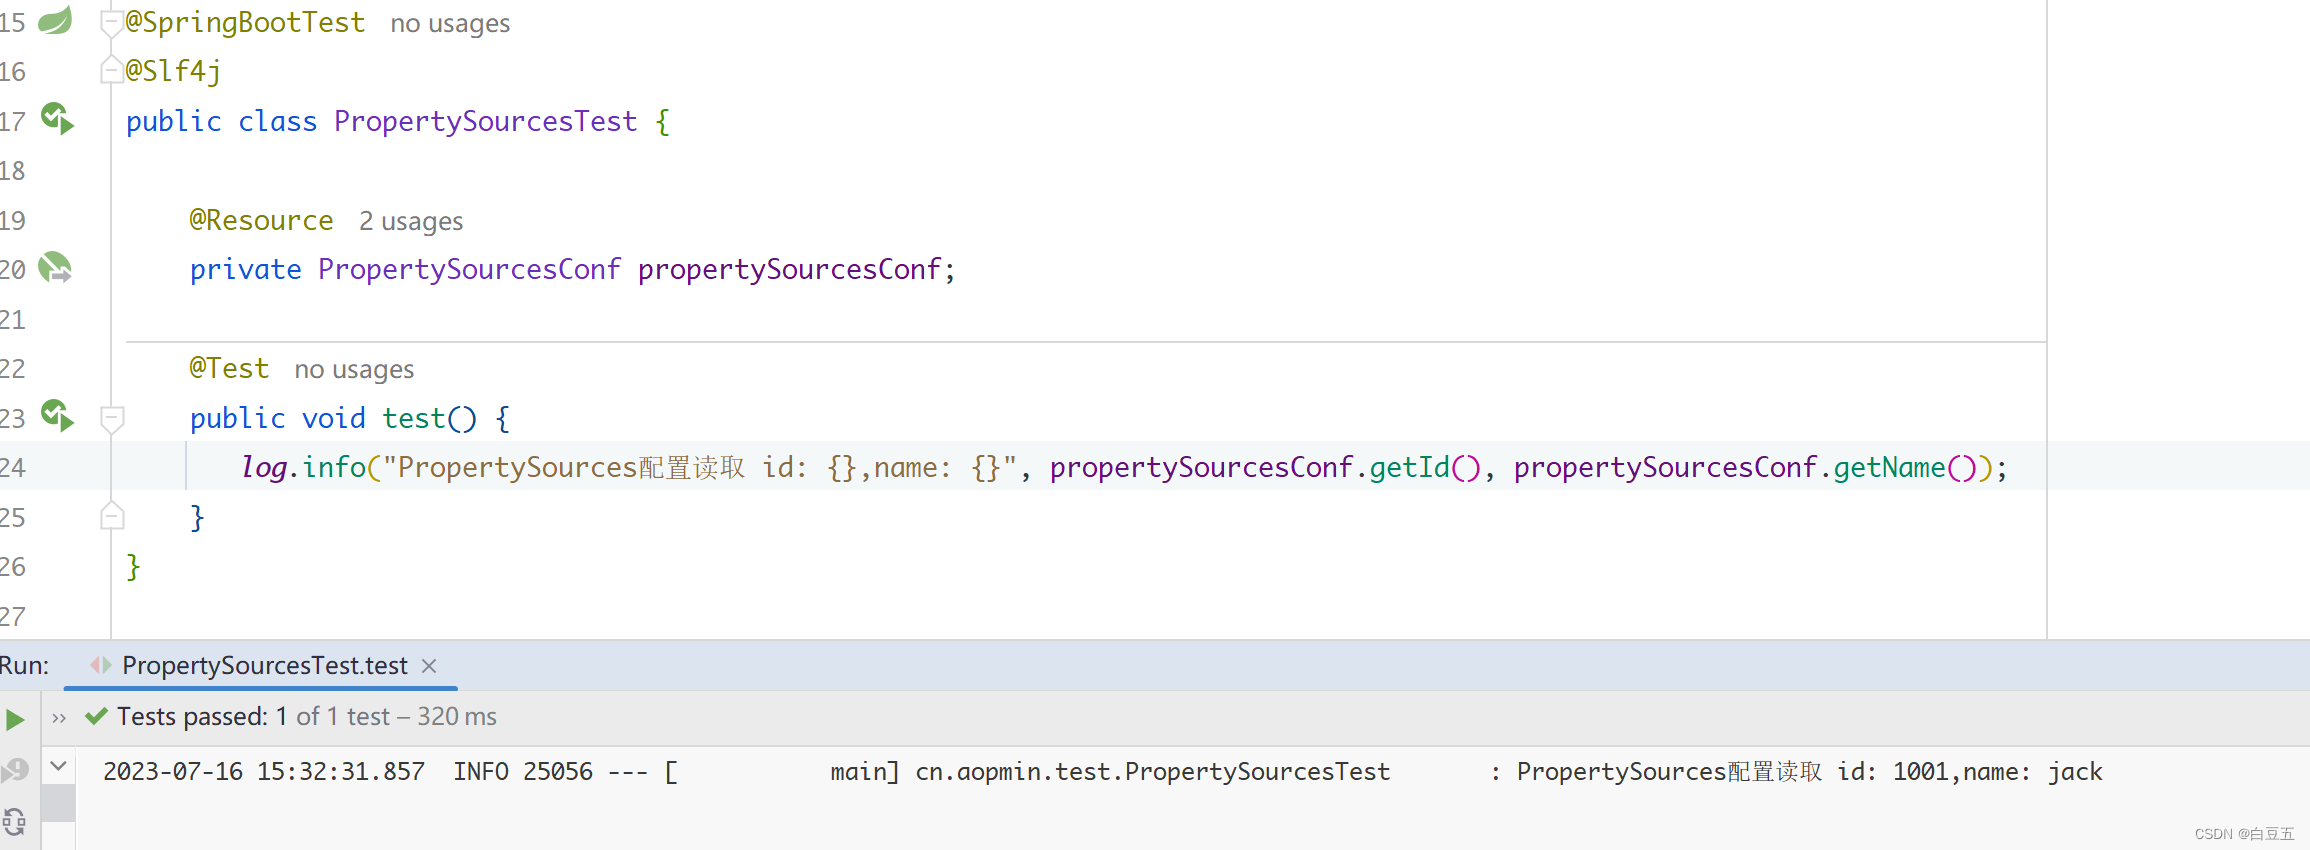
3、测试
@SpringBootTest
@Slf4j
public class PropertySourcesTest {


    @Resource
    private PropertySourcesConf propertySourcesConf;

    @Test
    public void test() {


       log.info("PropertySources配置读取 id: {}", propertySourcesConf.getId());
            log.info("name: {}", propertySourcesConf.getName());
    }
}
6. 配置PropertySourcesPlaceholderConfigurer的Bean获取外部配置
1、编写student.yml配置:
file:
  type: 自定义yaml文件配置
2、 配置PropertySourcesPlaceholderConfigurer获取自定义yml文件配置:
package cn.aopmin.config;

import org.springframework.beans.factory.config.YamlPropertiesFactoryBean;
import org.springframework.context.annotation.Bean;
import org.springframework.context.annotation.Configuration;
import org.springframework.context.support.PropertySourcesPlaceholderConfigurer;
import org.springframework.core.io.ClassPathResource;

import java.util.Objects;

/**
 * 配置PropertySourcesPlaceholderConfigurer读取yml配置
 * @author 白豆五
 * @version 2023/07/16
 * @since JDK8
 */
@Configuration
public class MyYamlConfig {


    @Bean
    public static PropertySourcesPlaceholderConfigurer yamlConfigurer() {


        PropertySourcesPlaceholderConfigurer configurer = new PropertySourcesPlaceholderConfigurer();
        YamlPropertiesFactoryBean yaml = new YamlPropertiesFactoryBean();
        yaml.setResources(new ClassPathResource("student.yml"));//自定义yml文件
        //Objects.requireNonNull()方法的作用是如果对象为空,则抛出空指针异常,否则返回对象本身。
        configurer.setProperties(Objects.requireNonNull(yaml.getObject()));
        return configurer;
    }
}
3、测试
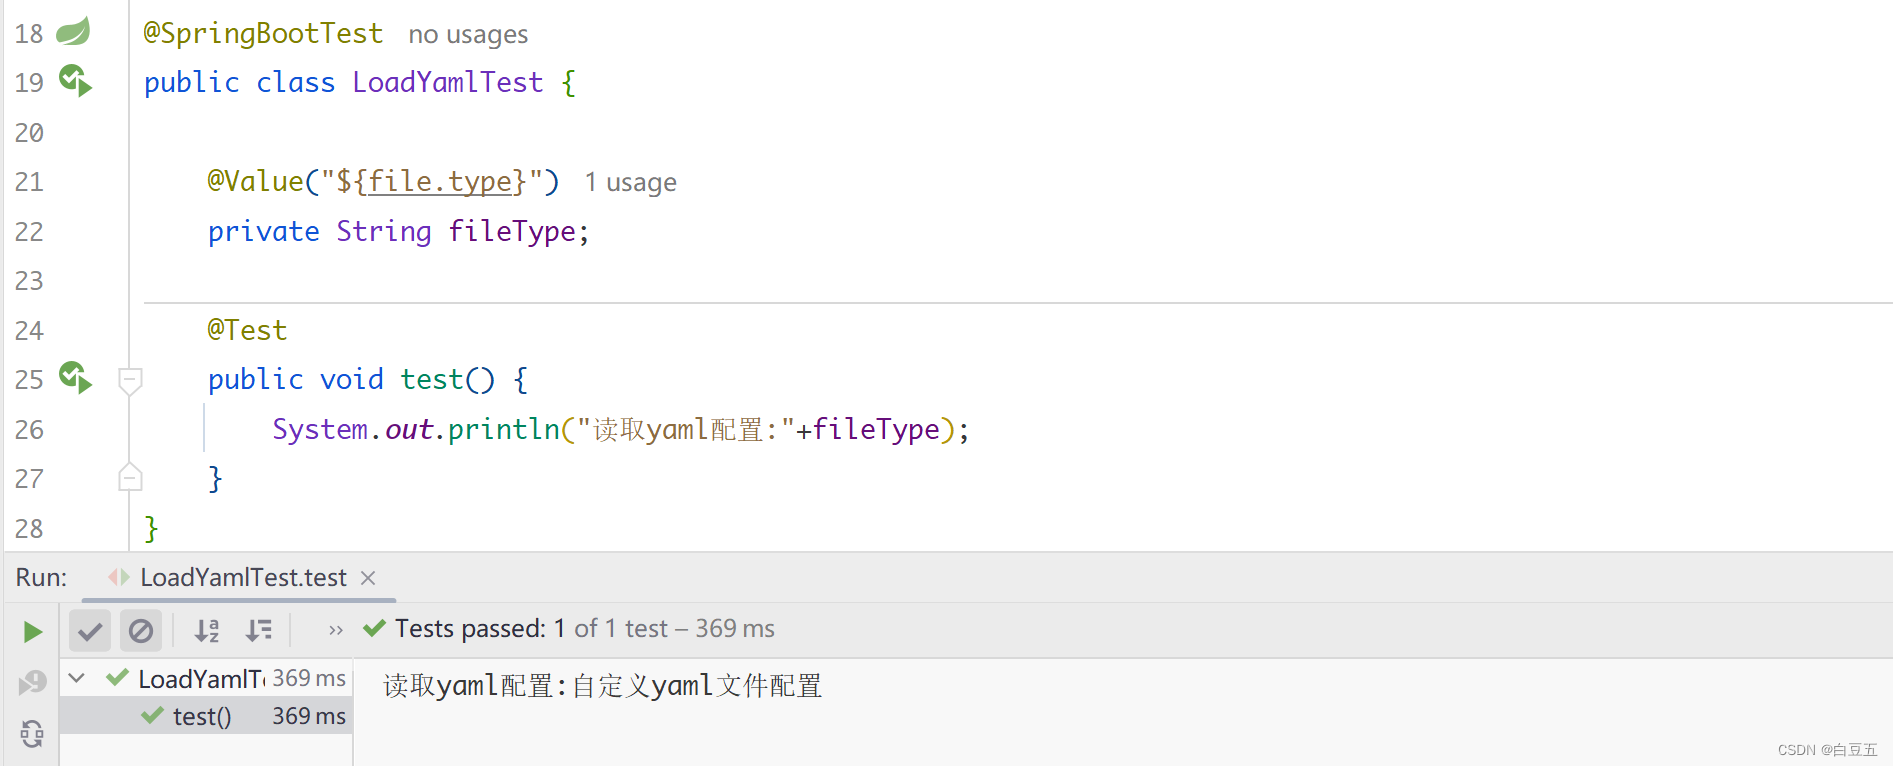
@SpringBootTest
public class LoadYamlTest {


    @Value("${file.type}")
    private String fileType;

    @Test
    public void test() {


        System.out.println("读取yaml配置:"+fileType);
    }
}
7. Java原生方式获取配置
通过IO流读取配置,然后放入propertis配置对象中。
package cn.aopmin.test;

import org.junit.jupiter.api.Test;
import org.springframework.boot.test.context.SpringBootTest;

import java.io.IOException;
import java.io.InputStream;
import java.io.InputStreamReader;
import java.nio.charset.StandardCharsets;
import java.util.Properties;

/**
 * @author 白豆五
 * @version 2023/07/16
 * @since JDK8
 */
@SpringBootTest
public class CustomTest {


    @Test
    public void test() {


        // 配置对象
        Properties props = new Properties();
        InputStreamReader input = null;
        try {


            // 输入流 (字节流转字符流)
            input = new InputStreamReader(
                    this.getClass().getClassLoader().getResourceAsStream("student.properties"),//通过类加载器来获取指定路径下的资源文件,并返回一个InputStream对象
                    StandardCharsets.UTF_8); //指定编码格式

            // 加载配置
            props.load(input);
        } catch (IOException e) {


            throw new RuntimeException(e);
        } finally {


            if (input!=null)
                try {


                    input.close();
                } catch (IOException e) {


                    e.printStackTrace();
                }

        }
        // 获取配置
        System.out.println("id:" + props.getProperty("student.id") + ", name:" + props.getProperty("student.name"));
    }
}
