目录
基于COLMAP软件展示从LLFF格式数据集的制作到开始模型训练的完整流程
准备工作
先安装colmap,以获得图片的相机位姿
colmap安装包:
cuda版本和无cuda版本
链接:https://pan.baidu.com/s/1GUJBgmYcr7CMDWvJLKo3iA
提取码:lxwj
下载后点击colmap.bat打开
NeRF主要采用了两类数据集,合成数据集(synthetic)和真实数据集(real images),这是创建llff格式的真实数据集
准备图片,可以连续拍摄,也可以拍摄视频再通过下面的抽帧脚本生成图片
import os
import cv2
def extract_images(video_path, output_folder):
    # 获取视频文件名
    video_name = os.path.splitext(os.path.basename(video_path))[0]
    # 新建文件夹
    output_path = os.path.join(output_folder, video_name)
    if not os.path.exists(output_path):
        os.makedirs(output_path)
    # 打开视频
    cap = cv2.VideoCapture(video_path)
    # 设置帧间隔
    frame_interval = int(2)
    # 逐帧提取并保存满足间隔要求的帧
    count = 0
    while cap.isOpened():
        ret, frame = cap.read()
        if ret:
            print(frame_interval)
            if count % frame_interval == 0:
                image_name = os.path.join(output_path, f"{video_name}_{count//frame_interval}.jpg")
                cv2.imwrite(image_name, frame)
            count += 1
        else:
            break
    cap.release()

if __name__ == '__main__':
    video_path = 'C:/Users/ruler9702/Desktop/test_video/test.mp4'  # 视频文件路径
    output_folder = 'C:/Users/ruler9702/Desktop/test_frame'  # 输出文件夹路径
    extract_images(video_path, output_folder)
创建⼯程: 点击File -> New project 以新建一个项目。
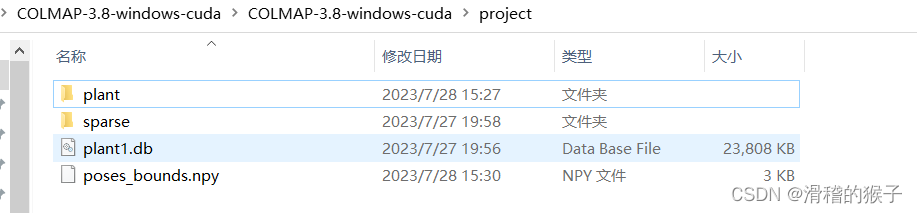
将图片形成一个文件夹,我这是将图片放进plant文件夹中,同时在poject文件夹下新建一个sparse文件夹,再在sparse下建一个0文件夹

colmap获得图片的相机位姿
打开colmap

点击File,选择New Project,继续点击new,在之前创建文件夹下手动输入文件名plant2后,点击保存:
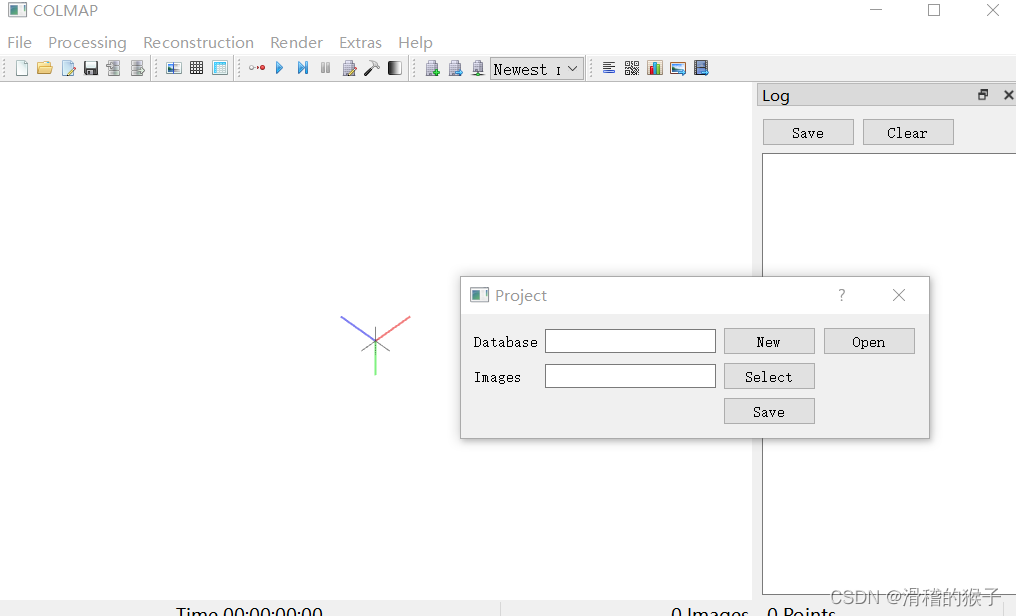
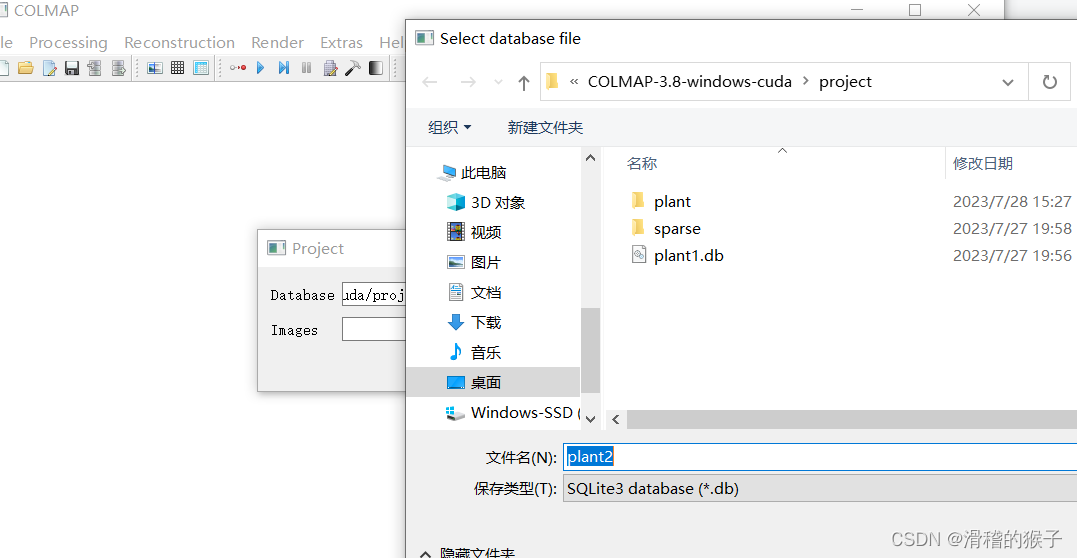
再点击select选择自己的图片文件夹

点击Save
接下来点击File右边的Processing,选择Feature extraction,出现如下界面,只需要配置第一个选项,然后点击下面Extract。
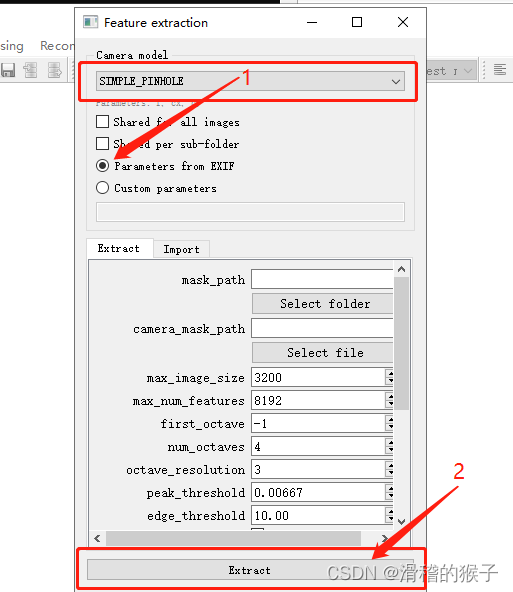
待特征提取完毕后关闭窗口。
图片特征匹配,点击Processing -> Feature matching,使用默认配置直接点击Run进行特征匹配。
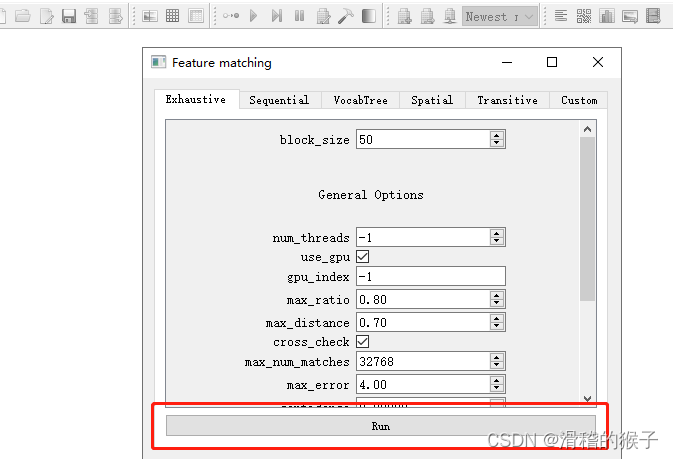
待特征匹配完毕后关闭窗口
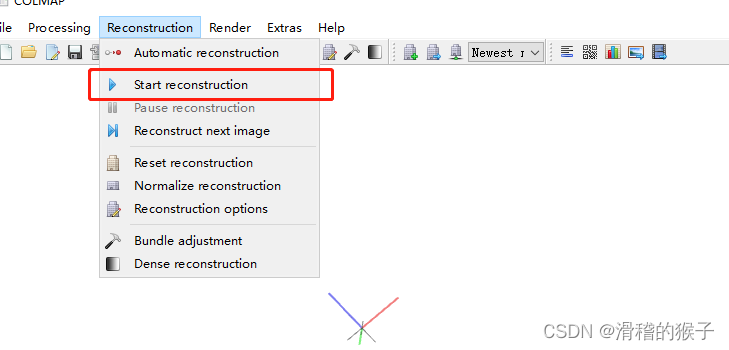
点击Reconstruction -> Start reconstruction进行重建,在窗口中可以看到重建过程,此过程可能会持续一段时间。
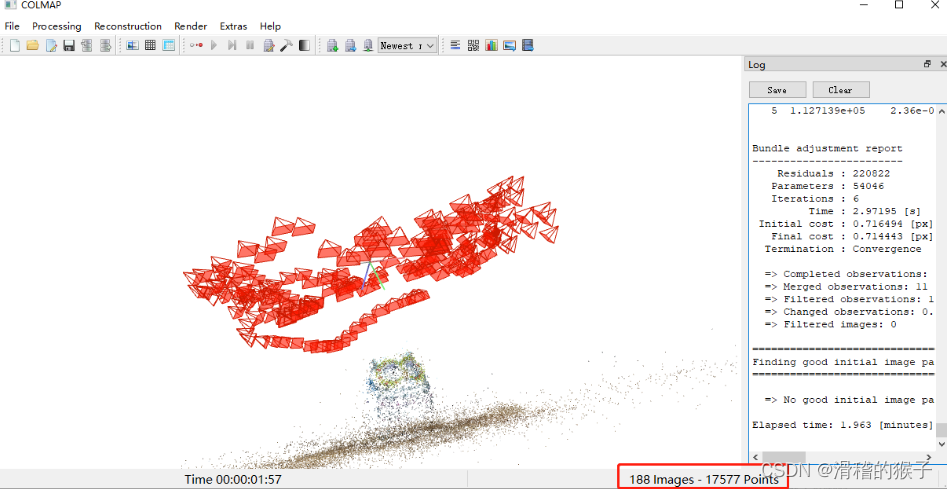
重建完毕后,得到如下图,通过右下角Images和Points可以大致判断是否重建成功。
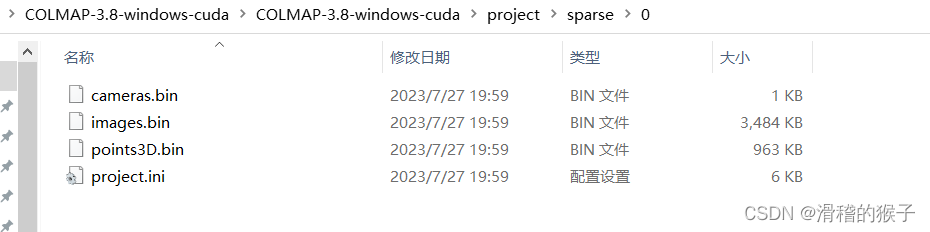
保存位姿和稀疏点
点击File -> Export model 以导出模型,在保存图像的文件夹所在的目录下新建/sparse/0/文件夹,选择该文件夹将模型导入到该目录下,得到四个文件。
将获取的位姿等数据转化为llff格式
接下来,将获取的位姿等数据转化为llff格式,需要下载llff脚本,(地址:GitHub - Fyusion/LLFF: Code release for Local Light Field Fusion at SIGGRAPH 2019)
在脚本中,termina输入python imgs2poses 加自己project的地址
例如:

之后就得到poses_bounds.npy文件

训练自己的nerf
将之前的文件夹完整迁移至nerf代码的/nerf-pytorch/data/nerf_llff_data/目录下。也将之前的图片文件夹改为images


复制/nerf-pytorch/configs目录下的fern.txt文件(因为fern同为LLFF格式的数据集),并重命名为自己测试数据的名称,修改如下内容:

所有准备工作都已完成,可以训练了
如果你在训练时遇到
Mismatch between imgs 0 and poses 55 !!!!
Traceback (most recent call last):
File "run_nerf.py", line 878, in <module>
train()
File "run_nerf.py", line 544, in train
spherify=args.spherify)
File "C:\Users\HP\Desktop\nerf-pytorch-master\load_llff.py", line 246, in load_llff_data
poses, bds, imgs = _load_data(basedir, factor=factor) # factor=8 downsamples original imgs by 8x
TypeError: cannot unpack non-iterable NoneType object
可能是因为函数不兼容,解决方法是,在文件夹下新建一个images_8的文件夹,将八倍下采样的图片放到这。
import os
from PIL import Image

# 输入文件夹路径和输出文件夹路径
input_folder = "C:\\Users\\86130\\Desktop\\COLMAP-3.8-windows-cuda\\COLMAP-3.8-windows-cuda\\project1\\rice"
output_folder = "C:\\Users\\86130\\Desktop\\COLMAP-3.8-windows-cuda\\COLMAP-3.8-windows-cuda\\project1\\images_8"

# 创建输出文件夹
if not os.path.exists(output_folder):
    os.makedirs(output_folder)

# 获取输入文件夹中所有图片文件的列表
image_files = [f for f in os.listdir(input_folder) if os.path.isfile(os.path.join(input_folder, f))]

# 循环处理每个图片文件
for image_file in image_files:
    # 打开图像文件
    image_path = os.path.join(input_folder, image_file)
    image = Image.open(image_path)

    # 获取原始图像的宽度和高度
    width, height = image.size

    # 计算新图像的宽度和高度(原始图像的1/8)
    new_width = width // 8
    new_height = height // 8

    # 使用resize()函数对图像进行下采样
    downscaled_image = image.resize((new_width, new_height), Image.ANTIALIAS)

    # 构造输出文件路径
    output_path = os.path.join(output_folder, image_file)

    # 保存下采样后的图像
    downscaled_image.save(output_path)

    print(f"Downsampling complete: {image_file}")

print("All images downscaled successfully.")