银河麒麟系统ansible awx安装实践
一 系统环境
1.系统版本
[root@localhost ~]# nkvers
############## Kylin Linux Version #################
Release:
Kylin Linux Advanced Server release V10 (Sword)

Kernel:
4.19.90-25.27.v2101.ky10.x86_64

Build:
Kylin Linux Advanced Server
release V10 (SP2) /(Sword)-x86_64-Build09/20210524
#################################################
2.系统内核
[root@localhost ~]# uname -r
4.19.90-25.27.v2101.ky10.x86_64
3.内存,cpu资源大小
安装过程中发现4G内存资源使用紧张,建议最小内存给6G。
| 资源名称 | 具体配额 |
|---|---|
| 内存 | 6G |
| CPU | 2核 |
二 简介
ansible
ansible是一个自动化运维工具,基于Python开发,集合了众多运维工具(puppet、cfengine、chef、func、fabric)的优点,实现了批量系统配置、批量程序部署、批量运行命令等功能。Ansible架构相对比较简单,仅需通过SSH连接客户机执行任务即可。
awx
awx是一个开源的web应用,并为ansible的任务引擎提供用户接口和REST API。它是 ansible Tower的开源版本。ansible AWX允许我们使用web接口去管理Ansible的playbooks、inventoris和调度任务。
三 ansible 安装
1.配置麒麟系统网络(外网)yum源
[root@localhost yum.repos.d]# cat /etc/yum.repos.d/kylin_x86_64.repo
###Kylin Linux Advanced Server 10 - os repo###

[ks10-adv-os]
name = Kylin Linux Advanced Server 10 - Os
baseurl = http://update.cs2c.com.cn:8080/NS/V10/V10SP2/os/adv/lic/base/$basearch/
gpgcheck = 1
gpgkey=file:///etc/pki/rpm-gpg/RPM-GPG-KEY-kylin
enabled = 1

[ks10-adv-updates]
name = Kylin Linux Advanced Server 10 - Updates
baseurl = http://update.cs2c.com.cn:8080/NS/V10/V10SP2/os/adv/lic/updates/$basearch/
gpgcheck = 1
gpgkey=file:///etc/pki/rpm-gpg/RPM-GPG-KEY-kylin
enabled = 1

[ks10-adv-addons]
name = Kylin Linux Advanced Server 10 - Addons
baseurl = http://update.cs2c.com.cn:8080/NS/V10/V10SP2/os/adv/lic/addons/$basearch/
gpgcheck = 1
gpgkey=file:///etc/pki/rpm-gpg/RPM-GPG-KEY-kylin
enabled = 0
2.安装ansible
[root@localhost ~]# dnf install ansible -y
3.查看ansible版本
[root@localhost ~]# ansible --version
ansible 2.8.8
  config file = /etc/ansible/ansible.cfg
  configured module search path = ['/root/.ansible/plugins/modules', '/usr/share/ansible/plugins/modules']
  ansible python module location = /usr/lib/python3.7/site-packages/ansible
  executable location = /usr/bin/ansible
  python version = 3.7.9 (default, Mar 13 2023, 15:53:43) [GCC 7.3.0]
4.安装docker,启动并设置开机自启
[root@localhost ~]# dnf install docker -y
[root@localhost ~]# systemctl restart docker
[root@localhost ~]# systemctl enable docker
5.安装docker-compose组件和python-docker组件
[root@localhost ~]# dnf install docker-compose python-docker -y
6.验证安装版本
[root@localhost ~]# docker-compose --version
docker-compose version 1.22.0, build f46880f
四 安装awx项目
1.下载awx包并解压
[root@localhost ~]# wget https://github.com/ansible/awx/archive/15.0.1.tar.gz
[root@localhost ~]# tar xf 15.0.1.tar.gz
[root@localhost ~]# cd awx-15.0.1/installer
[root@localhost installer]# ll
总用量 16
-rw-rw-r-- 1 root root  166 10月 20  2020 build.yml
-rw-rw-r-- 1 root root  437 10月 20  2020 install.yml
-rw-rw-r-- 1 root root 7648 10月 20  2020 inventory
drwxrwxr-x 7 root root   99 10月 20  2020 roles
2.下载ansible/awx:15.0.1,postgres:10,和redis镜像并执行awx安装脚本
[root@localhost ~]# docker pull redis:latest
[root@localhost ~]# docker pull ansible/awx:15.0.1
[root@localhost ~]# docker pull postgres:10
[root@localhost ~]# docker images
REPOSITORY    TAG       IMAGE ID       CREATED         SIZE
redis         latest    4695a05c473a   46 hours ago    130MB
postgres      10        1cad456b3a24   12 months ago   202MB
ansible/awx   15.0.1    04558a4dc475   2 years ago     1.29GB
[root@localhost installer]#  ansible-playbook -i inventory install.yml
3.查看容器镜像运行状态
[root@localhost ~]# docker ps -a
CONTAINER ID   IMAGE                COMMAND                  CREATED       STATUS       PORTS                                   NAMES
da0297837db1   ansible/awx:15.0.1   "/usr/bin/tini -- /u…"   5 hours ago   Up 5 hours   8052/tcp                                awx_task
d41f292afab7   ansible/awx:15.0.1   "/usr/bin/tini -- /b…"   5 hours ago   Up 5 hours   0.0.0.0:80->8052/tcp, :::80->8052/tcp   awx_web
0f66b0887802   redis                "docker-entrypoint.s…"   5 hours ago   Up 5 hours   6379/tcp                                awx_redis
ae3fc2fde61c   postgres:10          "docker-entrypoint.s…"   5 hours ago   Up 5 hours   5432/tcp                                awx_postgres
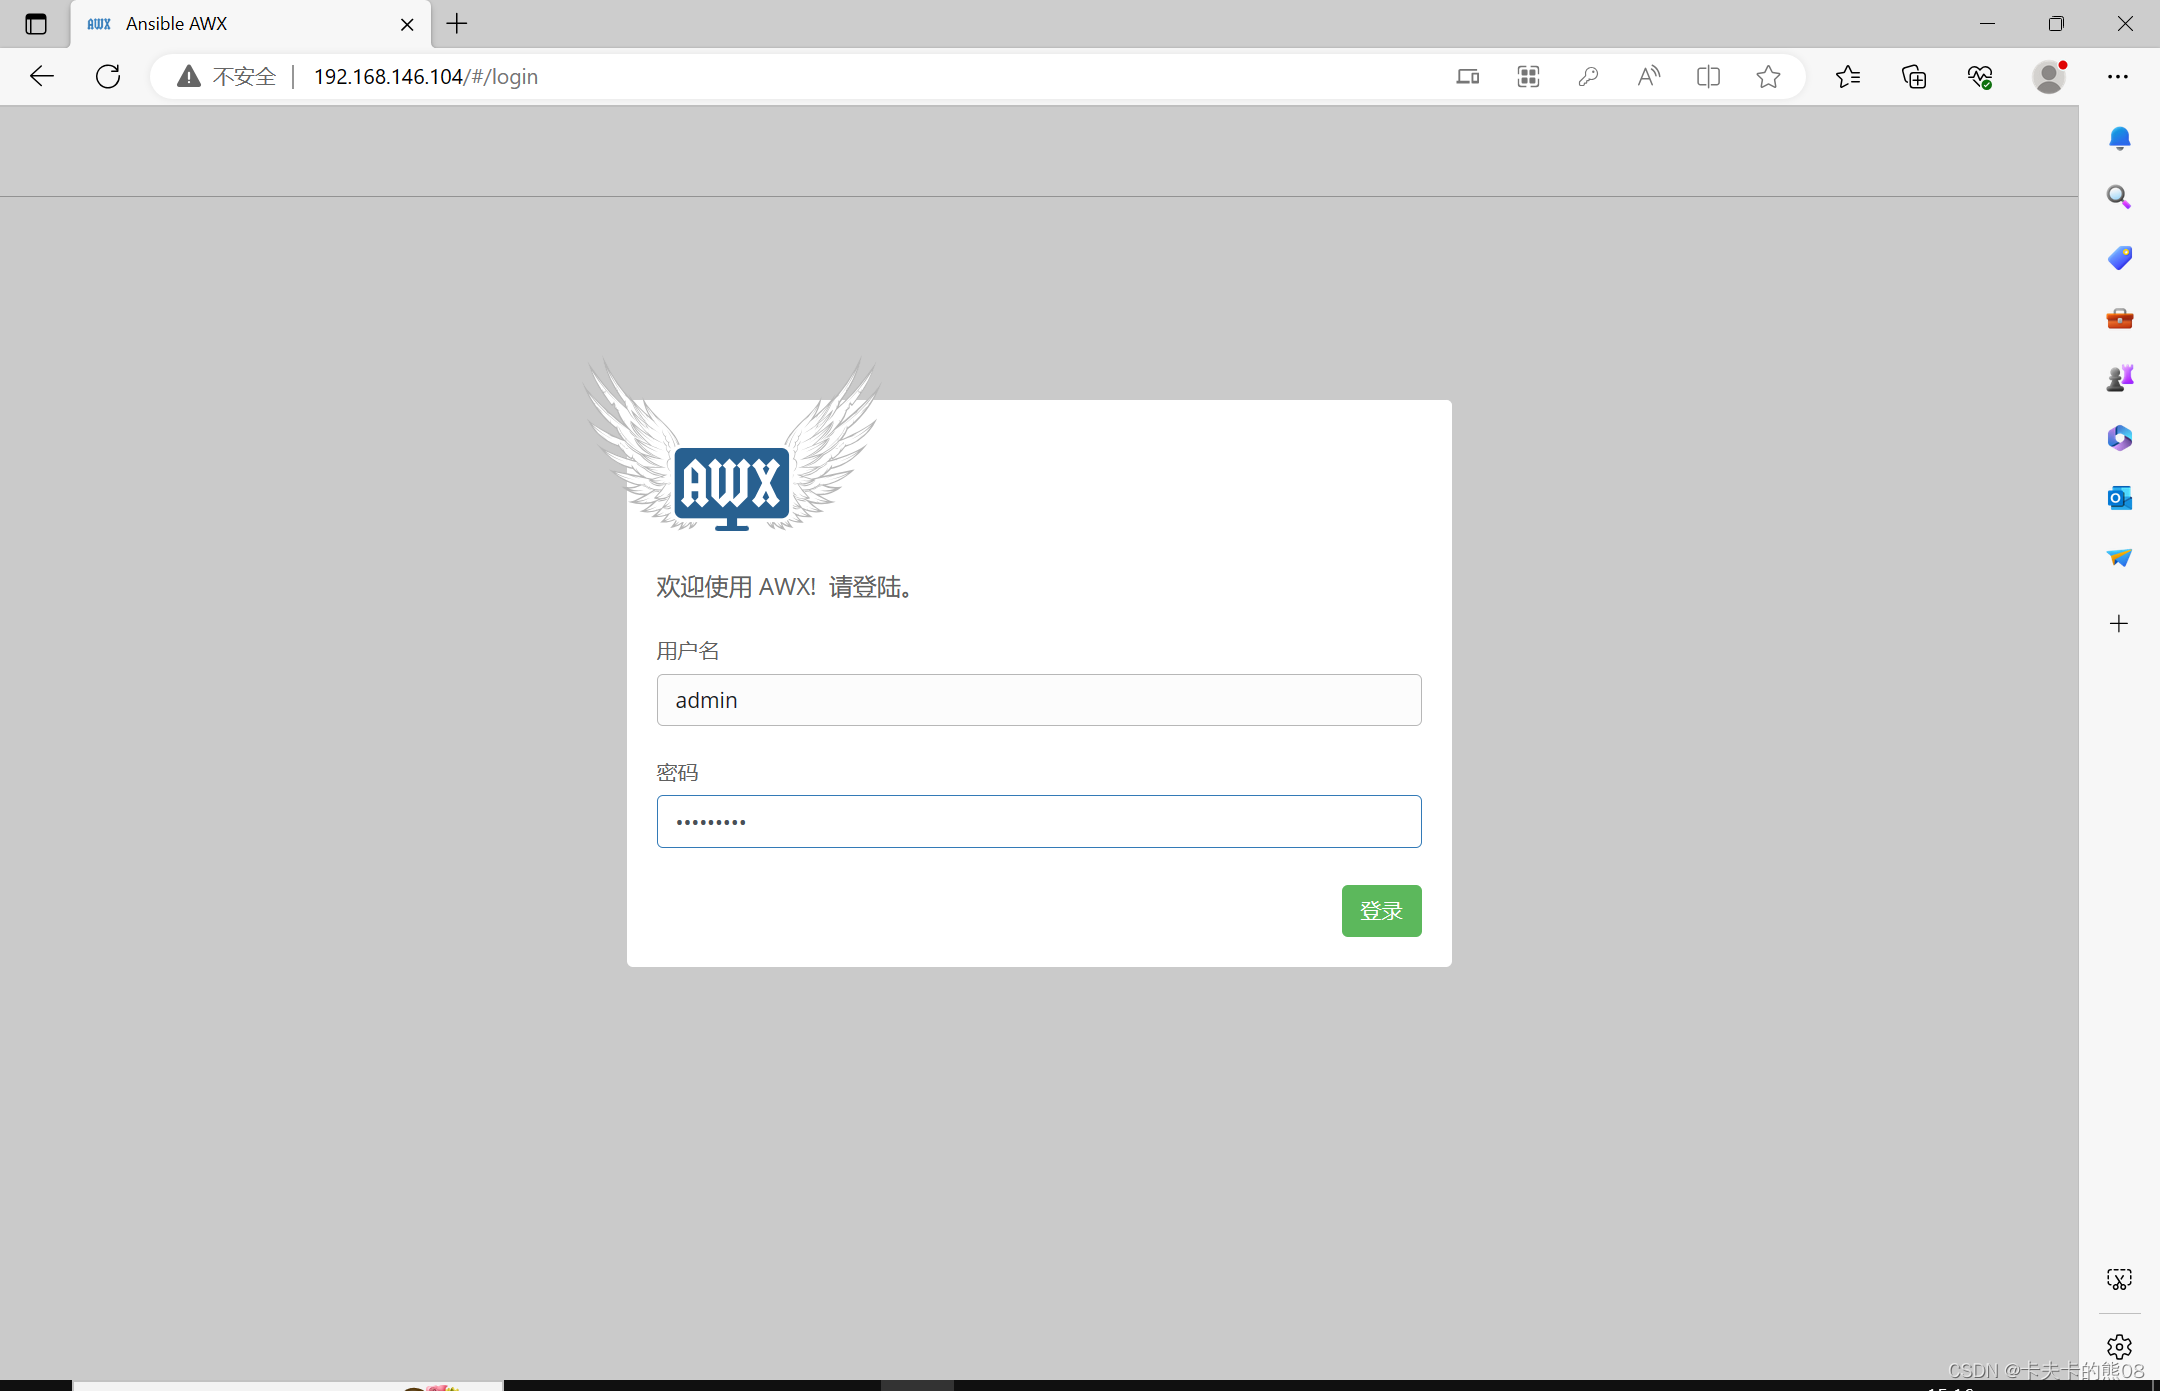
五 登录awx平台
登陆地址: http://192.168.146.104
登录账号:admin
登录密码:password
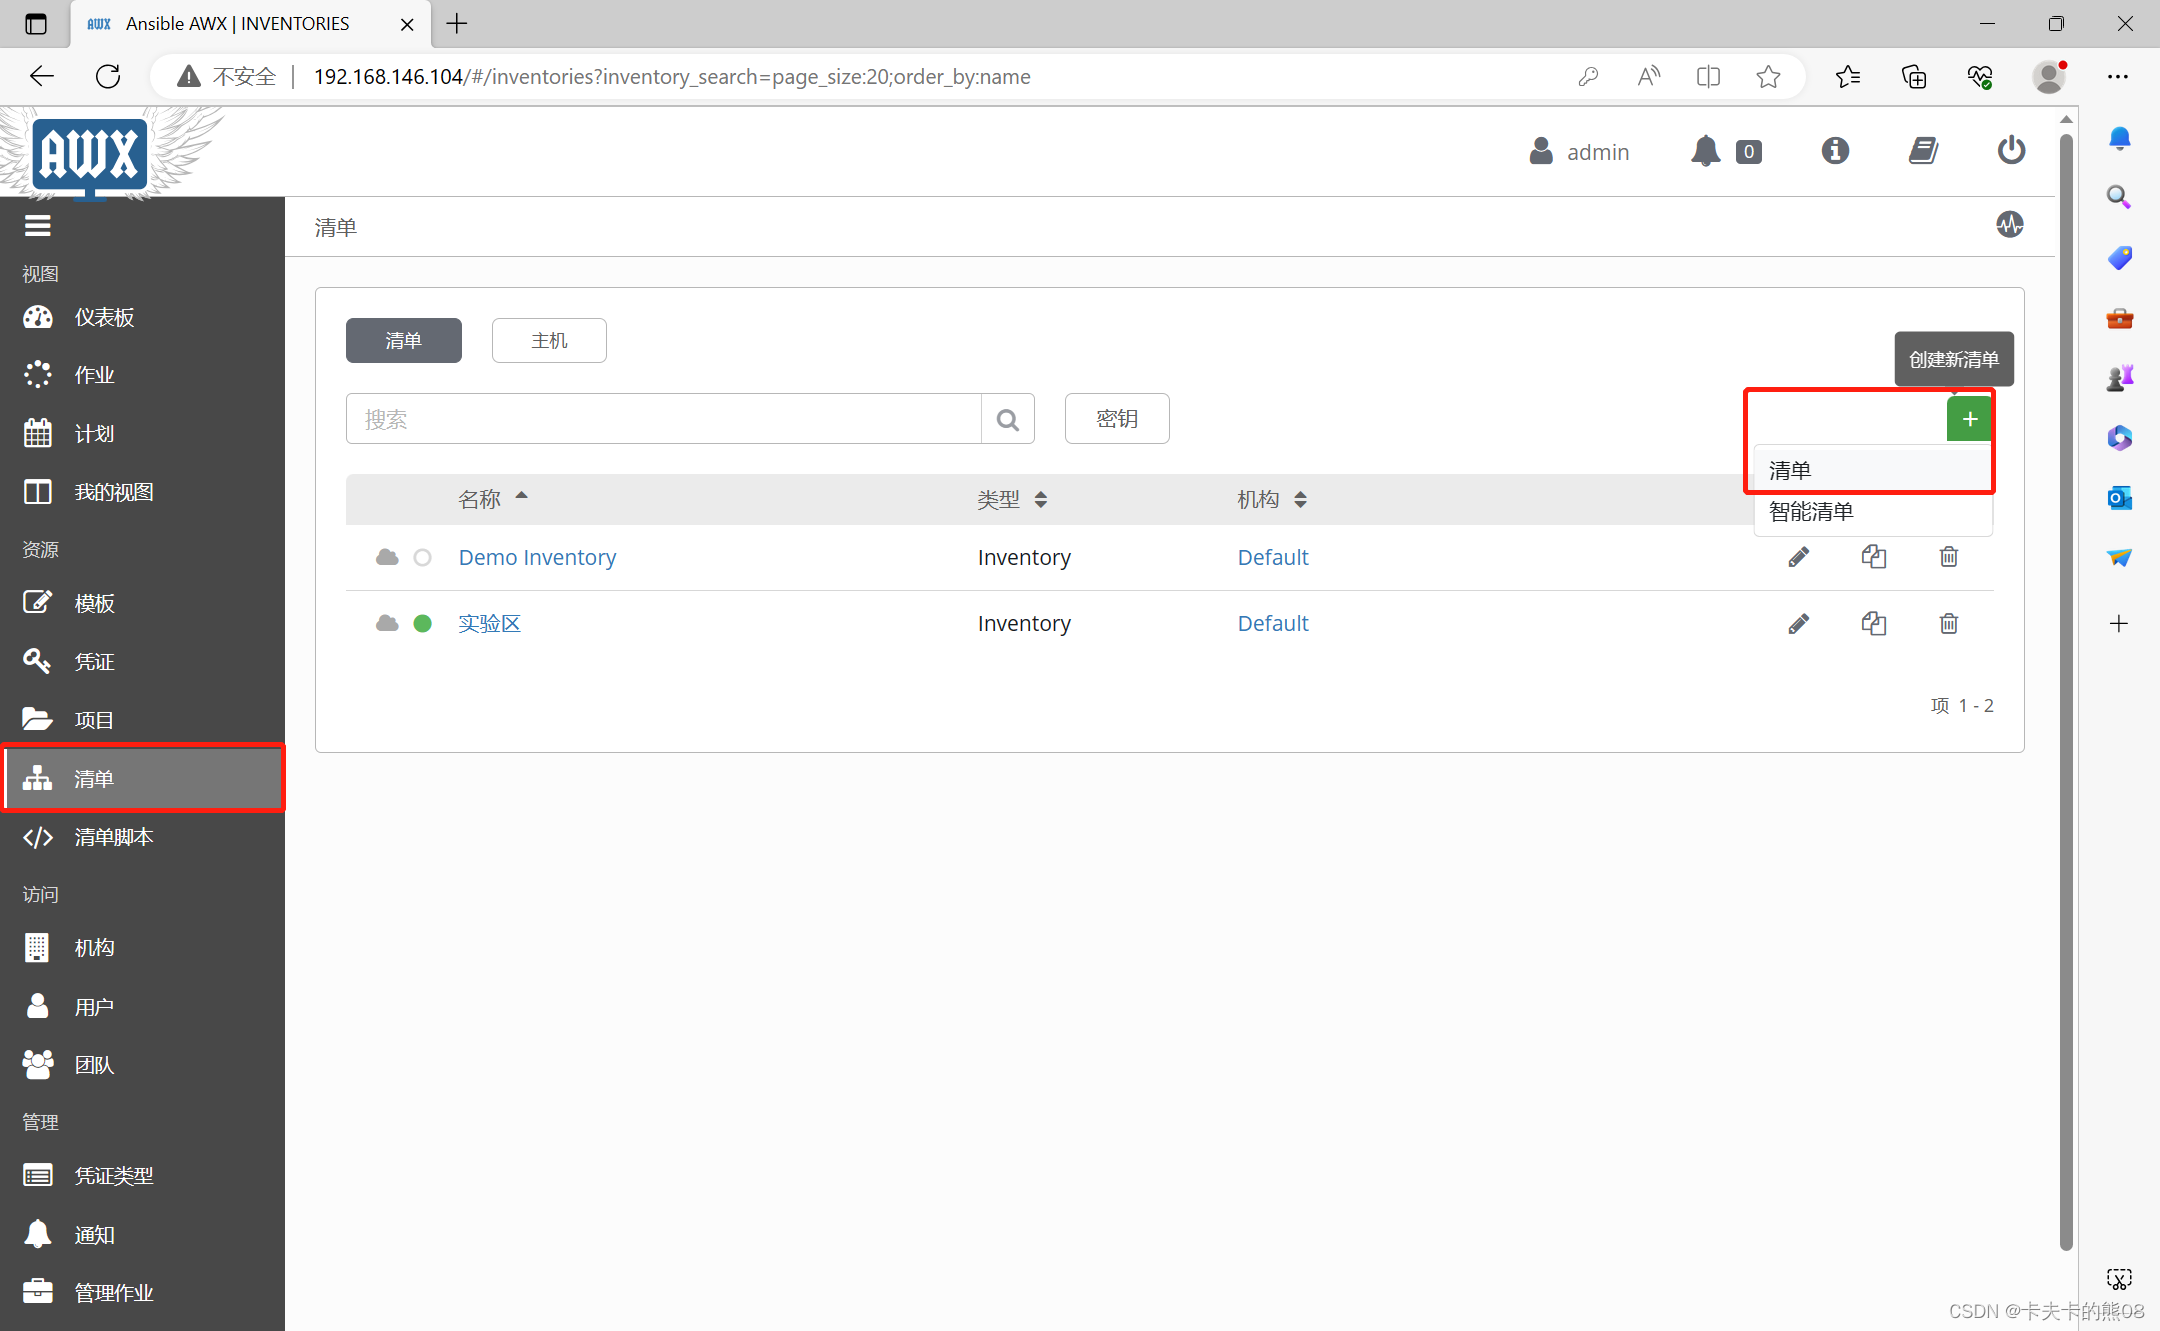
1.新增清单
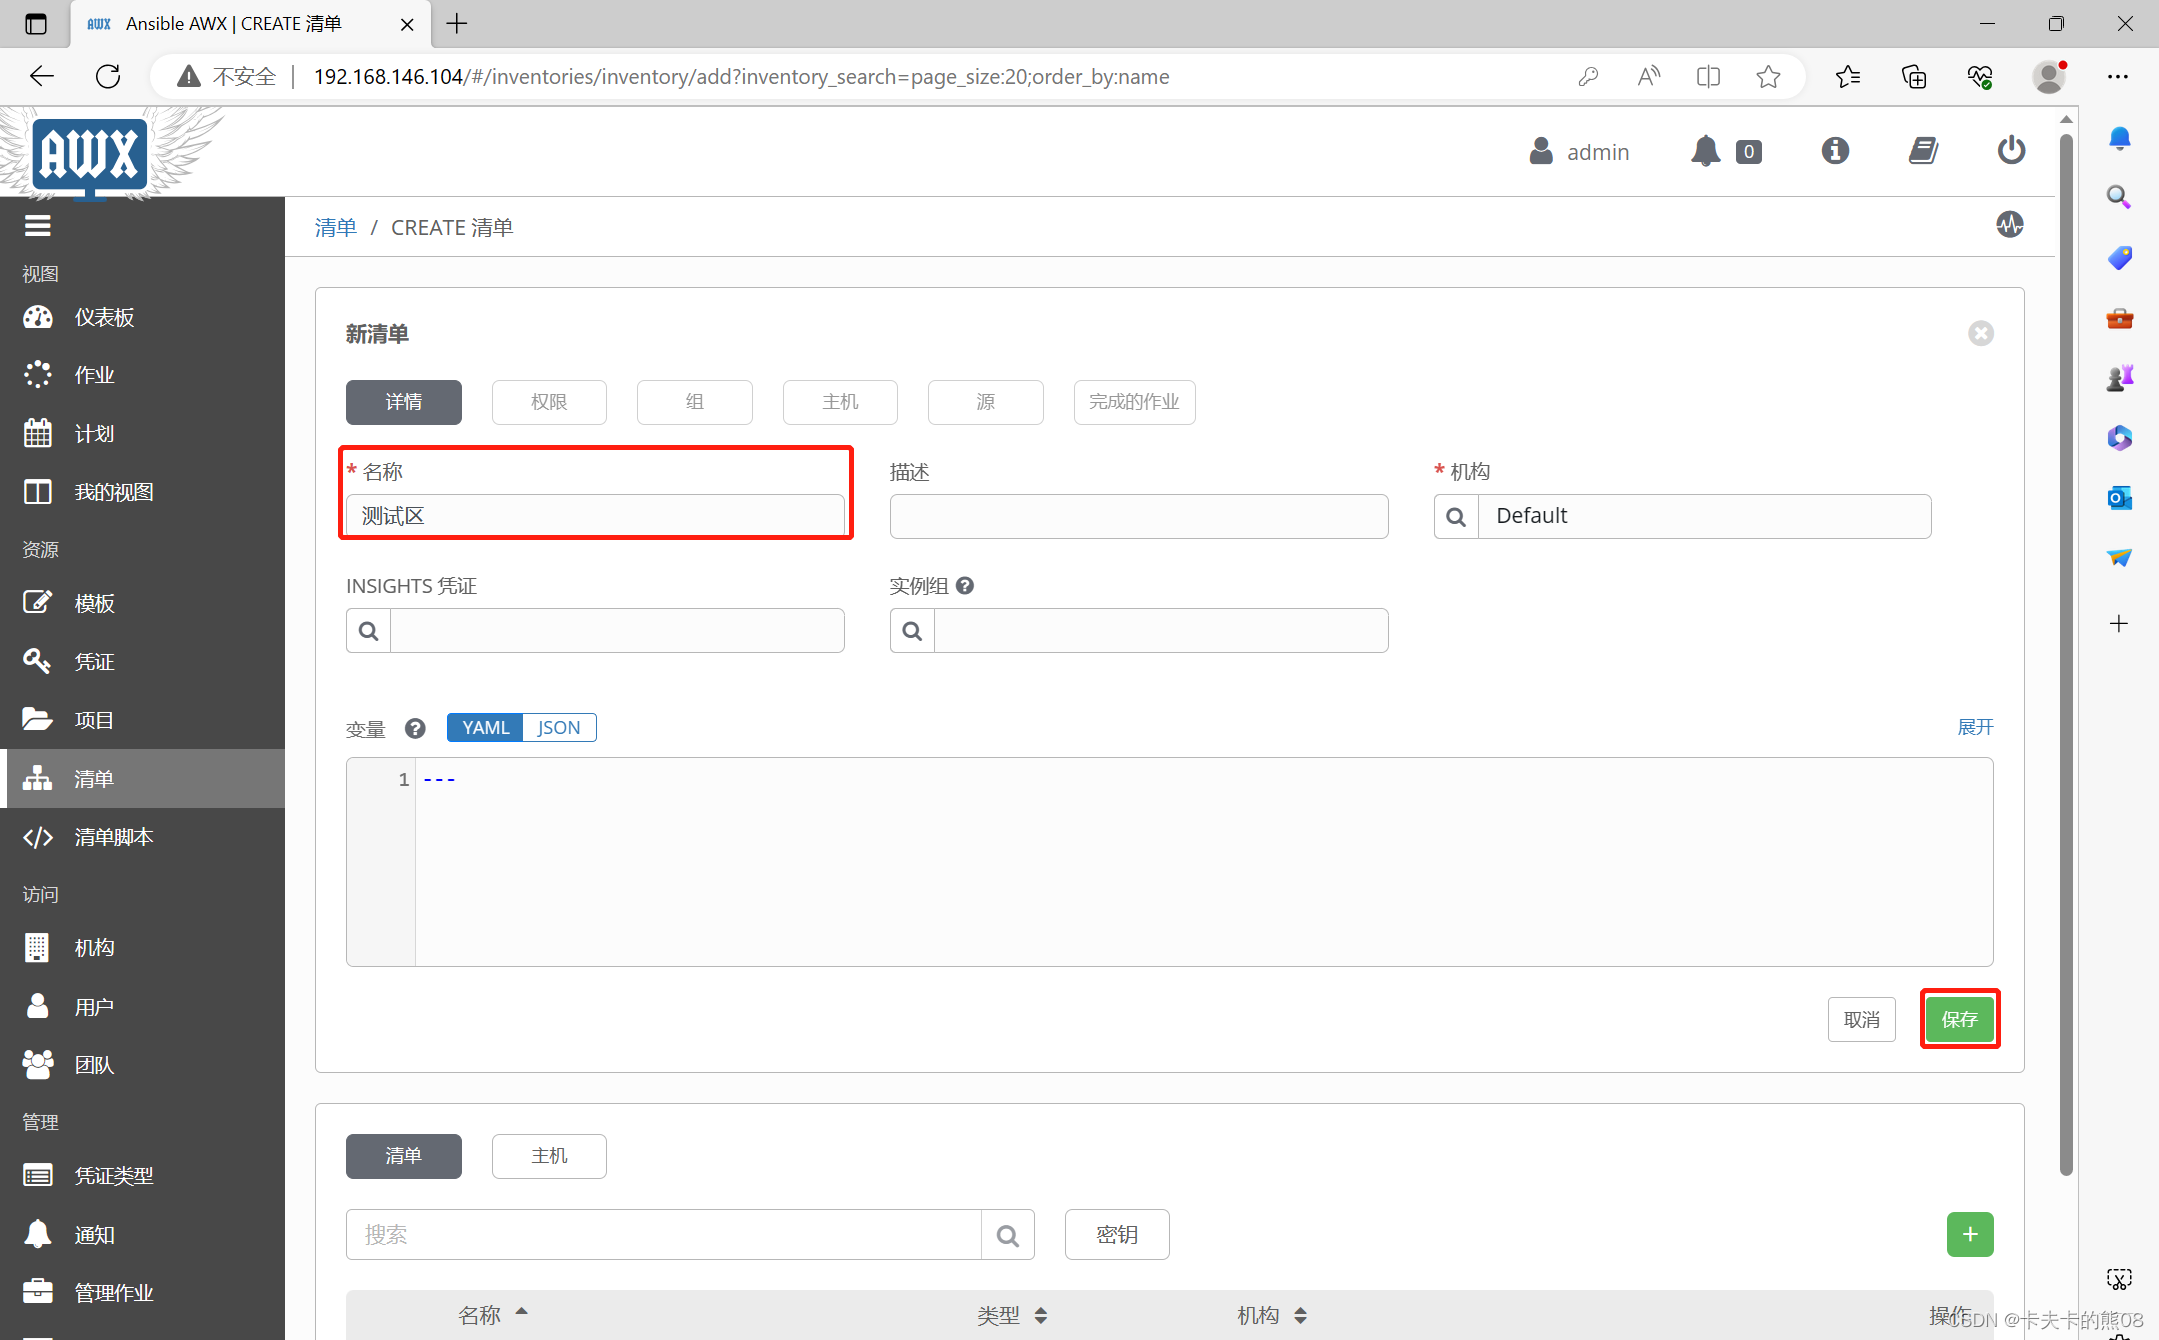
2.清单名称测试区
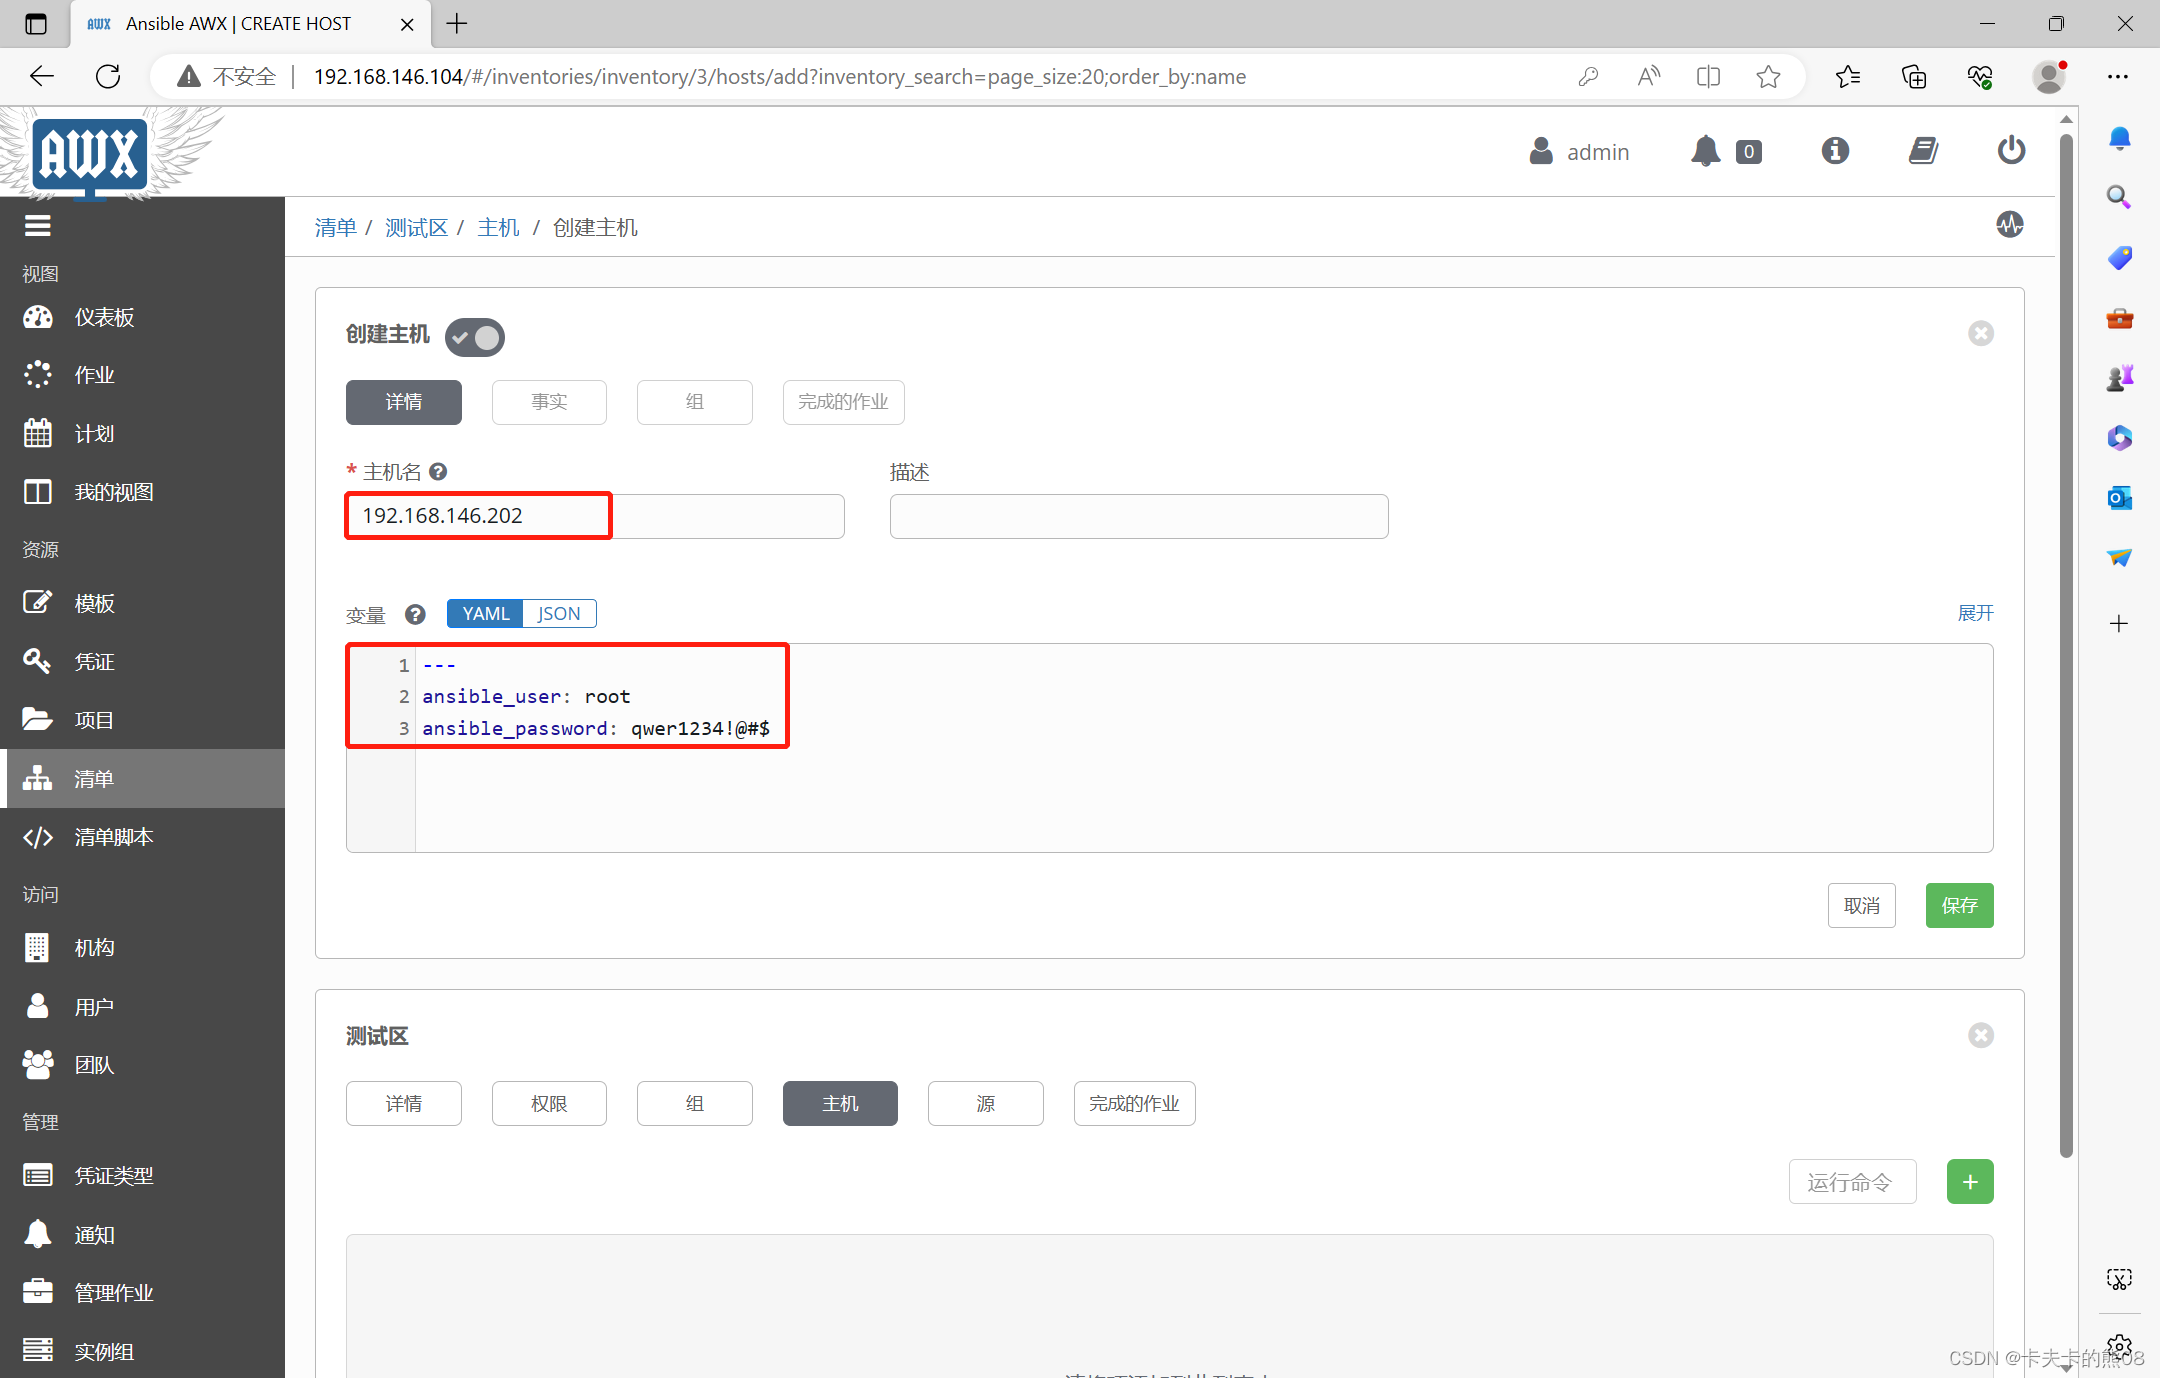
3.创建主机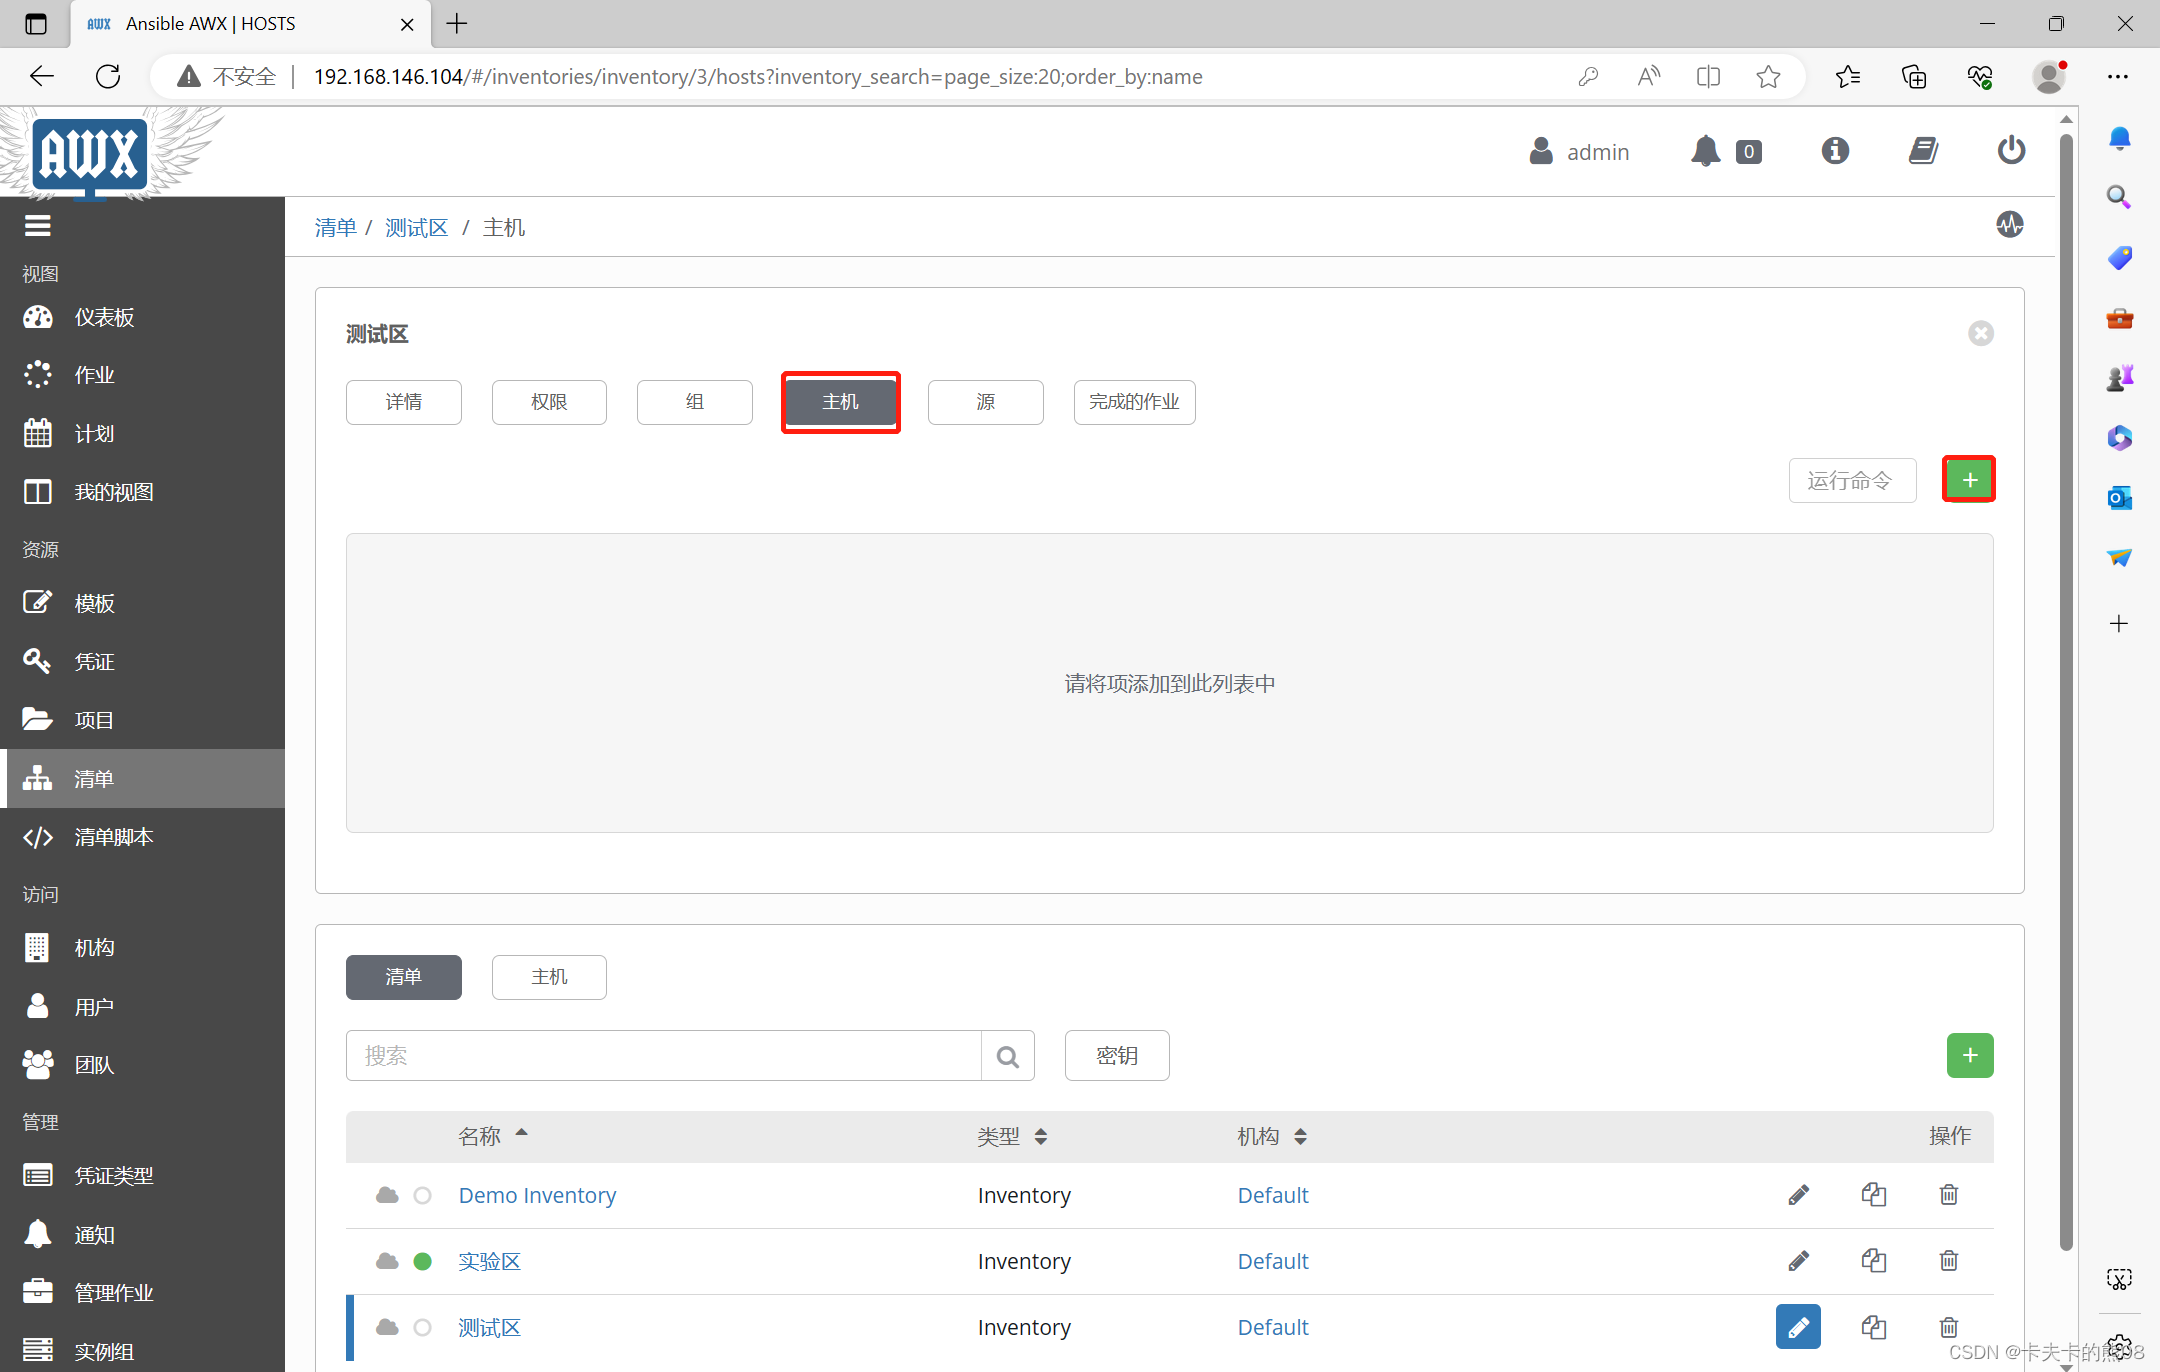
4.新增被管主机192.168.146.202,指定登录用户和密码
5.主机新增完毕
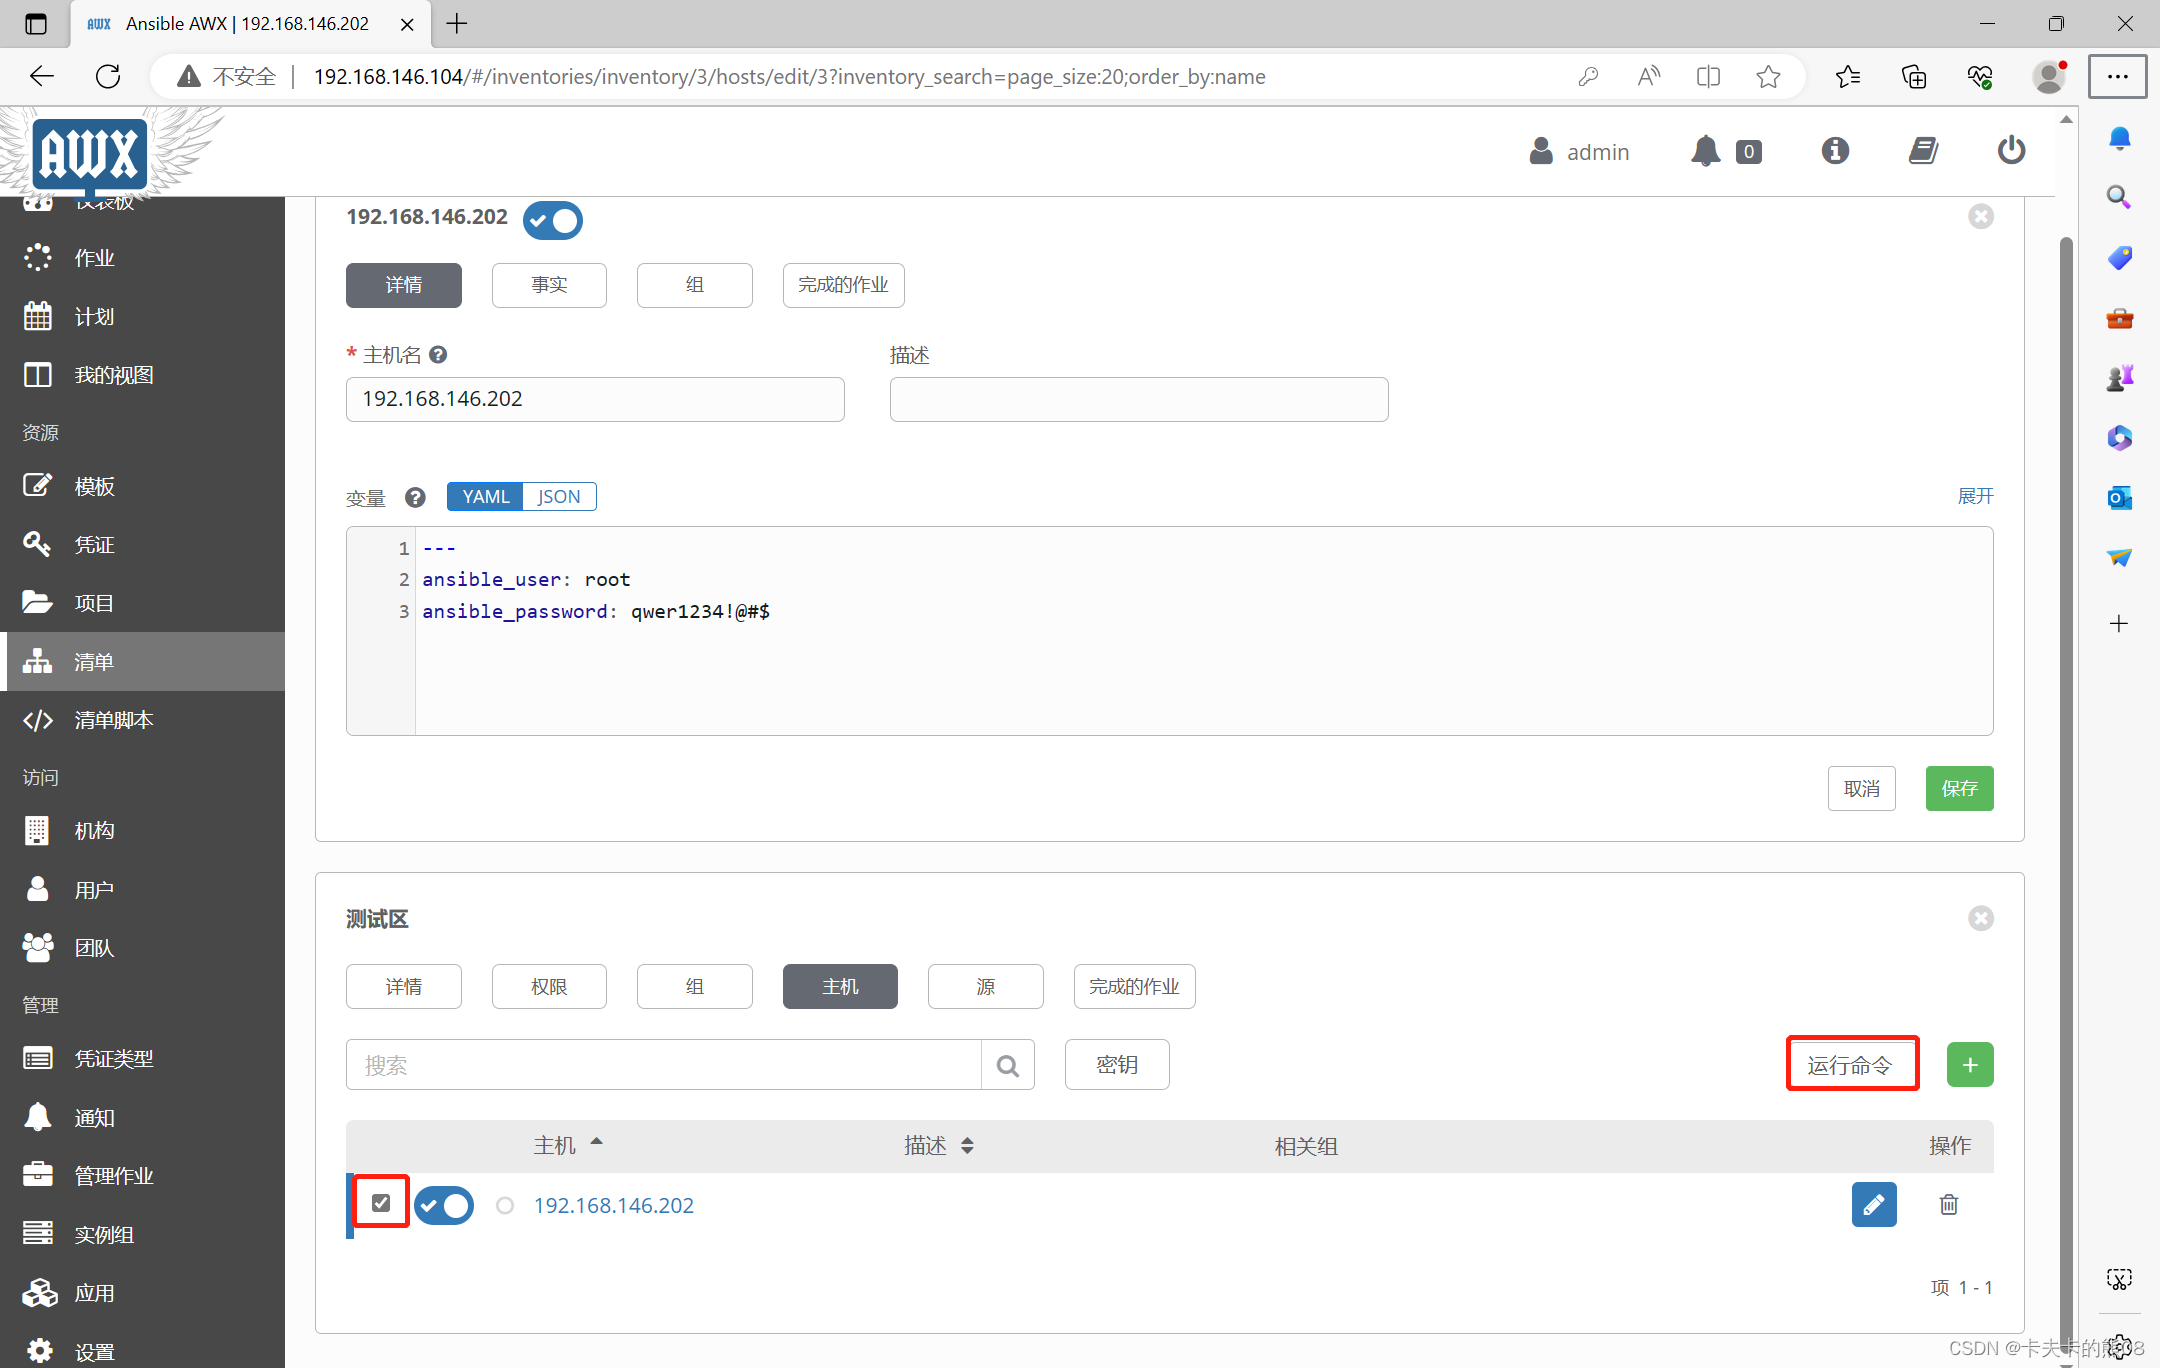
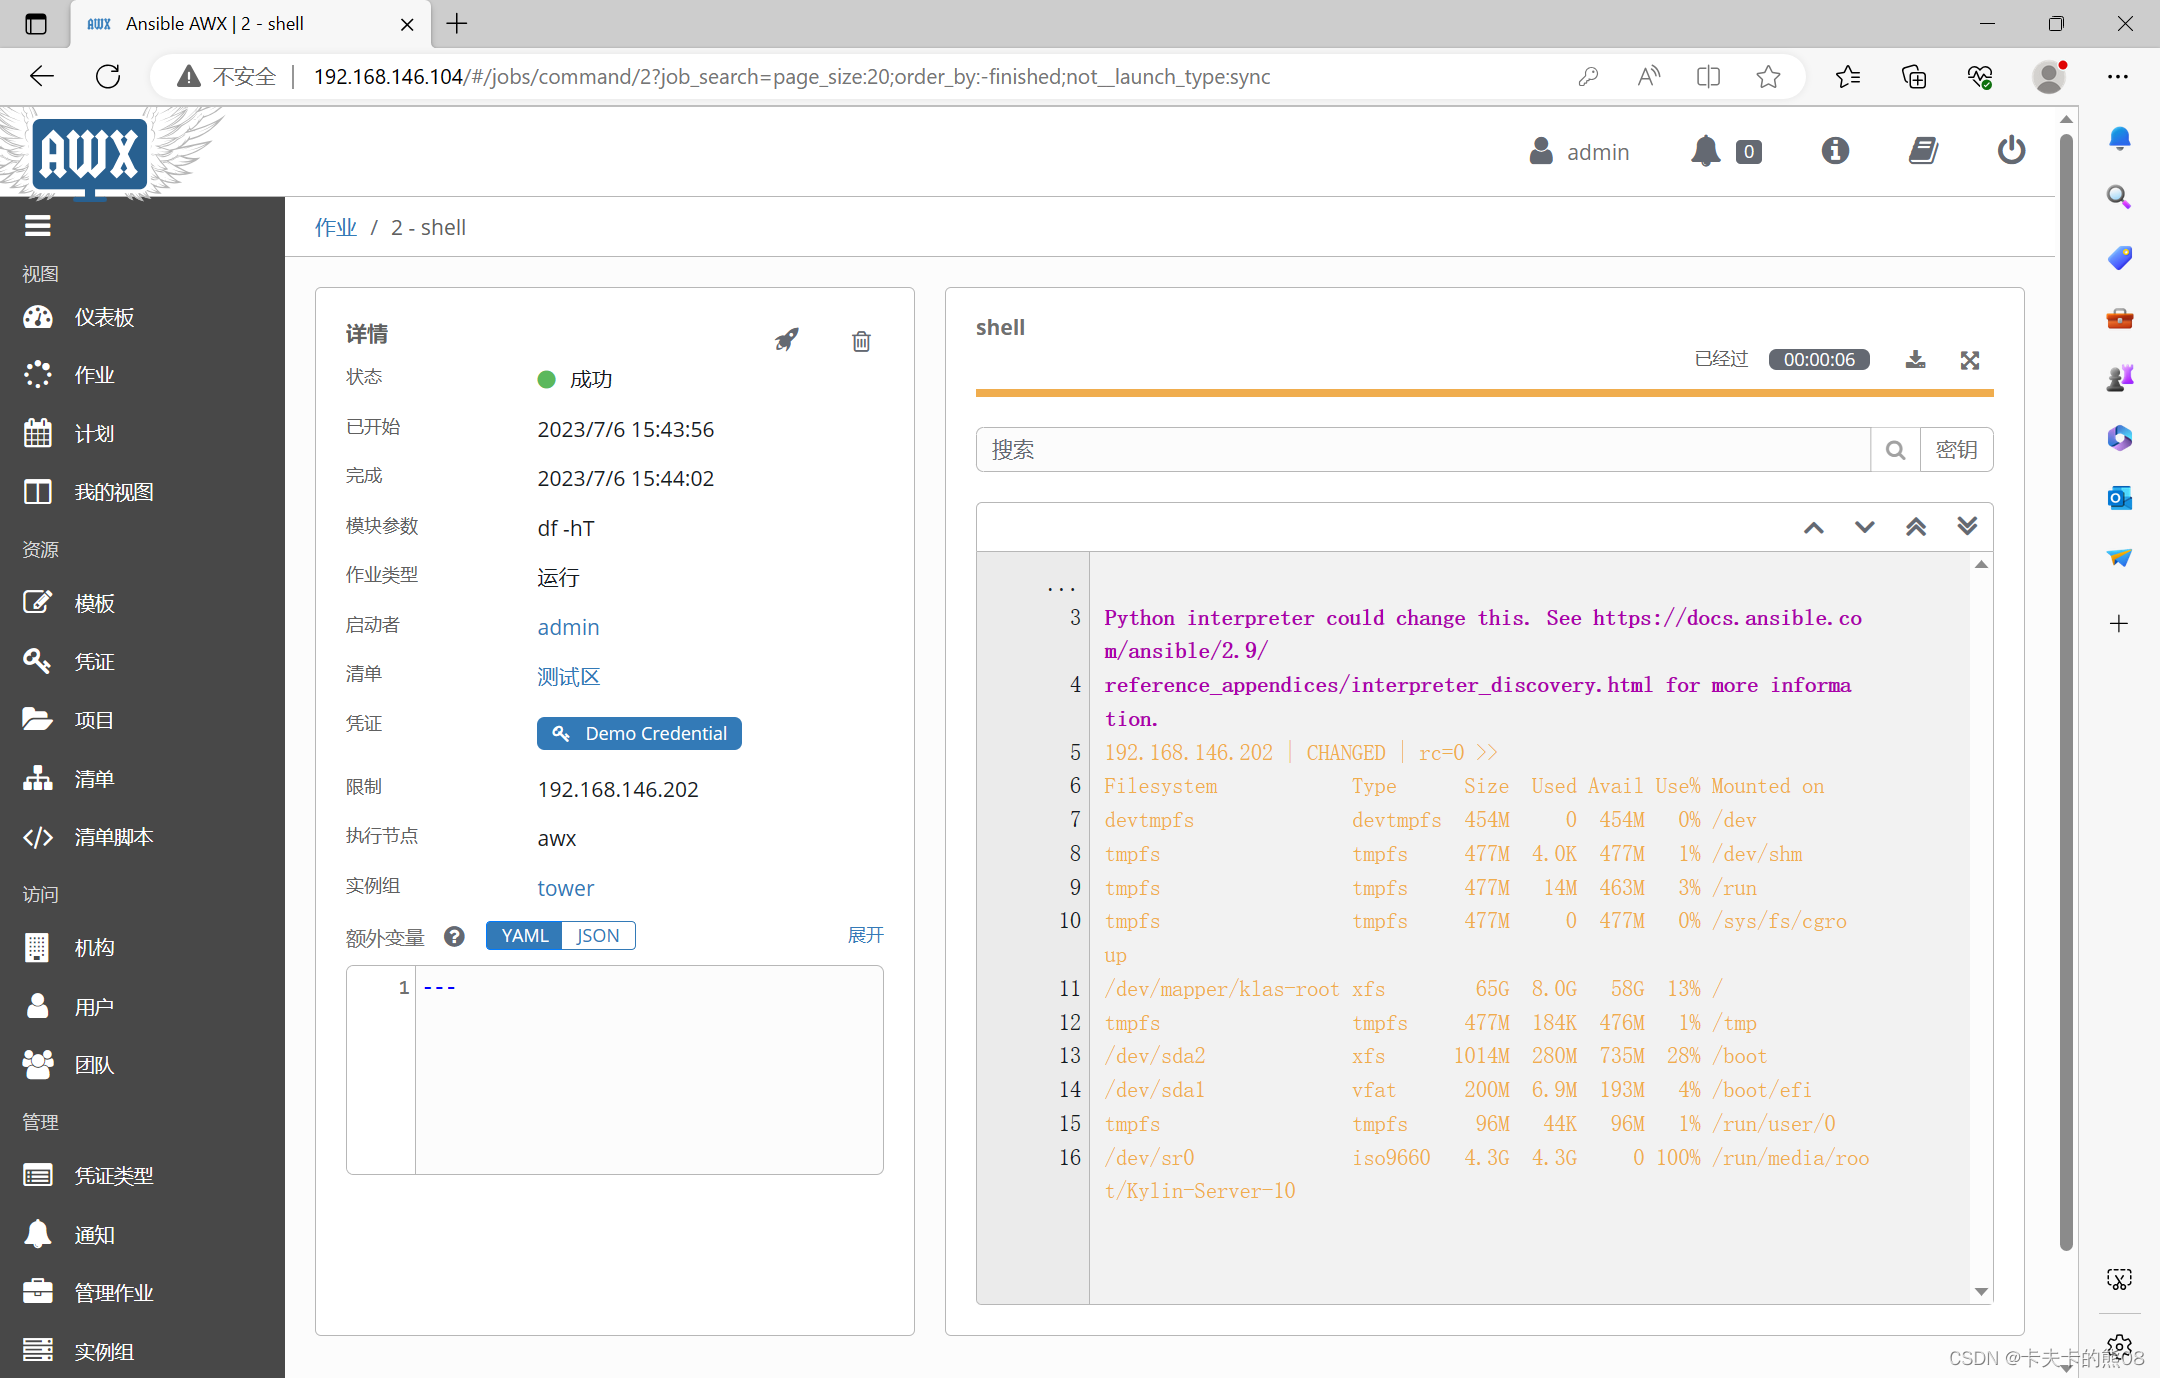
6.运行命令
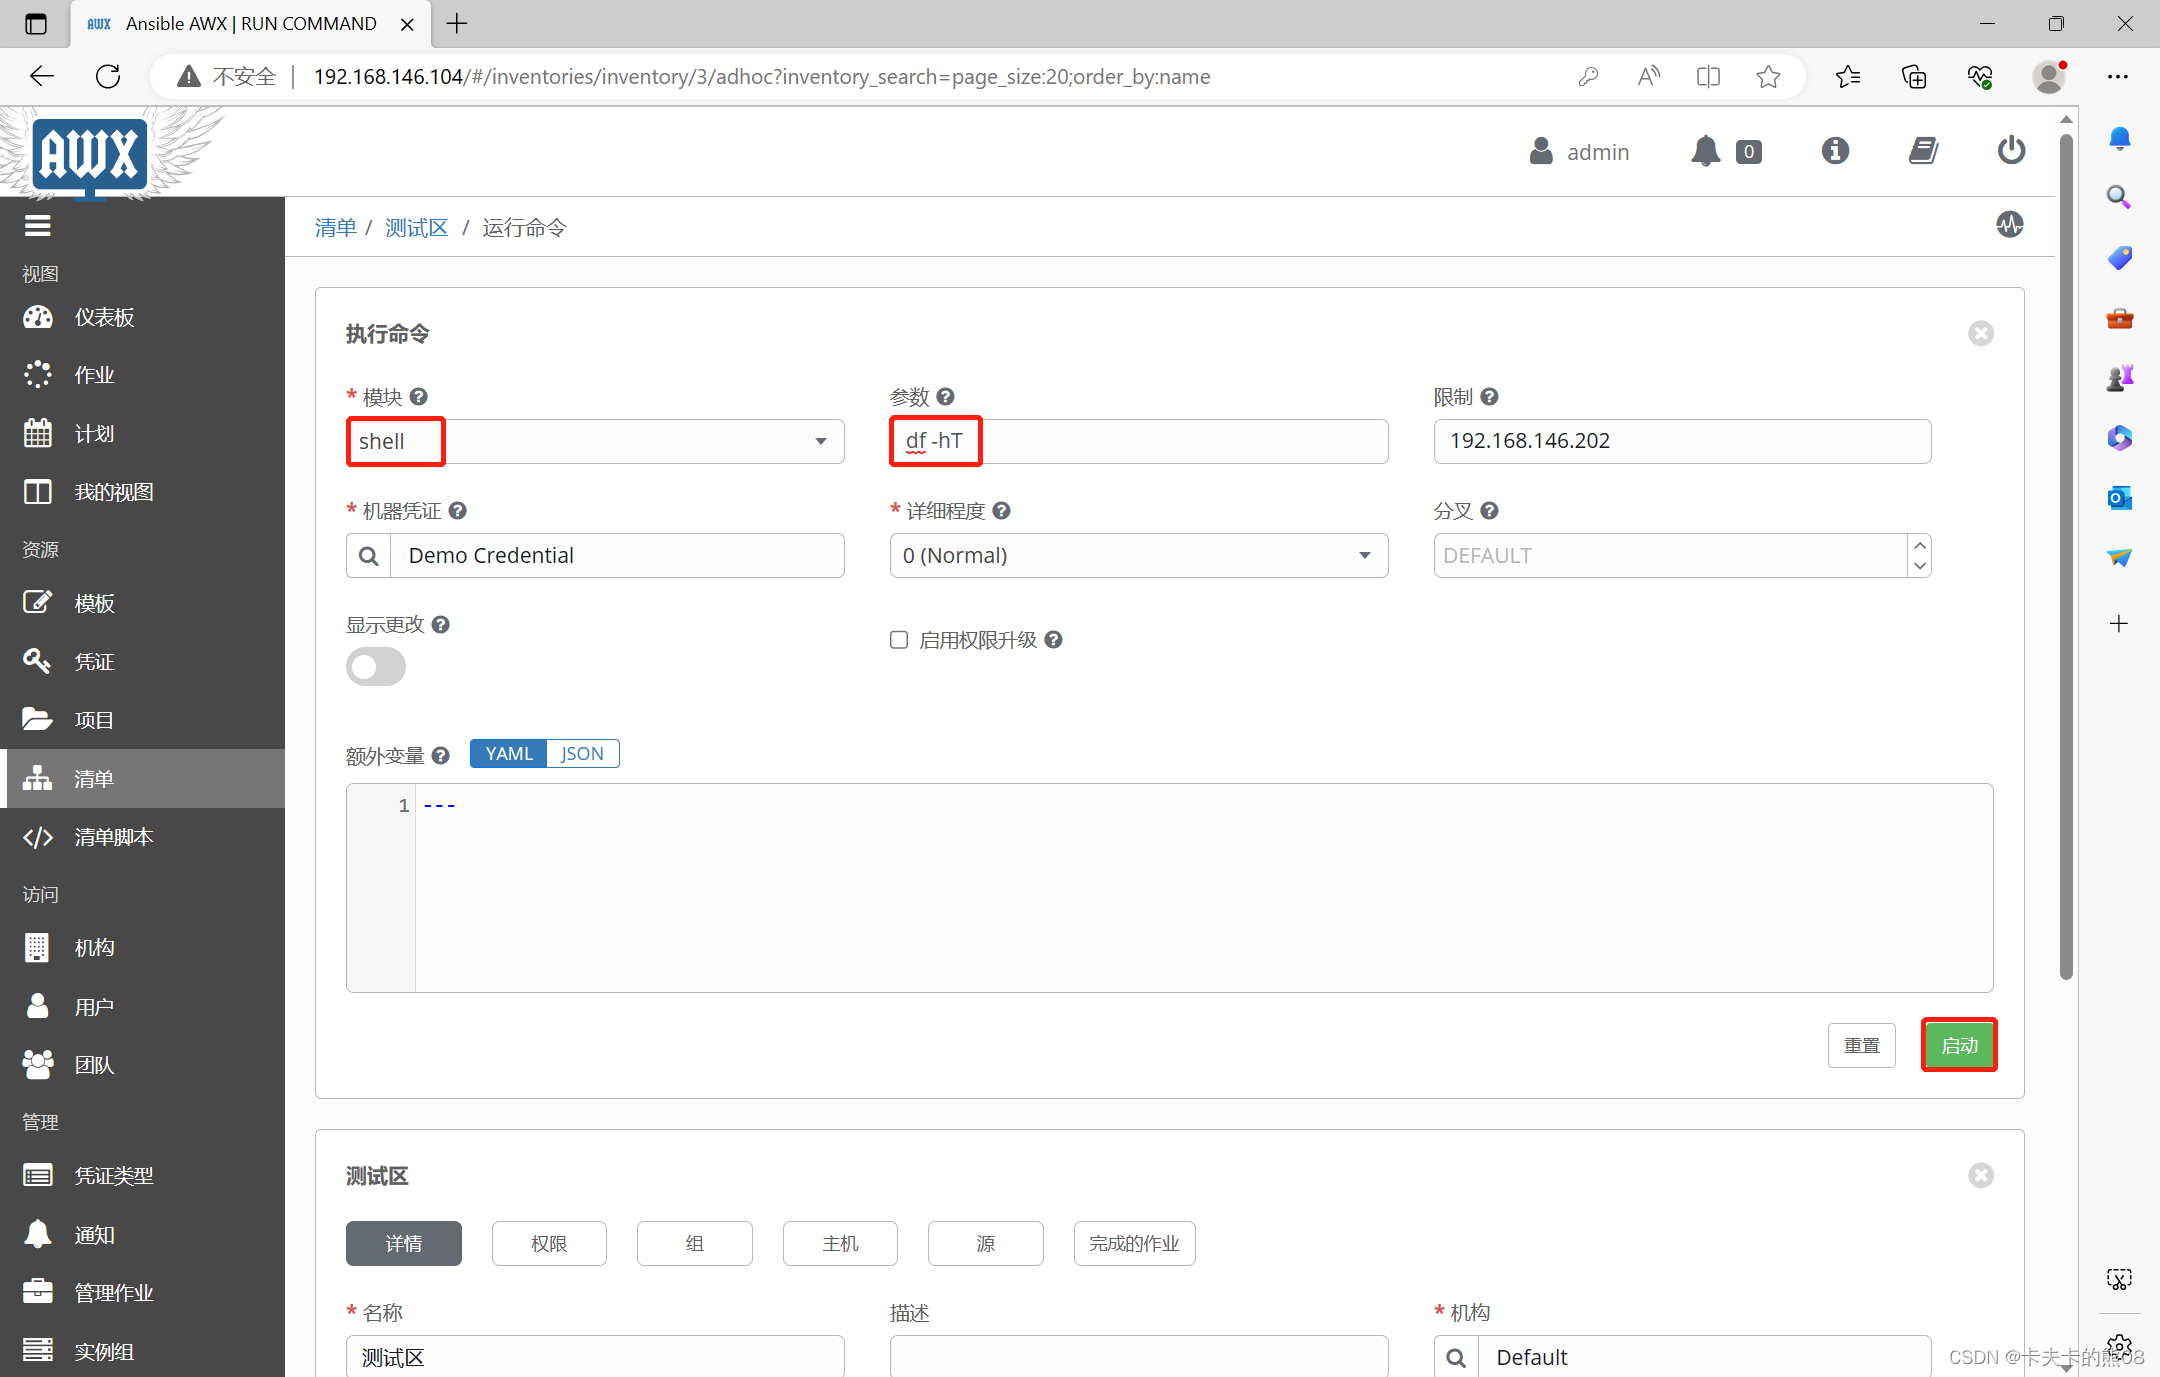
7.执行结果