every blog every motto: You can do more than you think.
https://blog.csdn.net/weixin_39190382?type=blog
0. 前言
访问图像元素
1. 访问图像像素
1.1 访问某像素
//灰度图像:
image.at<uchar>(j, i) //j为行数,i为列数
//BGR彩色图像
image.at<Vec3b>(j, i)[0] //B分量
image.at<Vec3b>(j, i)[1] //G分量
image.at<Vec3b>(j, i)[2] //R分量
1.2 遍历像素
以添加噪声为例
1.2.1 准备
创建添加噪声函数
Salt.h
#pragma once
#include <iostream>
#include <opencv2/opencv.hpp>
#include <random>

using namespace cv;
using namespace std;

void Salt(Mat img,int n); // n加入噪声点数
Salt.cpp
#include "Salt.h"

void Salt(Mat img,int n){


    // 随机数生成器
    default_random_engine generater;
    uniform_int_distribution<int> randRow(0,img.rows-1);
    uniform_int_distribution<int> randCol(0,img.cols-1);

    int i,j;
    for (int k=0;k<n;k++){


        i=randRow(generater);
        j=randCol(generater);

        if (img.channels() == 1){


            img.at<uchar>(i,j) = 255;
        }
        else if (img.channels() == 3){


            img.at<Vec3b>(i,j)[0] = 255;
            img.at<Vec3b>(i,j)[1] = 255;
            img.at<Vec3b>(i,j)[2] = 255;
        }
    }
}
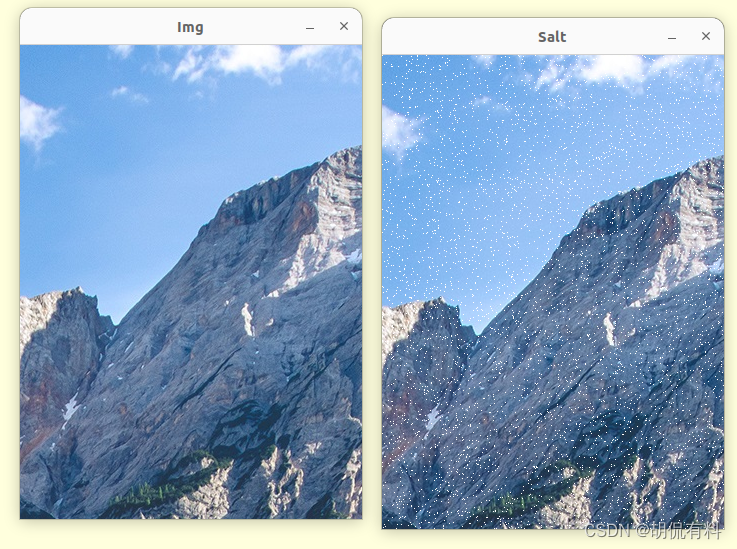
1.2.2 添加噪声
#include "Salt.h"
#include <iostream>
#include <opencv2/opencv.hpp>


using namespace cv;
using namespace std;


int main(){


    Mat img = imread("/home/v/home.png");
    if (img.empty()){


        cout<<"Could not open or find the image"<<endl;
        return -1;
    }

    imshow("Img",img);

    Salt(img,5000); // 加入噪声点
    imshow("Salt",img);
    waitKey(0);
    return 0;
}
1.3 指针遍历
1.3.1 以卷积运算为例
#include "Salt.h"
#include <iostream>
#include <opencv2/opencv.hpp>
using namespace cv;
using namespace std;
int main(){
Mat img = imread("/home/v/home.png");
if (img.empty()){
cout<<"Could not open or find the image"<<endl;
return -1;
}
Mat out_img;
out_img = Mat(img.size(),img.type()); // 定义输出图像大小
out_img = img.clone(); // clone原图像像素值
int rows = img.rows; // 原图行数
int stepx = img.channels(); // 原图通道数
int cols = (img.cols)*img.channels(); // 矩阵总列数
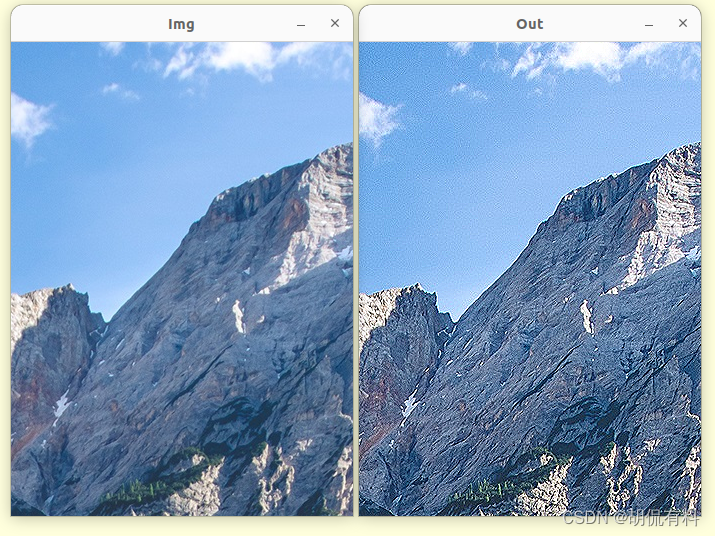
for (int row=1;row<rows-1;row++){
const uchar* previous = img.ptr<uchar>(row-1); // 原图上一行指针
const uchar* current = img.ptr<uchar>(row); // 原图当前行指针
const uchar* next = img.ptr<uchar>(row+1); // 原图下一行指针
uchar* output = out_img.ptr<uchar>(row); // 输出图像当前指针
for (int col=stepx;col<cols-stepx;col++){
// 对列进行遍历
// saturate_cast<uchar>(a) 当a小于0,输出0,当a大于255输出255,0-255之间原样输出
output[col] = saturate_cast<uchar>(5*current[col]-(previous[col]+current[col-stepx] + current[col+stepx] + next[col]));
}
}
imshow("Img",img);
imshow("Out",out_img);
waitKey(0);
return 0;
}
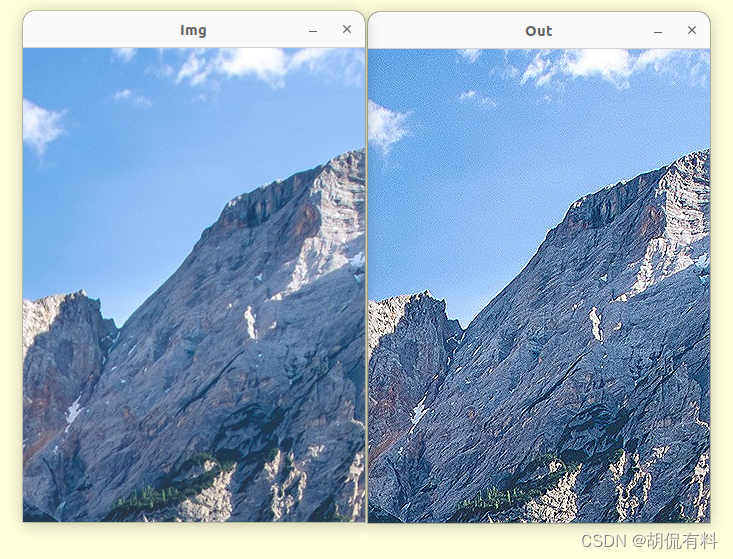
1.3.2 自带的卷积运算
#include "Salt.h"
#include <iostream>
#include <opencv2/opencv.hpp>


using namespace cv;
using namespace std;


int main(){


    Mat img = imread("/home/v/home.png");
    if (img.empty()){


        cout<<"Could not open or find the image"<<endl;
        return -1;
    }
    Mat out_img;

    Mat kernel = (Mat_<char>(3,3)<<0,-1,0,-1,5,-1,0,-1,0);
    filter2D(img,out_img,img.depth(),kernel); // 卷积

    imshow("Img",img);
    imshow("Out",out_img);
    waitKey(0);
    return 0;
}