写作是为了更好的思考
aHR0cHM6Ly93d3cuNTEuY29tLw==
本期网址如上,使用base64解码获得
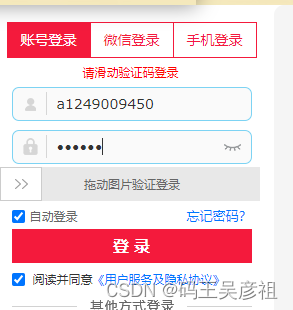
本期目标依然是滑块逆向的登录,我们在登录界面,任意输入账号密码之后,需要多输错几次,就会出现滑动图片验证码登录的模块
本期的主题在于逆向登录的实现,滑块的缺口识别可以参考我的验证码识别专栏ocr验证码识别
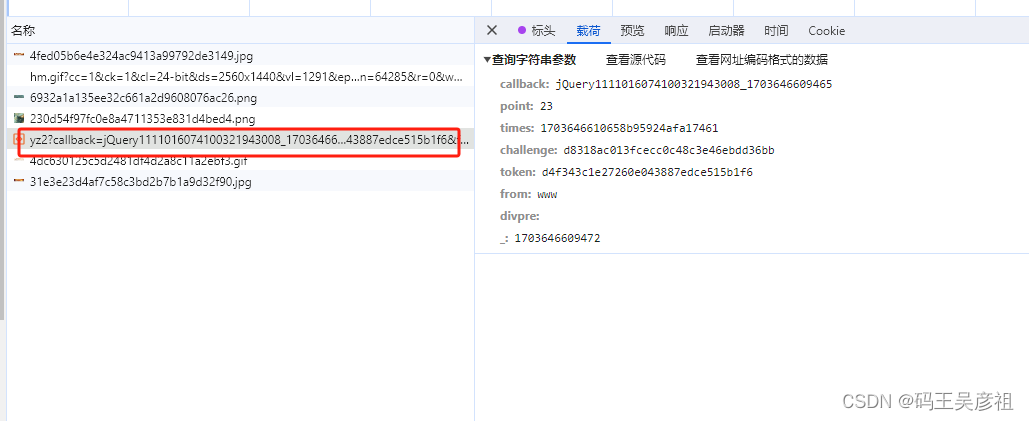
先来看获取验证码的请求,在经过多次请求抓包后,最后我们将目标锁定在slidecode这个接口上,无论是从接口名字上还是响应的参数上都很可疑
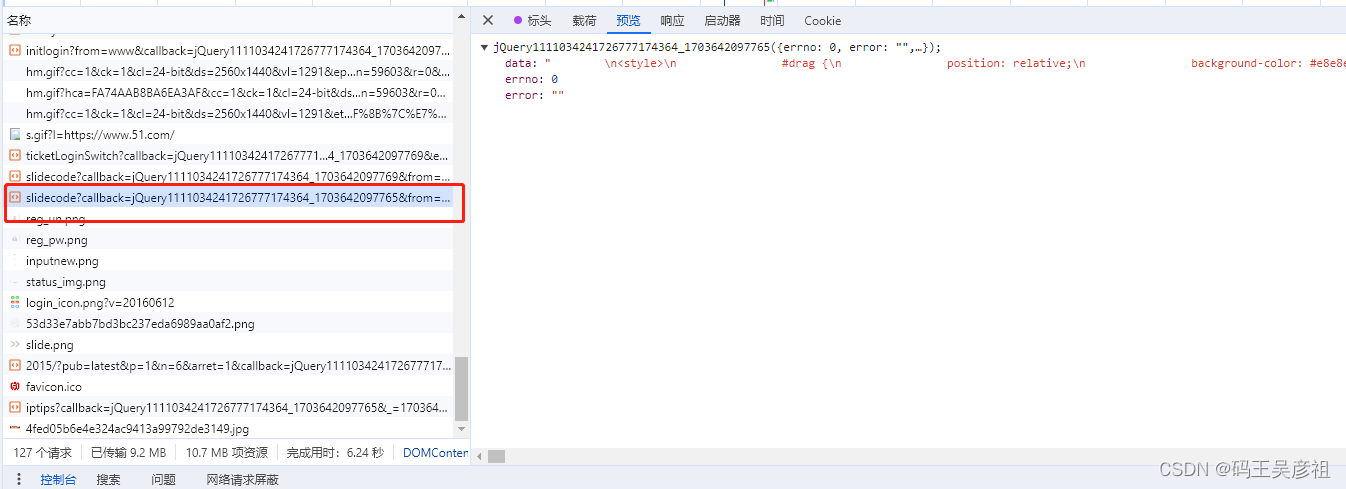
分析该请求后,发现接口需要传的参数可以不传,也就是直接发送’https://authcode.51.com/authcode/slidecode’这个请求即可,我们将该请求抓到本地,本地执行后观察一下响应参数,如下
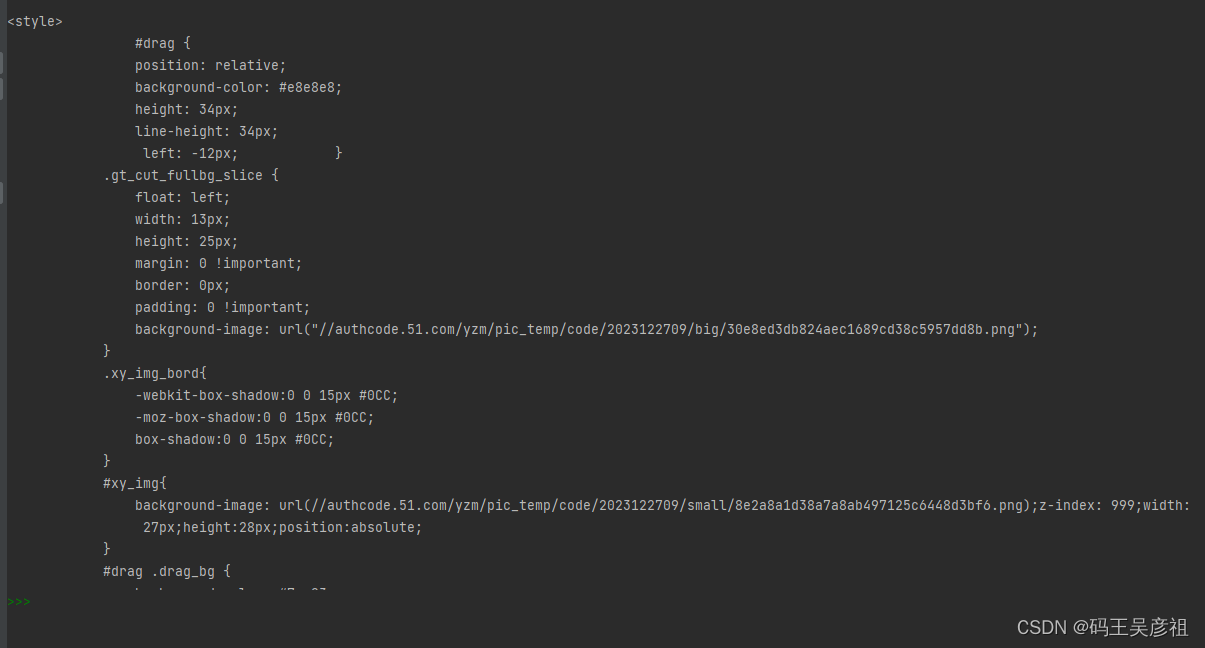
其中最关键的有三部分,第一就是得到验证码的大图图片,但是发现验证码的图片是顺序的
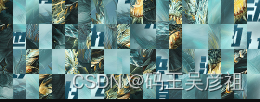
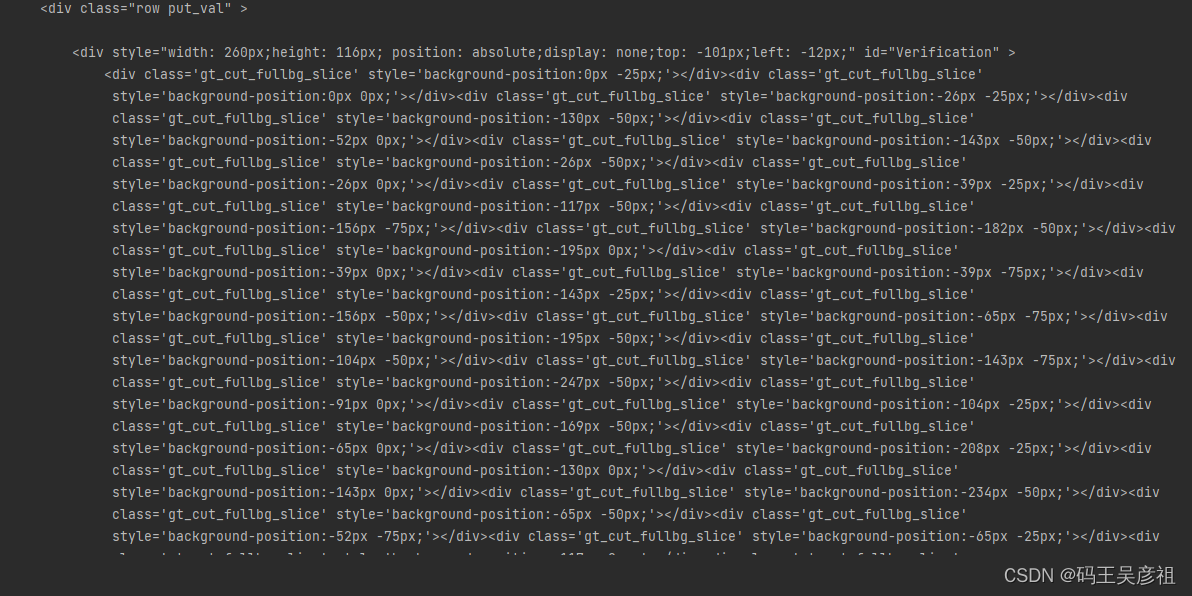
然后第二个关键的部分就来了,经过观察发现,图片被切分成80个小块,同时,在响应请求中也能找到由一个80个div组成的列表,每个div里面都包含两个px值,那么其实这个值代表的就是该小块图片正确所在的x和y,我们根据这个猜测,首先将原图进行切分,然后将80个小块和80个div对应,将每个小块放到div中指定的x和y中尝试下,代码如下:
# 请求滑块
response = session.get('https://authcode.51.com/authcode/slidecode', headers=headers)
html_code = response.text
png_urls = re.findall(r'url\([\'\"]?(.*\.png)[\'\"]?\)', html_code)

big_img, small_png = png_urls[0], png_urls[1]
print(png_urls)
# 请求大图
big_img_content = session.get("https:" + big_img, headers=headers).content
# 将二进制数据转换为 NumPy 数组
array_data = np.frombuffer(big_img_content, dtype=np.uint8)

# 解码图像
image = cv2.imdecode(array_data, cv2.IMREAD_COLOR)


# 获取所有小图像素位置
soup = BeautifulSoup(html_code, 'lxml')
divs = soup.find_all('div', class_='gt_cut_fullbg_slice')

px_pairs = []
for div in divs:
    style = div.get('style')
    px_value = re.search(r'-?\d+px\s+-?\d+px', style).group()
    px_pairs.append(px_value)

pxs = []
for p in px_pairs:
    px = p.replace("-", "").replace("px", "")
    p1, p2 = px.split()
    pxs.append([int(p1), int(p2)])
print(pxs)

# 指定图像尺寸和分割大小
image_height, image_width = image.shape[:2]
split_height, split_width = 25, 13

# 计算分割后的小图像数目
num_cols = image_width // split_width
num_rows = image_height // split_height

# 创建一个空列表来存储小图像及其位置
images_list = []

# 分割图像并存储到列表中
pxs_index = 0
for row in range(num_rows):
    for col in range(num_cols):
        # 计算当前小图像的位置
        # x = col * split_width
        # y = row * split_height
        x, y = pxs[pxs_index]

        # 提取当前小图像
        small_image = image[y:y+split_height, x:x+split_width]

        # 将小图像和其位置加入列表中
        images_list.append({


            'image': small_image,
            'position': [col * split_width, row * split_height]
        })
        pxs_index += 1


# 计算大图像的尺寸
max_x = max(image['position'][0] + image['image'].shape[1] for image in images_list)
max_y = max(image['position'][1] + image['image'].shape[0] for image in images_list)

# 创建一个空白的大图像
final_image = np.zeros((max_y, max_x, 3), dtype=np.uint8)

# 将小图像放置到大图像中
for image in images_list:
    x, y = image['position']
    h, w = image['image'].shape[:2]
    final_image[y:y+h, x:x+w] = image['image']

# 写入最终图像到本地
cv2.imwrite("1.png", final_image)
经过代码还原,验证猜测正确
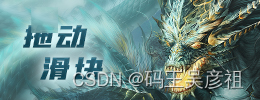
滑块请求到这就结束了,接下来看拖动验证请求,经过多次请求,最后锁定拖动验证请求如下
跟栈进去查看参数的形成
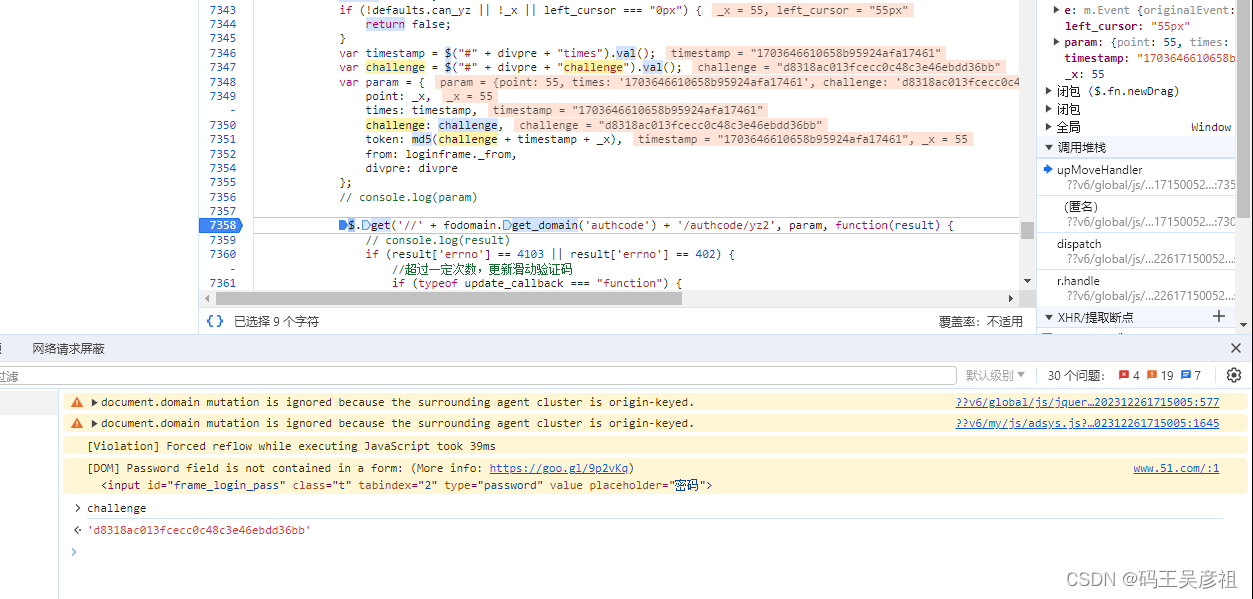
到这里,其实整个参数的形成就很明显了,timestamp和challenge是由第一个接口中获得的,也就是获取验证码请求第三个关键部分

token的形成实际上就是做一个md5加密,point是拖动的值,callback是响应参数,可以固定,其余的是固定参数,所以最后滑动验证请求如下:
_x = 77
params = {


    'callback': 'jQuery111106087267623987562_1703485072488',
    'point': _x,
    'times': times_value,
    'challenge': challenge_value,
    'token': calculate_md5(challenge_value + times_value + str(_x)),
    'from': 'www',
    'divpre': '',
    '_': '1703485072500',
}


response = session.get('https://authcode.51.com/authcode/yz2', params=params, headers=headers)
最后拿到正确的响应结果
