说明:
集群环境至少需要3个节点。推荐使用6个节点配置,即3个主节点,3个从节点。(我是在同一台机器上)
1.新建6个文件夹 分别是 7001/7002/7003/7004/7005/7006
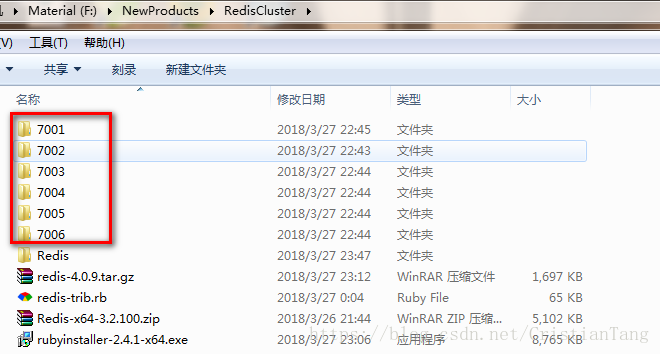
目录说明:
redis-4.0.9.tar.gz是我从官网(点击打开链接)下载的文件(里面包含了ruby写的启动集群脚本redis-4.0.9\src\redis-trib.rb)
Redis-x64-3.2.100.zip是redis服务压缩包:
现在官网没有windows版本的下载地址,只能在github上下载,官网只提供linux版本的下载
官网下载地址:http://redis.io/download
github下载地址:https://github.com/MSOpenTech/redis/tags
rubyinstaller-2.4.1-x64.exe是ruby的安装包,因为待会的redis-trib.rb脚本就需要根据它来运行2.将redis.windows.conf 复制一份
3.然后修改配置文件中的下面选项
port 700X (redis 端口号)
cluster-migration-barrier 1
appendfilename "appendonly.700X.aof"
daemonize yes (是否以后台daemon方式运行 windows上不支持,可以忽略)
cluster-enabled yes (开启集群)
cluster-config-file nodes.700x.conf ( 注意这个需要改为各自的名字,如果不改后面运行redis-trib.rb脚本的时候会报一个错:
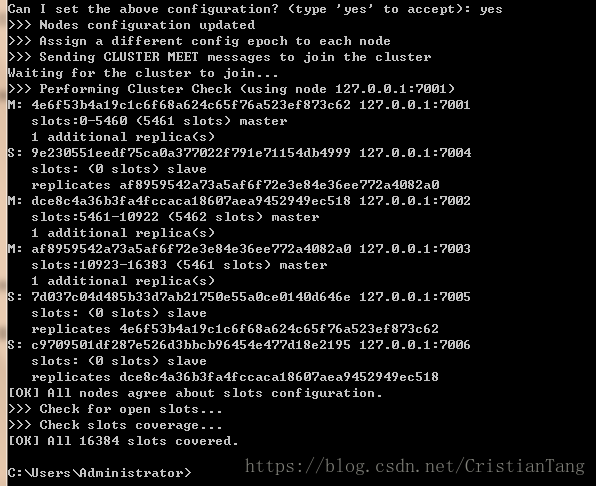
Can I set the above configuration? (type 'yes' to accept): yes
>>> Nodes configuration updated
>>> Assign a different config epoch to each node
>>> Sending CLUSTER MEET messages to join the cluster
Waiting for the cluster to join..........................................................................................................................................................cluster-node-timeout 5000 (集群模式时,当前节点在与其他节点保活探测时,多久没有响应时认为其他节点处于fail状态,上面是5秒)
appendonly yes (是否开启appendonlylog,开启的话每次写操作会记一条log,这会提高数据抗风险能力,但影响效率。)
cluster-require-full-coverage yes (默认为Yes,丢失一定比例Key后(可能Node无法连接或者挂掉),集群停止接受写操作 no:允许某些slot没有active节点的时候其余slot还能用。就是其中1个实例挂掉,不会导致整个redis cluster都不可用了)
cluster-slave-validity-factor 10 (控制从节点FailOver相关的 设置设为0,从节点会一直尝试启动FailOver.设为正数,失联大于一定时间(factor*节点TimeOut),不再进行FailOver)
4.分别放到 上面的6个文件夹里面(注意:拷贝完成之后要修改 7001/7002/7003/7004/7005/7006 目录下面 redis.conf 文件中的 port 参数)
5.在redis的bin中分别启动这 6 个 redis 实例 :
redis-server.exe F:\NewProducts\RedisCluster\7001\redis.7001.conf
redis-server.exe F:\NewProducts\RedisCluster\7002\redis.7002.conf
redis-server.exe F:\NewProducts\RedisCluster\7003\redis.7003.conf
redis-server.exe F:\NewProducts\RedisCluster\7004\redis.7004.conf
redis-server.exe F:\NewProducts\RedisCluster\7005\redis.7005.conf
redis-server.exe F:\NewProducts\RedisCluster\7006\redis.7006.conf
启动后会根据cluster-config-file nodes.700x.conf 在redis服务路径里面生成各自的文件,配置文件没有修改这个属性的名字那么他们都是一个名字,启动的服务就会有同一个id,如下图所示,这个会导致后面启动集群出现Waiting for the cluster to join错误

6.这些服务启动完成后就可以启动集群服务了,首先安装ruby程序,安装完成后配置到环境变量中去便于使用
cmd中运行命令》ruby F:\NewProducts\RedisCluster\redis-trib.rb create --replicas 1 127.0.0.1:7001 127.0.0.1:7002 127.0.0.1:7003 127.0.0.1:7004 127.0.0.1:7005 127.0.0.1:7006
成功的话会出现如下界面:输入yes进行下一步
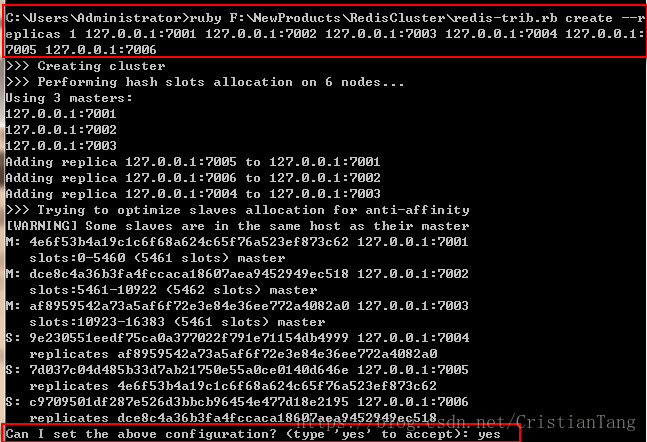
输入yes后出现下面内容表示成功
说明:我在运行这一步的时候出现了几种错误:
第一种 in `call': ERR Slot 8579 is already busy (Redis::CommandError)
错误提示是
slot插槽被占用了(这是 搭建集群前时,以前redis的旧数据和配置信息没有清理干净。)
解决方案是
用redis-cli 登录到每个节点执行 flushall 和 cluster reset 就可以了。
例如:
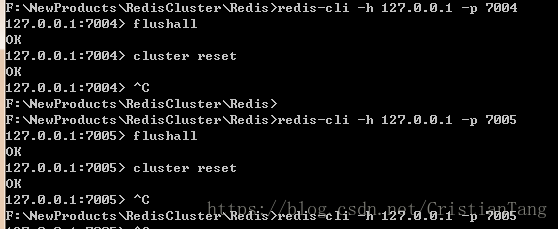
第二种:Node 127.0.0.1:7001 is not empty. Either the node already knows other nodes (check with CLUSTER NODES) or contains some key in database 0.
说明:这是因为该端口的redis服务器中已经有数据了,需要清空数据
方法:使用redis desktop manager工具登录清空,或者cmd中登录后用命令flushdb清空
关闭所有cmd命令窗口后,再次启动集群服务,只需要启动下面命令即可,刚开始启动一个的时候会报错,启动完成后就正常了
redis-server.exe F:\NewProducts\RedisCluster\7001\redis.7001.conf
redis-server.exe F:\NewProducts\RedisCluster\7002\redis.7002.confredis-server.exe F:\NewProducts\RedisCluster\7003\redis.7003.conf
redis-server.exe F:\NewProducts\RedisCluster\7004\redis.7004.conf
redis-server.exe F:\NewProducts\RedisCluster\7005\redis.7005.conf
redis-server.exe F:\NewProducts\RedisCluster\7006\redis.7006.conf