1.分别建一个发消息的rabbitmq和接消息的rabbitmq
并且发消息发两个不同的q,接消息也接不同的Q
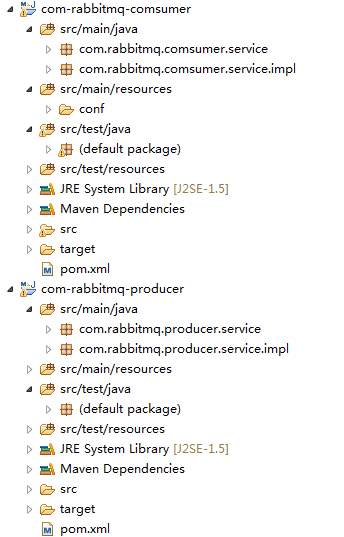
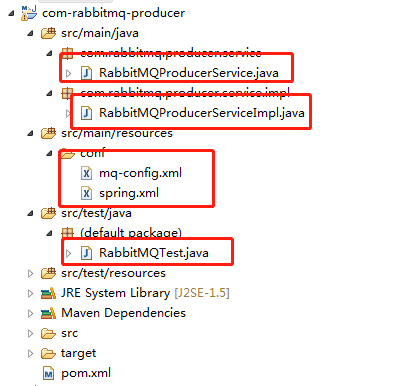
2.先是发消息的项目producer
pom.xml
<project xmlns="http://maven.apache.org/POM/4.0.0" xmlns:xsi="http://www.w3.org/2001/XMLSchema-instance"
	xsi:schemaLocation="http://maven.apache.org/POM/4.0.0 http://maven.apache.org/xsd/maven-4.0.0.xsd">
	<modelVersion>4.0.0</modelVersion>
	<groupId>com.rabbitmq</groupId>
	<artifactId>com-rabbitmq-producer</artifactId>
	<version>0.0.1-SNAPSHOT</version>

	<dependencies>

		<!-- RabbitMQ -->
		<dependency>
			<groupId>com.rabbitmq</groupId>
			<artifactId>amqp-client</artifactId>
			<version>3.5.1</version>
		</dependency>
		<dependency>
			<groupId>org.springframework.amqp</groupId>
			<artifactId>spring-rabbit</artifactId>
			<version>1.4.5.RELEASE</version>
		</dependency>
		<dependency>
			<groupId>junit</groupId>
			<artifactId>junit</artifactId>
			<version>4.12</version>
		</dependency>
		<dependency>
			<groupId>org.springframework</groupId>
			<artifactId>spring-core</artifactId>
			<version>4.3.8.RELEASE</version>
		</dependency>
	</dependencies>
</project>
RabbitMQProducerService.java
package com.rabbitmq.producer.service;


public interface RabbitMQProducerService
{
	public void sendMessage(String message);
	public void sendMessageyy(String message);
}
RabbitMQProducerServiceImpl.java
package com.rabbitmq.producer.service.impl;

import org.springframework.amqp.core.AmqpTemplate;
import org.springframework.beans.factory.annotation.Autowired;
import org.springframework.stereotype.Service;

import com.rabbitmq.producer.service.RabbitMQProducerService;


@Service("rabbitMQProducerService")
public class RabbitMQProducerServiceImpl implements RabbitMQProducerService
{

	@Autowired
    private AmqpTemplate amqpTemplate;

	public void sendMessage(String message)
	{
		//guilfrrrrrrr为配置文件中queue对应的key,指明发送给哪个queue。
		amqpTemplate.convertAndSend("guilfrrrrrrr",message);
	}

	public void sendMessageyy(String message) {
		//guilfrrrrrrr为配置文件中queue对应的key,指明发送给哪个queue。
		amqpTemplate.convertAndSend("guilfyyyy",message);
	}

}
spring.xml
<?xml version="1.0" encoding="UTF-8"?>

<beans xmlns="http://www.springframework.org/schema/beans"
 xmlns:context="http://www.springframework.org/schema/context"
 xmlns:xsi="http://www.w3.org/2001/XMLSchema-instance"
 xsi:schemaLocation="http://www.springframework.org/schema/beans
      http://www.springframework.org/schema/beans/spring-beans-3.0.xsd
      http://www.springframework.org/schema/context
      http://www.springframework.org/schema/context/spring-context.xsd"
      >

     <!-- 扫描文件(自动将servicec层注入) -->
    <context:component-scan base-package="com.rabbitmq.producer.service"/>

 </beans>
mq-config.xml
<?xml version="1.0" encoding="UTF-8"?>
<beans xmlns="http://www.springframework.org/schema/beans"
	xmlns:xsi="http://www.w3.org/2001/XMLSchema-instance"
	xmlns:rabbit="http://www.springframework.org/schema/rabbit"
	xsi:schemaLocation="http://www.springframework.org/schema/beans
		http://www.springframework.org/schema/beans/spring-beans.xsd
		http://www.springframework.org/schema/rabbit
       	http://www.springframework.org/schema/rabbit/spring-rabbit.xsd">

	<!-- RabbitMQ 通过参数创建工厂-->
	<rabbit:connection-factory id="rabbitConnectionFactory" addresses="192.168.88.134"
		username="admin" password="admin"/>

	<!--通过指定下面的admin信息,当前producer中的exchange和queue会在rabbitmq服务器上自动生成-->
	<rabbit:admin connection-factory="rabbitConnectionFactory" />


    <!-- queue 队列声明 声明不同的Q,这Q会显示在RabbitMQ页面上-->
   	<rabbit:queue durable="true" auto-delete="false" exclusive="false" name="guilfRabbitmqtt"/>
   	<rabbit:queue durable="true" auto-delete="false" exclusive="false" name="guilfRabbitmqyy"/>


   	<!-- 定义direct exchange,绑定com.mj.test queue  一个queue是显示在RabbitMQ页面上,key跟实现类里面的key一样-->
	<rabbit:direct-exchange name="guitttttttttt">
	    <rabbit:bindings>
	        <rabbit:binding queue="guilfRabbitmqtt" key="guilfrrrrrrr" />
	        <rabbit:binding queue="guilfRabbitmqyy" key="guilfyyyy" />
	    </rabbit:bindings>
	</rabbit:direct-exchange>

	<!--定义rabbit template用于数据的接收和发送 amqpTemplate这个会在实现里面注入发送消息-->
    <rabbit:template id="amqpTemplate" connection-factory="rabbitConnectionFactory" exchange="guitttttttttt" />

</beans>
RabbitMQTest.java
import org.junit.Test;
import org.junit.Before;
import org.springframework.context.ApplicationContext;
import org.springframework.context.support.ClassPathXmlApplicationContext;

import com.rabbitmq.producer.service.RabbitMQProducerService;


public class RabbitMQTest
{
	private RabbitMQProducerService rabbitMQProducerService;


    @Before
    public void before(){
        @SuppressWarnings("resource")
        ApplicationContext context = new ClassPathXmlApplicationContext(new String[]{"classpath:conf/spring.xml",
        		"classpath:conf/mq-config.xml"});

        rabbitMQProducerService = (RabbitMQProducerService) context.getBean("rabbitMQProducerService");
    }

    @Test
   	public void testSend1()
   	{

       	try {
       		rabbitMQProducerService.sendMessage("my first rabbitmq send1!");
   		} catch (Exception e) {
   			e.printStackTrace();
   		}
   	}

    @Test
   	public void testSend2()
   	{

       	try {
       		rabbitMQProducerService.sendMessageyy("my first rabbitmq send2!");
   		} catch (Exception e) {
   			e.printStackTrace();
   		}
   	}


}
得到结果

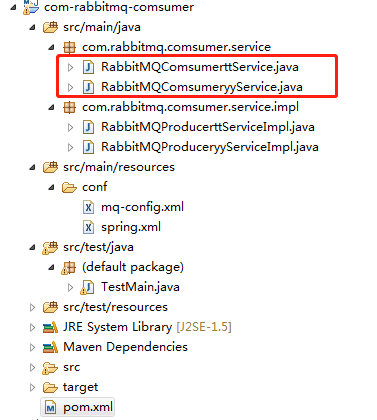
2.监听Q并消费掉 comsumer,这里就有两个消费
pom.xml
<project xmlns="http://maven.apache.org/POM/4.0.0" xmlns:xsi="http://www.w3.org/2001/XMLSchema-instance"
	xsi:schemaLocation="http://maven.apache.org/POM/4.0.0 http://maven.apache.org/xsd/maven-4.0.0.xsd">
	<modelVersion>4.0.0</modelVersion>
	<groupId>com.rabbitmq</groupId>
	<artifactId>com-rabbitmq-comsumer</artifactId>
	<version>0.0.1-SNAPSHOT</version>

	<dependencies>

		<!-- RabbitMQ -->
		<dependency>
			<groupId>com.rabbitmq</groupId>
			<artifactId>amqp-client</artifactId>
			<version>3.5.1</version>
		</dependency>
		<dependency>
			<groupId>org.springframework.amqp</groupId>
			<artifactId>spring-rabbit</artifactId>
			<version>1.4.5.RELEASE</version>
		</dependency>
		<dependency>
			<groupId>junit</groupId>
			<artifactId>junit</artifactId>
			<version>4.12</version>
		</dependency>
		<dependency>
			<groupId>org.springframework</groupId>
			<artifactId>spring-core</artifactId>
			<version>4.3.8.RELEASE</version>
		</dependency>
	</dependencies>
</project>
spring.xml
<?xml version="1.0" encoding="UTF-8"?>

<beans xmlns="http://www.springframework.org/schema/beans"
 xmlns:context="http://www.springframework.org/schema/context"
 xmlns:xsi="http://www.w3.org/2001/XMLSchema-instance"
 xsi:schemaLocation="http://www.springframework.org/schema/beans
      http://www.springframework.org/schema/beans/spring-beans-3.0.xsd
      http://www.springframework.org/schema/context
      http://www.springframework.org/schema/context/spring-context.xsd"
      >


     <!-- 扫描文件(自动将servicec层注入) -->
    <context:component-scan base-package="com.rabbitmq.producer.service"/>

 </beans>
mq-config.xml
<?xml version="1.0" encoding="UTF-8"?>
<beans xmlns="http://www.springframework.org/schema/beans"
	xmlns:xsi="http://www.w3.org/2001/XMLSchema-instance"
	xmlns:rabbit="http://www.springframework.org/schema/rabbit"
	xsi:schemaLocation="http://www.springframework.org/schema/beans
		http://www.springframework.org/schema/beans/spring-beans.xsd
		http://www.springframework.org/schema/rabbit
       	http://www.springframework.org/schema/rabbit/spring-rabbit.xsd">

	<!-- RabbitMQ 得到工厂-->
    <rabbit:connection-factory id="rabbitConnectionFactory" addresses="192.168.88.134"
		username="admin" password="admin"/>

    <rabbit:admin connection-factory="rabbitConnectionFactory" />
<!--监听-->
<rabbit:listener-container connection-factory="rabbitConnectionFactory" acknowledge="auto">
  <rabbit:listener queue-names="guilfRabbitmqtt" ref="messageListenertt" />
  <rabbit:listener queue-names="guilfRabbitmqyy" ref="messageListeneryy" />
</rabbit:listener-container>
 </beans>
RabbitMQComsumerttService.java
package com.rabbitmq.comsumer.service;


public interface RabbitMQComsumerttService
{
	public void sendMessage(String message);
}
RabbitMQComsumeryyService.java
package com.rabbitmq.comsumer.service;


public interface RabbitMQComsumeryyService
{
	public void sendMessageyy(String message);
}
RabbitMQProducerttServiceImpl.java
package com.rabbitmq.comsumer.service.impl;

import org.springframework.amqp.core.Message;
import org.springframework.amqp.core.MessageListener;
import org.springframework.stereotype.Service;

import com.rabbitmq.comsumer.service.RabbitMQComsumerttService;


@Service("messageListenertt")
public class RabbitMQProducerttServiceImpl implements RabbitMQComsumerttService,MessageListener
{

	public void sendMessage(String message)
	{
		System.out.println(message+"tt");
	}

	public void onMessage(Message message) {
		String msg = new String(message.getBody());
		System.out.println(msg+"tt");
		sendMessage(msg);
	}

}
RabbitMQProduceryyServiceImpl.java
package com.rabbitmq.comsumer.service.impl;

import org.springframework.amqp.core.Message;
import org.springframework.amqp.core.MessageListener;
import org.springframework.stereotype.Service;

import com.rabbitmq.comsumer.service.RabbitMQComsumeryyService;


@Service("messageListeneryy")
public class RabbitMQProduceryyServiceImpl implements RabbitMQComsumeryyService,MessageListener
{

	public void sendMessageyy(String message) {
		System.out.println(message+"yy");
	}

	public void onMessage(Message message) {
		String msg = new String(message.getBody());
		System.out.println(msg+"yy");
		sendMessageyy(msg);
	}

}
TestMain.java
import java.io.IOException;

import org.junit.runner.RunWith;
import org.springframework.context.ApplicationContext;
import org.springframework.context.support.ClassPathXmlApplicationContext;
import org.springframework.context.support.GenericXmlApplicationContext;


/**
 * 应用启动入口类
 */
public class TestMain {

	public static void main(String[] args) {
        @SuppressWarnings("resource")
		ClassPathXmlApplicationContext context = new ClassPathXmlApplicationContext(
                new String[]{"classpath:conf/spring.xml","classpath:conf/mq-config.xml"});
        context.start();

        System.out.println("Press any key to exit.");
        try {
			System.in.read();
		} catch (IOException e) {
			// TODO Auto-generated catch block
			e.printStackTrace();
		}
	}


}
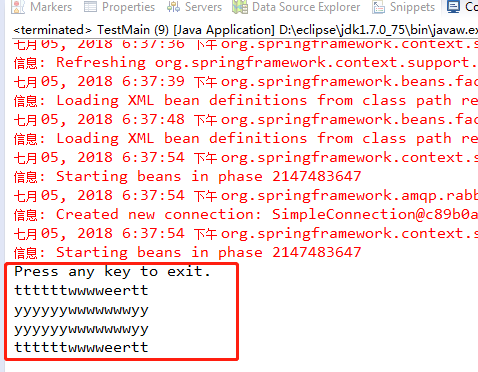
启动得到