一、物理机安装需要的软件包
[root@foundation77 ~]# yum install -y fence-virtd
[root@foundation77 ~]# yum install fence-virtd-libvirt
[root@foundation77 ~]# yum install fence-virtd-multicast -y
[root@foundation77 ~]# fence_virtd -c
Module search path [/usr/lib64/fence-virt]:

Available backends:
    libvirt 0.1
Available listeners:
    multicast 1.2

Listener modules are responsible for accepting requests
from fencing clients.

Listener module [multicast]:

The multicast listener module is designed for use environments
where the guests and hosts may communicate over a network using
multicast.

The multicast address is the address that a client will use to
send fencing requests to fence_virtd.

Multicast IP Address [225.0.0.12]:

Using ipv4 as family.

Multicast IP Port [1229]:

Setting a preferred interface causes fence_virtd to listen only
on that interface.  Normally, it listens on all interfaces.
In environments where the virtual machines are using the host
machine as a gateway, this *must* be set (typically to virbr0).
Set to 'none' for no interface.

Interface [virbr0]: br0

The key file is the shared key information which is used to
authenticate fencing requests.  The contents of this file must
be distributed to each physical host and virtual machine within
a cluster.

Key File [/etc/cluster/fence_xvm.key]:

Backend modules are responsible for routing requests to
the appropriate hypervisor or management layer.

Backend module [libvirt]:

Configuration complete.

=== Begin Configuration ===
backends {
    libvirt {
        uri = "qemu:///system";
    }

}

listeners {
    multicast {
        port = "1229";
        family = "ipv4";
        interface = "br0";
        address = "225.0.0.12";
        key_file = "/etc/cluster/fence_xvm.key";
    }

}

fence_virtd {
    module_path = "/usr/lib64/fence-virt";
    backend = "libvirt";
    listener = "multicast";
}

=== End Configuration ===
Replace /etc/fence_virt.conf with the above [y/N]? y
[root@foundation77 ~]# dd if=/dev/urandom of=/etc/cluster/fence_xvm.key bs=128 count=1    ##生成key文件
1+0 records in
1+0 records out
128 bytes (128 B) copied, 0.000184416 s, 694 kB/s
[root@foundation77 ~]# cd /etc/cluster/
[root@foundation77 cluster]# ll
total 4
-rw-r--r--. 1 root root 128 Jun 26 01:47 fence_xvm.key
[root@foundation77 cluster]# systemctl restart fence_virtd.service
Display all 370 possibilities? (y or n)
[root@foundation77 cluster]# systemctl restart fence_virtd   #开启服务
[root@foundation77 cluster]# systemctl status  fence_virtd
● fence_virtd.service - Fence-Virt system host daemon
   Loaded: loaded (/usr/lib/systemd/system/fence_virtd.service; disabled; vendor preset: disabled)
   Active: active (running) since Tue 2018-06-26 01:47:37 CST; 11s ago
  Process: 5337 ExecStart=/usr/sbin/fence_virtd $FENCE_VIRTD_ARGS (code=exited, status=0/SUCCESS)
 Main PID: 5339 (fence_virtd)
   CGroup: /system.slice/fence_virtd.service
           └─5339 /usr/sbin/fence_virtd -w

Jun 26 01:47:37 foundation77.ilt.example.com systemd[1]: [/usr/lib/systemd/sy...
Jun 26 01:47:37 foundation77.ilt.example.com systemd[1]: Starting Fence-Virt ...
Jun 26 01:47:37 foundation77.ilt.example.com fence_virtd[5339]: fence_virtd s...
Jun 26 01:47:37 foundation77.ilt.example.com systemd[1]: Started Fence-Virt s...
Hint: Some lines were ellipsized, use -l to show in full.
二、在server1和server4安装ricci
这操作在server1操作,server4同样
[root@server1 ~]# yum install -y ricci
[root@server1 ~]# passwd ricci
Changing password for user ricci.
New password:
BAD PASSWORD: it is based on a dictionary word
BAD PASSWORD: is too simple
Retype new password:
passwd: all authentication tokens updated successfully.
[root@server1 ~]# /etc/init.d/ricci start
Starting system message bus:                               [  OK  ]
Starting oddjobd:                                          [  OK  ]
generating SSL certificates...  done
Generating NSS database...  done
Starting ricci:                                            [  OK  ]
[root@server1 ~]# chkconfig ricci on
三、安装ricci的控制软件luci
此软件可以安装的任何电脑,此时我们安装的server1
[root@server1 ~]# yum install -y luci
[root@server1 ~]# /etc/init.d/luci start
Adding following auto-detected host IDs (IP addresses/domain names), corresponding to `server1' address, to the configuration of self-managed certificate `/var/lib/luci/etc/cacert.config' (you can change them by editing `/var/lib/luci/etc/cacert.config', removing the generated certificate `/var/lib/luci/certs/host.pem' and restarting luci):
    (none suitable found, you can still do it manually as mentioned above)

Generating a 2048 bit RSA private key
writing new private key to '/var/lib/luci/certs/host.pem'
Start luci...                                              [  OK  ]
Point your web browser to https://server1:8084 (or equivalent) to access luci
注意:集群配置时,主机的时间必须同步
此时提示我们访问server1:8084
注意:需要物理机做域名解析
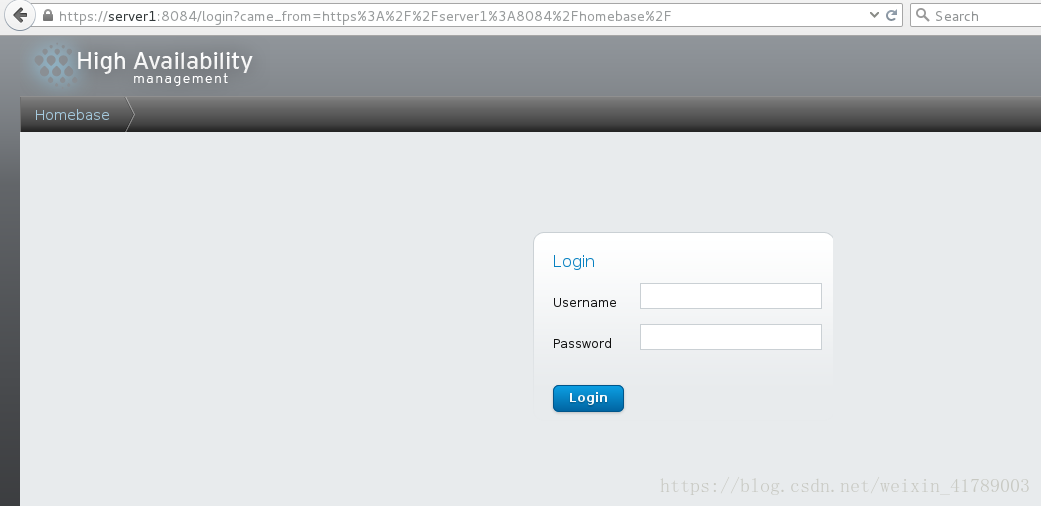
输入luci机的账户和密码进入
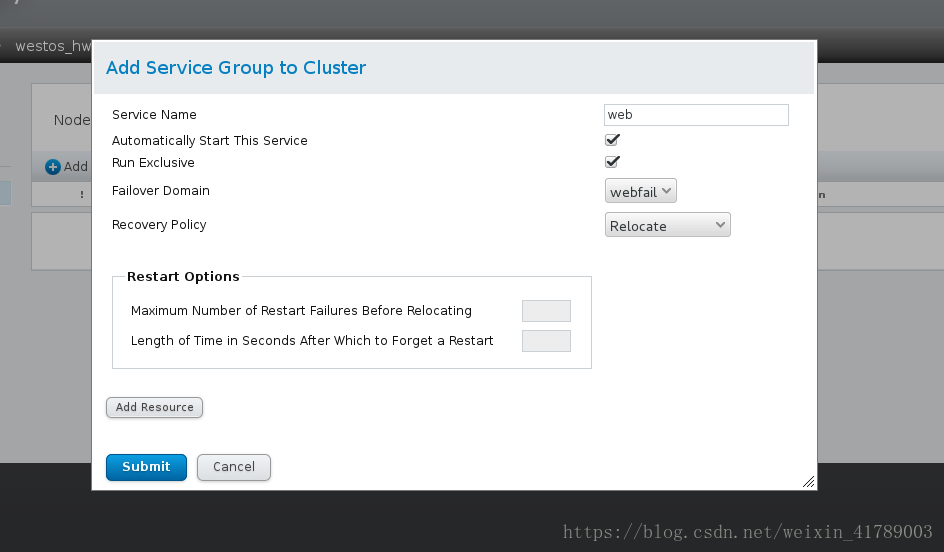
新增集群主机
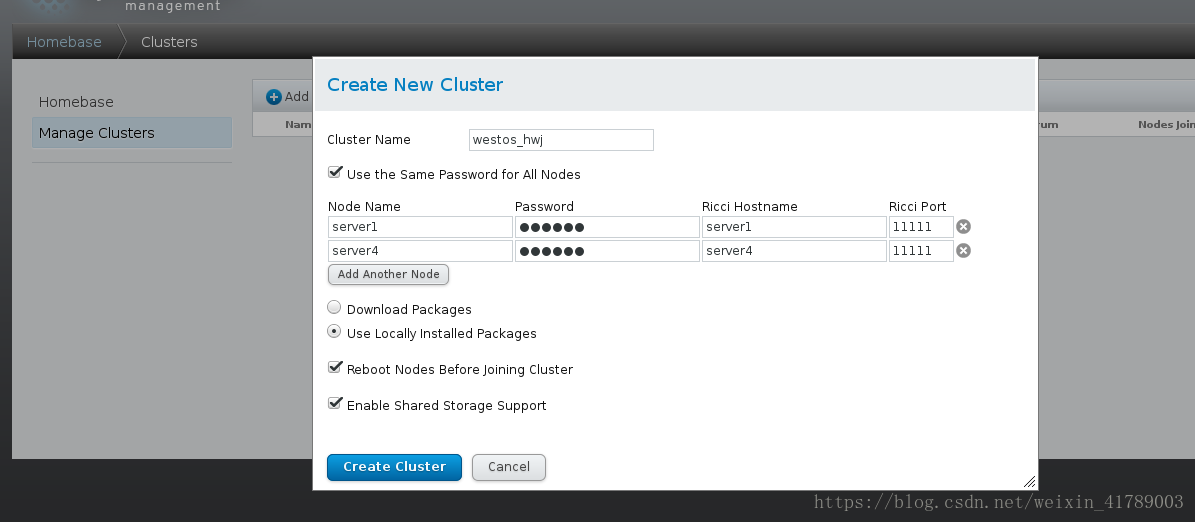
提交后,luci机会自动重启,

长时间显示此页面,是因为luci机的luci没开启,进入server1将luci机开启即可
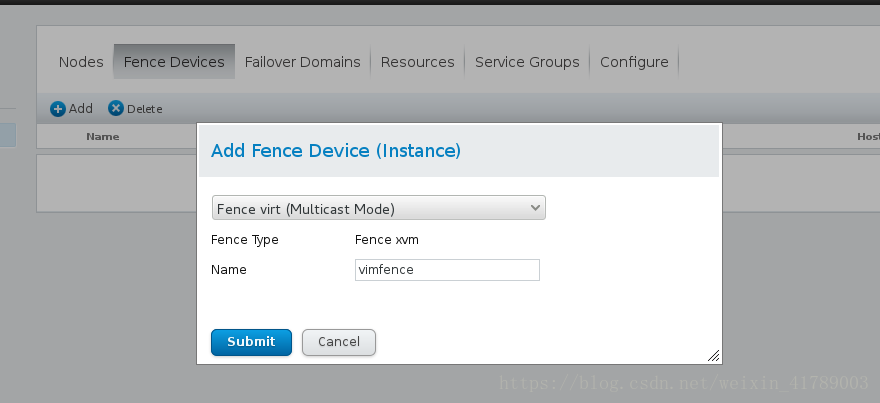
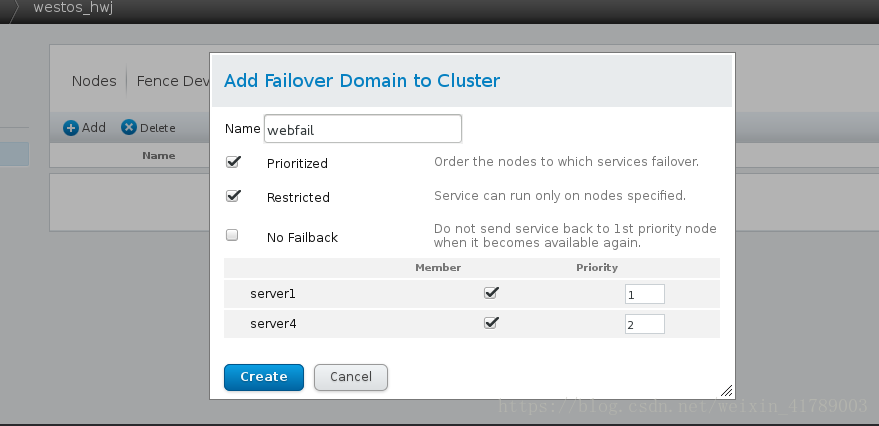
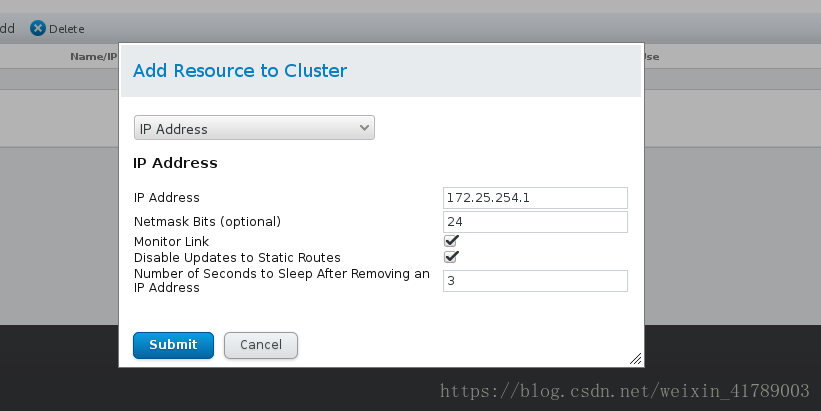
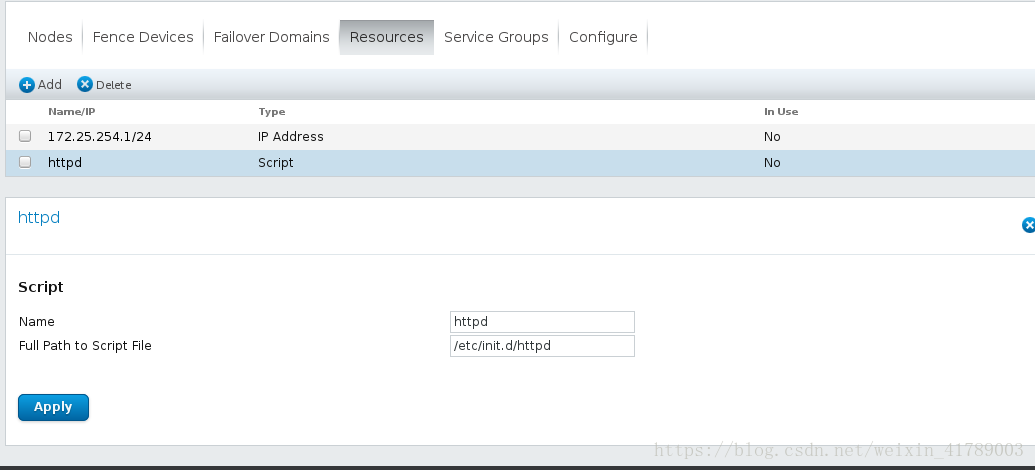
进入页面后进行相关配置
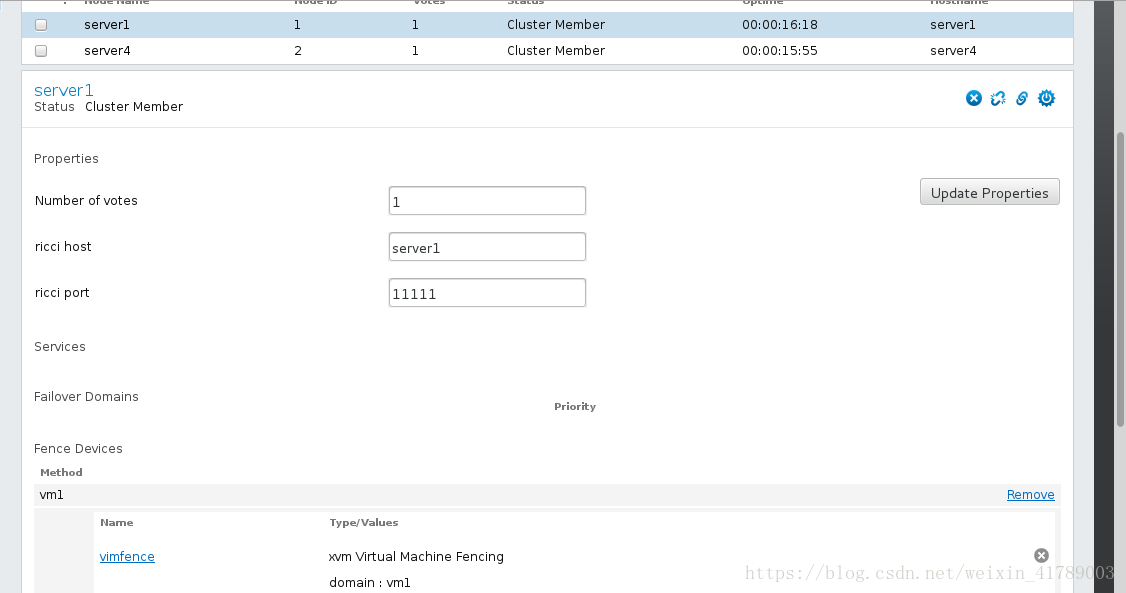
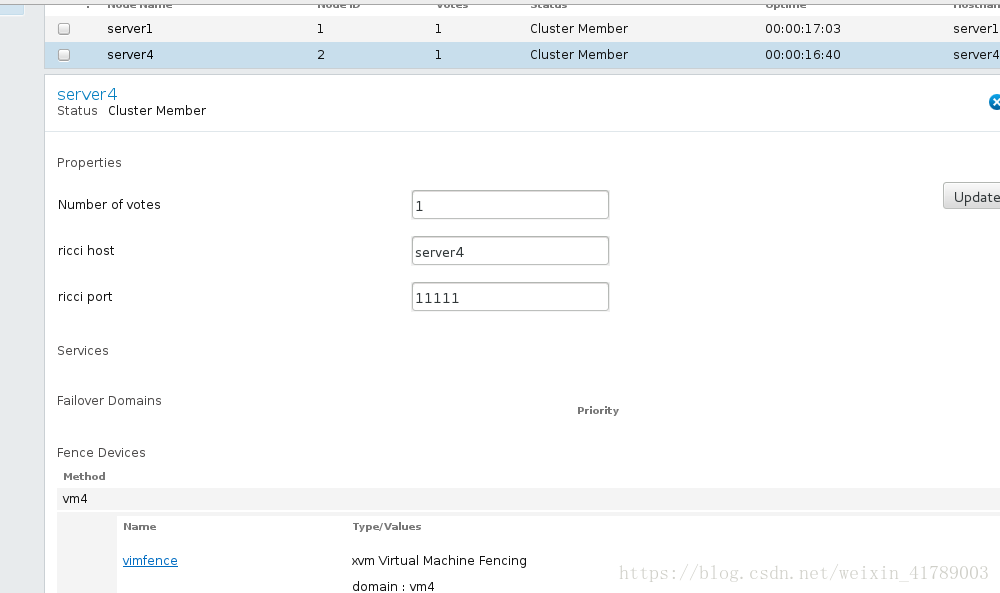
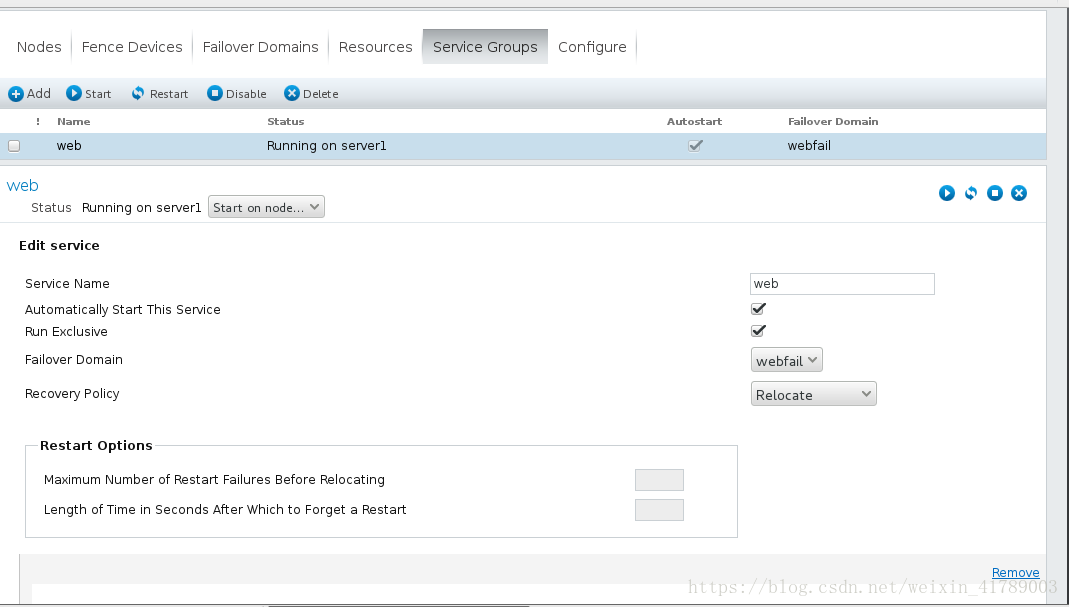


测试:
配置完成后在luci机:
可查看到当前配置
[root@server1 ~]# clustat
Cluster Status for westos_hwj @ Tue Jun 26 02:21:51 2018
Member Status: Quorate

 Member Name                             ID   Status
 ------ ----                             ---- ------
 server1                                     1 Online, Local, rgmanager
 server4                                     2 Online, rgmanager

 Service Name                   Owner (Last)                   State
 ------- ----                   ----- ------                   -----
 service:web                    server1                        started
当server4有损坏时:
[root@server1 ~]# fence_node server4    ##此命令可以让server4重启
fence server4 failed
[root@server1 ~]# clustat
Cluster Status for westos_hwj @ Tue Jun 26 02:23:14 2018
Member Status: Quorate

 Member Name                             ID   Status
 ------ ----                             ---- ------
 server1                                     1 Online, Local, rgmanager
 server4                                     2 Offline

 Service Name                   Owner (Last)                   State
 ------- ----                   ----- ------                   -----
 service:web                    server1                        started