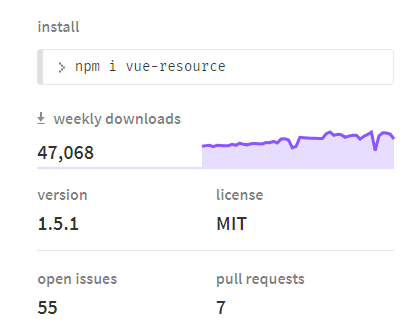
目前Vue项目中对json数据的请求一般使用两个插件vue-resource和axios, 但vue-resource已经不再维护, 而axios是官方推荐的且npm下载量已经170多万,github的Star已经接近4.5万, 再看看vue-resource


但是作为学习笔记,在学习axios的同时也会对比vue-resource的用法。
先看看同域请求
1 <div class="container">
2     <h1>vue request</h1>
3     <button @click="getJson">GET请求</button>
5  </div>
 1 methods: {
 2       getJson() {
 3         this.$http.get('/static/api/city.json', {
 4           params: {
 5             userId: '111'
 6           },
 7           headers: {
 8             'token': 'mitu'
 9           }
10         }).then((res) => {
11           console.log(res)
12         }, (err) => {
13           console.log(err)
14         })
15       },
16 }
请求结果 :

这是vue-resource的get请求方法, city.json存在于同域下的static目录, 注意,首先必须先安装 npm install -S vue-resource 然后在入口文件main.js中注册vue-resource

同理 axios的get请求如下 :
 1 import axios from 'axios'
 2 methods: {
 3       getJson() {
 4         axios.get('/static/api/city.json').then((res) => {
 5           console.log(res)
 6         }).catch((err) => {
 7           console.log(err)
 8         })
 9       }
10 }
区别在于 ,
1 .axios无需在main.js中注册,但需要在组件内部引入 import axios from 'axios'
2. vue-resource是绑定到vue实例中,所以调用时应该是 this.$http.get(), 而axios是独立的插件, 调用应该是 axios.get()
跨域请求 :
如直接把
axios.get('/static/api/city.json') 改成请求其他外部域的api如:
axios.get('https://c.y.qq.com/musichall/fcgi-bin/fcg_yqqhomepagerecommend.fcg')
返回结果如下 :

注意到有 No 'Access-Control-Allow-Origin' header, 表示浏览器端限制了跨域的请求。
解决的思路是,先让服务端通过跨域请求,然后客户端(浏览器)再向服务端请求数据,在此服务端起到一个代理的作用 。
1. 找到项目配置文件 config/index.js ,将proxyTable添加以下代码 :
proxyTable: {
      '/api': {
        target: 'https://c.y.qq.com/musichall/fcgi-bin/fcg_yqqhomepagerecommend.fcg',
        changeOrigin: true,
        pathRewrite: {
          '^/api': ''
        }
      }
},
'/api'是供客户端请求的接口 可自定义, 以上两个'/api'必须是一致的。表示客户端请求以 '/api'开头的目标都指向target
target: url ------ 是请求的外域目标api
changeOrigin ----- ture表示开启跨域请求
pathRewrite ---- 对目标资源重定向,可为空值
1  methods: {
2    getJson() {
3      axios.get('/api').then((res) => {
4       console.log(res)
5      }).catch((err) => {
6       console.log(err)
7      })
8    },
9 }

请求数据成功!