前一篇文件Android 自定义View之View的绘制流程(一)我们说清楚了一个XML布局文件是如何显示到界面上的,也给出了对应流程的简单UML流程图,对这点还有疑问了可以移步过去补充补充。在Android 自定义View之View的绘制流程(一)中我们中间说到了View的绘制流程最终的三个阶段Measure,Layout,Draw分别对应View的onMeasure,onLayout,onDraw方法,接下来就以一个Flowlayout的实例来分别对这几个过程进行说明。
1. 示例
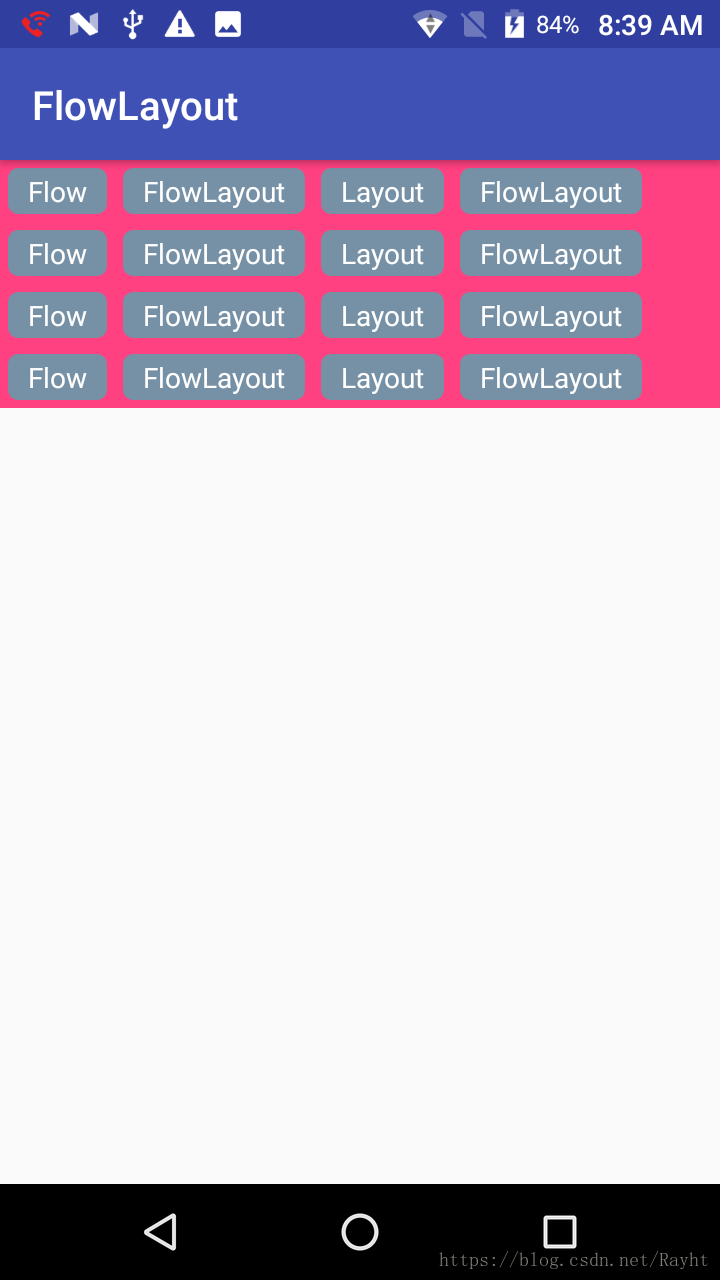
后文会结合一个自定义的FlowLayout来进行示例的说明,在这个示例中主要展示的是onMeasure和onLayout的使用方式,基本没有涉及到onDraw的过程,因为onDraw其实质是对Canvas的操作,后面有会专门的文章对Canvas的一引些高级用法进行记录说明,先看示例图:
2. Measure过程
我们知道Measure过程最终其实是调用View(ViewGroup)自身的onMeasure来实现的,那么我们首先来看一下 View的onMeasure方法(ViewGroup没有重写onMeasure方法我们这里只需要看View的就可以了):
    protected void onMeasure(int widthMeasureSpec, int heightMeasureSpec) {
        setMeasuredDimension(getDefaultSize(getSuggestedMinimumWidth(), widthMeasureSpec),
                getDefaultSize(getSuggestedMinimumHeight(), heightMeasureSpec));
    }
从上面代码中可以看到,这个方法中其实就是调用了setMeasuredDimension方法设置了自己的宽和高,通过两个值在getDefaultSize中产生,这两个值分别是:
- mMinWidth和mBackground中的大的值,其中mMinWidth是我们设置的android: minWidth属性值,mBackground为我们 传设置的背景属性,可能图片,Drable等;
- onMeasure方法中的参数widthMeasureSpec或heightMeasureSpec。
    public static int getDefaultSize(int size, int measureSpec) {
        int result = size;
        int specMode = MeasureSpec.getMode(measureSpec);
        int specSize = MeasureSpec.getSize(measureSpec);

        switch (specMode) {
        case MeasureSpec.UNSPECIFIED:
            result = size;
            break;
        case MeasureSpec.AT_MOST:
        case MeasureSpec.EXACTLY:
            result = specSize;
            break;
        }
        return result;
    }
这里首先通过MeasureSpec解析传入的widthMeasureSpec或者heightMeasureSpec解析出specMode和specSize,其实这里无论传入的是widthMeasureSpec还是heightMeasureSpec都是一个32位的数值,其前两们是我们通常说的模式Model,后30位是具体的数值,其实MeasureSpec.getMode(measureSpec)和MeasureSpec.getSize(measureSpec)就是通过简单的移位操作取其前2位为specModel,后30位为specSize,从上面getDefaultSize方法实现
中我们不难发现specModel有3种可能存在的值:
- MeasureSpec.UNSPECIFIED, 简单理解,父View不对View做具体的限制,子View可根据自己的需要自由设置自己的宽高值,所以我们看到,在getDefaultSize方法中设置了传入的getSuggestedMinimumWidth()返回的值,当然其实我们在自定义View时可以根据需要传其它值。
- MeasureSpec.AT_MOST,对应我们设置的wrap_content属性,意思是最多不能超过父View指定的大小,即specSize的值,我们在自定义ViewGroup时一般会对所有的子View进行测量然后根据子View的值来计算自己的大小。
- MeasureSpec.EXACTLY,表示父容器已经测量出精确的大小,也是ChildView的最终大小,在实际代码中一般我们设置march_parent或者设置具体的值时测量模式就会是MeasureSpec.EXACTLY。
好了,我们回过头来再看getDefaultSize方法的逻辑,在方法逻辑中也是分别对这3种情况进行处理:
- EXACTLY:所上所述EXACTLY表示以父容器的大小为精确大小,即这里测量的大小等于specSize;
- AT_MOST:与EXACTLY相同;
- UNSPECIFIED:取mMinWidth与mBackground的较大值。
好了,说完了默认情况,我们来看示例FlowLayout中的onMeasure方法的处理逻辑,先上代码,再来分析:

    @Override
    protected void onMeasure(int widthMeasureSpec, int heightMeasureSpec) {
        super.onMeasure(widthMeasureSpec, heightMeasureSpec);
        Log.i("Leiht","测量布局...");

        int widthModel = MeasureSpec.getMode(widthMeasureSpec);
        int heightModel = MeasureSpec.getMode(heightMeasureSpec);

        int widthSpecSize = MeasureSpec.getSize(widthMeasureSpec);
        int heightSpecSize = MeasureSpec.getSize(heightMeasureSpec);

        //最终测量出的宽度
        int measuredWith = 0;
        //最终测量出的高度
        int measuredHeight = 0;

        //测量行的宽
        int curLineW = 0;
        //测量行的高
        int curLineH = 0;

        //父容器的宽高测量模式都是EXACTLY,即'match_parent',测量宽度和高度就等于父容器的宽高
        if(widthModel == MeasureSpec.EXACTLY && heightModel == MeasureSpec.EXACTLY) {
            measuredWith = widthSpecSize;
            measuredHeight = heightSpecSize;
        }else {
            //当前被测量的子View的宽
            int childWidth;
            //当前被测量的子View的高
            int childHeight;

            int count = getChildCount();
            //保存每行的View
            List<View> viewList = new ArrayList<>();
            for (int i = 0; i < count; i++) {
                View childView = getChildAt(i);

                //测量子View
                measureChild(childView, widthMeasureSpec, heightMeasureSpec);

                MarginLayoutParams layoutParams = (MarginLayoutParams) childView.getLayoutParams();

                childWidth = childView.getMeasuredWidth() + layoutParams.leftMargin +
                        layoutParams.rightMargin;
                childHeight = childView.getMeasuredHeight() + layoutParams.topMargin +
                        layoutParams.bottomMargin;

                //该行的宽度大于measuredWith,换行
                if(curLineW + childWidth > widthSpecSize) {
                    //-------------记录该子View之前行的信息Start----------
                    //宽度取各行中最宽的为准
                    measuredWith = Math.max(measuredWith, curLineW);
                    //高度为所有行的高度之和
                    measuredHeight = measuredHeight + curLineH;
                    //-------------记录该子View之前行的信息End----------

                    //该childView属于下一行的第一个View,记录新信息
                    //新行的宽高等于当前行第一个View的宽高
                    curLineW = childWidth;
                    curLineH = childHeight;
                }else {
                    curLineW += childWidth;
                    curLineH = Math.max(curLineH, childHeight);

                    //该子View不需要换行,记录在List中
                    viewList.add(childView);
                }

                //最后一个,需要手动换行
                if(i == count - 1) {
                    measuredWith = Math.max(measuredWith, childWidth);
                    measuredHeight = measuredHeight + curLineH;
                }
             }
        }

        if(widthModel == MeasureSpec.EXACTLY) {
            measuredWith = Math.max(measuredWith, widthSpecSize);
        }
        //设置最终测量宽高
        setMeasuredDimension(measuredWith, measuredHeight);
    }
其实相对于自定义View来说,自定义ViewGroup的测量,因为ViewGroup需要考虑到其ChildView而View只需要根据父容器的模式和测量值给出自己的值便可以了,所以这里以容器了例说明,
- 首先处理模式为MeasureSpec.EXACTLY的情况,这里直接令最终的测量值等于父容器测量的大小,即widthSpecSize与heightSpecSize.
- 其实处理模式为AT_MOST与UNSPECIFIED的情况,这里实现得比较简单,一并在这里处理了,这里循环其每一个ChildView,分别调用measureChild(childView, widthMeasureSpec, heightMeasureSpec)对ChildView进行测量,然后通过MarginLayoutParams获取ChildView的测量宽高,累加如果大于最大宽度则换行,最后的高度是所有行的高度累加,亮度是每一行相比最大值,注意,在处理ChildView时需要考虑其Margin;
- 最后与默认实现方式一样,调用setMeasuredDimension(measuredWith, measuredHeight)设置最终的测量宽高。
测量工作到这里就完成了,接下来,我们再来看摆放Layout
3. Layout过程
与Measure过程类似,ViewGroup皆是分别对子ViewLayout的过程,从上一篇文章中我们知道View或者ViewGroup的Layout最终是调用自己的onLayout方法来完成的,我们分别来看View和ViewGroup的onLayout方法:
View的onLayout方法:
    protected void onLayout(boolean changed, int left, int top, int right, int bottom) {
    }
ViewGroup的onLayout方法:
    @Override
    protected abstract void onLayout(boolean changed,
            int l, int t, int r, int b);
从代码我们可以看出来,View的onLayout方法为一个普通方法,没有具体实现,自定义View时可以选择重写或不重写,而ViewGroup的onLayout方法为一个abstract方法,我们在自定义ViewGroup时必须实现这个方法来实现自己的Layout逻辑,注意是必须,因为ViewGroup需要在这个方法中调用ChildView的Layout方法。
好了,我们来看上面这个示例的onLayout方法的具体实现:
    @Override
    protected void onLayout(boolean changed, int l, int t, int r, int b) {
        Log.i("Leiht","摆放布局...");

        //每个子View的布局的X,减去左外边距
        int startX = getPaddingLeft();
        //每个子View的布局的X
        int startY = getPaddingTop();

        //onMeasure的宽度
        int measuredWidth = getMeasuredWidth();
        //onMeasure的高度
        int measureddHeight = getMeasuredHeight();

        int childUsedWidth = 0;
        int childUsedLineHeight = 0;
        int childCount = getChildCount();

        for(int i = 0; i < childCount; i++) {
            View childView = getChildAt(i);

            if(childView.getVisibility() == View.GONE) {
                continue;
            }

            MarginLayoutParams layoutParams = (MarginLayoutParams) childView.getLayoutParams();

            int childMeasuredWidth = childView.getMeasuredWidth();
            int childMeasuredHeight = childView.getMeasuredHeight();

            childUsedWidth = childMeasuredWidth + layoutParams.leftMargin + layoutParams.rightMargin;
            //startX已减去左外边距,这里需要减去右外边距
            if(startX + childUsedWidth > measuredWidth - getPaddingRight()) {
                //恢复左起点
                startX = getPaddingLeft();
                //累加行高
                startY += childUsedLineHeight;
            }
            //加上自己的边距
            int leftChildView = startX + layoutParams.leftMargin;
            int topChildView = startY + layoutParams.topMargin;
            int rightChildView = leftChildView + childMeasuredWidth;
            int bottomChildView = topChildView + childMeasuredHeight;

            childView.layout(leftChildView, topChildView, rightChildView, bottomChildView);

            startX += childMeasuredWidth + layoutParams.leftMargin + layoutParams.rightMargin;
            //计算每一行使用的高度
            childUsedLineHeight = Math.max(childUsedLineHeight, childMeasuredHeight + layoutParams.topMargin + layoutParams.bottomMargin);
        }
    }
这里其实逻辑也很简单
- 首先,取开始位置,这里主要是从getPaddingLeft()和getPaddingTop()开始布局ChildView。
- 然后循环第一个ChildView,通过MarginLayoutParams获取ChildView的测量宽度和测量高度,通过前一个ChildView的摆放位置加上自己的MarginLeft和MarginTop获取自己的摆放位置,这里需要注意判断是否需要换行,即当前行已摆放的ChildView加上正在Layout的ChildView,如果超过最大宽度则换行从0+getPaddingLeft()开始重新Layout新的行。
- 最后调用ChildView.layout(leftChildView, topChildView, rightChildView, bottomChildView)进行子View的Layout操作确定ChildView的位置。
4. Draw过程
Draw是通过View的onDraw方法完成的,在这个方法中其实是通过Canvas来完成我们在界面上看到的一系列效果的绘制,如文字,图形等,这里就不详细介绍Canvas的使用技巧了。
5. 总结
简单总结onMeasure() -> onLayout() -> onDraw().