转载地址:https://www.cnblogs.com/nangxi/articles/7630579.html
Angular组件之间的交互分为:
1.通过输入型绑定把数据从父组件传到子组件。
2.通过setter截听输入属性值的变化
3.通过ngOnChanges()来截听输入属性值的变化
4.父组件监听子组件的事件
5.父组件与子组件通过本地变量互动
6.父组件调用@ViewChild()
7.父组件和子组件通过服务来通讯
这些在Angular的中文官方文档都有,类似的博客一大堆,写这篇博客的目的不是说把人家做过的东西再做一遍,而是把人家做过的东西转化成自己的东西,这样才是有用的。
在博客正式开始之前我们先介绍一下项目目录
----------app.component.ts
----------app.component.html
----------app.component.css
----------app.module.ts
----------child(文件夹)
--------------child.component.ts
--------------child.component.html
--------------child.component.css
一、通过输入型绑定把数据从父组件传到子组件
这个通讯方法的操作很简单,父组件发送自己的数据给子组件,子组件接收父组件传递过来的数据。
1.app.component.html
<child [childData]="appData"></child><!--childData是子组件的接收参数,appData是父组件传递的数据,整个数据传递过程的重点,桥梁-->
2.app.component.ts

import { Component } from '@angular/core';
import { ChildComponent } from './child/child.component';

@Component({
  selector: 'app-root',
  templateUrl: './app.component.html',
  styleUrls: ['./app.component.css']
})
export class AppComponent {
  title = 'app';
  appData=['Apple','Banana','watermelon','pear'];
}
3.child.component.ts
import { Component,Input } from '@angular/core';//记得导入Input装饰器

@Component({
  selector: 'child',
  templateUrl: './child.component.html',
  styleUrls: ['./child.component.css']
})
export class ChildComponent {
  title = 'child';
  @Input() childData:any;//接收数据的接口
}
4.child.component.html
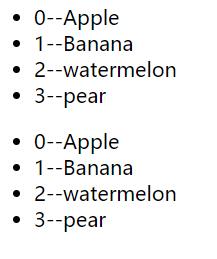
<ul>
    <li *ngFor="let children of childData; let num1 = index">{{num1}}--{{children}}</li>
</ul>
<ul>
    <li *ngFor="let children of childData; index as num2">{{num2}}--{{children}}</li><!--index的第二种写法-->
</ul>
我们第一个实验将父组件的数组传递给子组件然后渲染出来,效果是这样的
二、通过setter截听输入属性值的变化
这种交互方式的书写格式有些不太符合我们平时的书写规范
1.app.component.html
<child *ngFor="let app of appData" [child]="app"></child>
2.app.component.ts
import { Component } from '@angular/core';

@Component({
  selector: 'app-root',
  templateUrl: './app.component.html',
  styleUrls: ['./app.component.css']
})
export class AppComponent {
  title = 'app';
  appData=['Apple','Banana',' ','pear']; //父组件数据
}
3.child.component.ts
import { Component,Input } from '@angular/core';
@Component({
selector: 'child',
templateUrl: './child.component.html',
styleUrls: ['./child.component.css']
})
export class ChildComponent {
title = 'child';
private _name = ''; //定义一个私有向量,来暂时储存父组件传递过来的数据
@Input() set child(name: string) { //child是我们用来接收父组件传递过来的数据的一个变量,我们用setter来截取到这个变量,然后做一些修改,child这个变量名
//它是取决于父组件app.component.html里面的[child]="app",不能随便改动,child的形参名字可以随便修改
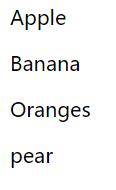
this._name = name.trim() || 'Oranges'; //会trim掉名字里的空格,并把空值替换成Oranges。
}
get child(): string{ //用get重新获取重置过后的child变量,这个过程中_name这个是有变量就用到了
return this._name;
}
}
4.child.component.html
<p>{{child}}</p>
我们第二个实验的效果是这样的
三、通过ngOnChanges()来截听输入属性值的变化
OnChanges是一个生命周期钩子,一旦检测到该组件(或指令)的输入属性发生了变化,Angular就会调用它的ngOnChanges()方法。
1.app.component.html
<table>
    <tr>
        <td>ID</td>
        <td><input type="text" [(ngModel)]="id"/></td>
    </tr>
    <tr>
        <td>PassWord</td>
        <td><input type="text" [(ngModel)]="password"/></td> <!--使用ngModel要记住在app.module.ts里面添加FormsModule-->
    </tr>
    <tr colspan="2">
        <td><button (click)="reset()">Reset Log</button></td>
    </tr>
</table>
<div>
    <child [id]="id" [password]="password"></child>
</div>
2.app.component.ts
import { Component,ViewChild } from '@angular/core';//这里使用了我们第六点将会用到的父组件调用@ViewChild(),第六点细讲
import { ChildComponent } from './child/child.component';

@Component({
  selector: 'app-root',
  templateUrl: './app.component.html',
  styleUrls: ['./app.component.css']
})
export class AppComponent {
    title = 'app';
    id:number;
    password:number;
    @ViewChild(ChildComponent) childView: ChildComponent;//此处先忽略不看
    constructor() {
      this.reset();//构造函数,有初始化id和password的功能
    }

    reset() {
        this.id = 100001;
        this.password = 123456;
        if (this.childView) {
            this.childView.reset();
        }
      }
}
3.child.component.ts
import { Component, Input, OnChanges, SimpleChanges } from '@angular/core';

@Component({
  selector: 'child',
  templateUrl: './child.component.html',
  styleUrls: ['./child.component.css']
})
export class ChildComponent implements OnChanges {
  title = 'child';
  @Input() id: number;
  @Input() password: number;
  changeLog: string[] = []; //这个数组用来存放修改日志,修改一个input就会储存相应的记录
  ngOnChanges(changes: SimpleChanges) {
      for (let propName in changes) {
          let chng = changes[propName];
          let cur  = JSON.stringify(chng.currentValue);//修改前的数据
          let prev = JSON.stringify(chng.previousValue);//修改后的数据
          this.changeLog.push(`${propName}被修改了: 前一个数据 = ${cur}, 后一个数据 = ${prev}`);
        }
    }
    reset() {
      this.changeLog.length = 0; //清除日志
    }
}
4.child.component.html
<div class="hero">
    <h4>-- Change Log --</h4>
    <div *ngFor="let chg of changeLog">{{chg}}</div> <!--将日志一条一条打印出来-->
</div>
我们第三个实验的效果是这样的

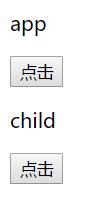
四、父组件监听子组件的事件
通过@Output装饰器自定义一个方法,在需要emits(向上弹射)的函数里面弹射变量
1.app.component.html
<p>{{title}}</p>
<child (onClick)="onCli($event)"></child> <!--onClick是子组件自定义的事件,触发onClick事件,执行父组件的onCli()方法-->
2.app.component.ts
import { Component } from '@angular/core';
@Component({
selector: 'app-root',
templateUrl: './app.component.html',
styleUrls: ['./app.component.css']
})
export class AppComponent {
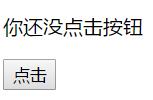
title="你还没点击按钮";
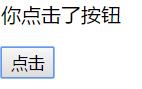
onCli(isClick: boolean) { //父组件的方法,更换title的值
if(isClick){ //如果子组件弹射出来的变量为true
this.title="你点击了按钮"; //那么就更改title
}
}
}
3.child.component.ts
import { Component, EventEmitter, Output } from '@angular/core';//注意导入

@Component({
  selector: 'child',
  templateUrl: './child.component.html',
  styleUrls: ['./child.component.css']
})
export class ChildComponent{
  title = 'child';
  @Output() onClick = new EventEmitter<boolean>();//暴露自定义事件onClick
  click(isClick: boolean) { //click()只是一个普通的方法
    this.onClick.emit(isClick);//向父组件弹射isClick变量,这个变量在button被点击的时候触发
  }
}
4.child.component.html
<button (click)="click(true)">点击</button> <!--给click方法传入true-->
1.在子组件里面定义并暴露出自定义事件;
2.在子组件里面需要弹射的函数里面弹射变量;
3.在父组件里面通过$event接收变量。
我们第四个实验的效果是这样的
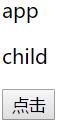
五、父组件与子组件通过本地变量互动
这种通讯比较简单,而且父组件可以同时调用子组件的变量或方法1.app.component.html
<p>{{title}}</p><!--调用父组件自己的变量-->
<p>{{data.title}}</p><!--调用子组件的变量-->
<child #data></child><!--在父组件模板里,新建一个本地变量来代表子组件,然后利用这个变量来读取子组件的属性和调用子组件的方法-->
<button (click)="data.click()">点击</button><!--调用子组件的方法-->
2.app.component.ts
import { Component } from '@angular/core';

@Component({
  selector: 'app-root',
  templateUrl: './app.component.html',
  styleUrls: ['./app.component.css']
})
export class AppComponent {
    title="app";//父组件的变量
}
3.child.component.ts
import { Component } from '@angular/core';
@Component({
selector: 'child',
templateUrl: './child.component.html',
styleUrls: ['./child.component.css']
})
export class ChildComponent{
title = 'child';//子组件的变量
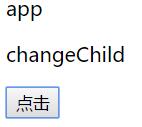
click(){//子组件的方法
this.title="changeChild";
}
}
child.component.html不用编写代码
我们第五个实验的效果是这样的
六、父组件调用@ViewChild()
这种父子组件之间的通讯方式也很容易理解,项目代码和第五个通讯方式差不多
1.app.component.html
<p>{{title}}</p>
<p>{{data.title}}</p>
<child #data></child>
<button (click)="onclick()">点击</button><!--注意这里,跟第五个方法有些区别-->
2.app.component.ts
import { Component } from '@angular/core';
import { ViewChild } from '@angular/core';
import { ChildComponent } from './child/child.component';

@Component({
  selector: 'app-root',
  templateUrl: './app.component.html',
  styleUrls: ['./app.component.css']
})
export class AppComponent {
    title="app";
    @ViewChild(ChildComponent)//通过@ViewChild属性装饰器,将子组件CountdownTimerComponent注入到私有属性timerComponent里面,此处不能加分号。
    private child: ChildComponent;
    onclick(){
        this.child.click();
    }
}
3.child.component.ts
import { Component } from '@angular/core';

@Component({
  selector: 'child',
  templateUrl: './child.component.html',
  styleUrls: ['./child.component.css']
})
export class ChildComponent{
  title = 'child';
  click(){
      this.title="changeChild";
  }
}
child.component.html也是不用编写代码,我们第六个实验的效果跟第五个是一样的,这里不再讲述。
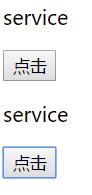
七、父组件和子组件通过服务来通讯
这种服务通讯方式我在 一篇文章有详细地解析过。这个实验要在app.component.html加入新的文件Service.ts
1.app.component.html
<p>{{title}}</p>
<button (click)="onclick()">点击</button>
<child></child>
2.app.component.ts
import { Component } from '@angular/core';
import { ChildComponent } from './child/child.component';
import { Service } from './Service';//导入服务

@Component({
  selector: 'app-root',
  templateUrl: './app.component.html',
  styleUrls: ['./app.component.css']
})
export class AppComponent {
    title='app';
    constructor(public pService: Service) { //原来的写法是这样的pService = new Service();
     }
    onclick(){
        this.title = this.pService.getData();
        console.log(this.title);
    }
}
3.child.component.ts
import { Component } from '@angular/core';
import { Service } from '../Service';

@Component({
  selector: 'child',
  templateUrl: './child.component.html',
  styleUrls: ['./child.component.css']
})
export class ChildComponent{
  title = 'child';
  constructor(public pService: Service) {
    }
  onclick(){
    this.title = this.pService.getData();
  }
}
4.child.component.html
<p>{{title}}</p>
<button (click)="onclick()">点击</button>
app.component.html和child.component.html,app.component.ts和child.component.ts的代码几乎一样,目的是要展示出服务在父子组件甚至任何组件里面的使用
5.Service.ts
import {Injectable} from "@angular/core"

@Injectable()
export class Service {
  title='service';//公共变量
  getData() {//公共方法
    return this.title;
  }
}
6.app.module.ts
import { BrowserModule } from '@angular/platform-browser';
import { NgModule } from '@angular/core';

import { AppComponent } from './app.component';
import { ChildComponent } from './child/child.component';
import { Service } from './Service';//导入服务

@NgModule({
  declarations: [
    AppComponent,
    ChildComponent
  ],
  imports: [
    BrowserModule
  ],
  providers: [Service],//注册服务
  bootstrap: [AppComponent]
})
export class AppModule { }
实验七的效果是这样的,在点击之前
点击之后
八、结语
至此七种父子组件之间的交互方式解析完毕,大家在不同的代码情况因地制宜,选择最合适的方式!