https://www.kubernetes.org.cn/4041.html
第1章 环境概述
环境介绍:
OS:Linux CentOS 7.3 3.10.0-514.el7.x86_64
Master IP:192.168.100.50
| 组件 | 版本 | 部署方式 | 安装目录或访问入口 |
| etcd | 3.3.2 | 二进制 | /usr/local/kubernetes/bin/etcd |
| docker | 18.03.0-ce | 二进制 | /usr/bin/docker |
| flannel | 0.10.0 | 二进制 | /usr/local/kubernetes/bin/flanneld |
| kubernetes | 1.10.0 | 二进制 | /usr/local/kubernetes/bin |
| kube-apiserver、kube-controller-manager、kubectl、kube-proxy、kube-scheduler | |||
Node IP:192.168.100.51/52
| 组件 | 版本 | 部署方式 | 安装目录或访问入口 |
| etcd | 3.3.2 | 二进制 | /usr/local/kubernetes/bin/etcd |
| docker | 18.03.0-ce | 二进制 | /usr/bin/docker |
| flannel | 0.10.0 | 二进制 | /usr/local/kubernetes/bin/flanneld |
| kubernetes | 1.10.0 | 二进制 | /usr/local/kubernetes/bin |
| Kubectl、kubelet、kube-proxy | |||
第2章 部署ETCD
Etcd需要在3台主机上都安装。
1、注意编辑install_etcd.sh脚本中ifconfig获取本机ip地址的命令,按照实际情况进行修改以正确过滤获得主机IP。
2、在3台主机上分别执行如下命令
./install_etcd.sh etcd01 etcd01=http://192.168.100.50:2380,etcd02=http://192.168.100.51:2380,etcd03=http://192.168.100.52:2380
./install_etcd.sh etcd02 etcd01=http://192.168.100.50:2380,etcd02=http://192.168.100.51:2380,etcd03=http://192.168.100.52:2380
./install_etcd.sh etcd03 etcd01=http://192.168.100.50:2380,etcd02=http://192.168.100.51:2380,etcd03=http://192.168.100.52:2380
注意:执行上述命令时,不能等一台完全执行成功了再去下一台执行,因为etcd启动后会进行选举leader投票,如果各etcd启动间隔过大,会导致etcd集群启动失败。
3、确认
#etcdctl member list
b12108f5c8234dfb: name=etcd02 peerURLs=http://192.168.100.51:2380 clientURLs=http://192.168.100.51:2379 isLeader=false
d5b914ca14c97aed: name=etcd03 peerURLs=http://192.168.100.52:2380 clientURLs=http://192.168.100.52:2379 isLeader=true
fc3d5384c4e24956: name=etcd01 peerURLs=http://192.168.100.50:2380 clientURLs=http://192.168.100.50:2379 isLeader=false
第3章 安装Flannel
Flannel需要在所有主机上安装。
1、编辑install_flannel.sh脚本设置正确的网卡接口及etcd键值
2、在3台主机上分别执行下面命令
./install_flannel.sh http://192.168.100.50:2379,http://192.168.100.51:2379,http://192.168.100.52:2379
3、确认
# ifconfig flannel.1
flannel.1: flags=4163<UP,BROADCAST,RUNNING,MULTICAST> mtu 1450
inet 172.18.64.0 netmask 255.255.255.255 broadcast 0.0.0.0
ether 2e:ff:72:f0:0f:a8 txqueuelen 0 (Ethernet)
RX packets 828 bytes 80054 (78.1 KiB)
RX errors 0 dropped 0 overruns 0 frame 0
TX packets 876 bytes 71341 (69.6 KiB)
TX errors 0 dropped 0 overruns 0 carrier 0 collisions 0
第4章 部署Docker
Docker需要在所有主机上安装。
此次docker部署采用二进制安装方式进行。
1、编辑 install-docker.sh
在二进制安装脚本中添加flannel参数
2、执行安装脚本
./install-docker.sh docker-18.03.0-ce.tgz
3、确认
# docker version
Client:
Version: 18.03.0-ce
API version: 1.37
Go version: go1.9.2
Git commit: 0520e24
Built: Wed Mar 21 23:05:52 2018
OS/Arch: linux/amd64
Experimental: false
Orchestrator: swarm
Server:
Engine:
Version: 18.03.0-ce
API version: 1.37 (minimum version 1.12)
Go version: go1.9.4
Git commit: 0520e24
Built: Wed Mar 21 23:14:54 2018
OS/Arch: linux/amd64
Experimental: false
第5章 部署Kubernetes
1、部署Master节点
在192.168.100.50主机上执行下面命令
./install_k8s_master.sh 192.168.100.50 http://192.168.100.50:2379,http://192.168.100.51:2379,http://192.168.100.52:2379
2、部署Minion节点
在51和52主机上执行下面命令
./install_k8s_node.sh 192.168.100.50
3、确认集群状态
# kubectl get cs
NAME STATUS MESSAGE ERROR
scheduler Healthy ok
etcd-2 Healthy {“health”:”true”}
etcd-0 Healthy {“health”:”true”}
etcd-1 Healthy {“health”:”true”}
controller-manager Healthy ok
# kubectl get nodes
NAME STATUS ROLES AGE VERSION
webgate2 Ready <none> 1d v1.10.0
webgate3 Ready <none> 1d v1.10.0
至此,一个简单的kubernetes集群就搭建完成了。
第6章 部署Busybox容器
1、准备容器镜像
因为实验环境无法连外网,也没有构建registry,所以只能使用node上的本地镜像来跑容器。要把busybox容器跑起来,除了要有busybox镜像外,还需要pause镜像。
镜像使用上传tar文件用docker load的方式在每台node导入。
# docker images
REPOSITORY TAG IMAGE ID CREATED SIZE
busybox 1.0 8ac48589692a 7 weeks ago 1.15MB
busybox latest 8ac48589692a 7 weeks ago 1.15MB
gcr.io/google_containers/kubernetes-dashboard-amd64 v1.8.3 0c60bcf89900 3 months ago 102MB
gcr.io/google_containers/k8s-dns-sidecar-amd64 1.14.7 db76ee297b85 7 months ago 42MB
gcr.io/google_containers/k8s-dns-kube-dns-amd64 1.14.7 5d049a8c4eec 7 months ago 50.3MB
gcr.io/google_containers/k8s-dns-dnsmasq-nanny-amd64 1.14.7 5feec37454f4 7 months ago 41MB
gcr.io/google_containers/pause-amd64 3.0 99e59f495ffa 2 years ago 747kB
上面images包含下一节用到的dns和dashboard镜像。
2、编写busybox_rc.yaml
具体内容见本文对应介质包内文件内容。
3、运行rc
./ kubectl create -f /root/busybox-rc.yaml
4、确认
docker exec -it {容器ID} sh进入其中一个容器,执行命令进行验证。
下面再部署下kube-dns和DashBoard服务。
第7章 部署kube-dns和DashBoard服务
1、部署kube-dns服务
Kube-dns作为集群内部的域名解析服务,没有它就只能使用ip地址来相互访问。
注意修改kube-dns.yaml中的clusterIP地址和kube-master-url地址。
执行命令:kubectl create -f kube-dns.yaml,部署启动kube-dns服务。
注意使用的是kube-dns1.14.7版本镜像,1.14.1镜像在docker ce 18.03下跑不起来。镜像也要手工load到本地。
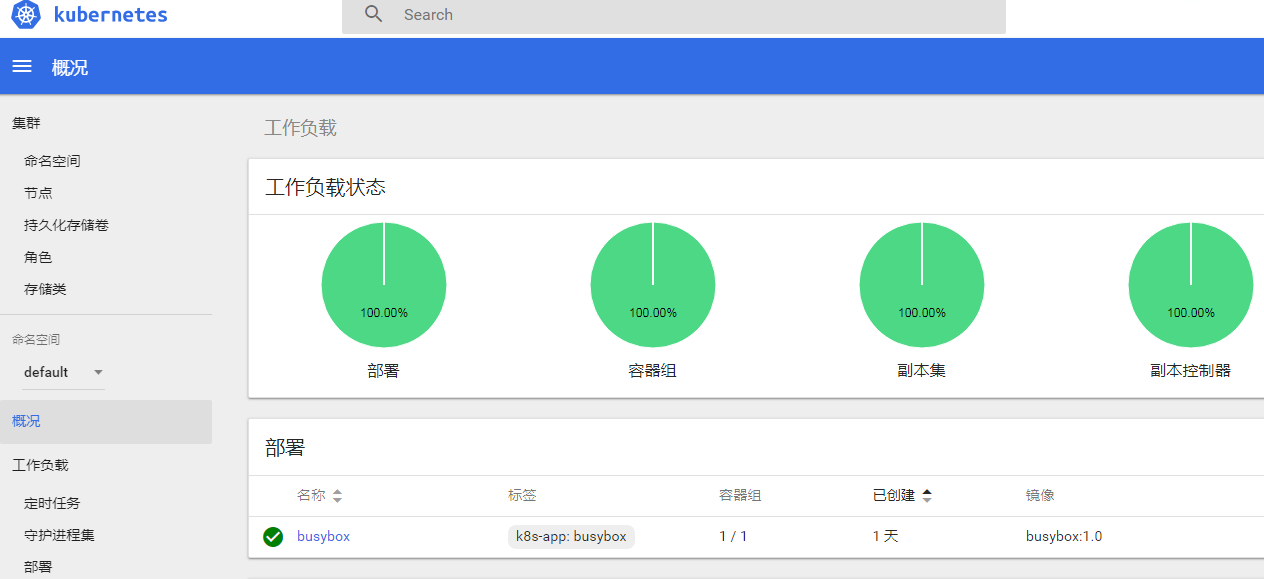
2、部署DashBoard服务
注意修改kubernetes-dashboard.yaml中的API server地址和开放的Node port。
执行命令:kubectl create -f kubernetes-dashboard.yaml,部署启动dashboard服务。
使用get pods命令找出pod运行的node,使用http://{NodeIP}:30090访问即可。
注意:镜像也要手工load到本地。
3、确认
# kubectl get pods -o wide –namespace kube-system
NAME READY STATUS RESTARTS AGE IP NODE
kube-dns-6fbf8d6694-5bxxh 3/3 Running 0 12d 172.18.90.2 webgate2
kubernetes-dashboard-dbd4c76f-wq8sd 1/1 Running 0 12d 172.18.64.2 webgate3
文章对应的安装介质及镜像下载地址:
链接: https://pan.baidu.com/s/17KDR-XxvbUu8Bamjwqbs-w 密码: c3ns