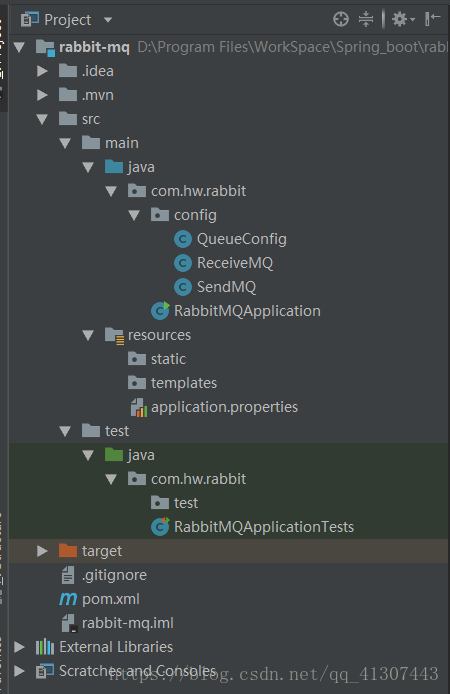
1.创建SpringBoot项目,项目结构如下:
2.在pom.xml中添加Maven依赖
<!-- rabbitMQ -->
<dependency>
	<groupId>org.springframework.boot</groupId>
	<artifactId>spring-boot-starter-amqp</artifactId>
	<version>1.5.2.RELEASE</version>
</dependency>
3.在配置文件中添加RabbitMQ的配置信息。
spring.rabbitmq.host=127.0.0.1
spring.rabbitmq.port=5672
spring.rabbitmq.username=guest
spring.rabbitmq.password=guest
4.创建一个队列类
import org.springframework.amqp.core.Queue;
import org.springframework.context.annotation.Bean;
import org.springframework.context.annotation.Configuration;

@Configuration
public class QueueConfig {

    @Bean
    public Queue queue(){
        return new Queue("hello_rabbit");
    }
}
5.实现一个发送消息的类
import org.springframework.amqp.core.AmqpTemplate;
import org.springframework.beans.factory.annotation.Autowired;
import org.springframework.stereotype.Component;

import java.util.Date;
import java.util.Random;

@Component
public class SendMQ {

    @Autowired
    private AmqpTemplate amqpTemplate;

    public void send(){

        String mq = "Hello RabbitMQ" + new Date();

        this.amqpTemplate.convertAndSend("hello_rabbit" , mq);
        String ms = "Hello RabbitMQ" + new Random();
        this.amqpTemplate.convertAndSend("hello_rabbit" , ms);
    }
}
6.定义一个消息接收类
import org.springframework.amqp.rabbit.annotation.RabbitListener;
import org.springframework.stereotype.Component;

@Component
public class ReceiveMQ {

    @RabbitListener(queues = "hello_rabbit")
    public void process(String mag){
        System.out.println("接收的消息::"+mag);
    }

}
7.定义测试类
import com.hw.rabbit.config.SendMQ;
import org.junit.Test;
import org.junit.runner.RunWith;
import org.springframework.beans.factory.annotation.Autowired;
import org.springframework.boot.test.context.SpringBootTest;
import org.springframework.test.context.junit4.SpringRunner;

@RunWith(SpringRunner.class)
@SpringBootTest(classes = RabbitMQApplication.class)
public class RabbitMQApplicationTests {

	@Autowired
	private SendMQ sendMQ;

	@Test
	public void contextLoads() {
		sendMQ.send();
	}
}
注意:4,5,6中的 hello_rabbit 要一致。
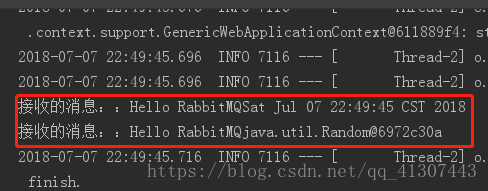
8.启动项目,在控制台输出如下:
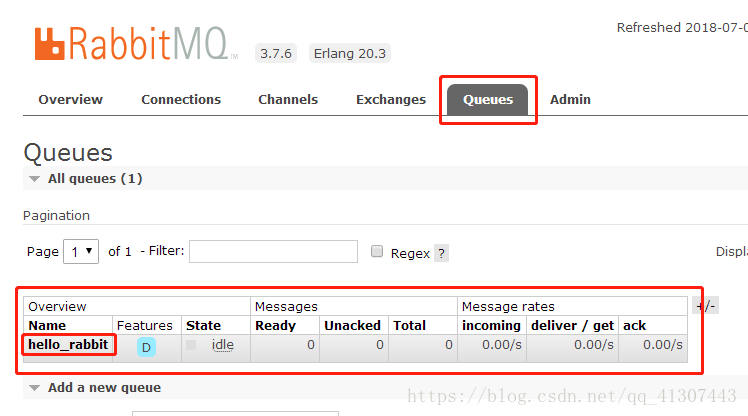
在地址栏输入:127.0.0.1:15672,登录RabbitMQ ,在Queues模块下有队列如下: