第一步检查是否已安装
1:检查是否本地已经安装了mysql
rpm -qa | grep mysql2:卸载以前的mysql
rpm -e 已经存在的MySQL全名开始安装
保持联网状态下,现在执行下面命令
yum install mysql继续执行下面命令:
yum install mysql-devel执行命令过程中遇到类似这样的都是输入y,继续
总计:8.9 M
总下载量:3.4 M
Is this ok [y/d/N]:
然后执行下面3个命令:
# wget http://dev.mysql.com/get/mysql-community-release-el7-5.noarch.rpm
# rpm -ivh mysql-community-release-el7-5.noarch.rpm
# yum install mysql-community-server
执行完,重启mysql服务。
# service mysqld restart然后即可登录mysql,初始登录没有密码
[root@slave1 ~]# service mysqld restart
Redirecting to /bin/systemctl restart  mysqld.service
[root@slave1 ~]#  mysql -u root
Welcome to the MySQL monitor.  Commands end with ; or \g.
Your MySQL connection id is 2
Server version: 5.6.40 MySQL Community Server (GPL)

Copyright (c) 2000, 2018, Oracle and/or its affiliates. All rights reserved.

Oracle is a registered trademark of Oracle Corporation and/or its
affiliates. Other names may be trademarks of their respective
owners.

Type 'help;' or '\h' for help. Type '\c' to clear the current input statement.

mysql>
初次登录设置一下密码,设置为123456
mysql> set password for 'root'@'localhost' =password('123456');
Query OK, 0 rows affected (0.02 sec)
退户登录
mysql> exit
Bye
[root@slave1 ~]#
配置mysql
# vim /etc/my.cnf在最后面添加下面内容
[mysql]
default-character-set =utf8
配置mysql远程链接
设置远程访问账号:grant all privileges on . to 远程访问用户名@’%’ identified by ‘用户密码’;
mysql> grant all privileges on *.* to root@'%' identified by '123456';
Query OK, 0 rows affected (0.00 sec)

mysql> flush privileges;
Query OK, 0 rows affected (0.00 sec)

mysql>
配置完即可通过navicat工具远程连接上
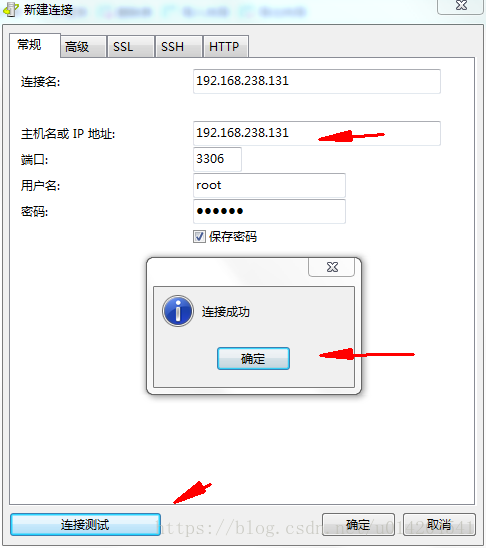
如果还是连接不上,估计是防火墙问题,本文不做详细介绍了,目前没有这样的环境作为说明