通过前面的学习,在实际开发中,我们基本上能对mybatis应用自如了,但是我们发现了一个问题,所有操作都是围绕着po类,xxxMapper.xml文件,xxxMapper接口等文件来进行的。如果实际开发中数据库的表特别多,那么我们需要手动去写每一张表的po类,xxxMapper.xml,xxxMapper.java文件,这显然需要花费巨大的精力,而且可能由于表字段太多,写错了而不知道也是可能的。
所以我们在实际开发中,一般使用逆向工程方式来自动生成所需的文件。
本篇博客源码下载链接:http://pan.baidu.com/s/1nvvA68L 密码:jc1p
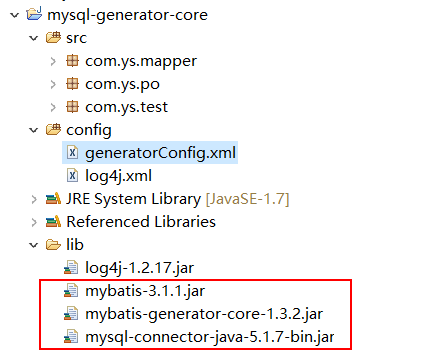
①、新建一个工程,并导入相应的jar包(详情见上面源码)
注意:使用逆向工程时,最好新建一个工程,如果你在原来的工程中使用,那也可以,但是有一定的风险,因为mybatis是根据配置文件中配置的路径来生成的文件的,如果你工程中有相同名字的文件,那么就会被新生成的文件所覆盖。所以实际开发中,我们一般新建一个工程,将生成的文件复制到自己的所需的工程中。
②、创建配置文件 generatorConfig.xml 文件
|
1
2
3
4
5
6
7
8
9
10
11
12
13
14
15
16
17
18
19
20
21
22
23
24
25
26
27
28
29
30
31
32
33
34
35
36
37
38
39
40
41
42
43
44
45
46
47
48
49
50
51
52
53
|
<?xml version=
"1.0"
encoding=
"UTF-8"
?>
<!DOCTYPE generatorConfiguration
PUBLIC
"-//mybatis.org//DTD MyBatis Generator Configuration 1.0//EN"
"http://mybatis.org/dtd/mybatis-generator-config_1_0.dtd"
>
<generatorConfiguration>
<context id=
"testTables"
targetRuntime=
"MyBatis3"
>
<commentGenerator>
<!-- 是否去除自动生成的注释
true
:是 :
false
:否 -->
<property name=
"suppressAllComments"
value=
"true"
/>
</commentGenerator>
<!--数据库连接的信息:驱动类、连接地址、用户名、密码 -->
<jdbcConnection driverClass=
"com.mysql.jdbc.Driver"
connectionURL=
"jdbc:mysql://localhost:3306/mybatisrelation"
userId=
"root"
password=
"root"
>
</jdbcConnection>
<!-- <jdbcConnection driverClass=
"oracle.jdbc.OracleDriver"
connectionURL=
"jdbc:oracle:thin:@127.0.0.1:1521:yycg"
userId=
"yycg"
password=
"yycg"
>
</jdbcConnection> -->
<!-- 默认
false
,把JDBC DECIMAL 和 NUMERIC 类型解析为 Integer,为
true
时把JDBC DECIMAL和NUMERIC类型解析为java.math.BigDecimal -->
<javaTypeResolver>
<property name=
"forceBigDecimals"
value=
"false"
/>
</javaTypeResolver>
<!-- targetProject:生成PO类的位置,重要!! -->
<javaModelGenerator targetPackage=
"com.ys.po"
targetProject=
".\src"
>
<!-- enableSubPackages:是否让schema作为包的后缀 -->
<property name=
"enableSubPackages"
value=
"false"
/>
<!-- 从数据库返回的值被清理前后的空格 -->
<property name=
"trimStrings"
value=
"true"
/>
</javaModelGenerator>
<!-- targetProject:mapper映射文件生成的位置,重要!! -->
<sqlMapGenerator targetPackage=
"com.ys.mapper"
targetProject=
".\src"
>
<property name=
"enableSubPackages"
value=
"false"
/>
</sqlMapGenerator>
<!-- targetPackage:mapper接口生成的位置,重要!! -->
<javaClientGenerator type=
"XMLMAPPER"
targetPackage=
"com.ys.mapper"
targetProject=
".\src"
>
<property name=
"enableSubPackages"
value=
"false"
/>
</javaClientGenerator>
<!-- 指定数据库表,要生成哪些表,就写哪些表,要和数据库中对应,不能写错! -->
<table tableName=
"items"
></table>
<table tableName=
"orders"
></table>
<table tableName=
"orderdetail"
></table>
<table tableName=
"user"
></table>
</context>
</generatorConfiguration>
|
注意:
1、连接数据库的配置,包括数据名称,数据库用户名密码等配置
2、指定要生成代码的包名,包括实体类po的包名,mapper的包名等
3、指定数据库中哪些表需要生成文件
③、运行主程序生成代码
|
1
2
3
4
5
6
7
8
9
10
11
12
13
14
15
16
17
18
19
20
21
22
23
24
25
26
27
28
29
30
31
32
33
34
35
36
37
|
package
com.ys.test;
import
java.io.File;
import
java.util.ArrayList;
import
java.util.List;
import
org.mybatis.generator.api.MyBatisGenerator;
import
org.mybatis.generator.config.Configuration;
import
org.mybatis.generator.config.xml.ConfigurationParser;
import
org.mybatis.generator.internal.DefaultShellCallback;
public
class
GeneratorTest {
public
void
testGenerator()
throws
Exception{
List<String> warnings =
new
ArrayList<String>();
boolean
overwrite =
true
;
//指向逆向工程配置文件
File configFile =
new
File(GeneratorTest.
class
.getResource(
"/generatorConfig.xml"
).getFile());
ConfigurationParser cp =
new
ConfigurationParser(warnings);
Configuration config = cp.parseConfiguration(configFile);
DefaultShellCallback callback =
new
DefaultShellCallback(overwrite);
MyBatisGenerator myBatisGenerator =
new
MyBatisGenerator(config,
callback, warnings);
myBatisGenerator.generate(
null
);
}
public
static
void
main(String[] args)
throws
Exception {
try
{
GeneratorTest generator =
new
GeneratorTest();
generator.testGenerator();
}
catch
(Exception e) {
e.printStackTrace();
}
}
}
|
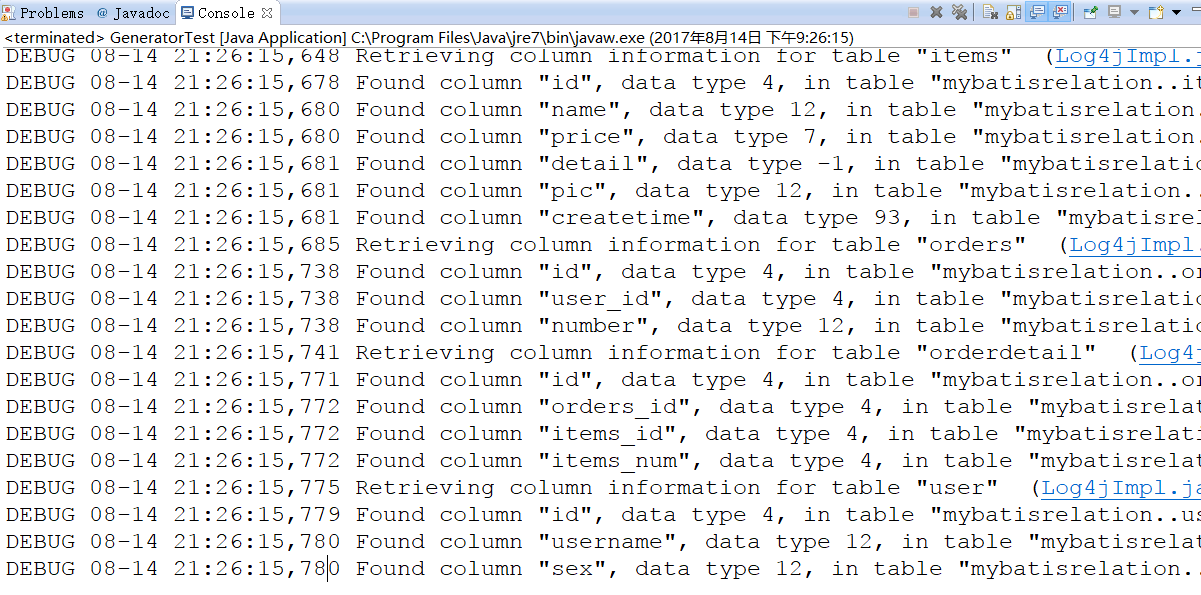
直接运行上面的程序,控制台会打印如下代码,说明生成代码成功
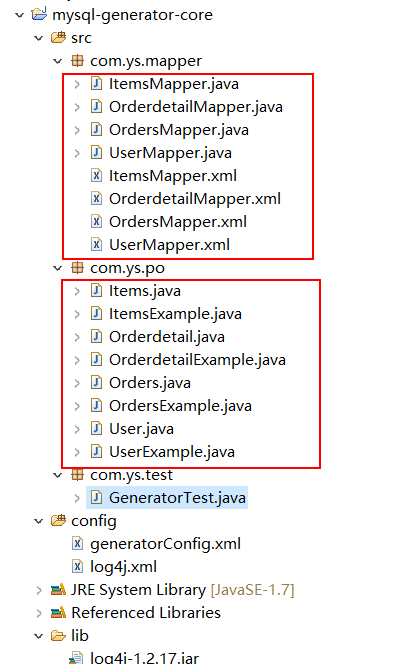
然后刷新generatorConfig.xml 文件中指定的包,会发现生成了如下文件