一、搭建服务注册中心
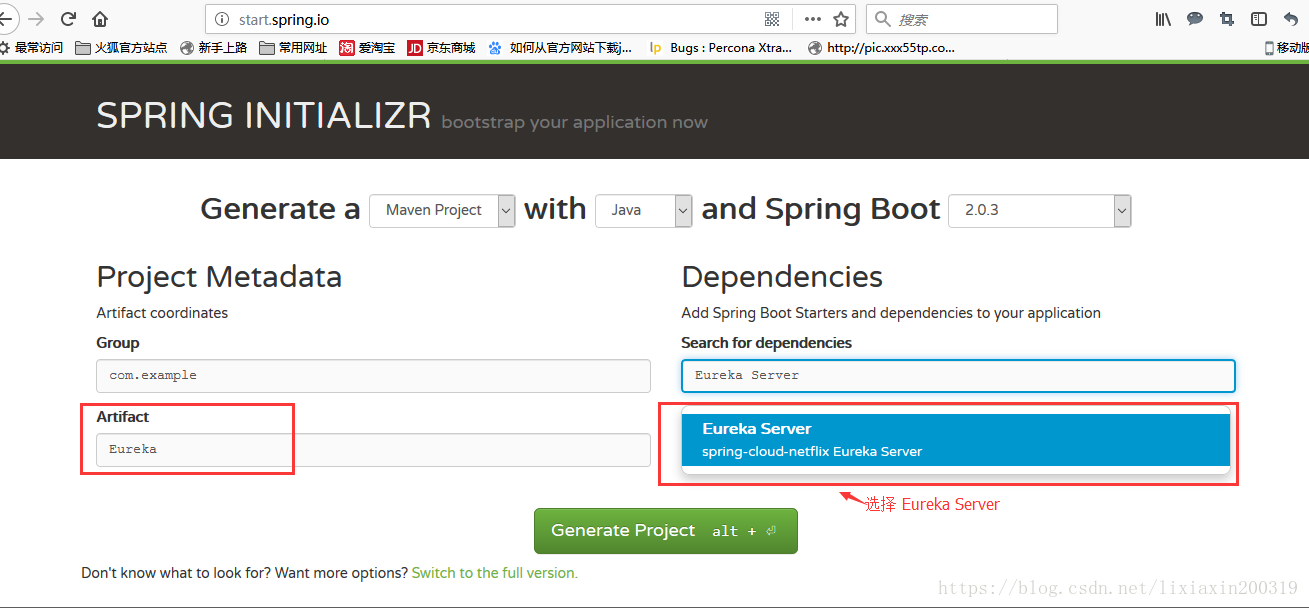
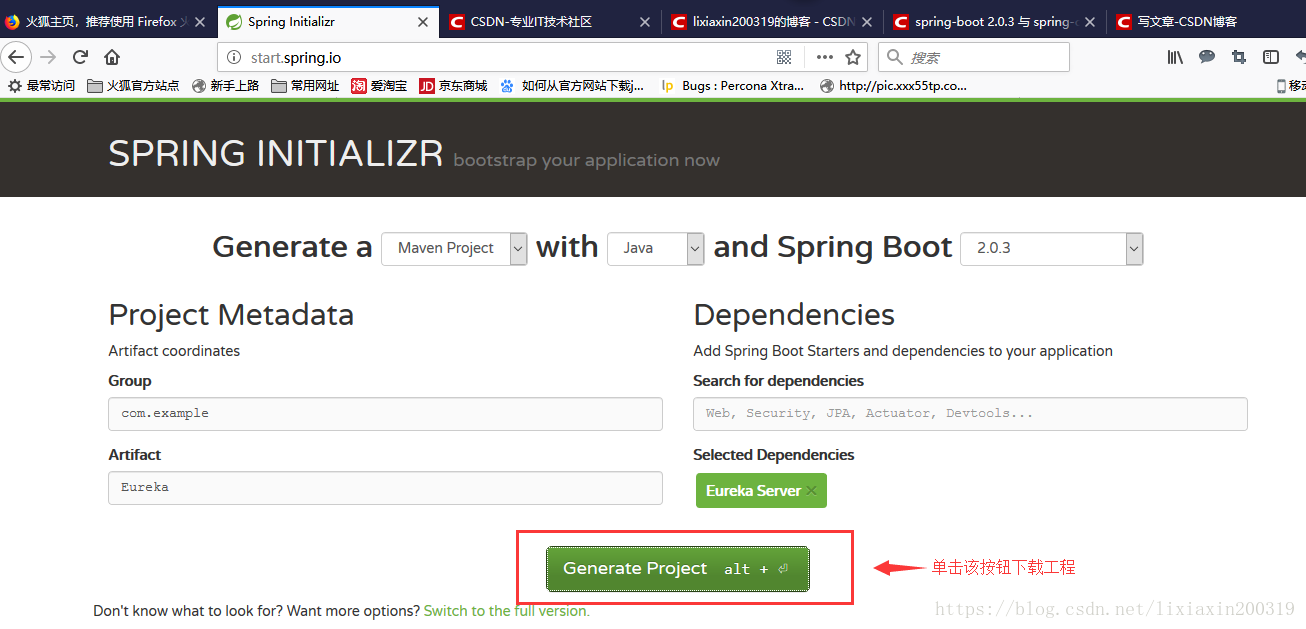
1. 访问 http://start.spring.io/ 创建 maven 工程,在 Search for dependencies 中输入 Eureka Server 选中弹出的 Eureka Server 。输入 Artifact 为 Eureka 。
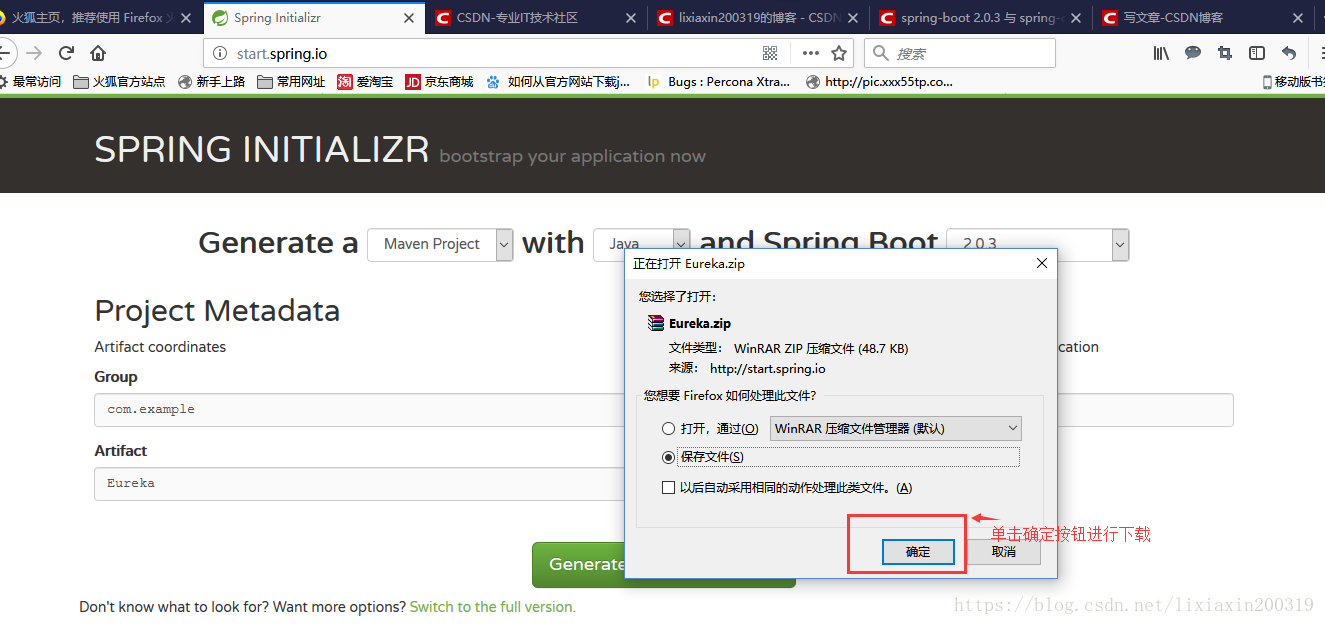
2. 下载完成后,解压下载的压缩包,并把解压后的 maven 工程导入 Eclipse。
3. pom.xml 配置如下:
<?xml version="1.0" encoding="UTF-8"?>
<project xmlns="http://maven.apache.org/POM/4.0.0" xmlns:xsi="http://www.w3.org/2001/XMLSchema-instance"
xsi:schemaLocation="http://maven.apache.org/POM/4.0.0 http://maven.apache.org/xsd/maven-4.0.0.xsd">
<modelVersion>4.0.0</modelVersion>
<groupId>com.example</groupId>
<artifactId>Eureka</artifactId>
<version>0.0.1-SNAPSHOT</version>
<packaging>jar</packaging>
<name>Eureka</name>
<description>Demo project for Spring Boot</description>
<parent>
<groupId>org.springframework.boot</groupId>
<artifactId>spring-boot-starter-parent</artifactId>
<version>2.0.3.RELEASE</version>
<relativePath/> <!-- lookup parent from repository -->
</parent>
<properties>
<project.build.sourceEncoding>UTF-8</project.build.sourceEncoding>
<project.reporting.outputEncoding>UTF-8</project.reporting.outputEncoding>
<java.version>1.8</java.version>
<spring-cloud.version>Finchley.RELEASE</spring-cloud.version>
</properties>
<dependencies>
<dependency>
<groupId>org.springframework.cloud</groupId>
<artifactId>spring-cloud-starter-netflix-eureka-server</artifactId>
</dependency>
<dependency>
<groupId>org.springframework.boot</groupId>
<artifactId>spring-boot-starter-test</artifactId>
<scope>test</scope>
</dependency>
</dependencies>
<dependencyManagement>
<dependencies>
<dependency>
<groupId>org.springframework.cloud</groupId>
<artifactId>spring-cloud-dependencies</artifactId>
<version>${spring-cloud.version}</version>
<type>pom</type>
<scope>import</scope>
</dependency>
</dependencies>
</dependencyManagement>
<build>
<plugins>
<plugin>
<groupId>org.springframework.boot</groupId>
<artifactId>spring-boot-maven-plugin</artifactId>
</plugin>
</plugins>
</build>
</project>
4. EurekaApplication.java
package com.example.Eureka;
import org.springframework.boot.SpringApplication;
import org.springframework.boot.autoconfigure.SpringBootApplication;
import org.springframework.cloud.netflix.eureka.server.EnableEurekaServer;
@EnableEurekaServer // 这个注解是用来启用 Eureka 注册中心的
@SpringBootApplication
public class EurekaApplication {
public static void main(String[] args) {
SpringApplication.run(EurekaApplication.class, args);
}
}
5. 在 application.properties 中配置属性
spring.application.name=eureka-server
server.port = 1111
eureka.instance.hostname=localhost
eureka.client.register-with-eureka=false
eureka.client.fetch-registry=false
eureka.client.service-url.defaultZone=http://${eureka.instance.hostname}:${server.port}/eureka/
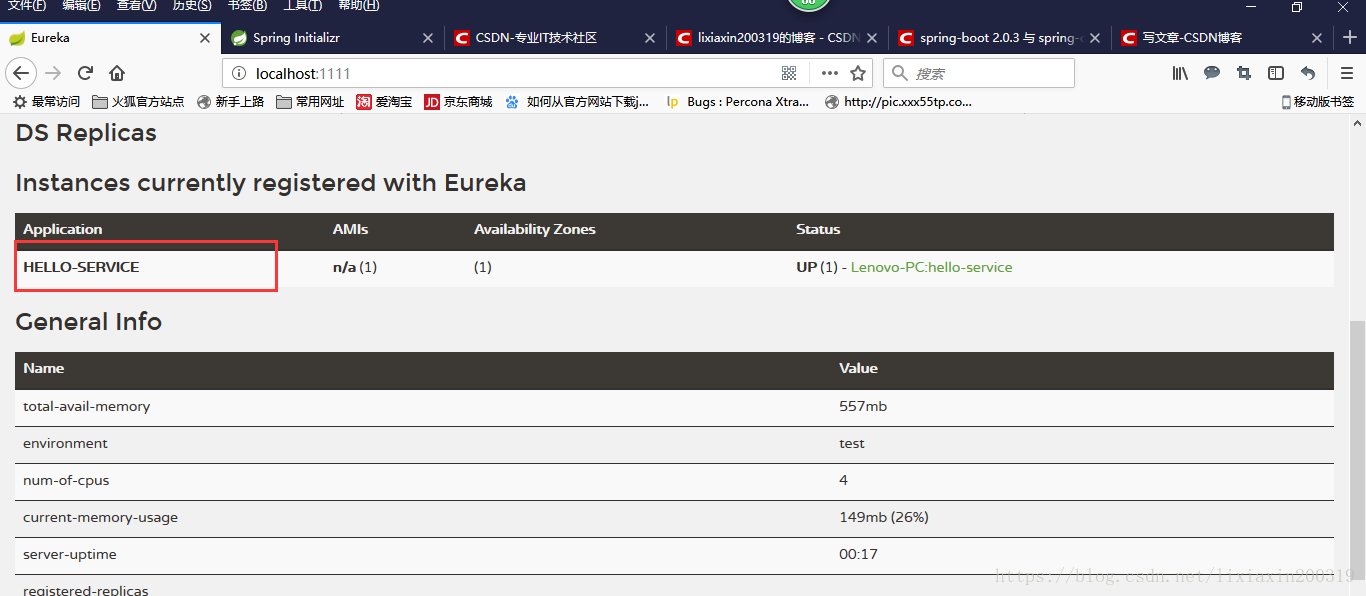
6. 配置完成后执行 EurekaApplication
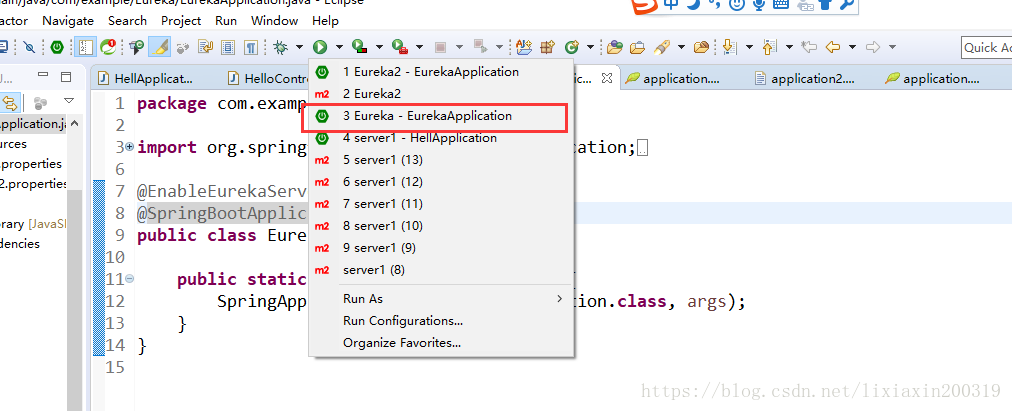
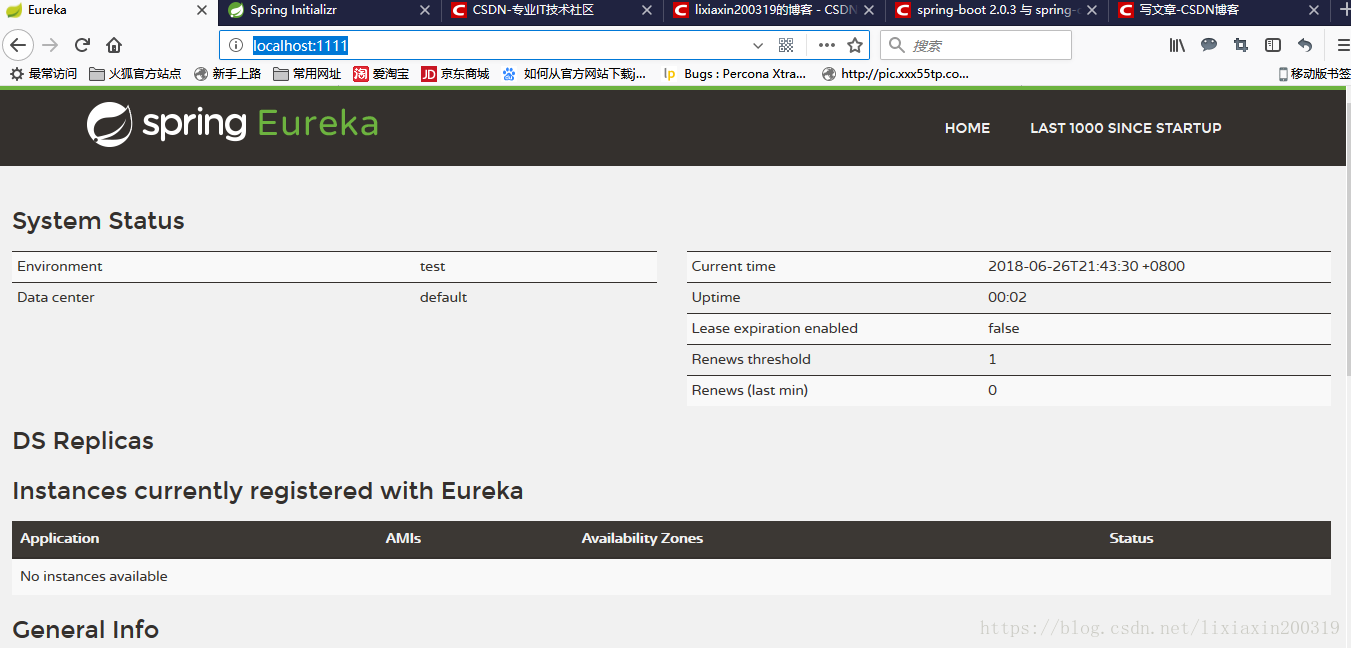
7. 通过 http://localhost:1111/ 访问服务注册中心
二、部署服务提供者
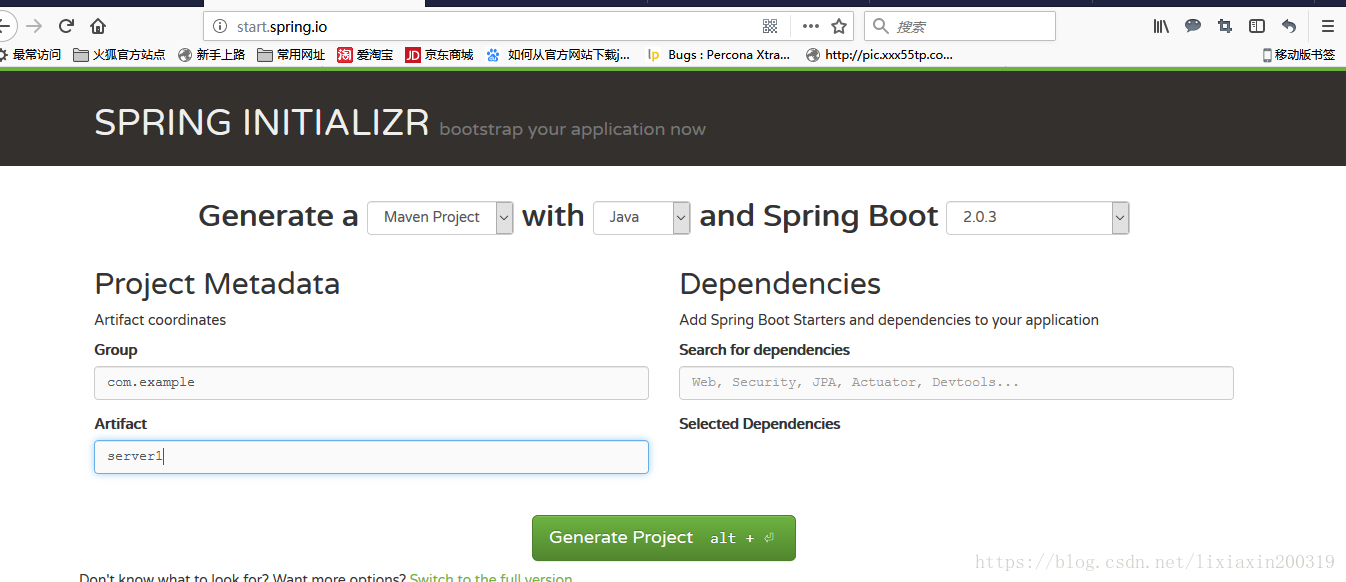
1. 访问 http://start.spring.io/ 输入 Artifact 为 server1,Generate Project alt + 下载创建好的工程
2. 解压下载好的工程文件,并报 maven 工程导入 Eclipse
3. 在 pom.xml 中配置依赖的 jar 包
<?xml version="1.0" encoding="UTF-8"?>
<project xmlns="http://maven.apache.org/POM/4.0.0" xmlns:xsi="http://www.w3.org/2001/XMLSchema-instance"
xsi:schemaLocation="http://maven.apache.org/POM/4.0.0 http://maven.apache.org/xsd/maven-4.0.0.xsd">
<modelVersion>4.0.0</modelVersion>
<groupId>com.example</groupId>
<artifactId>server1</artifactId>
<version>0.0.1-SNAPSHOT</version>
<packaging>jar</packaging>
<name>server1</name>
<description>Demo project for Spring Boot</description>
<parent>
<groupId>org.springframework.boot</groupId>
<artifactId>spring-boot-starter-parent</artifactId>
<version>1.5.13.RELEASE</version> <!-- sprong boot 版本不能高于 1.5.13 否则会与spring-cloud-starter-eureka 1.4.4 版本不兼容 -->
<relativePath/> <!-- lookup parent from repository -->
</parent>
<!--
<parent>
<groupId>org.springframework.boot</groupId>
<artifactId>spring-boot-starter-parent</artifactId>
<version>2.0.3.RELEASE</version>
<relativePath/>
</parent>
-->
<properties>
<project.build.sourceEncoding>UTF-8</project.build.sourceEncoding>
<project.reporting.outputEncoding>UTF-8</project.reporting.outputEncoding>
<java.version>1.8</java.version>
</properties>
<dependencies>
<dependency>
<groupId>org.springframework.boot</groupId>
<artifactId>spring-boot-starter</artifactId>
</dependency>
<dependency>
<groupId>org.springframework.boot</groupId>
<artifactId>spring-boot-starter-test</artifactId>
<scope>test</scope>
</dependency>
<!-- 下面红色部分是需要手动配置的依赖包 -->
<dependency>
<groupId>org.springframework.cloud</groupId>
<artifactId>spring-cloud-starter-eureka</artifactId>
<version>1.4.4.RELEASE</version>
</dependency>
<dependency>
<groupId>org.springframework.cloud</groupId>
<artifactId>spring-cloud-starter-netflix-eureka-client</artifactId>
<version>1.4.4.RELEASE</version>
</dependency>
<dependency>
<groupId>log4j</groupId>
<artifactId>log4j</artifactId>
<!-- <version>${log4j.version}</version> -->
</dependency>
<dependency>
<groupId>com.fasterxml.jackson.core</groupId>
<artifactId>jackson-annotations</artifactId>
<version>2.9.6</version>
</dependency>
<dependency>
<groupId>com.fasterxml.jackson.core</groupId>
<artifactId>jackson-core</artifactId>
<version>2.9.6</version>
</dependency>
<dependency>
<groupId>com.fasterxml.jackson.core</groupId>
<artifactId>jackson-databind</artifactId>
<version>2.9.6</version>
</dependency>
</dependencies>
<dependencyManagement>
<dependencies>
<dependency>
<groupId>org.springframework.cloud</groupId>
<artifactId>spring-cloud-dependencies</artifactId>
<version>Brixton.SR5</version>
<type>pom</type>
<scope>import</scope>
</dependency>
</dependencies>
</dependencyManagement>
<build>
<plugins>
<plugin>
<groupId>org.springframework.boot</groupId>
<artifactId>spring-boot-maven-plugin</artifactId>
</plugin>
</plugins>
</build>
</project>
4. HelloController.java 是响应请求的 controller
package com.example.server1;
import org.apache.log4j.Logger;
import org.springframework.beans.factory.annotation.Autowired;
import org.springframework.cloud.client.ServiceInstance;
import org.springframework.cloud.client.discovery.DiscoveryClient;
import org.springframework.cloud.netflix.eureka.EnableEurekaClient;
import org.springframework.web.bind.annotation.RequestMapping;
import org.springframework.web.bind.annotation.RequestMethod;
import org.springframework.web.bind.annotation.RestController;
@RestController
public class HelloController {
private final Logger logger = Logger.getLogger(HelloController.class);
@Autowired
private DiscoveryClient client;
@RequestMapping(value="/hello",method = RequestMethod.GET)
public String index() {
ServiceInstance instance = client.getLocalServiceInstance();
logger.info("/hello,host:" + instance.getHost() +", service_id:"
+ instance.getServiceId());
return "Hello World";
}
}
5. HellApplication.java 是启用服务提供者的主类
package com.example.server1;
import org.springframework.boot.SpringApplication;
import org.springframework.boot.autoconfigure.SpringBootApplication;
import org.springframework.cloud.client.discovery.EnableDiscoveryClient;
@EnableDiscoveryClient // 这个注解是用来向服务注册开启中心进行注册功能的
@SpringBootApplication
public class HellApplication {
public static void main(String[] args) {
SpringApplication.run(HellApplication.class, args);
System.out.println("Hell word");
}
}
6. 在application.properties 文件配置 prong-boot 属性
spring.application.name=hello-service
eureka.client.serviceUrl.defaultZone=http://localhost:1111/eureka/
7. 启动 HellApplication 后,服务提供者在服务注册中心注册成功