现在Spring boot 极大的简化了 Spring Framework 应用程序的配置,通过简单的依赖配置即可实现程序的基本安全。
首先我们先了解一下 oauth 2.0
OAuth 2.0 的规范可以参考 : RFC 6749
OAuth 是一个开放标准,允许用户让第三方应用访问该用户在某一网站上存储的私密的资源(如照片,视频,联系人列表),而无需将用户名和密码提供给第三方应用。目前,OAuth 的最新版本为 2.0
OAuth 允许用户提供一个令牌,而不是用户名和密码来访问他们存放在特定服务提供者的数据。每一个令牌授权一个特定的网站(例如,视频编辑网站)在特定的时段(例如,接下来的2小时内)内访问特定的资源(例如仅仅是某一相册中的视频)。这样,OAuth 允许用户授权第三方网站访问他们存储在另外的服务提供者上的信息,而不需要分享他们的访问许可或他们数据的所有内容。
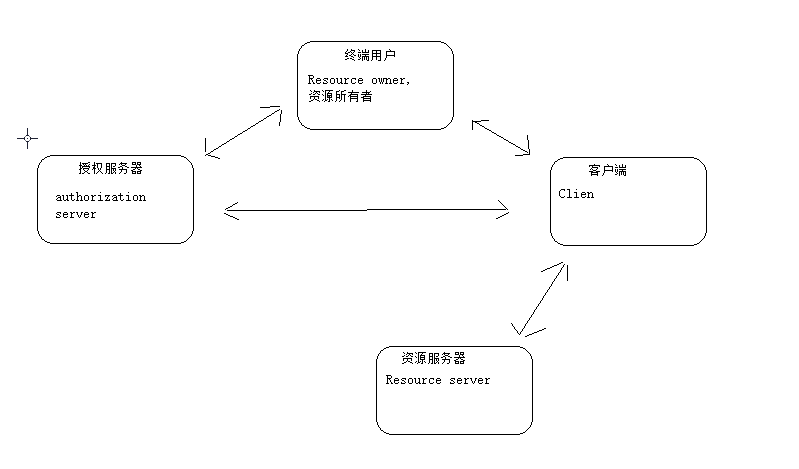
- resource owner:资源所有者,指终端的“用户”(user)
- resource server:资源服务器,即服务提供商存放受保护资源。访问这些资源,需要获得访问令牌(access token)。它与认证服务器,可以是同一台服务器,也可以是不同的服务器。如果,我们访问新浪博客网站,那么如果使用新浪博客的账号来登录新浪博客网站,那么新浪博客的资源和新浪博客的认证都是同一家,可以认为是同一个服务器。如果,我们是新浪博客账号去登录了知乎,那么显然知乎的资源和新浪的认证不是一个服务器。
- client:客户端,代表向受保护资源进行资源请求的第三方应用程序。
- authorization server: 授权服务器, 在验证资源所有者并获得授权成功后,将发放访问令牌给客户端。
在我们的系统中我们需要 添加依赖库。
· spring-boot-starter-web
· spring-boot-starter-security
· spring-boot-starter-web
· spring-security-jwt
· spring-security-oauth2
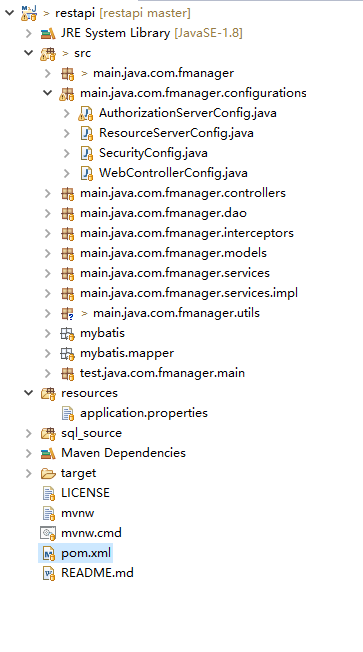
配置的主要目录结构是这样的
首先配置Spring boot 的配置文件 application.properties
security.oauth2.resource.filter-order=3

security.signing-key=MaYzkSjmkzPC57L
security.security-name=fmanager

security.jwt.client-id=testjwtclientid
security.jwt.client-secret=XY7kmzoNzl100
security.jwt.client-role=ADMIN_USER
security.jwt.grant-type=password
security.jwt.scope-read=read
security.jwt.scope-write=write
security.jwt.resource-ids=testjwtresourceid

#需要的是上面部分

# LOGGING
logging.level.org.springframework.web=DEBUG
logging.level.main.java.com.fmanager = DEBUG


spring.datasource.url=jdbc:postgresql://localhost:5432/fmanager
spring.datasource.username=xxxxx
spring.datasource.password=xxxx

mybatis.config-locations=classpath:mybatis/mybatis-config.xml
mybatis.mapper-locations=classpath:mybatis/mapper/*.xml
安全配置,
@Configuration
@EnableWebSecurity
@EnableGlobalMethodSecurity(prePostEnabled = true)
public class SecurityConfig extends WebSecurityConfigurerAdapter {

    @Value("${security.signing-key}")
    private String signingKey;

    @Value("${security.security-name}")
    private String securityRealm;


    @Resource
    private UserDetailsService userDetailsService;


    @Bean
    @Override
    protected AuthenticationManager authenticationManager() throws Exception {
       return super.authenticationManager();
    }


    @Override
    protected void configure(AuthenticationManagerBuilder auth) throws Exception {
       auth.userDetailsService(userDetailsService)
               .passwordEncoder(new BCryptPasswordEncoder());
    }


    @Override
    protected void configure(HttpSecurity http) throws Exception {
       http
               .sessionManagement()
               .sessionCreationPolicy(SessionCreationPolicy.STATELESS)
               .and()
               .httpBasic()
               .realmName(securityRealm)
               .and()
               .csrf()
               .disable().authorizeRequests().antMatchers("/oauth/token").permitAll(); //$NON-NLS-1$

    }

    @Bean
    public JwtAccessTokenConverter accessTokenConverter() {
        JwtAccessTokenConverter converter = new JwtAccessTokenConverter();
        converter.setSigningKey(signingKey);
        return converter;
    }

    @Bean
    public TokenStore tokenStore() {
        return new JwtTokenStore(accessTokenConverter());
    }

    @Bean
    @Primary //Making this primary to avoid any accidental duplication with another token service instance of the same name
    public DefaultTokenServices tokenServices() {
        DefaultTokenServices defaultTokenServices = new DefaultTokenServices();
        defaultTokenServices.setTokenStore(tokenStore());
        defaultTokenServices.setSupportRefreshToken(true);
        return defaultTokenServices;
    }
}
- 注意 注解要添加
- JwtTokenStore 和 JwtAccessTokenConverter beans: JwtAccessTokenConverter 在授权服务器和资源服务器中要使用,JwtTokenStore 用于在资源服务器中decode token.
- UserDetailsService: 我们注入了一个自己的UserDetailsServiceImpl (点击查看)service, 这样可以实现通过用户名密码认证
- 密码加密就用spring 提供的 BCryptPasswordEncoder
授权服务器配置
@Configuration
@EnableAuthorizationServer
public class AuthorizationServerConfig extends AuthorizationServerConfigurerAdapter {

	@Value("${security.jwt.client-id}")
	private String clientId;

	@Value("${security.jwt.client-secret}")
	private String clientSecret;

	@Value("${security.jwt.grant-type}")
	private String grantType;

	@Value("${security.jwt.scope-read}")
	private String scopeRead;

	@Value("${security.jwt.scope-write}")
	private String scopeWrite = "write"; //$NON-NLS-1$

	@Value("${security.jwt.resource-ids}")
	private String resourceIds;

	@Autowired
	private TokenStore tokenStore;

	@Autowired
	private JwtAccessTokenConverter accessTokenConverter;

	@Autowired
	private AuthenticationManager authenticationManager;

	@Autowired
	private PasswordEncoder passwordEncoder;

	@Override
	public void configure(ClientDetailsServiceConfigurer configurer) throws Exception {

		configurer.inMemory().withClient(clientId).secret(passwordEncoder.encode(clientSecret))
				.authorizedGrantTypes(grantType).scopes(scopeRead, scopeWrite).resourceIds(resourceIds);
	}

	@Override
	public void configure(AuthorizationServerEndpointsConfigurer endpoints) throws Exception {
		TokenEnhancerChain enhancerChain = new TokenEnhancerChain();
		enhancerChain.setTokenEnhancers(Arrays.asList(accessTokenConverter));
		endpoints.tokenStore(tokenStore).accessTokenConverter(accessTokenConverter).tokenEnhancer(enhancerChain)
				.authenticationManager(authenticationManager);
	}

	@Bean
	private static DelegatingPasswordEncoder passwordEncoder() {
		String idForEncode = "bcrypt"; //$NON-NLS-1$
		Map<String, PasswordEncoder> encoderMap = new HashMap<>();
		encoderMap.put(idForEncode, new BCryptPasswordEncoder());
		return new DelegatingPasswordEncoder(idForEncode, encoderMap);
	}

}- 继承AuthorizationServerConfigurerAdapter , 实现里面的配置
- Client id,Client secret, 提供认证的客户端id 和密码
- scope : 定义访问资源等级
- AuthenticationManager : Spring 的验证管理器
资源服务器配置
@Configuration
@EnableResourceServer
public class ResourceServerConfig extends ResourceServerConfigurerAdapter {

    @Autowired
    private ResourceServerTokenServices tokenServices;


    @Value("${security.jwt.resource-ids}")
    private String resourceIds;

    @Override
    public void configure(ResourceServerSecurityConfigurer resources) throws Exception {
        resources.resourceId(resourceIds).tokenServices(tokenServices);
    }


    @Override
    public void configure(HttpSecurity http) throws Exception {
                http
                .requestMatchers()
                .and()
                .authorizeRequests()
                .antMatchers("/**").authenticated(); //$NON-NLS-1$
    }

}- configure 方法里面配置资源访问, 这里我配置了所有url 都需要认证
配置基本完成, 连接数据库的配置也很简单。 在application.properties中添加mybastis 配置以及spring 连接配置
spring.datasource.url=jdbc:postgresql://localhost:5432/fmanager
spring.datasource.username=xxxxx
spring.datasource.password=xxxx

mybatis.config-locations=classpath:mybatis/mybatis-config.xml
mybatis.mapper-locations=classpath:mybatis/mapper/*.xml
写对应mapper 就可以了
比如:
@Mapper
public interface UserDAO {
	public User findById(long id);

	public User findByUserName(String name);
}
- 注意注解(Mapper)要加上, 不让系统不会自动加载的
好,先写一个测试Controller
@RestController
@RequestMapping("/test")
public class TestController {

    @Autowired
    private UserServcie userService;

	@RequestMapping(value="/greeting",method = RequestMethod.GET)
    public String greeting() {
	    System.out.println(userService.findById(1));
        return "Hello";
    }


}
用rest client 访问就会看到
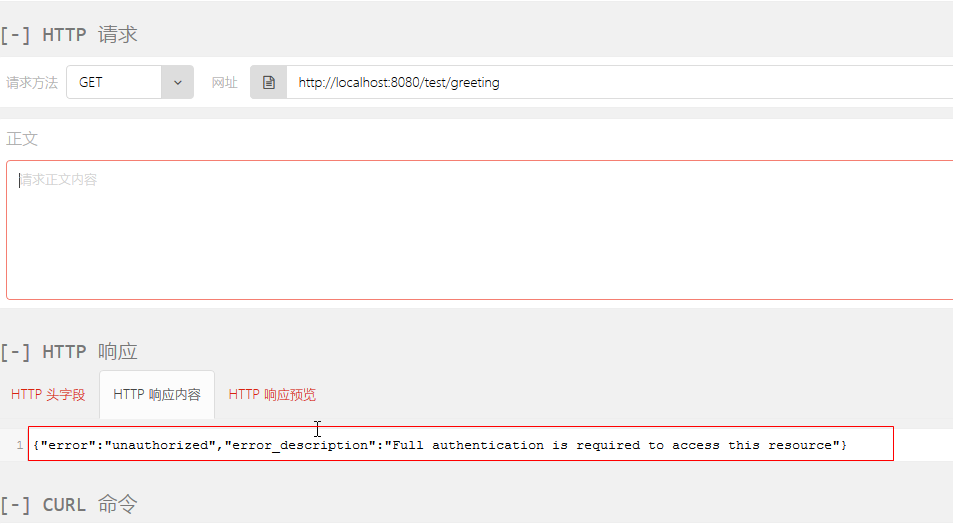
没有权限。
我们这里使用用户名密码获取token
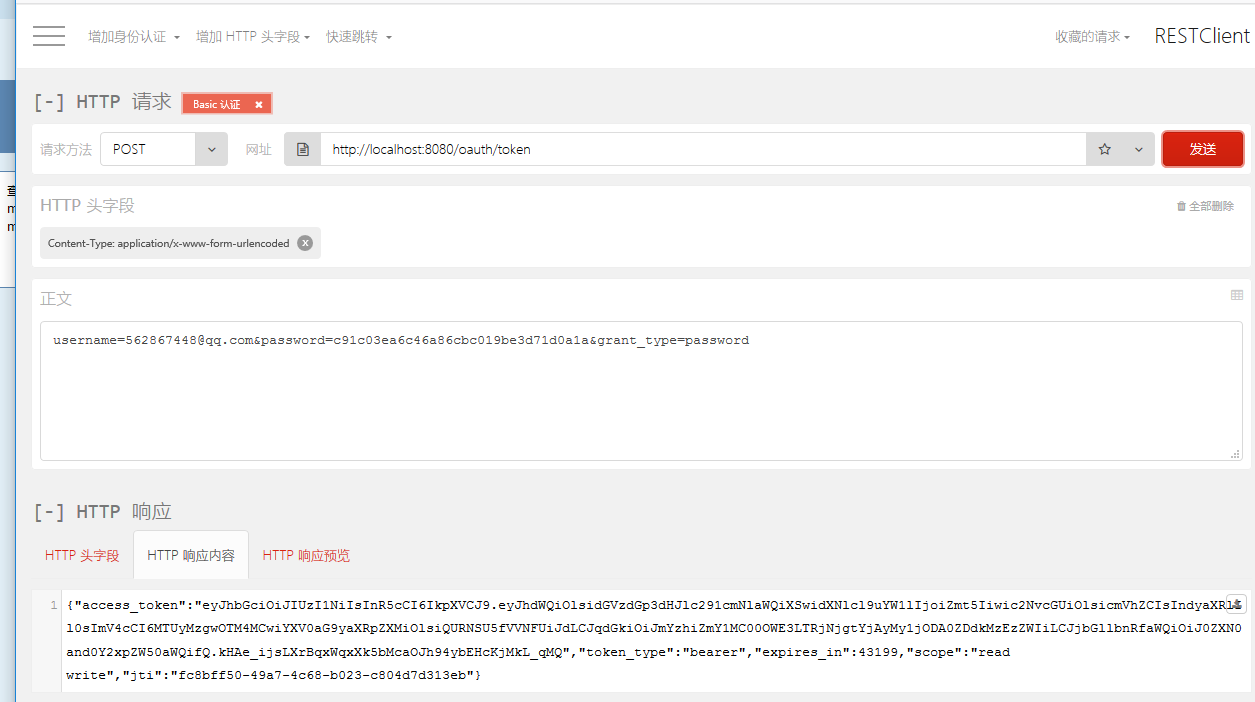
获取这个token 是记得要加
Content-Type:application/x-www-form-urlencoded
authorization: Basic dGVzdGp3dGNsaWVudGlkOlhZN2ttem9OemwxMDA=
这个authorization 是通过 之前的client_id 和client_secret base64 得到的。
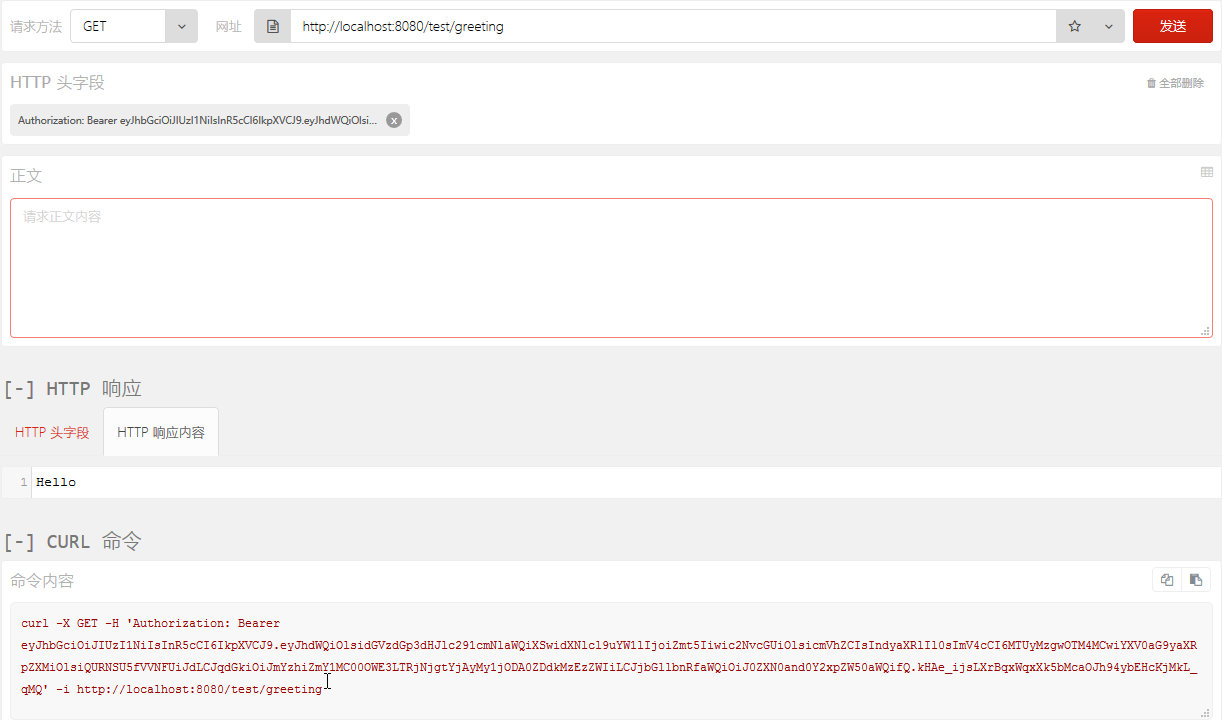
得到这个token,
然后我们再访问测试controller 的时候带上这个token 就可以正常访问了