安卓开发者交流群欢迎您加入
418263790
系列教程:
Xposed模块开发教程(一) 了解并使用Xposed
http://blog.csdn.net/u014418171/article/details/52910768
Xposed模块开发教程(二) 第一个Xposed模块应用-在手机状态栏增加显示cpu温度
http://blog.csdn.net/u014418171/article/details/52911715
在Xposed模块开发教程(一)中 我们已经安装好了Xposed模块环境 接下来终于要开发模块应用了
下面的例子将介绍如何hook修改系统状态栏
(我一直对手机的状态栏看不顺眼 终于可以加个功能了,本文将以 在状态栏增加支持显示cpu温度为例)
我们像以往那样新建一个普通Android Studio工程
然后编辑app/build.gradle
导入相关xposed api库
导入Xposed api库
dependencies {

    //provided 的作用是 在打包apk时不包含依赖包
    //de.robv.android.xposed:api:82就是XposedBridge.jar
    //API
    provided 'de.robv.android.xposed:api:82'
    //带源码Api
    provided 'de.robv.android.xposed:api:82:sources'
}
注意:
千万不要这样导入,运行会没有任何反应,模块无效,还记得第一篇文章中说到 的【…让基于Xposed开发的模块app们 都能使用XposedBridge.jar里的api (像android.jar那样, 后面会说到如何使用)….】 因为系统已经有XposedBridge.jar环境了 我们这边就没必要打包进apk去
//这是错误的做法
dependencies {
    //API
    compile 'de.robv.android.xposed:api:82'
    //带源码Api
    compile 'de.robv.android.xposed:api:82:sources'
}
PS:eclipse是直接导入XposedBridge.jar文件到libs里,没有其他特殊配置,这里不说eclipse了 都几乎一样
配置meta-data
AndroidManifest.xml里添加如下三个meta-data 主要是供xposed模块检测用
我的AndroidManifest.xml文件里面有个Activity ,你可以不用Activity 也行, xposed模块可以没有activity的
<?xml version="1.0" encoding="utf-8"?>
<manifest xmlns:android="http://schemas.android.com/apk/res/android"
    package="com.toshiba.statusbar">

    <application
        android:allowBackup="true"
        android:icon="@mipmap/ic_launcher"
        android:label="@string/app_name"
        android:supportsRtl="true"
        android:theme="@style/AppTheme">
        <!--是否是xposed模块-->
        <meta-data
            android:name="xposedmodule"
            android:value="true" />
        <!--对这个模块的一些描述-->
        <meta-data
            android:name="xposeddescription"
            android:value="对这个模块的一些描述" />
        <!--这个模块支持的最低xposed版本-->
        <meta-data
            android:name="xposedminversion"
            android:value="53" />
        <activity android:name=".MainActivity">
            <intent-filter>
                <action android:name="android.intent.action.MAIN" />

                <category android:name="android.intent.category.LAUNCHER" />
            </intent-filter>
        </activity>
    </application>

</manifest>
编写入口主要类,实现IXposedHookLoadPackage接口
IXposedHookLoadPackage接口 全手机包名加载的时候会回调 handleLoadPackage
package com.toshiba.statusbar;

import de.robv.android.xposed.IXposedHookLoadPackage;
import de.robv.android.xposed.XC_MethodHook;
import de.robv.android.xposed.XposedBridge;
import de.robv.android.xposed.callbacks.XC_LoadPackage;

import static de.robv.android.xposed.XposedHelpers.findAndHookMethod;
import static de.robv.android.xposed.XposedHelpers.findField;

public class StatusBar implements IXposedHookLoadPackage {

    @Override
    public void handleLoadPackage(XC_LoadPackage.LoadPackageParam loadPackageParam) throws Throwable {
         //这里将会被打印系统所有app的包名
         XposedBridge.log("xpfind "+loadPackageParam.packageName);

         //我们现在只对SystemUI.apk进行hook,SystemUI.apk是手机的状态栏,最近任务等关键apk
         //其包名是com.android.systemui
        if (!"com.android.systemui".equals(loadPackageParam.packageName))
            return;
        XposedBridge.log("xpfind SystemUI!");

    }
}
指定入口路径
Xposed模块在会从入口配置xposed_init文件里找入口类
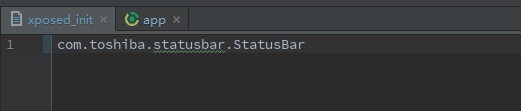
在assets创建一个xposed_init文件 以编辑内容正是StatusBar.java的类路径
com.toshiba.statusbar.StatusBar
如图
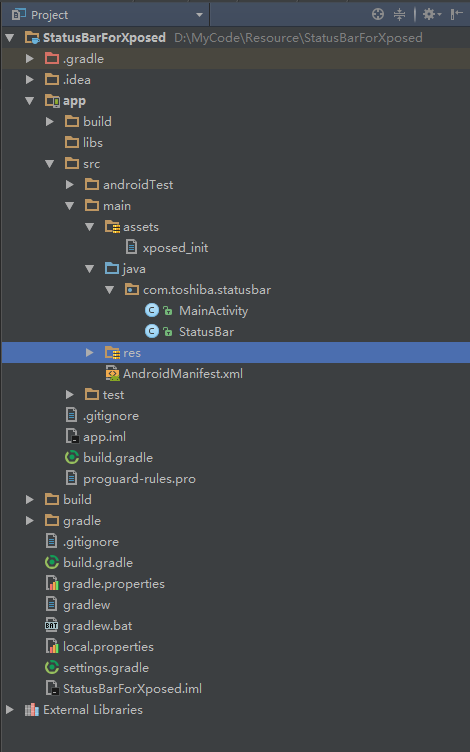
最后项目结构是这样的
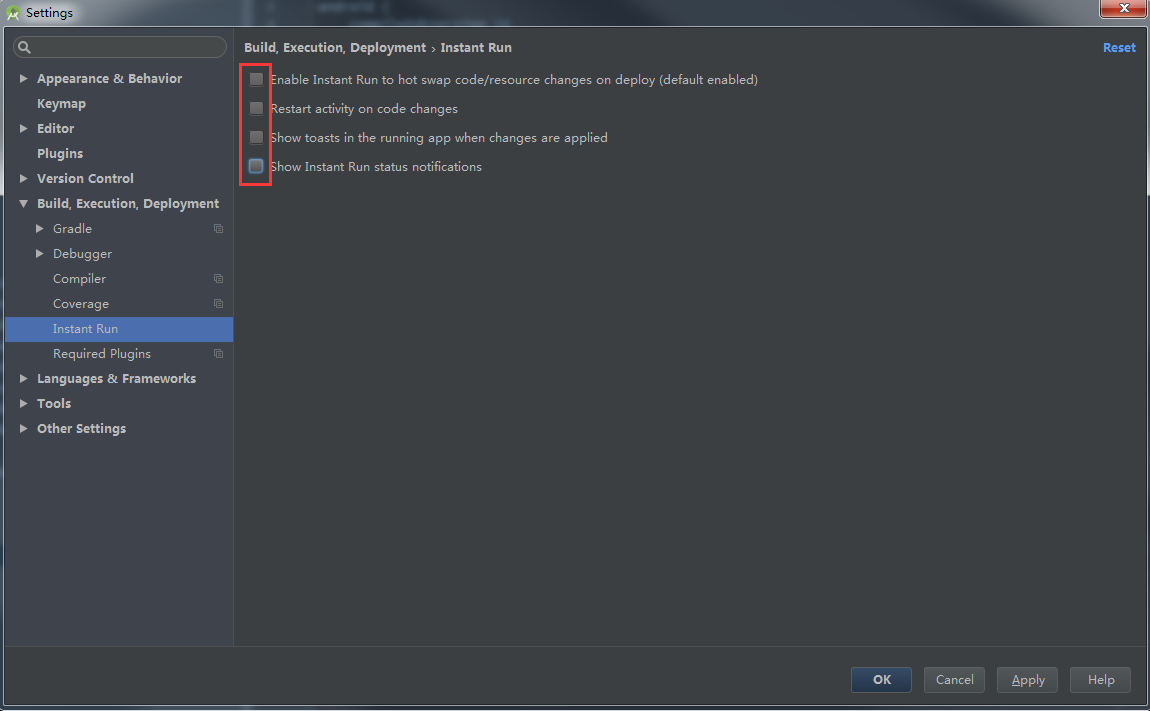
关闭Android Studio的Instant Run特性
进入Setting>搜索”Instant Run”>全部关闭
Xposed模块应用目前在Android Studio上不支持Instant Run新特性, 否则激活运行模块会没有任何反应,模块无效 (官方文档里也说了)
打包运行app 并从Xposed installer里配置
打开Xposed installer这个xposed安装管理器 右滑菜单选择 “模块”
找到刚才我们写的app 把右边的勾勾上 就激活了

然后…在Xposed installer的主界面点菜单选择 软重启 , 或手动重启手机 或..在电脑上输入命令: adb reboot , 随便你…
观察模块是否正常运行
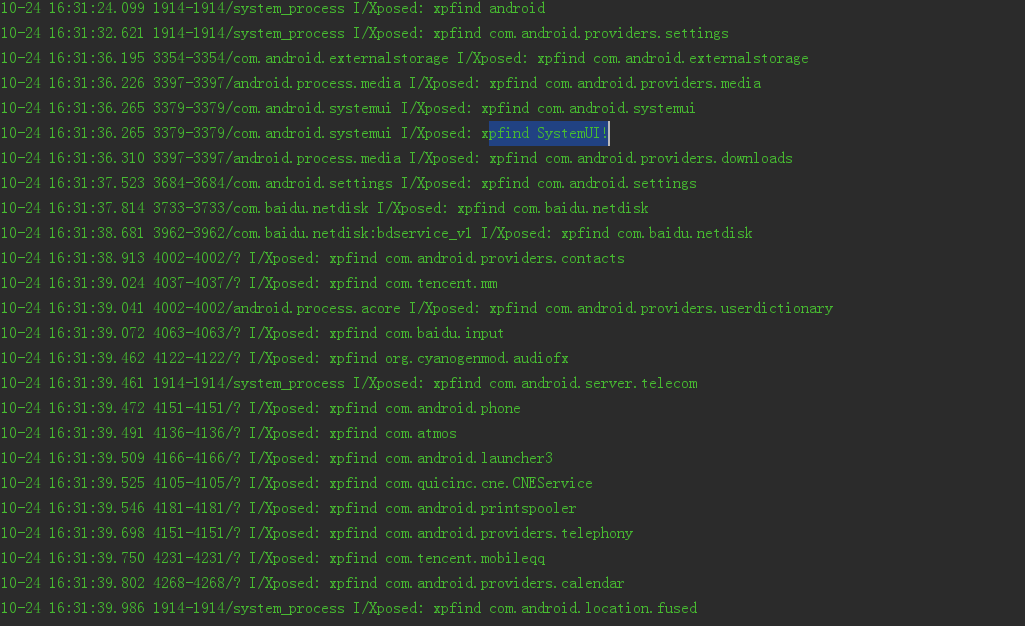
刚才重启过程中 在Android studio过滤我们要看到 logcat 并且选择 No Filter
这样才能看到全系统在打印
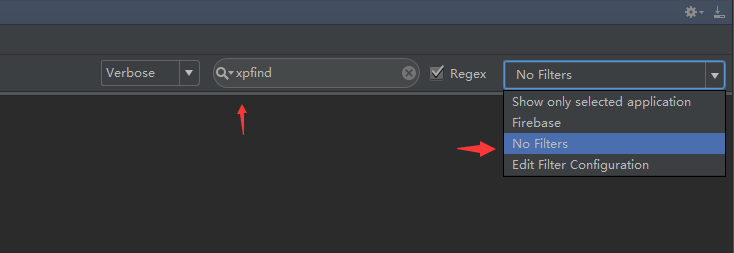
然后看见在打印各种包名 仔细找 发现
xpfind SystemUI!已经打印出来的 由刚才写的类 StatusBar 打印的
编写获取CPU温度的功能
到了这里 你的模块已经成功运行 并且环境什么的都已经正确
接下来我们可以放心进行下面的操作了
本文将以修改状态栏增加支持显示cpu温度为例
说起来 模块开发还是挺简单的
先编写功能吧 我们要先获取cpu温度
可以通过
在命令行 cmd里依次输入
adb shell
cat sys/devices/virtual/thermal/thermal_zone0/temp
我的手机返回了温度数据 36000 也就是cpu 温度36度
然后 我们把这句shell代码写成用java执行
把得到的数据转成int 再除以1000.0 就是我们要显示的温度了
编写类 CPU.java
package com.toshiba.statusbar;

import android.text.TextUtils;

import java.io.BufferedReader;
import java.io.InputStreamReader;

/**
 * 作者:东芝(2016/10/24).
 */

public class CPU {
    private static final String CMD_CPU_TEMPERATURE = "cat sys/devices/virtual/thermal/thermal_zone0/temp";

    public static float getTemperature() {
        try {
            Process process = Runtime.getRuntime().exec(CMD_CPU_TEMPERATURE);
            BufferedReader br = new BufferedReader(new InputStreamReader(process.getInputStream()));
            String line = br.readLine();
            if (!TextUtils.isEmpty(line)) {
                return Integer.parseInt(line) / 1000.0f;
            }
            br.close();
            process.destroy();
        } catch (Exception e) {
            e.printStackTrace();
        }
        return -1;
    }

}
确定要hook那个函数
功能搞定了 那么我们来看一下怎么把这个功能加到状态栏上去
其实很简单 我们只要找到状态栏这个View 对象 然后addView添加进去一个自己的TextView , 自己的TextView显示下刚才那个温度就行了
那么~~~你可能想问 你 怎么找到状态栏这个View呢…还有 ,你刚才怎么确定SystemUI.apk就是状态栏的关键apk? 说的好像我们都会似的…
莫慌莫慌 现在教你方法:
连接手机,并下拉手机状态栏 (手机开屏,不要关屏)
打开DDMS
Android studio是在上方菜单的Tools>Android>Android Device Monitor 就可以打开DDMS了
然后我们分析下布局
点击这个按钮

之后出现下图
(看不清图的, 请下载下来看)
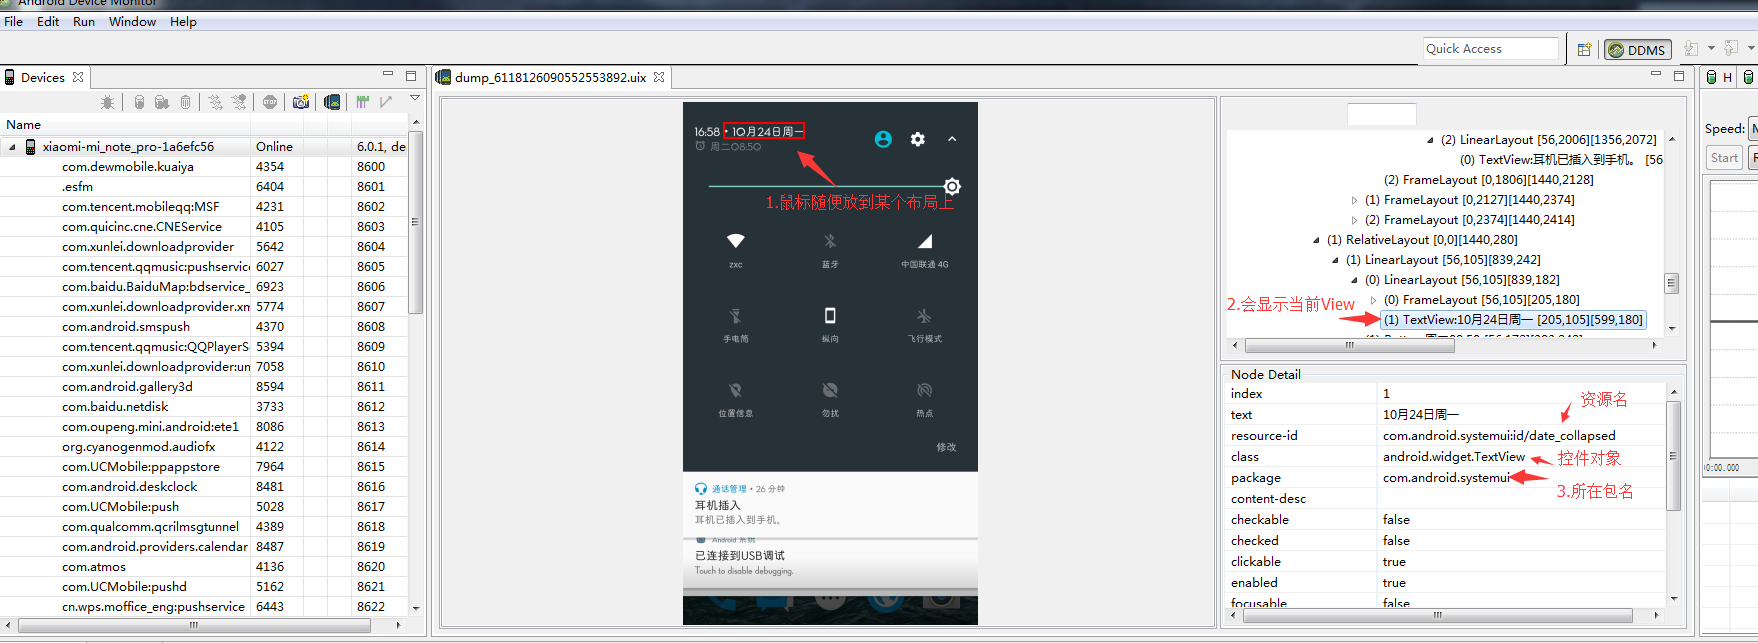
我们随便用鼠标点击下拉状态栏上任意一个布局VIew
右边可查看资源id名和所在apk的包名
可见 包名正是com.android.systemui
只可惜我们没法获取这个状态栏的View的位置,但至少知道包名了

(状态栏和下拉栏不一样 但是是同个apk,建议大家分析其他应用时也用这种方法 能让你少走很多弯路 )
状态栏的关键代码确定在com.android.systemui这个包名的应用里
接下来得花点时间研究系统源码了
下载安卓系统源码
链接:http://pan.baidu.com/s/1dE2gi0h 密码:h8sl
我下载的是安卓6.0.1的 我手机就是6.0.1 你也下载你的系统的
不过只要版本差距太大 没有太大区别
你也可以在线看安卓系统源码 但是不好分析
在线安卓源码 http://androidxref.com
下载好源码后
进入frameworks/base/packages/SystemUI/
也就是SystemUI项目的源码
(在线看的话在:http://androidxref.com/6.0.1_r10/xref/frameworks/base/packages/SystemUI/)
随意浏览一遍项目的基本结构
状态栏的布局代码其实就在这里
http://androidxref.com/6.0.1_r10/xref/frameworks/base/packages/SystemUI/res/layout/status_bar.xml
在末尾 看到 com.android.systemui.statusbar.policy.Clock..这个…不就是状态栏上面的时间吗
 <com.android.keyguard.AlphaOptimizedLinearLayout android:id="@+id/system_icon_area"
            android:layout_width="wrap_content"
            android:layout_height="match_parent"
            android:orientation="horizontal"
            >

            <include layout="@layout/system_icons" />

           <com.android.systemui.statusbar.policy.Clock
                android:id="@+id/clock"
                android:textAppearance="@style/TextAppearance.StatusBar.Clock"
                android:layout_width="wrap_content"
                android:layout_height="match_parent"
                android:singleLine="true"
                android:paddingStart="7dp"
                android:gravity="center_vertical|start"
                />
        </com.android.keyguard.AlphaOptimizedLinearLayout>
    </LinearLayout>
还有 <include layout="@layout/system_icons" /> 不就是状态栏上面的闹钟wifi电量等图标吗,里面还有电池View
system_icons.xml的内容:
在线看http://androidxref.com/6.0.1_r10/xref/frameworks/base/packages/SystemUI/res/layout/system_icons.xml

<LinearLayout xmlns:android="http://schemas.android.com/apk/res/android"
    android:id="@+id/system_icons"
    android:layout_width="wrap_content"
    android:layout_height="match_parent"
    android:gravity="center_vertical">

    <com.android.keyguard.AlphaOptimizedLinearLayout android:id="@+id/statusIcons"
        android:layout_width="wrap_content"
        android:layout_height="match_parent"
        android:gravity="center_vertical"
        android:orientation="horizontal"/>

    <include layout="@layout/signal_cluster_view"
        android:id="@+id/signal_cluster"
        android:layout_width="wrap_content"
        android:layout_height="wrap_content"
        android:layout_marginStart="2.5dp"/>

    <!-- battery must be padded below to match assets -->
    <com.android.systemui.BatteryMeterView android:id="@+id/battery"
        android:layout_height="14.5dp"
        android:layout_width="9.5dp"
        android:layout_marginBottom="@dimen/battery_margin_bottom"/>
</LinearLayout>
为了简单演示 我决定在时钟的前加一个温度显示 以最简单的方式 通过id为system_icons获取<include layout="@layout/system_icons" /> 的根布局对象LinearLayout 然后通过LinearLayout 对象addView.
那么我们看看应该在哪获取findViewById(R.id.system_icons)? 刚才看到状态栏的布局大概在statusbar.xml上, 那谁用了这个布局,并且有没有谁引用了
<include layout="@layout/status_bar"/> ,答案是有 (别问我为什么知道,请乖乖下载源码 导入Android Studio 全局搜索你就找到了,在线好像也可以全局搜索,我没试)
找到super_status_bar.xml这里嵌套了status_bar.xml
然后找到在com.android.systemui.statusbar.phone.PhoneStatusBar类里的
protected PhoneStatusBarView makeStatusBarView();方法里
inflate了它, 如下:
protected PhoneStatusBarView makeStatusBarView() {
                //...省略
        mStatusBarWindow = (StatusBarWindowView) View.inflate(context,
                R.layout.super_status_bar, null);
                //...省略
}
终于找到了,我们只要在这个方法后面拿到 mStatusBarWindow 然后
mStatusBarWindow .findViewById(R.id.system_icons) 再addView 搞定
开始代码实现Hook
我们回到我们的模块工程里
在StatusBar类里添加Hook代码
package com.toshiba.statusbar;
import android.content.Context;
import android.os.Handler;
import android.view.View;
import android.widget.LinearLayout;
import android.widget.TextView;
import java.lang.reflect.Field;
import de.robv.android.xposed.IXposedHookLoadPackage;
import de.robv.android.xposed.XC_MethodHook;
import de.robv.android.xposed.XposedBridge;
import de.robv.android.xposed.callbacks.XC_LoadPackage;
import static de.robv.android.xposed.XposedHelpers.findAndHookMethod;
import static de.robv.android.xposed.XposedHelpers.findField;
/**
* 作者:东芝(2016/10/24).
*/
public class StatusBar implements IXposedHookLoadPackage {
@Override
public void handleLoadPackage(XC_LoadPackage.LoadPackageParam loadPackageParam) throws Throwable {
//这里将会被打印系统所有app的包名
XposedBridge.log("xpfind " + loadPackageParam.packageName);
//我们现在只对SystemUI.apk进行hook,SystemUI.apk是手机的状态栏,最近任务等关键apk
//其包名是com.android.systemui
if (!"com.android.systemui".equals(loadPackageParam.packageName))
return;
XposedBridge.log("xpfind SystemUI!");
findAndHookMethod("com.android.systemui.statusbar.phone.PhoneStatusBar", loadPackageParam.classLoader, "makeStatusBarView", new XC_MethodHook() {
@Override
protected void beforeHookedMethod(MethodHookParam param) throws Throwable {
}
@Override
protected void afterHookedMethod(MethodHookParam param) throws Throwable {
if (handler == null) {//防止重复调用
//拿到变量名(本文章不再讲解 反射 的作用 请百度,这个是很简单的东西)
Field mStatusBarWindowField = findField(param.thisObject.getClass(), "mStatusBarWindow");
//拿到View对象
View mStatusBarWindow = (View) mStatusBarWindowField.get(param.thisObject);
//从View里拿到上下文
Context context = mStatusBarWindow.getContext();
//根据一种通过资源名的方式去取得id (本文章不再讲解getIdentifier的作用 请百度,这个是很简单的东西)
int system_iconsId = context.getResources().getIdentifier("system_icons", "id", context.getPackageName());
//找到system_icons这个View
LinearLayout mllSystem_icons = (LinearLayout) mStatusBarWindow.findViewById(system_iconsId);
//写一个要显示cpu温度的TextView
TextView temperatureTextView = new TextView(context);
temperatureTextView.setPadding(25, 0, 0, 0);
//添加到状态栏上面去
mllSystem_icons.addView(temperatureTextView);
handler = new Handler();
//后台更新Cpu数据
updateCpuTemperature(temperatureTextView,handler);
}
}
});
}
private Handler handler;
/**
* 后台更新Cpu数据
* @param handler
*/
private void updateCpuTemperature(final TextView textView, final Handler handler) {
//开启线程 避免柱塞UI
new Thread(new Runnable() {
@Override
public void run() {
while(true)//就让它一直执行 直到手机关机吧
{
//根据刚才写的工具类, 取得cpu温度
final float temperature = CPU.getTemperature();
if(temperature!=-1)//如果温度无误
{
handler.post(new Runnable() {
@Override
public void run() {
//在主线程刷新UI
textView.setText(String.format("%.1f℃", temperature));
}
});
}
try {
//一共5分钟执行一次判断CPU温度并更新
Thread.sleep(5 * 60 * 1000);
} catch (InterruptedException e) {
e.printStackTrace();
}
}
}
}).start();
}
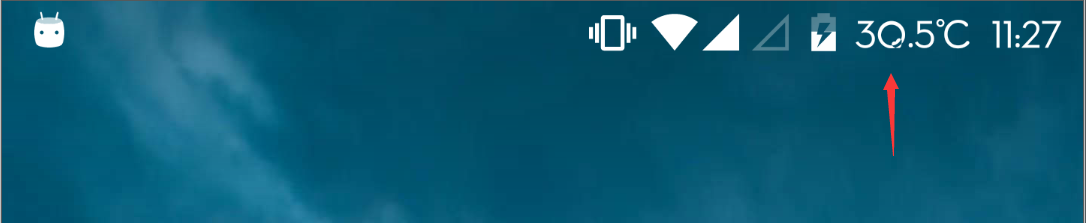
}打包运行app ,激活并重启, 开机后观察效果
然后…状态栏温度真的添加进去了
说到这里 你可能还不太懂Xposed里面的api是怎么用的 这我打算在第三章里面讲解
里面的api的作用
第一次写这样的文章, 不知道大家有没有理解…
教程源码
http://download.csdn.net/detail/u014418171/9663188