在一些体验较好的APP中,输入框输入时会有相应的提示,让人能够很快的通过点击提示进入下一步
这里,我就通过自己构思,实现了一个通过 SharedPreferences 保存的输入提示 demo
实现:
1、实现一个 SharedPreferences 以及其 get、set方法
2、布局一个 AutoCompleteTextView
3、通过java代码实现适配布局、输入提示的保存
4、实际运用
效果:
AutoCompleteTextView 定义的输入框和普通的 EditText 差不多
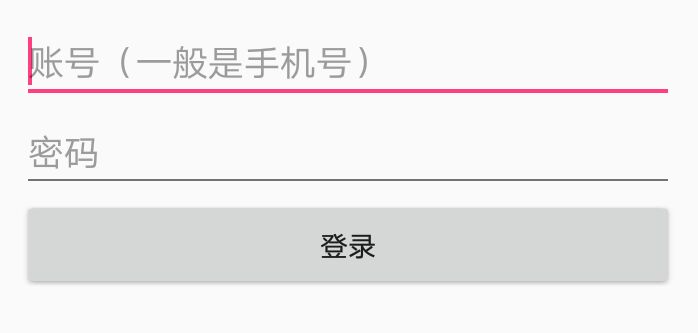
但是可以通过其他设置让它有输入提示功能

实现详情:
1、实现一个 SharedPreferences 以及其 get、set方法
SharedPreferences 是一个轻量级的储存类,这里我拿它来做实验,我设置最多可以保存三个提示
import android.content.Context;
import android.content.SharedPreferences;

/**
 * Created by Administrator on 2018/3/23 0023.
 * 定义 SharedPreferences 以及相应的 get、set 方法
 */

public class MySharedPreferences {
    //创建一个SharedPreferences    类似于创建一个数据库,库名为 data
    public static SharedPreferences share(Context context){
        SharedPreferences sharedPreferences = context.getSharedPreferences("date",
                Context.MODE_PRIVATE);
        return sharedPreferences;
    }

    //账号1
    public static String getPhone1(Context context){
        return share(context).getString("phone1",null);
    }
    //这里使用的是 apply() 方法保存,将不会有返回值
    public static void setPhone1(String phone1, Context context){
        SharedPreferences.Editor e = share(context).edit();
        e.putString("phone1",phone1);
        e.apply();
    }

    //账号2
    public static String getPhone2(Context context){
        return share(context).getString("phone2",null);
    }
    //这里使用的是 apply() 方法保存,将不会有返回值
    public static void setPhone2(String phone2, Context context){
        SharedPreferences.Editor e = share(context).edit();
        e.putString("phone2",phone2);
        e.apply();
    }

    //账号3
    public static String getPhone3(Context context){
        return share(context).getString("phone3",null);
    }
    //这里使用的是 apply() 方法保存,将不会有返回值
    public static void setPhone3(String phone3, Context context){
        SharedPreferences.Editor e = share(context).edit();
        e.putString("phone3",phone3);
        e.apply();
    }
}
SharedPreferences 可以灵活运用,还可以保存一些其他的常用配置信息、状态信息等
2、布局一个 AutoCompleteTextView
<AutoCompleteTextView
    android:id="@+id/phone"
    android:layout_width="match_parent"
    android:layout_height="wrap_content"
    android:hint="账号(一般是手机号)"/>

<EditText
    android:id="@+id/pswd"
    android:layout_width="match_parent"
    android:layout_height="wrap_content"
    android:inputType="textPassword"
    android:hint="密码"/>

<Button
    android:id="@+id/sign_in"
    android:layout_width="match_parent"
    android:layout_height="wrap_content"
    android:text="登录"/>
布局很简单,看上面的效果图就知道了,只不过第一个输入框是 AutoCompleteTextView
第二个是普通的 EditView 加了密码效果
3、通过java代码实现适配布局、输入提示的保存
这里是重点,主要是为 AutoCompleteTextView 加入提示数据还有更新登入提示数据
import android.app.Activity;
import android.content.Context;
import android.content.Intent;
import android.os.Bundle;
import android.view.View;
import android.widget.ArrayAdapter;
import android.widget.AutoCompleteTextView;
import android.widget.Button;
import android.widget.EditText;

public class MainActivity extends Activity {

    private AutoCompleteTextView phone;
    private EditText pswd;
    private Button sign_in;
    private String[] array;
    @Override
    protected void onCreate(Bundle savedInstanceState) {
        super.onCreate(savedInstanceState);
        setContentView(R.layout.activity_main);

        phone = (AutoCompleteTextView) findViewById(R.id.phone);

        array = new String[3];
        array[0] = MySharedPreferences.getPhone1(this)+"";
        array[1] = MySharedPreferences.getPhone2(this)+"";
        array[2] = MySharedPreferences.getPhone3(this)+"";

        //创建 AutoCompleteTextView 适配器 (输入提示)
        ArrayAdapter<String> adapter = new ArrayAdapter<String>(
                this,
                android.R.layout.simple_dropdown_item_1line,
                array);
        //初始化autoCompleteTextView
        phone.setAdapter(adapter);
        //设置输入多少字符后提示,默认值为2,在此设为1
        phone.setThreshold(1);

        pswd = (EditText) findViewById(R.id.pswd);
        sign_in = (Button) findViewById(R.id.sign_in);


        sign_in.setOnClickListener(new View.OnClickListener() {
            @Override
            public void onClick(View view) {
                //登录判断。。。

                //这里假设登入成功了 if 里面的是判断是否登入成功(这里随便写的)
                if((phone.getText().length()+pswd.getText().length()) >= 10){
                    //判断登录的账号有没有保存
                    phones(MainActivity.this, array, phone.getText().toString());
                }
                startActivity(new Intent(MainActivity.this, Main2Activity.class));
            }
        });

    }
    //判断登录的账号有没有保存,没有就保存起来,替换一个最久没登录的
    public static void phones(Context context, String[]array, String phone){
        //当 phone 是新登录的账号的时候
        boolean trfa = (!phone.equals(array[0]) && !phone.equals(array[1]) && !phone.equals(array[2]));
        if(trfa){
            //循环一下,将最后一个替换成新的
            MySharedPreferences.setPhone3(array[1], context);
            MySharedPreferences.setPhone2(array[0], context);
            MySharedPreferences.setPhone1(phone, context);
        }
    }
}
具体都有注释,可以仔细看看
4、实际运用
这里我模仿登录成功,就跳转到了另一个Activity去了,如果要查看效果,就又跳转回来实践
这里弹出来的提示数据都是在 SharedPreferences 里的,它只能存少量数据
如果有需要可以将数据存入 SQLite 中去
源码:https://github.com/iscopy/AutoCompleteTextView