LVS-DR模型的特性:
保证前端路由将目标地址为VIP报文统统发给Director Server,而不是RS
RS可以使用私有地址;也可以是公网地址,如果使用公网地址,此时可以通过互联网对RIP进行直接访问
RS跟Director Server必须在同一个物理网络中
所有的请求报文经由Director Server,但响应报文必须不能进过Director Server
不支持地址转换,也不支持端口映射
RS可以是大多数常见的操作系统
RS的网关绝不允许指向DIP(因为我们不允许他经过director)
RS上的lo接口配置VIP的IP地址
缺陷:RS和DS必须在同一机房中
ipvsadm -C  #清空 ipvs 转发表
ipvsadm -A -t 172.25.65.100:80 -s rr
ipvsadm -a -t 172.25.65.100:80 -r 172.25.65.3:80 -g
ipvsadm -a -t 172.25.65.100:80 -r 172.25.65.2:80 -g
-A:添加一个虚拟服务; -t:tcp 服务;-g:DR模式
保存 rule
service ipvsadm save

ipvsadm -nL #查看受到并响应客户端请求次数有解析
ipvsadm -L  #查看受到并响应客户端请求次数无解析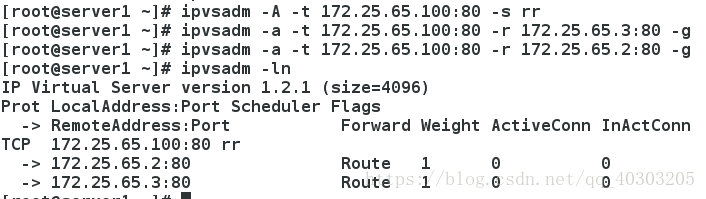
在server2 中
/etc/init.d/httpd start
ip addr add 172.25.65.100/24 dev eth0
ip addr
yum install arptables_jf -y
arptables -A IN -d 172.25.65.100 -j DROP
arptables -A OUT -s 172.25.65.100 -j mangle --mangle-ip-s 172.25.65.2
etc/init.d/arptables_jf save
arptables -L
在server3中
/etc/init.d/httpd start
ip addr add 172.25.65.100/24 dev eth0
ip addr
yum install arptables_jf -y
arptables -A IN -d 172.25.65.100 -j DROP
arptables -A OUT -s 172.25.65.100 -j mangle --mangle-ip-s 172.25.65.3
etc/init.d/arptables_jf save
arptables -L
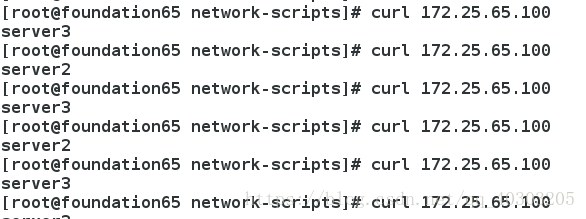
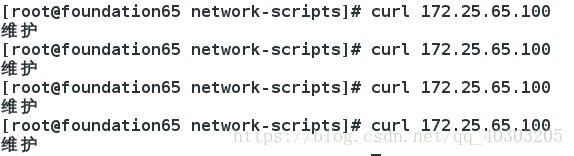
客户端测试:
crul 172.25.65.100
ldirectord
安装ldirectord 之前需要重新配置yum源
vim /etc/yum.repos.d/rhel-source.repo
添加如下几行
[rhel-source]
name=Red Hat Enterprise Linux $releasever - $basearch - Source
baseurl=http://172.25.65.250/rhel6.5
enabled=1
gpgcheck=0

[HighAvailability]
name=HighAvailability
baseurl=http://172.25.65.250/rhel6.5/HighAvailability
gpgcheck=0

[LoadBalancer]
name=LoadBalancer
baseurl=http://172.25.65.250/rhel6.5/LoadBalancer
gpgcheck=0

[ResilientStorage]
name=ResilientStorage
baseurl=http://172.25.65.250/rhel6.5/ResilientStorage
gpgcheck=0
查看yum源是否配置成功
yum repolist安装
yum install ldirectord-3.9.5-3.1.x86_64.rpm -y查看配置文件位置
rpm -ql ldirectord编辑配置文件
cp /usr/share/doc/ldirectord-3.9.5/ldirectord.cf /etc/ha.d/
vim /etc/ha.d/ldirectord.cf
#Sample for an http virtual service
virtual=172.25.65.100:80
        real=172.25.65.2:80 gate
        real=172.25.65.3:80 gate
        fallback=127.0.0.1:80 gate
        service=http
        scheduler=rr
        #persistent=600
        #netmask=255.255.255.255
        protocol=tcp
        checktype=negotiate
        checkport=80
        request="index.html"
        #receive="Test Page"
        #virtualhost=www.x.y.z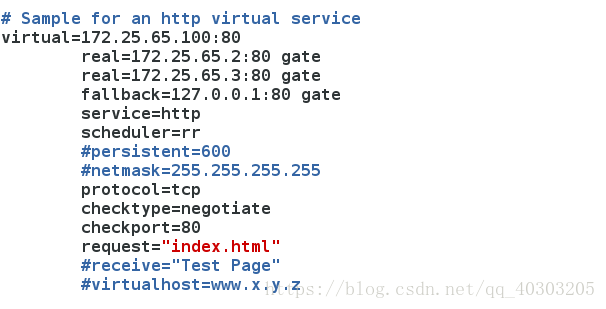
ipvsadm -C 清空ipvsadm

/etc/init.d/ldirectord start
开启ldirectord服务后 会自动生成规则
当其中一个real_server挂掉以后会自动修改ipvsadm中的规则 保障用户可以正常访问

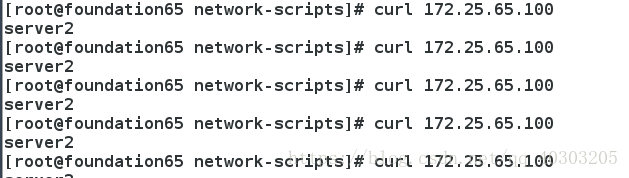
当所有的real_server都挂掉以后 则显示负责负载均衡的这台主机自己的站点
keepalived
安装之前需要安装openssl-devel.x86_64以解决keepalived的依赖性
yum install openssl-devel.x86_64 -y ./configure --prefix=/usr/local/keepalived --with-init=SYSV
make
make install
chmod +x keepalived
ln -s /usr/local/keepalived/etc/rc.d/init.d/keepalived /etc/init.d/
ln -s /usr/local/keepalived/etc/keepalived /etc/
ln -s /usr/local/keepalived/etc/sysconfig/keepalived /etc/sysconfig/
ln -s /usr/local/keepalived/sbin/keepalived /sbin/
查看是否安装成功
which keepalived
/etc/init.d/keepalived start
/etc/init.d/keepalived stop
将安装好的文件发送给server4
scp -r /usr/local/keepalived/ server4:/usr/local/Server4:
ln -s /usr/local/keepalived/etc/rc.d/init.d/keepalived /etc/init.d/
ln -s /usr/local/keepalived/etc/keepalived /etc/
ln -s /usr/local/keepalived/etc/sysconfig/keepalived /etc/sysconfig/
ln -s /usr/local/keepalived/sbin/keepalived /sbin/

which keepalived
/etc/init.d/keepalived start
/etc/init.d/keepalived stop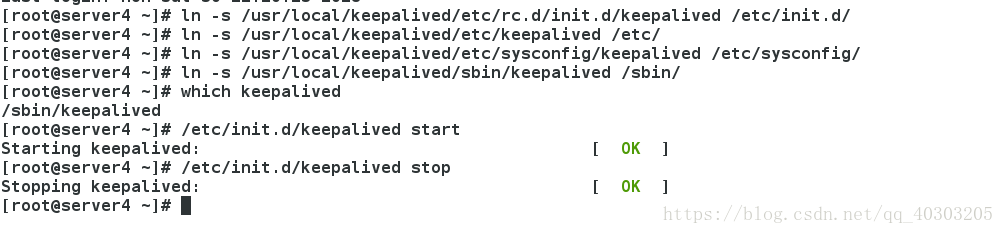
编辑配置文件:
vim /etc/keepalived/keepalived.conf
! Configuration File for keepalived

global_defs {
   notification_email {
     root@localhost
   }
   notification_email_from keepalived@localhost
   smtp_server 127.0.0.1
   smtp_connect_timeout 30
   router_id LVS_DEVEL
   vrrp_skip_check_adv_addr
   #vrrp_strict
   vrrp_garp_interval 0
   vrrp_gna_interval 0
}

vrrp_instance VI_1 {
    state MASTER
    interface eth0
    virtual_router_id 65
    priority 100
    advert_int 1
    authentication {
        auth_type PASS
        auth_pass 1111
    }
    virtual_ipaddress {
        172.25.65.100
    }
}

virtual_server 172.25.0.100 80 {
    delay_loop 3
    lb_algo rr
    lb_kind DR
    #persistence_timeout 50
    protocol TCP

    real_server 172.25.0.2 80 {
        weight 1
        TCP_CHECK {
            connect_timeout 3
            retry 3
            delay_before_retry 3
        }
    }
将编辑好的配置文件发送到server4中
修改成如下
! Configuration File for keepalived

global_defs {
   notification_email {
     root@localhost
   }
   notification_email_from keepalived@localhost
   smtp_server 127.0.0.1
   smtp_connect_timeout 30
   router_id LVS_DEVEL
   vrrp_skip_check_adv_addr
   #vrrp_strict
   vrrp_garp_interval 0
   vrrp_gna_interval 0
}

vrrp_instance VI_1 {
    state BACKUP
    interface eth0
    virtual_router_id 65
    priority 50
    advert_int 1
    authentication {
        auth_type PASS
        auth_pass 1111
    }
    virtual_ipaddress {
        172.25.65.100
    }
}

virtual_server 172.25.0.100 80 {
    delay_loop 3
    lb_algo rr
    lb_kind DR
    #persistence_timeout 50
    protocol TCP

    real_server 172.25.0.2 80 {
        weight 1
        TCP_CHECK {
            connect_timeout 3
            retry 3
            delay_before_retry 3
        }
    }
server4安装邮件方便查看实验效果:
yum install mailx -y关闭server1中的keepalived后 server4会顶替server1的工作