我们在使用springBoot操作数据库的时候,可以使用jdbcTemplate来操作数据库,当我们使用的是spring-jdbc,Spring Boot会自动创建一个JdbcTemplate。并可以使用 @Autowired JdbcTemplate字段自动加载它并使其可用。
当然了我们还可以整合mybatis和hibernate。与此同时,SpringBoot默认使用的是tomcat-jdbc连接池,如果需要使用别的连接池,例如:C3P0,DBCP,Druid,可以加入相关的依赖以及配置即可。
在这里作为啰嗦,演示一下怎么使用c3p0,并巩固一下自己的知识。
首先加入maven依赖:
<dependency>
    <groupId>com.mchange</groupId>
    <artifactId>c3p0</artifactId>
    <version>0.9.5.1</version>
</dependency>
然后加入配置信息,写入到application.yml或者application.properties中。
c3p0.jdbcUrl=jdbc:mysql://loclhost:3306/test
c3p0.user=${username}
c3p0.password=${password}
c3p0.driverClass=com.mysql.jdbc.Driver
c3p0.minPoolSize=2
c3p0.maxPoolSize=10
c3p0.maxIdleTime=1800000
c3p0.acquireIncrement=3
c3p0.maxStatements=1000
c3p0.initialPoolSize=3
c3p0.idleConnectionTestPeriod=60
c3p0.acquireRetryAttempts=30
c3p0.acquireRetryDelay=1000
c3p0.breakAfterAcquireFailure=false
c3p0.testConnectionOnCheckout=false
接着配置数据源数据源
@Configuration
public class DatasourceConfiguration {

 @Bean(name = "dataSource")
 @Qualifier(value = "dataSource")
 @Primary
 @ConfigurationProperties(prefix = "c3p0")
 public DataSource dataSource()
 {
  return DataSourceBuilder.create().type(com.mchange.v2.c3p0.ComboPooledDataSource.class).build();
 }
}
此时就可以使用,废话不多说,开始说明本篇的重点。
首先加入以下springBoot的JDBC的Maven的依赖
   <dependency>
            <groupId>org.springframework.boot</groupId>
            <artifactId>spring-boot-starter-jdbc</artifactId>
   </dependency>

   <dependency>
	    <groupId>org.springframework.boot</groupId>
	    <artifactId>spring-boot-starter-web</artifactId>
	</dependency>

    <dependency>
        <groupId>com.fasterxml.jackson.core</groupId>
        <artifactId>jackson-databind</artifactId>
    </dependency>
开发服务层(为了方便,将DAO层作为服务层的实现写在这里)
服务层接口定义如下:
package hello.mysql.service;

import java.util.List;

import hello.mysql.entry.User;

/**
 *  业务层接口定义
 * @author zhao
 *
 */
public interface UserService {
	User getUserById(Integer id);

	public List<User> getUserList();

	public int add(User user);

	public int update(Integer id, User user);

	public int delete(Integer id);
}
其实现如下:
package hello.mysql.service;

import java.util.List;

import org.springframework.beans.factory.annotation.Autowired;
import org.springframework.stereotype.Service;

import hello.mysql.dao.UserDao;
import hello.mysql.entry.User;

@Service
public class UserServiceImpl implements UserService {
@Autowired
	private JdbcTemplate jdbcTemplate ; // 在容器中已经自动有了这个,可以直接注入并使用

	@Override
	public User getUserById(Integer id) {
		List<User> list = jdbcTemplate.query("select *from zhao where id=?",
				new Object[]{id},new BeanPropertyRowMapper(User.class));
		 if(list !=null && list.size() >0)
			 return list.get(0);
		return null;
	}

	@Override
	public List<User> getUserList() {
		List<User> list = jdbcTemplate.query("select *from zhao",
				new Object[]{},new BeanPropertyRowMapper(User.class));
		if(list !=null && list.size() >0)
			return list;
		return null;
	}

	@Override
	public int add(User user) {
		return  jdbcTemplate.update("insert into zhao(username,age) values(?,?)"
				,new Object[] {user.getUsername(),user.getAge()});
	}

	@Override
	public int update(Integer id, User user) {
		return jdbcTemplate.update("update zhao set username=? ,age=? where id=?"
				,new Object[] {user.getUsername(),user.getAge(),id} );
	}

	@Override
	public int delete(Integer id) {

		return jdbcTemplate.update("delete from zhao where id=?",id);
	}
}
最后控制器层代码如下:
package hello.mysql.controller;
import java.util.List;
import org.springframework.beans.factory.annotation.Autowired;
import org.springframework.http.ResponseEntity;
import org.springframework.web.bind.annotation.DeleteMapping;
import org.springframework.web.bind.annotation.GetMapping;
import org.springframework.web.bind.annotation.PathVariable;
import org.springframework.web.bind.annotation.PostMapping;
import org.springframework.web.bind.annotation.RequestBody;
import org.springframework.web.bind.annotation.RequestMapping;
import org.springframework.web.bind.annotation.RequestMethod;
import org.springframework.web.bind.annotation.RestController;
import hello.mysql.entry.Result;
import hello.mysql.entry.User;
import hello.mysql.service.UserService;
/**
* user controller控制器开发
* @author zhao
*
*/
@RestController
@RequestMapping("/user")
public class UserController {
@Autowired
private UserService userService ;
/**
* 根据id查询用户。
* @param id
* @return Postman测试通过
*/
@GetMapping(value="/{id}")
public ResponseEntity<Result> getUserById(@PathVariable Integer id){
Result r=new Result();
try {
User user = userService.getUserById(id);
r.setStatus("200");
r.setResult(user);
} catch (Exception e) {
r.setResult(e.getClass().getName()+":"+ e.getMessage());
r.setStatus("error");
}
return ResponseEntity.ok(r);
}
/**
* 查询用户列表
* @return
*/
@GetMapping(value="/list")
public ResponseEntity<Result> getUserList(){
Result r= new Result() ;
try {
List<User> list = userService.getUserList();
r.setResult(list);
r.setStatus("200");
} catch (Exception e) {
r.setResult(e.getClass().getName()+":"+ e.getMessage());
r.setStatus("error");
}
return ResponseEntity.ok(r);
}
/**
* 添加用户
* @param user
* @return Postman测试通过,选择 post 提交, 选择 raw 并选中 json(application/json)
*/
@PostMapping(value="/add")
public ResponseEntity<Result> add(@RequestBody User user){
Result r =new Result() ;
try {
int num = userService.add(user);
if (num <=0) {
r.setStatus("fail");
}else {
r.setStatus("ok");
}
r.setResult(num);
} catch (Exception e) {
r.setResult(e.getClass().getName()+":"+ e.getMessage());
r.setStatus("error");
}
return ResponseEntity.ok(r);
}
/**
* 根据id 删除用户
* @param id
* @return
*/
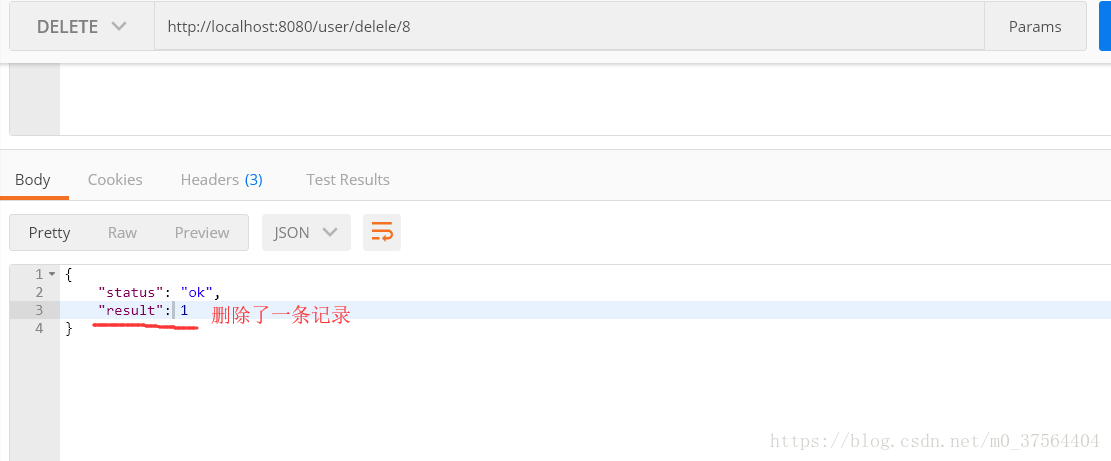
@DeleteMapping(value="delete/{id}")
public ResponseEntity<Result> delete(@PathVariable Integer id){
Result r =new Result() ;
try {
int result = userService.delete(id);
if(result <=0)
r.setStatus("fail");
else
r.setStatus("ok");
r.setResult(result);
} catch (Exception e) {
r.setResult(e.getClass().getName()+":"+e.getMessage());
r.setStatus("error");
}
return ResponseEntity.ok(r);
}
/** 更新用户信息可以使用put提交方式,更关心一个具体资源对应的url
* 根据id修改用户信息
* @param id
* @param user
* @return 通过测试
*/
@RequestMapping(value="update/{id}",method=RequestMethod.PUT)
public ResponseEntity<Result>update(@PathVariable Integer id ,@RequestBody User user){
Result r=new Result() ;
try {
int result = userService.update(id, user);
if(result <=0)
r.setStatus("fail");
else
r.setStatus("ok");
r.setResult(result);
} catch (Exception e) {
r.setResult(e.getClass().getName()+":"+ e.getMessage());
r.setStatus("error");
}
return ResponseEntity.ok(r);
}
}
ResponseEntity和ResponseBody,但是ResponseEntity中在org.springframework.http.HttpEntity的基础上添加了http状态码(http状态码),所以,@ ResponseBody可以直接返回Json结果,但@ResponseEntity不仅可以返回json结果,还可以定义返回的HttpHeaders和HttpStatus .Result是一个自定义结构体,用于封装返回信息。其代码如下:
package hello.mysql.util;

public class Result {
	private String status=null;
	private Object result =null;

	public Result status(String status) {
		this.status = status;
		return this ;
	}
 //Getter 和Setter
}
此时启动springBoot程序(Application.java中的主函数),运行为JavaApplication,启动项目。
然后可通过,谷歌浏览器的邮递员插件,进行测试。本程序已经过测试,全部通过,并返回正确的结果。放一张测试返回的图吧。