简介
本文记录学习Spring的Bean装配过程(基于注解与java配置)。
一、创建方式
创建bean对象需要一个配置类,该类只需要添加@Configration注解即可:
@Configuration
public class MyConfig {
    @Bean
    public Dog createDog() {
        return new Dog();
    }
}
以上就是一个简单的配置文件,创建bean通过一个函数加上@Bean注解完成。
运行:
public class App {
    public static void main( String[] args ){
        AnnotationConfigApplicationContext context =
                new AnnotationConfigApplicationContext(MyConfig.class);

        System.out.println(context.getBean("createDog"));//com.zdg.beanfit.Dog@7fad8c79
        System.out.println(context.getBean(Dog.class));//com.zdg.beanfit.Dog@7fad8c79

        context.close();
    }
}
获取bean有两种方式,一种通过名称,一种通过类型(即xx.Class)。通过名称获取则名称默认为函数名,两种打印结果显示相同,说明Spring容器装配Bean默认是单例的,可通过@Scope修改。
修改配置类:
@Configuration
public class MyConfig {
    @Bean("dog")
    @Scope(ConfigurableBeanFactory.SCOPE_PROTOTYPE)
    public Dog createDog() {
        return new Dog();
    }
}配置类在@Bean中添加了值,同时添加了@Scope注解,查看@Scope注解:
@AliasFor("scopeName")//这个注解表示该属性与scopeName等同
    String value() default "";
/**
     * Specifies the name of the scope to use for the annotated component/bean.
     * <p>Defaults to an empty string ({@code ""}) which implies
     * {@link ConfigurableBeanFactory#SCOPE_SINGLETON SCOPE_SINGLETON}.
     * @since 4.2
     * @see ConfigurableBeanFactory#SCOPE_PROTOTYPE
     * @see ConfigurableBeanFactory#SCOPE_SINGLETON
     * @see org.springframework.web.context.WebApplicationContext#SCOPE_REQUEST
     * @see org.springframework.web.context.WebApplicationContext#SCOPE_SESSION
     * @see #value
     */
    @AliasFor("value")//这个注解表示该属性与value等同
String scopeName() default "";可以看到两种属性等同,用哪种声明scope都可以,另外scopeName的注释中说明:空值则默认为ConfigurableBeanFactory.SCOPE_SINGLETON,这个值就等于singleton,配置类的代码中常量同样可以替换为prototype,web应用中还有request与session两个备选值
FactoryBean:
Spring提供FactoryBean接口,实现该接口即可使用Bean工厂创建Bean,工厂类代码如下:
public class CatFactoryBean implements FactoryBean<Cat>{
    public Cat getObject() throws Exception {
        return new Cat();
    }
    public Class<?> getObjectType() {
        return Cat.class;
    }

}
配置文件如下:
@Configuration
public class MyConfig {
    @Bean("catFactory")
    public CatFactoryBean CreateCat() {
        return new CatFactoryBean();
    }
}
声明工厂类与声明普通的Bean相同,唯一不同时工厂实现了FactoryBean接口。
使用方式:
public class App {
    public static void main( String[] args ){
        AnnotationConfigApplicationContext context =
                new AnnotationConfigApplicationContext(MyConfig.class);

        System.out.println(context.getBean(Cat.class));//com.zdg.beanfit.Cat@64d7f7e0
        System.out.println(context.getBean("catFactory"));//com.zdg.beanfit.Cat@64d7f7e0
        System.out.println(context.getBean(CatFactoryBean.class));//com.zdg.beanfit.CatFactoryBean@27c6e487
        System.out.println(context.getBean("&catFactory"));//com.zdg.beanfit.CatFactoryBean@27c6e487

        context.close();
    }
}使用工厂同样有两种方式,一种通过类型获取,一种通过名称获取,其中,当指定类型为工厂类的class对象时,会得到工厂对象,指定类型为bean的class对象则获得bean对象,通过工厂名称获取时得到的是需要生成的bean对象,如果想要通过名称获取工厂对象,可以在名称前添加&符号。
二、生命周期函数
bean的生命周期函数有两个,一个在对象创建后调用,一个在销毁前调用,设置两个生命周期函数的方式有三种:
1、声明方式一:@Bean注解的属性声明
第一步在类中写两个函数,名称任意,本文用init与destory:
public class Dog {
    private String name;
    public void init() {
        System.out.println(this.name+" is created");
    }
    public void destory() {
        System.out.println(this.name+" will be destroyed");
    }
    public String getName() {
        return name;
    }
    public void setName(String name) {
        this.name = name;
    }
}
第二步在配置文件中@Bean注解中添加声明,名称与Dog类中写的两个周期函数名称对应:
@Configuration
public class MyConfig {
@Bean(name="dog",initMethod="init",destroyMethod="destory")
public Dog createDog() {
Dog dog = new Dog();
dog.setName("amy");
System.out.println("i'm "+dog.getName());
return dog;
}
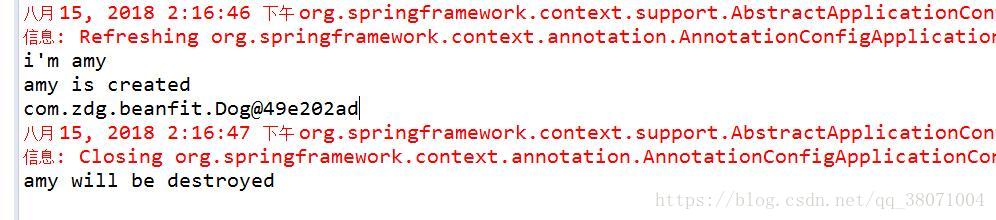
}运行代码:
 public static void main( String[] args ){
        AnnotationConfigApplicationContext context =
                new AnnotationConfigApplicationContext(MyConfig.class);
        System.out.println(context.getBean("dog"));
        context.close();
    }
运行效果截图:
2、声明方式二:实现接口
在Bean的类中实现两个接口InitializingBean,DisposableBean即可,配置类无需再@Bean注解中配置,代码如下。
public class Dog implements InitializingBean,DisposableBean{
    private String name;
    public String getName() {
        return name;
    }
    public void setName(String name) {
        this.name = name;
    }
    public void destroy() throws Exception {
        System.out.println("---destroy---");
    }
    public void afterPropertiesSet() throws Exception {
        System.out.println("---init---");
    }
}
3、声明方式三:注解
在Bean的类定义中添加两个函数,通过添加@PostConstruct和@PreDestroy注解声明,用这种方式jdk版本至少是1.6:
public class Dog{
    private String name;
    public String getName() {
        return name;
    }
    public void setName(String name) {
        this.name = name;
    }
    @PreDestroy
    public void destroy() throws Exception {
        System.out.println("destroy");
    }
    @PostConstruct
    public void afterPropertiesSet() throws Exception {
        System.out.println("init");
    }
}