接下来实现个人中心用户头像设置与裁剪。
- 加入依赖:
implementation 'de.hdodenhof:circleimageview:2.2.0'- 修改布局文件,将上一节头像的ImageView改为circleimageview,并设置点击事件
        <LinearLayout
            android:layout_width="match_parent"
            android:layout_height="200dp"
            android:orientation="vertical"
            android:gravity="center"
            android:background="@drawable/user_frgament_bg"
            >

            <de.hdodenhof.circleimageview.CircleImageView
                android:layout_width="96dp"
                android:layout_height="96dp"
                android:src="@drawable/add_pic"
                android:id="@+id/profile_image"
                app:civ_border_width="2dp"
                app:civ_border_color="@color/colorPrimary"/>

            <TextView
                android:layout_width="100dp"
                android:layout_height="30dp"
                android:text="编辑资料"
                android:textSize="16dp"
                android:textColor="#ffffff"
                android:layout_marginTop="10dp"
                android:id="@+id/edit_user"
                android:gravity="center"
                android:background="@drawable/button_bg"
                />
        </LinearLayout>
- 点击编辑头像后,弹出对话框,选择相机,图库或者取消,这是一个dialog,dialog的布局时三个button
<?xml version="1.0" encoding="utf-8"?>
<LinearLayout
    xmlns:android="http://schemas.android.com/apk/res/android"
    android:layout_width="match_parent"
    android:layout_height="match_parent"
    android:gravity="bottom"
    android:orientation="vertical"
    android:padding="10dp">

    <Button
        android:id="@+id/btn_camera"
        android:layout_width="match_parent"
        android:layout_height="wrap_content"
        android:background="@drawable/button_bg"
        android:text="拍照"
        android:textColor="@android:color/white"/>

    <Button
        android:id="@+id/btn_picture"
        android:layout_width="match_parent"
        android:layout_height="wrap_content"
        android:layout_marginBottom="10dp"
        android:layout_marginTop="10dp"
        android:background="@drawable/button_bg"
        android:text="图库"
        android:textColor="@android:color/white"/>


    <Button
        android:id="@+id/btn_cancel"
        android:layout_width="match_parent"
        android:layout_height="wrap_content"
        android:background="@drawable/button_bg"
        android:text="取消"
        android:textColor="@android:color/white"/>

</LinearLayout>- 接下来是初始化控件
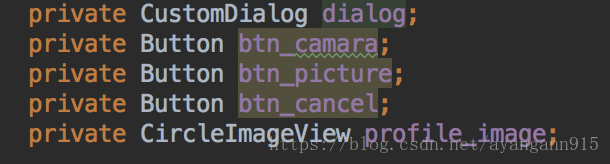

对弹出的对话框初始化,添加布局为前面的dialog布局
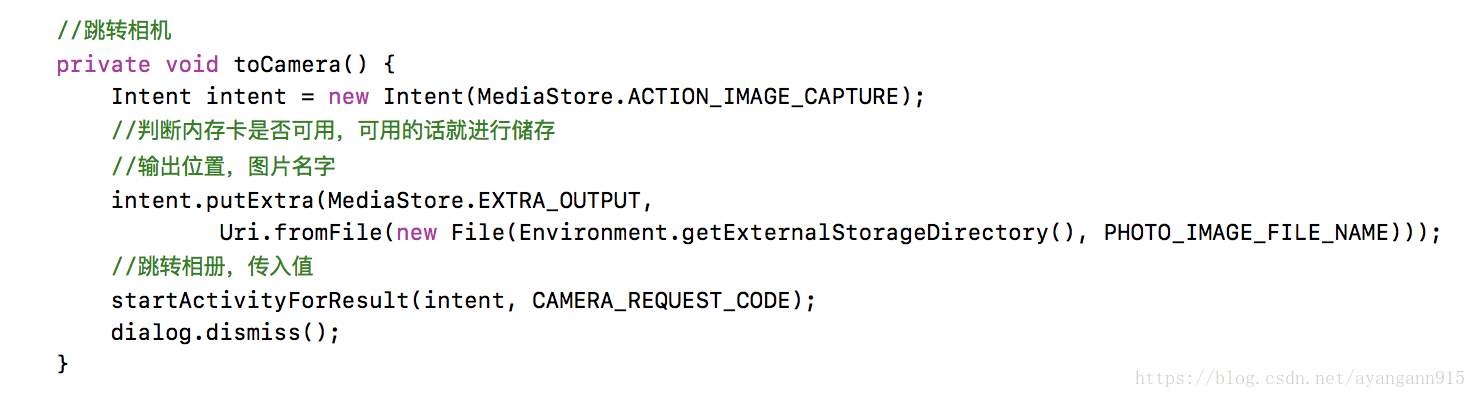
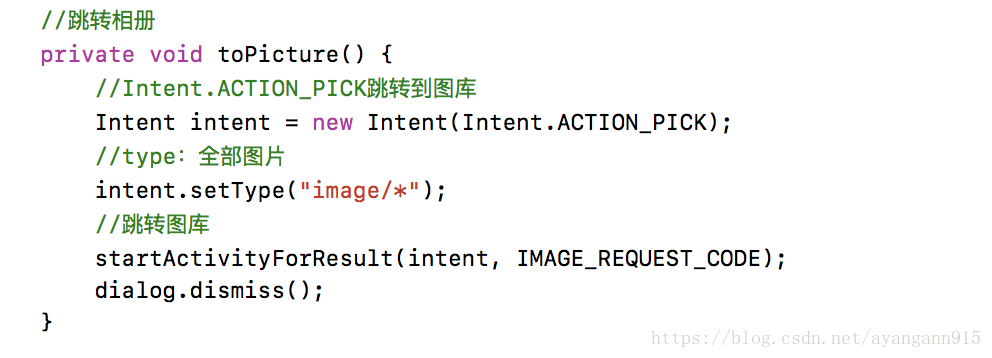
* 接下来是操作相册和相机,分别跳转到相机或相册
定义的返回码:
    public static final String PHOTO_IMAGE_FILE_NAME = "fileImg.jpg";
    public static final int CAMERA_REQUEST_CODE = 100;
    public static final int IMAGE_REQUEST_CODE = 101;
    public static final int RESULT_REQUEST_CODE = 102;
    private File tempFile = null;
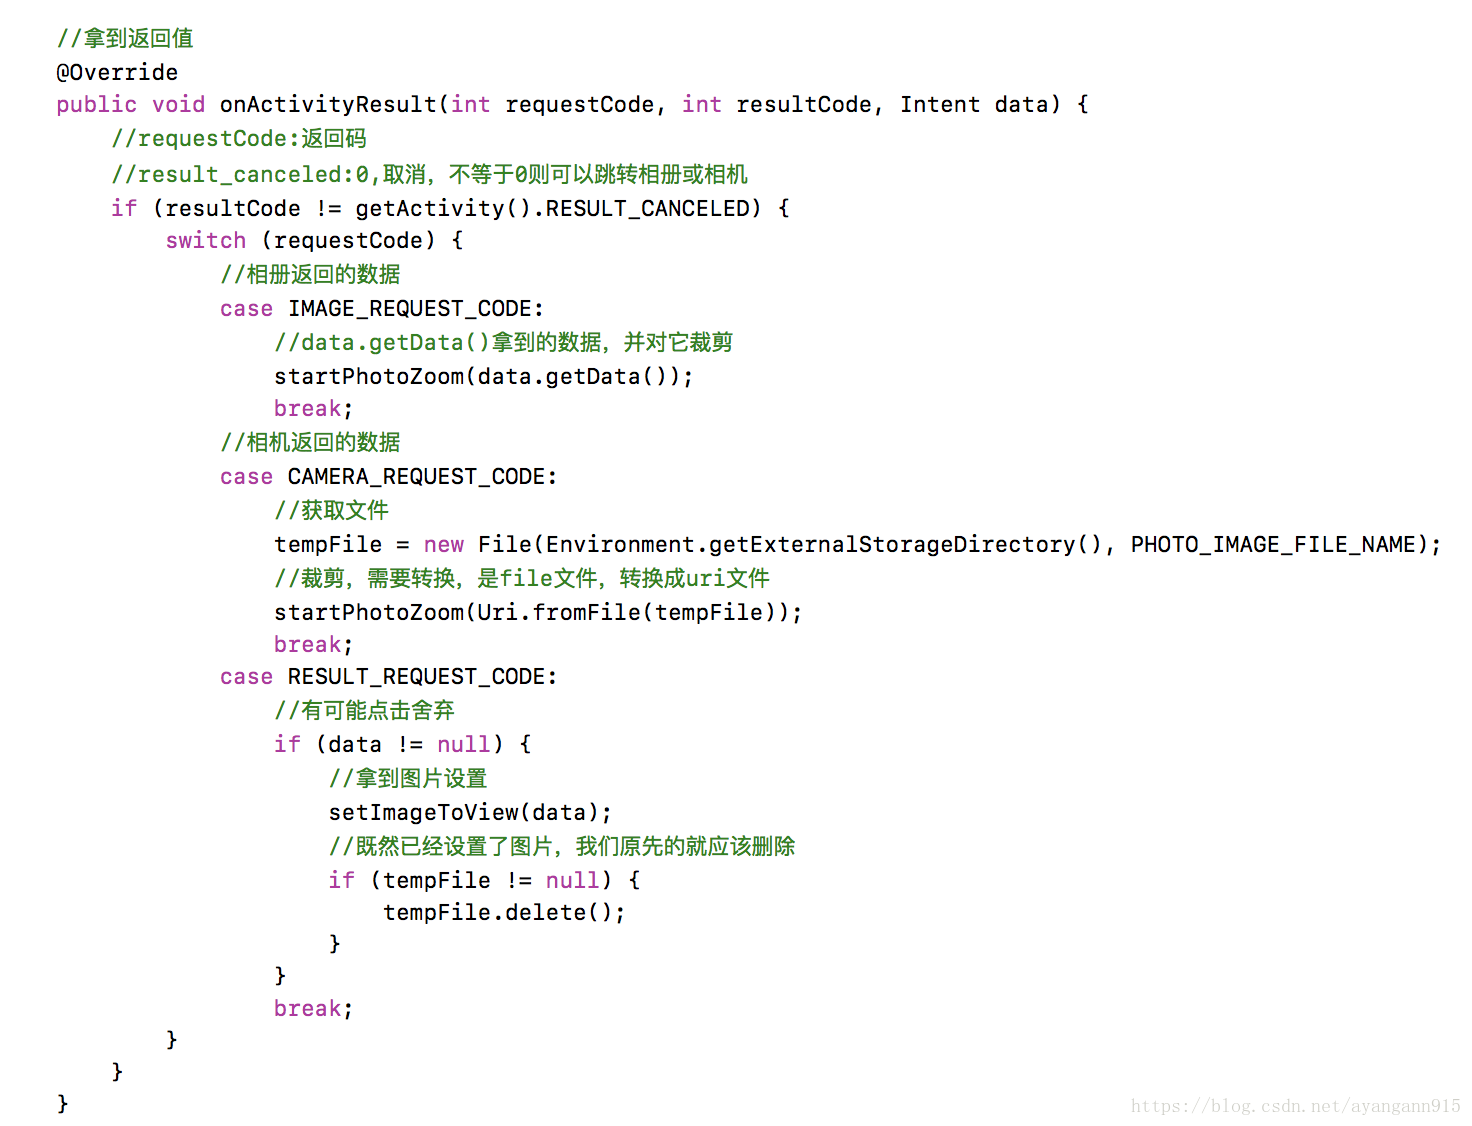
接下来是在获得相应码,取得传入的数据,获得图片
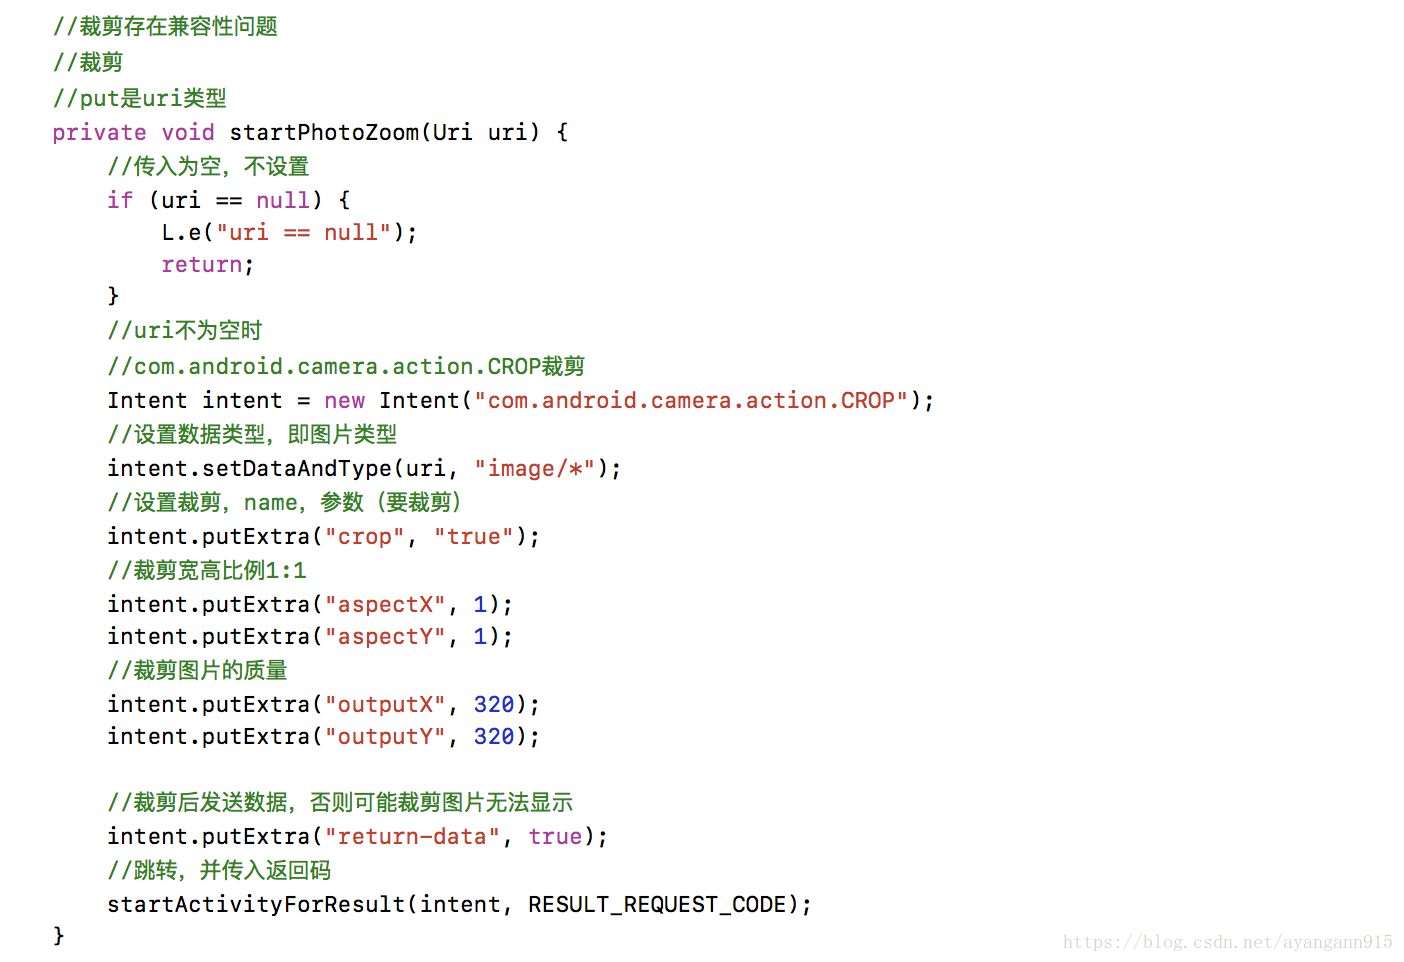
裁剪图片的方法
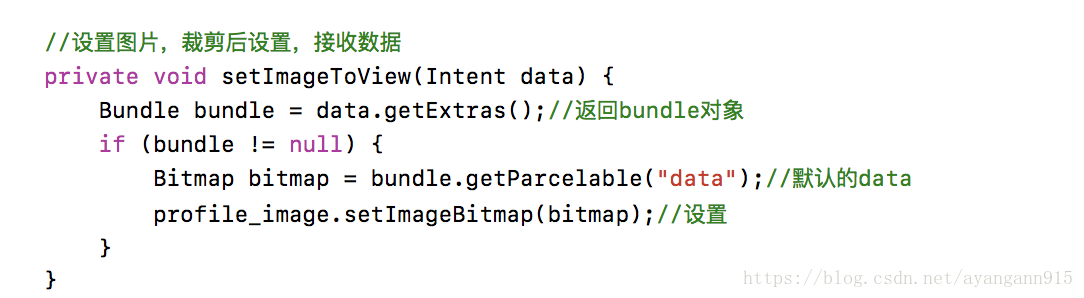
设置头像
不过仍存在问题,就是退出后头像仍然没有改变,还需进一步操作,下次改动。