转载请注明:https://mp.csdn.net/mdeditor/82504849
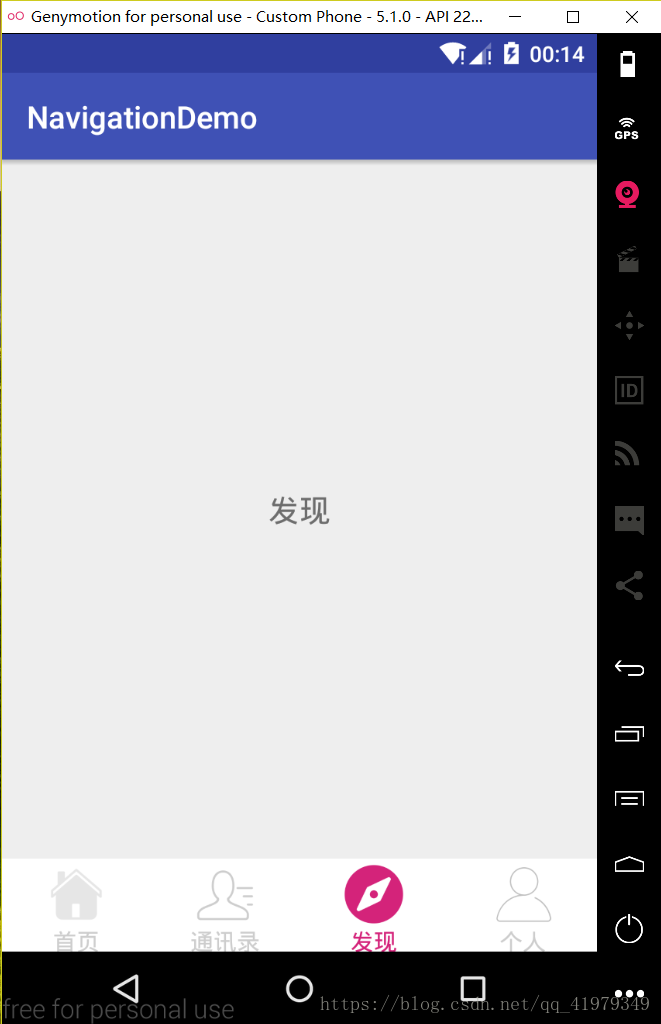
底部导航栏RadioGroup+Fragemt(界面不能滑动切换,只能点击)
1.首先在drawable中新建选择器selector文件,在drawable右键点击New->Drawable Resourse File,分别创建文字颜色选择器selector_text,和另外四个图片选择器selector_home_drawable,selector_phone_drawable,selector_find_drawable,selector_personal_drawable。选择器顾名思义就是点击后会改变颜色或者是图片
selector_text
<?xml version="1.0" encoding="utf-8"?>
<selector xmlns:android="http://schemas.android.com/apk/res/android">
    <item android:state_checked="false" android:color="#cdcdcd"/>
    <item android:state_checked="true" android:color="#d4237a"/>
</selector>
selector_home_drawable
<?xml version="1.0" encoding="utf-8"?>
<selector xmlns:android="http://schemas.android.com/apk/res/android">
    <item android:state_checked="false" android:drawable="@drawable/home"/>
    <item android:state_checked="true" android:drawable="@drawable/home_selected"/>
</selector>
selector_phone_drawable
<?xml version="1.0" encoding="utf-8"?>
<selector xmlns:android="http://schemas.android.com/apk/res/android">
    <item android:state_checked="false" android:drawable="@drawable/phone"/>
    <item android:state_checked="true" android:drawable="@drawable/phone_selected"/>

</selector>
selector_find_drawable
<?xml version="1.0" encoding="utf-8"?>
<selector xmlns:android="http://schemas.android.com/apk/res/android">
    <item android:state_checked="false" android:drawable="@drawable/find"/>
    <item android:state_checked="true" android:drawable="@drawable/find_selected"/>

</selector>
selector_personal_drawable
<?xml version="1.0" encoding="utf-8"?>
<selector xmlns:android="http://schemas.android.com/apk/res/android">
    <item android:state_checked="false" android:drawable="@drawable/personal"/>
    <item android:state_checked="true" android:drawable="@drawable/personal_selected"/>

</selector>
2.然后创建activity_main.xml布局文件,里面主要由RadioGroup和Fragment构成。Fragment主要布局导航各部分的主要内容,RadioGroup布局底部导航。
<?xml version="1.0" encoding="utf-8"?>
<RelativeLayout xmlns:android="http://schemas.android.com/apk/res/android"
    android:layout_width="match_parent"
    android:layout_height="match_parent"
    android:orientation="vertical"
   >
    <RadioGroup
        android:id="@+id/radio_group"
        android:layout_width="match_parent"
        android:layout_height="60dp"
        android:layout_alignParentBottom="true"
        android:background="#fff"
        android:orientation="horizontal">

        <RadioButton
            android:id="@+id/rd_home"
            style="@style/tab_menu_item"
            android:drawableTop="@drawable/selector_home_drawable"
            android:text="首页"
            android:textColor="@drawable/selector_text"/>
        <RadioButton
            android:id="@+id/rd_phone"
            style="@style/tab_menu_item"
            android:drawableTop="@drawable/selector_phone_drawable"
            android:text="通讯录"
            android:textColor="@drawable/selector_text"/>
        <RadioButton
            android:id="@+id/rd_find"
            style="@style/tab_menu_item"
            android:drawableTop="@drawable/selector_find_drawable"
            android:text="发现"
            android:textColor="@drawable/selector_text"/>
        <RadioButton
            android:id="@+id/rd_personal"
            style="@style/tab_menu_item"
            android:drawableTop="@drawable/selector_personal_drawable"
            android:text="个人"
            android:textColor="@drawable/selector_text"/>

    </RadioGroup>

    <FrameLayout
        android:id="@+id/fragment_container"
        android:layout_width="match_parent"
        android:layout_height="match_parent"
        android:layout_above="@id/radio_group"
        />

</RelativeLayout>
2.接着再创建四个fragment布局文件,这里我只贴出其中一个Fragemnt,其他三个只是改变text,便于观察是哪个Fragment
<?xml version="1.0" encoding="utf-8"?>
<LinearLayout xmlns:android="http://schemas.android.com/apk/res/android"
    android:layout_width="match_parent"
    android:layout_height="match_parent">

    <TextView
        android:layout_width="match_parent"
        android:layout_height="wrap_content"
        android:layout_gravity="center"
        android:gravity="center"
        android:text="发现"
        android:textSize="20sp" />

</LinearLayout>
4. 四个fragment布局文件创建完成后,再创建四个Fragment类,HomeFragment和HomeFragment,PhoneFragment,PersonalFragment,均继承android.support.v4.app.Fragment;这里我也只贴出一个Fragemnt的代码,其他三个都与这个类似,只是改变R.layout.fragment_find,改成对应的layout名字即可;
public class FindFragment  extends Fragment{
    @Override
    public View onCreateView(LayoutInflater inflater, @Nullable ViewGroup container, @Nullable Bundle savedInstanceState){
        View view=inflater.inflate(R.layout.fragment_find,container,false);
        return view;
    }
}
#需注意最好继承android.support.v4.app.Fragment,不然会出现其他不适应问题。
5.最后我们在MainActivity中开始布局渲染,需注意的是图片一般会偏大造成图片和文字所占比例有些奇怪,故在代码中做了图片的优化。
public class MainActivity extends AppCompatActivity implements RadioGroup.OnCheckedChangeListener {

    private RadioButton homeRb, phoneRb, findRb, personalRb;
    private RadioGroup mRadioGroup;
    private HomeFragment mHomeFragment;
    private PhoneFragment mPhoneFragment;
    private PersonalFragment mPersonalFragment;
    private FindFragment mFindFragment;

    @Override
    protected void onCreate(Bundle savedInstanceState) {
        super.onCreate(savedInstanceState);
        setContentView(R.layout.activity_main);
        initView();
    }

    private void initView() {
        mRadioGroup = findViewById(R.id.radio_group);
        mRadioGroup.setOnCheckedChangeListener(this);
        homeRb = findViewById(R.id.rd_home);
        phoneRb = findViewById(R.id.rd_phone);
        findRb = findViewById(R.id.rd_find);
        personalRb = findViewById(R.id.rd_personal);
        homeRb.setChecked(true);

        /**图片的优化,其他三个图片做类似处理
         * 底部导航的时候会发生图片的颜色变化,所以radiobutton中的照片不是一张,而是引用了自定义的选择器照片
         * 本来使用的是getResources.getDrawable,不过已经过时,所以使用ContextCompat
         */
        Drawable home = ContextCompat.getDrawable(this, R.drawable.selector_home_drawable);
        /**
         *  当这个图片被绘制时,给他绑定一个矩形规定这个矩形
         *  参数前两个对应图片相对于左上角的新位置,后两个为图片的长宽
         */
        home.setBounds(0, 0, 80, 80);
        /**
         *   设置图片在文字的哪个方向,分别对应左,上,右,下
         */

        homeRb.setCompoundDrawables(null, home, null, null);

        Drawable phone = ContextCompat.getDrawable(this, R.drawable.selector_phone_drawable);
        phone.setBounds(0, 0, 80, 80);
        phoneRb.setCompoundDrawables(null, phone, null, null);

        Drawable find = ContextCompat.getDrawable(this, R.drawable.selector_find_drawable);
        find.setBounds(0, 0, 80, 80);
        findRb.setCompoundDrawables(null, find, null, null);

        Drawable personal = ContextCompat.getDrawable(this, R.drawable.selector_personal_drawable);
        personal.setBounds(0, 0, 80, 80);
        personalRb.setCompoundDrawables(null, personal, null, null);
    }

    @Override
    public void onCheckedChanged(RadioGroup group, int checkedId) {
        FragmentTransaction transaction = getSupportFragmentManager().beginTransaction();
        hideAllFragment(transaction);
        switch (checkedId) {
            case R.id.rd_home:
                if (mHomeFragment == null) {
                    mHomeFragment = new HomeFragment();
                    transaction.add(R.id.fragment_container, mHomeFragment);
                } else {
                    transaction.show(mHomeFragment);
                }
                break;
            case R.id.rd_phone:
                if (mPhoneFragment == null) {
                    mPhoneFragment = new PhoneFragment();
                    transaction.add(R.id.fragment_container, mPhoneFragment);
                } else {
                    transaction.show(mPhoneFragment);
                }
                break;
            case R.id.rd_find:
                if (mFindFragment == null) {
                    mFindFragment = new FindFragment();
                    transaction.add(R.id.fragment_container, mFindFragment);
                } else {
                    transaction.show(mFindFragment);
                }
                break;
            case R.id.rd_personal:
                if (mPersonalFragment == null) {
                    mPersonalFragment = new PersonalFragment();
                    transaction.add(R.id.fragment_container,  mPersonalFragment);
                } else {
                    transaction.show( mPersonalFragment);
                }
                break;
        }
        transaction.commit();
    }

    public void hideAllFragment(FragmentTransaction transaction){
        if(mHomeFragment!=null){
            transaction.hide(mHomeFragment);
        }
        if(mPhoneFragment!=null){
            transaction.hide(mPhoneFragment);
        }
        if(mFindFragment!=null){
            transaction.hide(mFindFragment);
        }
        if(mPersonalFragment!=null){
            transaction.hide(mPersonalFragment);
        }
    }


}