版权声明:本文为博主原创文章,转载请注明。 https://blog.csdn.net/a44496913/article/details/72934955
最近项目做到用户自定义头像功能模块,然后仿照微信做了一个。从相册获取照片的链接在这:http://blog.csdn.net/a44496913/article/details/72979704
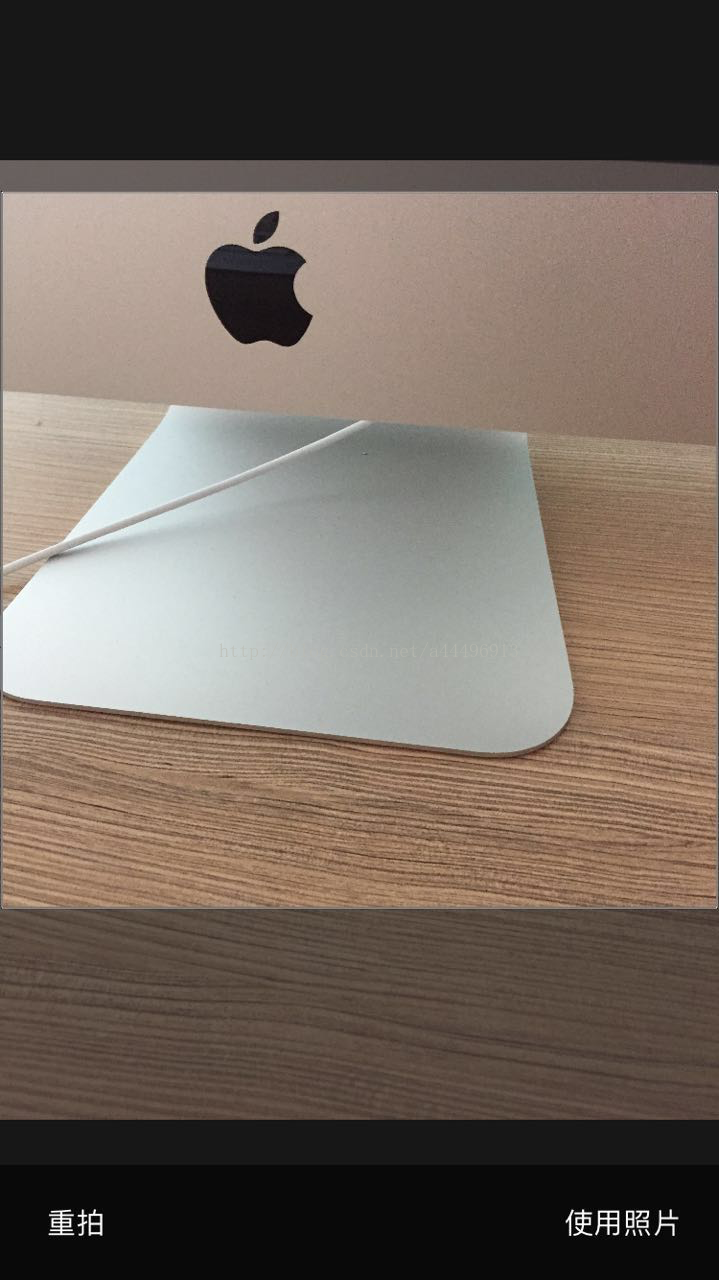
先来两张效果图
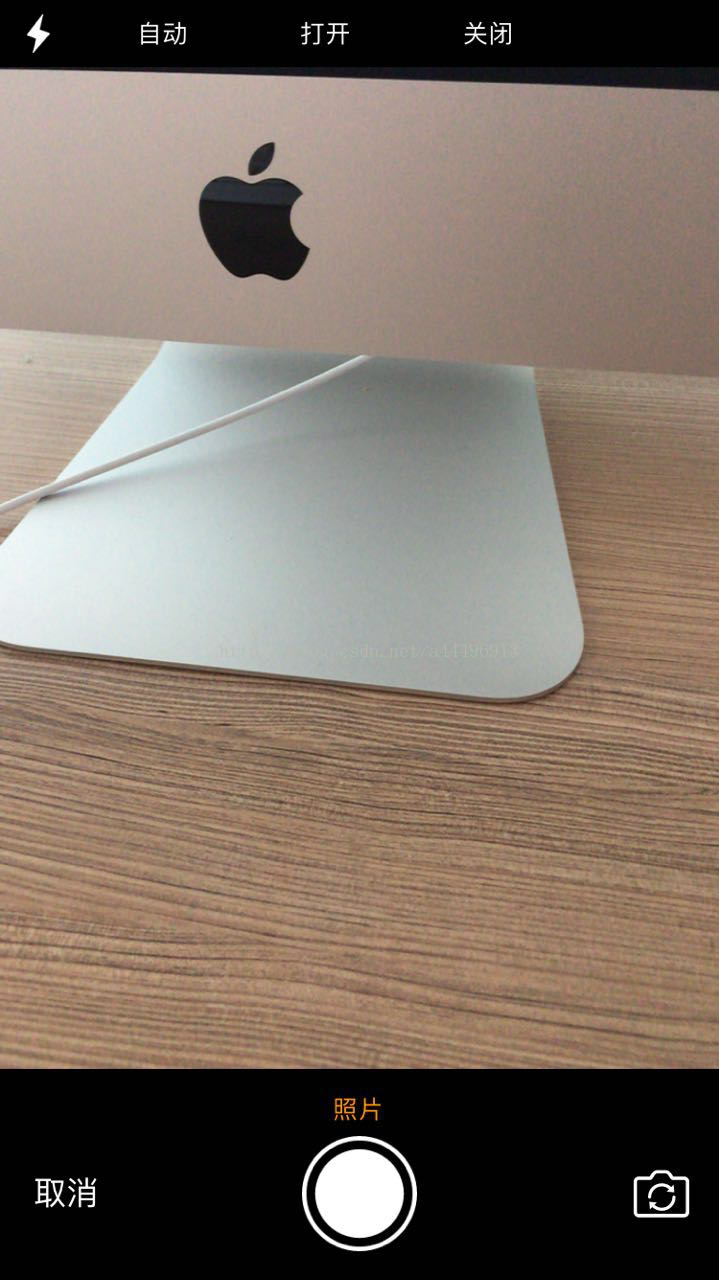
1.使用相机拍照
- 导入需要的框架
#import <AVFoundation/AVFoundation.h>- 创建相机
/** 捕获设备,通常是前置摄像头,后置摄像头,麦克风(音频输入) */
@property (strong, nonatomic) AVCaptureDevice *device;

/** 代表输入设备,使用AVCaptureDevice初始化 */
@property (strong, nonatomic) AVCaptureDeviceInput *input;

/** 输出图片 */
@property (strong, nonatomic) AVCaptureStillImageOutput *imageOutput;

/** 由他将输入输出结合在一起,并开始启动捕获设备(摄像头) */
@property (strong, nonatomic) AVCaptureSession *session;

/** 图像预览层,实时显示捕获的图像 */
@property (strong, nonatomic) AVCaptureVideoPreviewLayer *previewLayer;
- (void)createCameraDistrict{

    //获取后置摄像头
    self.device = [self camerWithPosition:AVCaptureDevicePositionBack];
    self.input = [[AVCaptureDeviceInput alloc] initWithDevice:self.device error:nil];

    self.imageOutput = [[AVCaptureStillImageOutput alloc] init];
    self.session = [[AVCaptureSession alloc] init];

    //设置获取图片的质量
    self.session.sessionPreset = AVCaptureSessionPresetPhoto;

    //添加输入输出
    if ([self.session canAddInput:self.input]) {
        [self.session addInput:self.input];
    }

    if ([self.session canAddOutput:self.imageOutput]) {
        [self.session addOutput:self.imageOutput];
    }

    //生成预览层
    self.previewLayer = [[AVCaptureVideoPreviewLayer alloc] initWithSession:self.session];
    self.previewLayer.frame = CGRectMake(0, 35, SCREEN_WIDTH, SCREEN_HEIGHT - self.bottomView.size.height - 35);
    self.previewLayer.videoGravity = AVLayerVideoGravityResizeAspectFill;
    self.previewLayer.backgroundColor = [UIColor blackColor].CGColor;
    [self.view.layer addSublayer:self.previewLayer];

    if ([_device lockForConfiguration:nil]) {

        //自动闪光灯
        if ([_device isFlashModeSupported:AVCaptureFlashModeAuto]) {
            [_device setFlashMode:AVCaptureFlashModeAuto];
        }

        //自动白平衡
        if ([_device isWhiteBalanceModeSupported:AVCaptureWhiteBalanceModeAutoWhiteBalance]) {
            [_device setWhiteBalanceMode:AVCaptureWhiteBalanceModeAutoWhiteBalance];
        }

        [_device unlockForConfiguration];
    }

    //开始取景
    [self.session startRunning];
}
//根据前后置位置获取相应的摄像头
- (AVCaptureDevice *)camerWithPosition:(AVCaptureDevicePosition)position{

    NSArray *devices = [AVCaptureDevice devicesWithMediaType:AVMediaTypeVideo];
    for (AVCaptureDevice *device in devices) {
        if (device.position == position) {
            return device;
        }
    }

    return nil;
}
//设置闪光灯状态为自动
[self.device lockForConfiguration:nil];
if ([self.device hasFlash]) {
if ([_device isFlashModeSupported:AVCaptureFlashModeAuto]) {
[_device setFlashMode:AVCaptureFlashModeAuto];
}
}
[self.device unlockForConfiguration];//设置闪光灯状态为打开
[self.device lockForConfiguration:nil];
if ([self.device hasFlash]) {
if ([_device isFlashModeSupported:AVCaptureFlashModeOn]) {
[_device setFlashMode:AVCaptureFlashModeOn];
}
}
[self.device unlockForConfiguration];//设置闪光灯状态为关闭
[self.device lockForConfiguration:nil];
if ([self.device hasFlash]) {
if ([_device isFlashModeSupported:AVCaptureFlashModeOff]) {
[_device setFlashMode:AVCaptureFlashModeOff];
}
}
[self.device unlockForConfiguration];//切换相机
- (IBAction)switchCameraButtonClicked:(id)sender {
[self changeCamera];
//延迟一秒设置相机初始焦点
__weak typeof(self) weakSelf = self;
dispatch_time_t delayTime = dispatch_time(DISPATCH_TIME_NOW, (int64_t)(1.0 * NSEC_PER_SEC));
dispatch_after(delayTime, dispatch_get_main_queue(), ^{
[weakSelf setupFocusPointManual]; //设置初始焦点居中
});
}- (void)changeCamera{
NSUInteger cameraCount = [[AVCaptureDevice devicesWithMediaType:AVMediaTypeVideo] count];
if (cameraCount > 1) {
NSError *error;
//给摄像头的切换添加翻转动画
CATransition *animation = [CATransition animation];
animation.duration = 0.5f;
animation.timingFunction = [CAMediaTimingFunction functionWithName:kCAMediaTimingFunctionLinear];
animation.type = @"oglFlip";
animation.subtype = kCATransitionFromLeft;
AVCaptureDevice *newCamera = nil;
AVCaptureDeviceInput *newInput = nil;
//拿到另外一个摄像头位置
AVCaptureDevicePosition position = [[_input device] position];
if (position == AVCaptureDevicePositionFront){
newCamera = [self camerWithPosition:AVCaptureDevicePositionBack];
}
else {
newCamera = [self camerWithPosition:AVCaptureDevicePositionFront];
self.lightBtn.selected = YES;
[self autoButtonClicked:self.autoBtn];
}
//生成新的输入
newInput = [AVCaptureDeviceInput deviceInputWithDevice:newCamera error:nil];
if (newInput != nil) {
[self.session beginConfiguration];
[self.session removeInput:self.input];
if ([self.session canAddInput:newInput]) {
[self.session addInput:newInput];
self.input = newInput;
} else {
[self.session addInput:self.input];
}
[self.session commitConfiguration];
} else if (error) {
NSLog(@"toggle carema failed, error = %@", error);
}
[self.previewLayer addAnimation:animation forKey:@"OglFlipAnimation"];
}
}
- (void)setupFocusPointManual{

    CGPoint point = CGPointMake(SCREEN_WIDTH / 2.0, 35 + self.previewLayer.bounds.size.height / 2.0);
    [self focusAtPoint:point];
}
- (void)focusAtPoint:(CGPoint)point{
CGSize size = self.view.bounds.size;
CGPoint focusPoint = CGPointMake( point.y /size.height ,1-point.x/size.width );
NSError *error;
if ([self.device lockForConfiguration:&error]) {
if ([self.device isFocusModeSupported:AVCaptureFocusModeAutoFocus]) {
[self.device setFocusPointOfInterest:focusPoint];
[self.device setFocusMode:AVCaptureFocusModeAutoFocus];
}
if ([self.device isExposureModeSupported:AVCaptureExposureModeAutoExpose ]) {
[self.device setExposurePointOfInterest:focusPoint];
[self.device setExposureMode:AVCaptureExposureModeAutoExpose];
}
[self.device unlockForConfiguration];
_focusView.center = point;
_focusView.hidden = NO;
[UIView animateWithDuration:0.3 animations:^{
_focusView.transform = CGAffineTransformMakeScale(1.25, 1.25);
}completion:^(BOOL finished) {
[UIView animateWithDuration:0.5 animations:^{
_focusView.transform = CGAffineTransformIdentity;
} completion:^(BOOL finished) {
_focusView.hidden = YES;
}];
}];
}
}
//根据点击手势设置焦点
- (void)focusGesture:(UITapGestureRecognizer*)gesture{
    CGPoint point = [gesture locationInView:gesture.view];
    CGRect frame = self.previewLayer.frame;

    //去除预览区以外的点
    if ((point.x >= frame.origin.x && point.x <= frame.origin.x + frame.size.width) &&
        (point.y >= frame.origin.y && point.y <= frame.origin.y + frame.size.height)) {

        [self focusAtPoint:point];
    }
}
//拍照、获取照片
- (void)takePhotos{
AVCaptureConnection *conntion = [self.imageOutput connectionWithMediaType:AVMediaTypeVideo];
if (!conntion) {
[YMLPrompt showMessage:@"拍照失败,请重试" delay:3.0f];
return;
}
[self.imageOutput captureStillImageAsynchronouslyFromConnection:conntion completionHandler:^(CMSampleBufferRef imageDataSampleBuffer, NSError *error) {
if (imageDataSampleBuffer == nil) {
return ;
}
NSData *imageData = [AVCaptureStillImageOutput jpegStillImageNSDataRepresentation:imageDataSampleBuffer];
UIImage *image = [UIImage imageWithData:imageData];
image = [image fixOrientation]; //修正图片方向
[self.session stopRunning];
}];
}
//获取照片后,保存到相册
- (void)saveImageToPhotoAlbum:(UIImage *)savedImage{

    UIImageWriteToSavedPhotosAlbum(savedImage, self, @selector(image:didFinishSavingWithError:contextInfo:), NULL);
}

//保存完成回调
- (void)image:(UIImage *)image didFinishSavingWithError:(NSError *)error contextInfo:(void *)contextInfo

{
    NSString *msg = nil ;
    if(error != NULL){
        msg = @"保存图片失败" ;
    }else{
        msg = @"保存图片成功" ;
    }
    kLog(@"%@",msg);
}
注意点:1.)由于目前苹果对用户隐私的保护,需要在 Info.plist 文件中添加如下信息:
<key>NSCameraUsageDescription</key>
<string>相机使用说明</string>
<key>NSPhotoLibraryUsageDescription</key>
<string>相册使用说明</string>
2.) 相机拍照默认是横屏的(Home键在右手侧),拍出来的照片方向不是向上的,在直接预览或者在相册中查看却都是方向向上的,但是在裁剪之后得 到的图片方向不是向上的。通过图片的 imageOrientation 属性可以看到,拍出来的图片方向是 UIImageOrientationRight,所以需要调整图片方向
- 在UIImage类别中添加一个修正图片方向的方法
#import "UIImage+Custom.h"

@implementation UIImage (Custom)

- (UIImage *)fixOrientation {

    // No-op if the orientation is already correct
    if (self.imageOrientation == UIImageOrientationUp) return self;

    // We need to calculate the proper transformation to make the image upright.
    // We do it in 2 steps: Rotate if Left/Right/Down, and then flip if Mirrored.
    CGAffineTransform transform = CGAffineTransformIdentity;

    switch (self.imageOrientation) {
        case UIImageOrientationDown:
        case UIImageOrientationDownMirrored:
            transform = CGAffineTransformTranslate(transform, self.size.width, self.size.height);
            transform = CGAffineTransformRotate(transform, M_PI);
            break;

        case UIImageOrientationLeft:
        case UIImageOrientationLeftMirrored:
            transform = CGAffineTransformTranslate(transform, self.size.width, 0);
            transform = CGAffineTransformRotate(transform, M_PI_2);
            break;

        case UIImageOrientationRight:
        case UIImageOrientationRightMirrored:
            transform = CGAffineTransformTranslate(transform, 0, self.size.height);
            transform = CGAffineTransformRotate(transform, -M_PI_2);
            break;
        case UIImageOrientationUp:
        case UIImageOrientationUpMirrored:
            break;
    }

    switch (self.imageOrientation) {
        case UIImageOrientationUpMirrored:
        case UIImageOrientationDownMirrored:
            transform = CGAffineTransformTranslate(transform, self.size.width, 0);
            transform = CGAffineTransformScale(transform, -1, 1);
            break;

        case UIImageOrientationLeftMirrored:
        case UIImageOrientationRightMirrored:
            transform = CGAffineTransformTranslate(transform, self.size.height, 0);
            transform = CGAffineTransformScale(transform, -1, 1);
            break;
        case UIImageOrientationUp:
        case UIImageOrientationDown:
        case UIImageOrientationLeft:
        case UIImageOrientationRight:
            break;
    }

    // Now we draw the underlying CGImage into a new context, applying the transform
    // calculated above.
    CGContextRef ctx = CGBitmapContextCreate(NULL, self.size.width, self.size.height,
                                             CGImageGetBitsPerComponent(self.CGImage), 0,
                                             CGImageGetColorSpace(self.CGImage),
                                             CGImageGetBitmapInfo(self.CGImage));
    CGContextConcatCTM(ctx, transform);
    switch (self.imageOrientation) {
        case UIImageOrientationLeft:
        case UIImageOrientationLeftMirrored:
        case UIImageOrientationRight:
        case UIImageOrientationRightMirrored:
            // Grr...
            CGContextDrawImage(ctx, CGRectMake(0,0,self.size.height,self.size.width), self.CGImage);
            break;

        default:
            CGContextDrawImage(ctx, CGRectMake(0,0,self.size.width,self.size.height), self.CGImage);
            break;
    }

    // And now we just create a new UIImage from the drawing context
    CGImageRef cgimg = CGBitmapContextCreateImage(ctx);
    UIImage *img = [UIImage imageWithCGImage:cgimg];
    CGContextRelease(ctx);
    CGImageRelease(cgimg);
    return img;
}
2.对图片进行裁剪
裁剪图片在 GHPhotoClipView 类中实现
#import <UIKit/UIKit.h>

@interface GHPhotoClipView : UIView

/** 用于裁剪的原始图片 */
@property (strong, nonatomic) UIImage *image;

/** 重新拍照block */
@property (copy, nonatomic) void(^remakeBlock)();

/** 裁剪完成block */
@property (copy, nonatomic) void(^sureUseBlock)(UIImage *image);


@end
#import "GHPhotoClipView.h"
#import "GHPhotoClipCoverView.h"
@interface GHPhotoClipView ()
/** 图片 */
@property (strong, nonatomic) UIImageView *imageV;
/** 图片加载后的初始位置 */
@property (assign, nonatomic) CGRect norRect;
/** 裁剪框frame */
@property (assign, nonatomic) CGRect showRect;
@end
@implementation GHPhotoClipView
- (instancetype)initWithFrame:(CGRect)frame{
self = [super initWithFrame:frame];
if (self) {
self.backgroundColor = [UIColor blackColor];
[self createSubViews];
}
return self;
}
- (void)createSubViews{
self.imageV = [[UIImageView alloc] initWithFrame:CGRectMake(0, 0 , self.frame.size.width, self.frame.size.width)];
[self addSubview:self.imageV];
GHPhotoClipCoverView *coverView = [[GHPhotoClipCoverView alloc] initWithFrame:self.bounds];
[coverView addGestureRecognizer:[[UIPanGestureRecognizer alloc] initWithTarget:self action:@selector(panGR:)]];
[coverView addGestureRecognizer:[[UIPinchGestureRecognizer alloc] initWithTarget:self action:@selector(pinGR:)]];
self.showRect = CGRectMake(1, self.frame.size.height * 0.15,self.frame.size.width - 2 ,self.frame.size.width - 2);
coverView.showRect = self.showRect;
[self addSubview:coverView];
UIView *bottomView = [[UIView alloc] initWithFrame:CGRectMake(0, self.frame.size.height - 60, self.frame.size.width, 60)];
bottomView.backgroundColor = [[UIColor blackColor] colorWithAlphaComponent:0.6f];
[coverView addSubview:bottomView];
[YMLFactory btnWithFrame:CGRectMake(10, 15, 60, 30) Type:UIButtonTypeCustom Title:@"重拍" fontSize:15 titleColor:[UIColor whiteColor] bgColor:[UIColor clearColor] target:self selector:@selector(leftButtonClicked) superView:bottomView];
[YMLFactory btnWithFrame:CGRectMake(bottomView.frame.size.width - 90, 15, 80, 30) Type:UIButtonTypeCustom Title:@"使用照片" fontSize:15 titleColor:[UIColor whiteColor] bgColor:[UIColor clearColor] target:self selector:@selector(rightButtonClicked) superView:bottomView];
}
- (void)setImage:(UIImage *)image{
if (image) {
CGFloat ret = image.size.height / image.size.width;
_imageV.height = _imageV.width * ret;
_imageV.center = self.center;
_norRect = _imageV.frame;
_imageV.image = image;
}
_image = image;
}
- (void)panGR:(UIPanGestureRecognizer *)sender{
CGPoint point = [sender translationInView:self];
kLog(@"%f %f",point.x,point.y);
_imageV.center = CGPointMake(_imageV.centerX + point.x, _imageV.centerY + point.y);
[sender setTranslation:CGPointZero inView:self];
if (sender.state == UIGestureRecognizerStateEnded) {
[UIView animateWithDuration:0.3f animations:^{
_imageV.frame = _norRect;
}];
}
}
- (void)pinGR:(UIPinchGestureRecognizer *)sender{
_imageV.transform = CGAffineTransformScale(_imageV.transform, sender.scale, sender.scale);
sender.scale = 1.0;
if (sender.state == UIGestureRecognizerStateEnded) {
[UIView animateWithDuration:0.3f animations:^{
_imageV.frame = _norRect;
}];
}
}
#pragma mark -- 重拍
- (void)leftButtonClicked{
kLog(@"重拍");
if (self.remakeBlock) {
self.remakeBlock();
}
}
#pragma mark -- 使用照片
- (void)rightButtonClicked{
kLog(@"使用照片");
CGFloat w = self.image.size.width;
CGFloat h = self.image.size.height;
CGFloat originX = (1- self.showRect.size.width / self.norRect.size.width) / 2.0 * w;
CGFloat originY = (self.showRect.origin.y - self.norRect.origin.y) / self.norRect.size.height * h;
CGFloat clipW = self.showRect.size.width / self.norRect.size.width * w;
CGFloat clipH = self.showRect.size.height / self.norRect.size.height * h;
CGRect clipRect = CGRectMake(originX, originY, clipW, clipH);
UIImage *image = [Tools imageFromImage:self.image inRect:clipRect];
_imageV.image = image;
if (self.sureUseBlock) {
self.sureUseBlock(image);
}
}
@end
- 裁剪图片的方法
/**
 * 从图片中按指定的位置大小截取图片的一部分
 * UIImage image 原始的图片
 * CGRect rect 要截取的区域
 */
+ (UIImage *)imageFromImage:(UIImage *)image inRect:(CGRect)rect{

    //将UIImage转换成CGImageRef
    CGImageRef sourceImageRef = [image CGImage];

    //按照给定的矩形区域进行剪裁
    CGImageRef newImageRef = CGImageCreateWithImageInRect(sourceImageRef, rect);

    //将CGImageRef转换成UIImage
    UIImage *newImage = [UIImage imageWithCGImage:newImageRef];

    //返回剪裁后的图片
    return newImage;
}- 裁剪框效果
#import <UIKit/UIKit.h>

@interface GHPhotoClipCoverView : UIView

/** 显示方框区域 */
@property (assign, nonatomic) CGRect showRect;

@end
#import "GHPhotoClipCoverView.h"

@implementation GHPhotoClipCoverView

- (instancetype)initWithFrame:(CGRect)frame{

    self = [super initWithFrame:frame];

    if (self) {
        self.backgroundColor = [UIColor clearColor];
    }
    return self;
}

- (void)drawRect:(CGRect)rect{

    [super drawRect:rect];

    CGContextRef ctx = UIGraphicsGetCurrentContext();

    // 整体颜色
    CGContextSetRGBFillColor(ctx, 0.15, 0.15, 0.15, 0.6);
    CGContextFillRect(ctx, rect);   //draw the transparent layer

    //中间清空矩形框
    CGRect clearDrawRect = self.showRect;
    CGContextClearRect(ctx, clearDrawRect);

    //边框
    CGContextStrokeRect(ctx, clearDrawRect);
    CGContextSetRGBStrokeColor(ctx, 1, 1, 1, 1);  //颜色
    CGContextSetLineWidth(ctx, 0.5);             //线宽
    CGContextAddRect(ctx, clearDrawRect);       //矩形
    CGContextStrokePath(ctx);
}


@endDemo地址:https://github.com/HuberyYang/CameraDemo.git
参考文章:30分钟搞定iOS自定义相机