转载请注明来源: http://blog.csdn.net/kjunchen/article/details/52698186
Android MVP 模式应用实例解析
概述
MVP 即 Model - View - Presenter。 Model 提供数据,View 负责显示,Presenter 负责逻辑处理。
View: 对应于 Activity , 负责 View 的绘制以及用户交互。
Model: 依然是业务逻辑和实体模型
Presenter: 负责完成 View 和 Modle 之间的交互
The MVP pattern stands for Model-View-Presenter, and it separates the UI concerns between the data of the UI (Model), the display of the UI (View), and the logic of the UI (Presenter). For Android, the View is the Activity, which will handle gathering user input and updating the display; the Presenter is a class that will handle communication between the Model and View; the Model will handle persisting and retrieving data, along with any business logic that the data must adhere to. Interfaces will be used to de-couple each of these components.

单一职责原则(SRP:Single responsibility principle)又称单一功能原则
MVP 优点
分离了视图逻辑和业务逻辑,降低了耦合
Activity 只处理生命周期的任务,代码变得更加简洁
试图逻辑和业务逻辑分别抽象到了 View 和 Presenter 的接口中,提高代码阅读性
Presenter 抽象成接口,可以有多种具体的实现,方便进行单元测试
将业务逻辑抽到 Presenter 中,避免后台线程引用 Activity 导致 Activity 的资源无法被系统回收从而引起内存泄露和 OOM
MVP 设计技巧
先设计 View 和 Model,最后设计 Presenter 。
View 主要是定接口,有些情况下没有 Model 。
Sample
理论需要付诸实践,下面就来写个 MVP 模式应用的示例,看看在项目中具体如何应用,如何将 View 与 Model 进行完美分离,而采用 Presenter 进行交互。下面举个加载保存用户的例子:
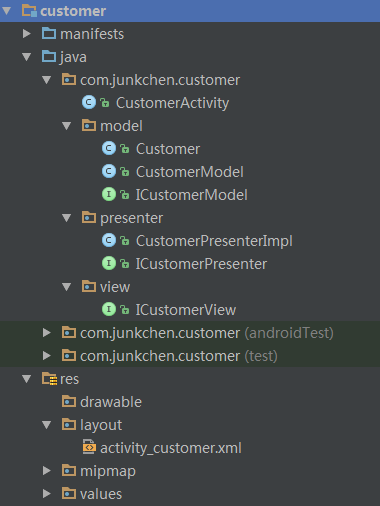
项目整体结构图:
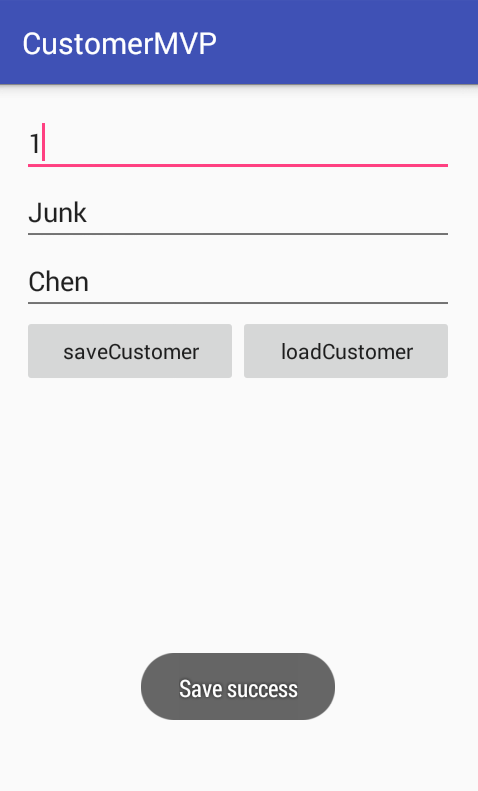
效果图:
View
View 中主要设计接口,只做 UI 显示相关的。
public interface ICustomerView {
    void setCustomerId(int id);
    void setCustomerFirstName(String firstName);
    void setCustomerLastName(String lastName);
    int getCustomerId();
    String getCustomerFirstName();
    String getCustomerLastName();
    void showSaveResult(String result);
    void showLoadFailedInfo();
}
Model
Model 中设计数据模型,提供 UI 显示需要的数据内容。
首先我们需要一个实体对象 Customer :
public class Customer {
    private int id;
    private String firstName;
    private String lastName;

    //Omit to write set and get method
    ...
}
接着在设计一个 Customer 的接口 ICustomerModel ,这里面主要是 保存和加载用户:
public interface ICustomerModel {
    boolean saveCustomer(String firstName, String lastName);
    Customer loadCustomer(int id);
}
最后实现接口:
public class CustomerModel implements ICustomerModel {
    @Override
    public boolean saveCustomer(String firstName, String lastName) {
        return true;
    }

    @Override
    public Customer loadCustomer(int id) {
        Customer customer = new Customer();
        customer.setFirstName("Junk");
        customer.setLastName("Chen");
        return customer;
    }
}
Presenter
设计完 View 和 Model 后,就可以设计 Presenter ,它主要是完成 View 与 Model 之间的交互、数据传递。在 Presenter 中会获得 View 的引用,实例化 Model 。
这里我依然是先设计了一个 ICustomerPresenter 接口,定义了 保存和加载用户的两个方法:
public interface ICustomerPresenter {
    void saveCustomer(final String firstName, final String lastName);
    void loadCustomer(final int id);
}
然后我实现这个接口:
public class CustomerPresenterImpl implements ICustomerPresenter {
    private static final String TAG = "CustomerPresenterImpl";
    private ICustomerModel customerModel;
    private ICustomerView customerView;

    public CustomerPresenterImpl(ICustomerView customerView) {
        this.customerView = customerView;
        customerModel = new CustomerModel();
    }

    @Override
    public void saveCustomer(final String firstName, final String lastName) {
        if (firstName.isEmpty() || lastName.isEmpty()) {
            customerView.showSaveResult("first name or last name can't empty");
            return;
        }
        boolean isSaveSuccess = customerModel.saveCustomer(firstName, lastName);
        if (isSaveSuccess)
            customerView.showSaveResult("Save success");
        else
            customerView.showSaveResult("Save failed");
    }

    @Override
    public void loadCustomer(final int id) {
        if (id > 0) {
            Customer customer = customerModel.loadCustomer(id);
            customerView.setCustomerFirstName(customer.getFirstName());
            customerView.setCustomerLastName(customer.getLastName());
        } else {
            customerView.showLoadFailedInfo();
            customerView.setCustomerFirstName("");
            customerView.setCustomerLastName("");
        }
    }
}
Activity
最后看看我们的 Activity 到底是什么样的呢?在 Activity 中会实例化 CustomerPresenterImpl 。
public class CustomerActivity extends AppCompatActivity implements ICustomerView, View.OnClickListener {
    private static final String TAG = "CustomerActivity";
    private EditText edt_id, edt_firstName, edt_lastName;
    private Button btn_saveCustomer, btn_loadCustomer;

    private ICustomerPresenter mCustomerPresenter;

    @Override
    protected void onCreate(Bundle savedInstanceState) {
        super.onCreate(savedInstanceState);
        setContentView(R.layout.activity_customer);

        initView();
        mCustomerPresenter = new CustomerPresenterImpl(this);
    }

    private void initView() {
        edt_id = (EditText) findViewById(R.id.edt_id);
        edt_firstName = (EditText) findViewById(R.id.edt_firstName);
        edt_lastName = (EditText) findViewById(R.id.edt_lastName);
        btn_saveCustomer = (Button) findViewById(R.id.btn_saveCustomer);
        btn_loadCustomer = (Button) findViewById(R.id.btn_loadCustomer);

        btn_saveCustomer.setOnClickListener(this);
        btn_loadCustomer.setOnClickListener(this);
    }

    @Override
    public void onClick(View v) {
        switch (v.getId()) {
            case R.id.btn_saveCustomer: {
                mCustomerPresenter.saveCustomer(getCustomerFirstName(), getCustomerLastName());
                break;
            }
            case R.id.btn_loadCustomer: {
                mCustomerPresenter.loadCustomer(getCustomerId());
                break;
            }
        }
    }

    @Override
    public void setCustomerId(int id) {
        edt_id.setText(String.valueOf(id));
    }

    @Override
    public void setCustomerFirstName(String firstName) {
        edt_firstName.setText(firstName);
    }

    @Override
    public void setCustomerLastName(String lastName) {
        edt_lastName.setText(lastName);
    }

    @Override
    public int getCustomerId() {
        if (edt_id.getText().toString().isEmpty()) return 0;
        return Integer.parseInt(edt_id.getText().toString());
    }

    @Override
    public String getCustomerFirstName() {
        return edt_firstName.getText().toString();
    }

    @Override
    public String getCustomerLastName() {
        return edt_lastName.getText().toString();
    }

    @Override
    public void showSaveResult(String result) {
        Toast.makeText(this, result, Toast.LENGTH_SHORT).show();
    }

    @Override
    public void showLoadFailedInfo() {
        Toast.makeText(this, "No customer.", Toast.LENGTH_SHORT).show();
    }
}
可以看到在 Activity 中只是做与 UI 显示有关的事情,需要数据就去找 Presenter 。
可以看到整个项目结构非常清晰,易理解。示例简单,抛砖引玉。
欢迎加QQ群交流: 365532949
Homepage: http://junkchen.com