SpringCloud(六) oauth2认证中心(单点登陆)
1.介绍
在Spring Cloud需要使用OAUTH2来实现多个微服务的统一认证授权,通过向OAUTH服务发送某个类型的grant type进行集中认证和授权,从而获得access_token,而这个token是受其他微服务信任的,我们在后续的访问可以通过access_token来进行,从而实现了微服务的统一认证授权
OAuth 2.0定义了四种授权方式。
密码模式(resource owner password credentials)
授权码模式(authorization code)
简化模式(implicit)
客户端模式(client credentials)
密码模式(resource owner password credentials)这种模式是最不推荐的,因为client可能存了用户密码 这种模式主要用来做遗留项目升级为oauth2的适配方案 当然如果client是自家的应用,也是可以
支持refresh token
授权码模式(authorization code)这种模式算是正宗的oauth2的授权模式设计了auth code,通过这个code再获取token支持refresh token
简化模式(implicit)这种模式比授权码模式少了code环节,回调url直接携带token这种模式的使用场景是基于浏览器的应用这种模式基于安全性考虑,建议把token时效设置短一些不支持refresh token
客户端模式(client credentials)这种模式直接根据client的id和密钥即可获取token,无需用户参与这种模式比较合适消费api的后端服务,比如拉取一组用户信息等不支持refresh token,主要是没有必要 refresh token的初衷主要是为了用户体验不想用户重复输入账号密码来换取新token,因而设计了refresh token用于换取新token
这种模式由于没有用户参与,而且也不需要用户账号密码,仅仅根据自己的id和密钥就可以换取新token,因而没必要refresh token
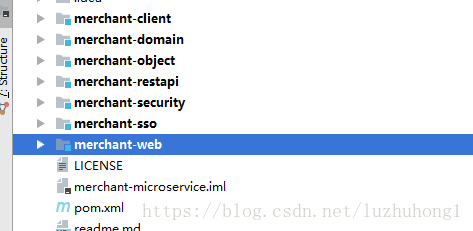
代码模块展示
SSO 设计分为服务端和客户端2个部分,sso服务端为每个应用提供了统一的访问控制和授权认证服务,在模块merchant-sso中进行开发和包含用户登陆设计 主页设计 认证服务设计等
merchant-sso 服务端 配置
pom.xml的配置
server:
  port: 8000
  session:
        cookie:
        name: SESSIONID
 eureka:
   client:
     serviceUrl:
       defaultZone: http://localhost:8761/eureka/
  encrypt:
      failOnError: false
  spring:
     datasource:
        type: com.alibaba.druid.pool.DruidDataSource
        driver-class-name: com.mysql.jdbc.Driver
        url: jdbc:mysql://localhost:3306/myzipkin?characterEncoding=utf8&useSSL=false
        username: myzipkin
        password: myzipkin
       # 初始化大小,最小,最大
        initialSize: 5
        minIdle: 5
        maxActive: 20
     # 配置获取连接等待超时的时间
        maxWait: 60000
     # 配置间隔多久才进行一次检测,检测需要关闭的空闲连接,单位是毫秒
        timeBetweenEvictionRunsMillis: 60000
     # 配置一个连接在池中最小生存的时间,单位是毫秒
        minEvictableIdleTimeMillis: 300000
         validationQuery: SELECT 1 FROM DUAL
        testWhileIdle: true
        testOnBorrow: false
        testOnReturn: false
   # 打开PSCache,并且指定每个连接上PSCache的大小
      poolPreparedStatements: true
      maxPoolPreparedStatementPerConnectionSize: 20
   #配置监控统计拦截的filters,去掉后监控界面sql将无法统计,'wall'用于防火墙
      filters: stat,wall,log4j
   # 通过connectProperties属性来打开mergeSql功能;慢SQL记录
      connectionProperties: druid.stat.mergeSql=true;druid.stat.slowSqlMillis=5000
   # 合并多个DruidDataSource的监控数据
   #useGlobalDataSourceStat=true
   jpa:
      database: MYSQL
      show-sql: false
      ## Hibernate ddl auto (validate|create|create-drop|update)
      hibernate:
        ddl-auto: none
        naming-strategy: org.hibernate.cfg.ImprovedNamingStrategy
      properties:
        hibernate:
          dialect: org.hibernate.dialect.MySQL5Dialect
      ---    ##FeignClient超时设置
   spring.cloud.loadbalancer.retry.enabled: true
   hystrix.command.default.execution.isolation.thread.timeoutInMilliseconds:10000
   ribbon.ConnectTimeout: 250 ribbon.ReadTimeout: 1000
   ribbon.OkToRetryOnAllOperations: true
   ribbon.MaxAutoRetriesNextServer: 2 ribbon.MaxAutoRetries: 1
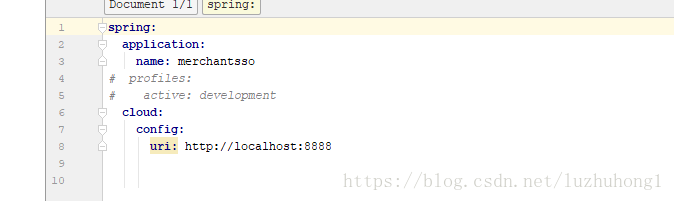
bootstrap.yml的配置
启动类
@SpringBootApplication
@EnableDiscoveryClient
@EnableZuulProxy
@EnableHystrix
@EnableFeignClients(basePackages = “com.demo”)
@ComponentScan(basePackages = “com.demo”)
public class MerchantSsoApplication {
public static void main(String[] args) {
SpringApplication.run(MerchantSsoApplication.class, args);
}
}
认证中心 主要类
@Configuration
@EnableAuthorizationServer
public class OAuthConfigurer extends AuthorizationServerConfigurerAdapter {
@Bean
public JwtAccessTokenConverter jwtAccessTokenConverter() {
    JwtAccessTokenConverter converter = new JwtAccessTokenConverter();
    //非对称加密
    KeyPair keyPair = new KeyStoreKeyFactory(new ClassPathResource(
            "keystore.jks"), "tc123456".toCharArray()).getKeyPair("tycoonclient");
    //对称加密
   // converter.setSigningKey("123");
    converter.setKeyPair(keyPair);
    return converter;
}

@Override
public void configure(ClientDetailsServiceConfigurer clients)
        throws Exception {
    clients.inMemory().withClient("ssoclient").secret("ssosecret")
            .autoApprove(true)
            .authorizedGrantTypes("authorization_code", "refresh_token").scopes("openid");
}
@Override
public void configure(AuthorizationServerSecurityConfigurer security)
        throws Exception {
    security.tokenKeyAccess("permitAll()").checkTokenAccess(
            "isAuthenticated()").allowFormAuthenticationForClients();
}
@Override
public void configure(AuthorizationServerEndpointsConfigurer endpoints)
        throws Exception {
    endpoints.accessTokenConverter(jwtAccessTokenConverter());
}
}
其中,使用注解@EnableAuthorizationServer 启用了认证服务器功能 这里使用令牌 token的鉴权机制为sso客户端提供授权认证的方法
管理令牌JWT 创建一个数字证书 利用jdk创建证书 这个自行百度
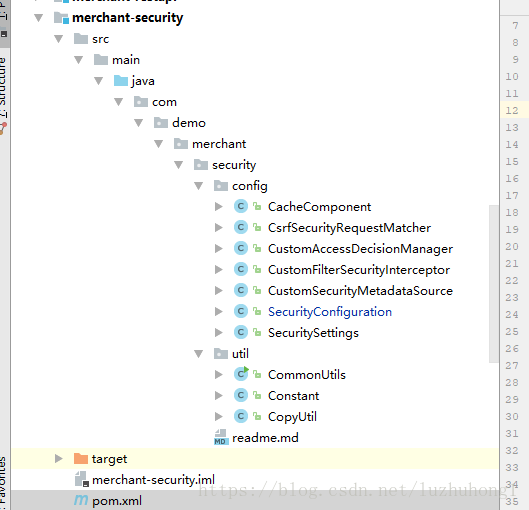
创建类SecurityConfiguration
@Configuration
@Order(SecurityProperties.ACCESS_OVERRIDE_ORDER)
public class SecurityConfiguration extends WebSecurityConfigurerAdapter {
@Autowired
private CustomUserDetailsService customUserDetailsService;
@Autowired
@Qualifier(“dataSource”)
private DataSource dataSource;
@Override
protected void configure(AuthenticationManagerBuilder auth)
        throws Exception {
    auth.userDetailsService(customUserDetailsService).passwordEncoder(passwordEncoder());
    //remember me
    auth.eraseCredentials(false);
}

@Override
protected void configure(HttpSecurity http) throws Exception {
    http.formLogin().loginPage("/login").permitAll().successHandler(loginSuccessHandler())
            .and().authorizeRequests()
            .antMatchers("/images/**", "/checkcode", "/scripts/**", "/styles/**").permitAll()
            .anyRequest().authenticated()
            .and().sessionManagement().sessionCreationPolicy(SessionCreationPolicy.NEVER)
            .and().exceptionHandling().accessDeniedPage("/deny")
            .and().rememberMe().tokenValiditySeconds(86400).tokenRepository(tokenRepository());//记住24小时
}

@Bean
public BCryptPasswordEncoder passwordEncoder() {
    return new BCryptPasswordEncoder();
}

@Bean
public JdbcTokenRepositoryImpl tokenRepository(){
    JdbcTokenRepositoryImpl jtr = new JdbcTokenRepositoryImpl();
    jtr.setDataSource(dataSource);
    return jtr;
}

@Bean
public LoginSuccessHandler loginSuccessHandler(){
    return new LoginSuccessHandler();
}
}
服务端搭建基本完成
接下来客户端搭建
配置pom.xml
<dependencies>
    <dependency>
        <groupId>com.demo</groupId>
        <artifactId>merchant-client</artifactId>
        <version>${project.version}</version>
    </dependency>

    <dependency>
        <groupId>org.springframework.cloud</groupId>
        <artifactId>spring-cloud-starter-security</artifactId>
    </dependency>
    <dependency>
        <groupId>org.springframework.cloud</groupId>
        <artifactId>spring-cloud-starter-oauth2</artifactId>
    </dependency>
    <dependency>
        <groupId>org.springframework.boot</groupId>
        <artifactId>spring-boot-configuration-processor</artifactId>
        <optional>true</optional>
    </dependency>

    <dependency>
        <groupId>org.springframework.boot</groupId>
        <artifactId>spring-boot-starter-data-redis</artifactId>
    </dependency>
</dependencies>
在客户端启动安全管理功能和OAUTH2的sso客户端的功能
@Configuration
@EnableOAuth2Sso
@EnableConfigurationProperties(SecuritySettings.class)
public class SecurityConfiguration extends WebSecurityConfigurerAdapter {
@Autowired
private AuthenticationManager authenticationManager;
@Autowired
private SecuritySettings settings;
@Autowired
private RoleFuture roleFuture;
@Autowired
private CacheComponent cacheComponent;

@Override
public void configure(HttpSecurity http) throws Exception {
    http
            .antMatcher("/**").authorizeRequests()
            .antMatchers(settings.getPermitall().split(",")).permitAll()
            .anyRequest().authenticated()
            .and().csrf().requireCsrfProtectionMatcher(csrfSecurityRequestMatcher())
            .csrfTokenRepository(csrfTokenRepository()).and()
            .addFilterAfter(csrfHeaderFilter(), CsrfFilter.class)
            .logout().logoutUrl("/logout").permitAll()
            .logoutSuccessUrl(settings.getLogoutsuccssurl())
            .and()
            .exceptionHandling().accessDeniedPage(settings.getDeniedpage());
}

@Bean
public CustomFilterSecurityInterceptor customFilter() throws Exception{
    CustomFilterSecurityInterceptor customFilter = new CustomFilterSecurityInterceptor();
    customFilter.setSecurityMetadataSource(securityMetadataSource());
    customFilter.setAccessDecisionManager(accessDecisionManager());
    customFilter.setAuthenticationManager(authenticationManager);
    return customFilter;
}

@Bean
public CustomAccessDecisionManager accessDecisionManager() {
    return new CustomAccessDecisionManager();
}

@Bean
public CustomSecurityMetadataSource securityMetadataSource() {
    return new CustomSecurityMetadataSource(roleFuture, cacheComponent);
}


//开放接口禁止防跨站伪造攻击
private CsrfSecurityRequestMatcher csrfSecurityRequestMatcher(){
    CsrfSecurityRequestMatcher csrfSecurityRequestMatcher = new CsrfSecurityRequestMatcher();
    List<String> list = new ArrayList<String>();
    list.add("/openhttp/");//完全开放
    csrfSecurityRequestMatcher.setExecludeUrls(list);
    return csrfSecurityRequestMatcher;
}

private Filter csrfHeaderFilter() {
    return new OncePerRequestFilter() {
        @Override
        protected void doFilterInternal(HttpServletRequest request,
                                        HttpServletResponse response, FilterChain filterChain)
                throws ServletException, IOException {
            CsrfToken csrf = (CsrfToken) request
                    .getAttribute(CsrfToken.class.getName());
            if (csrf != null) {
                Cookie cookie = new Cookie("XSRF-TOKEN",
                        csrf.getToken());
                cookie.setPath("/");
                response.addCookie(cookie);
            }
            filterChain.doFilter(request, response);
        }
    };
}

private CsrfTokenRepository csrfTokenRepository() {
    HttpSessionCsrfTokenRepository repository = new HttpSessionCsrfTokenRepository();
    repository.setHeaderName("X-XSRF-TOKEN");
    return repository;
}
}
@EnableOAuth2Sso这个注解启动了应用的sso客户端的功能
其他都是OaAuth2里面实现类
现在基本上搭建成功了
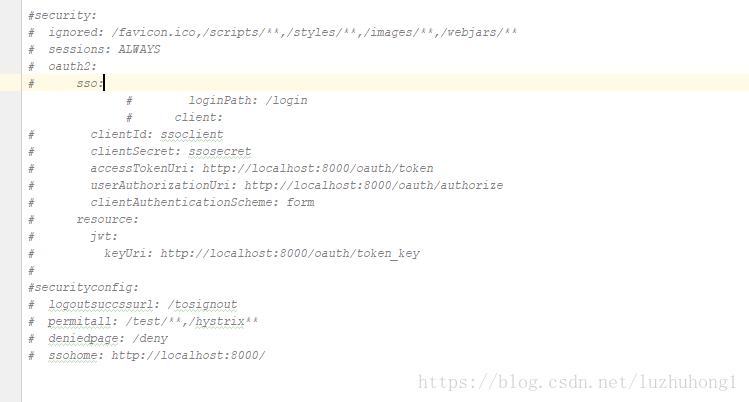
其他服务需要接入sso只需要在配置文件加如下配置