声明:测试使用的JDK9,Spring 5.09版本;
要清楚 Spring 依赖注入,首先 要清楚什么是 DI【依赖注入】:
大家都知 ioC是一个容器,而 DI 是用来管理容器中的 bean或者配置工厂bean的。在DI (注入)这个过程是基于bean 的创建时候才会注入,其过程【相对于正常初始化 bean】基本上是反向的,因此名称Inversion of Control(IoC);
注意:这里的 工厂bean 不是Spring中特定的 FactoryBean;
查看文档说明如下:

spring的属性注入(也叫依赖注入)支持3种方法【主要前两种】:
①构造
② setter,更为灵活的注入方式【在setter方法上使用@Required注解可用于使属性成为必需的依赖项,并且可以很好的配置setter 进行二次注入。当然若第三方类 jar包 没公开 任何 setter 方式,只能使用 ①构造 的方式进行注入;】
③ p命名空间:在 spring2.5版本以后 使用,更加简洁。【缺点,不如标准XML格式配置更加灵活,在实例测试中进行分析】
④SPEL 注入:在spring3.0以后 使用;
⑤ c命名空间:在spring3.1 版本以后 使用,和 p 命名空间类似;c-namespace允许使用内联属性来配置构造函数参数,而不是嵌套constructor-arg元素;存在于spring 框架核心内【xsd中无定义】;
以下提供的XML配置是基于对象注入的方式,简单类JOPO未做说明【ps:测试是按照简单类注入进行测试的】;
构造注入需要提供一个有参构造,配置applicationContext.xml 如下:
此方式是使用parameterName进行消除歧义;
<bean id="exampleBean" class="examples.ExampleBean">
    <!-- constructor injection using the nested ref element -->
    <constructor-arg>
        <ref bean="anotherExampleBean"/>
    </constructor-arg>

    <!-- constructor injection using the neater ref attribute -->
    <constructor-arg ref="yetAnotherBean"/>

    <constructor-arg type="int" value="1"/>
</bean>

<bean id="anotherExampleBean" class="examples.AnotherBean"/>
<bean id="yetAnotherBean" class="examples.YetAnotherBean"/>setter注入需要提供setter方法,配置applicationContext.xml 如下:
<bean id="exampleBean" class="examples.ExampleBean">
    <!-- setter injection using the nested ref element -->
    <property name="beanOne">
        <ref bean="anotherExampleBean"/>
    </property>

    <!-- setter injection using the neater ref attribute -->
    <property name="beanTwo" ref="yetAnotherBean"/>
    <property name="integerProperty" value="1"/>
</bean>

<bean id="anotherExampleBean" class="examples.AnotherBean"/>
<bean id="yetAnotherBean" class="examples.YetAnotherBean"/>p命名空间:在 spring2.5版本以后 使用,更加简洁;
在约束头中添加配置p 的命名空间;
<beans xmlns="http://www.springframework.org/schema/beans"
xmlns:xsi="http://www.w3.org/2001/XMLSchema-instance"
xmlns:p="http://www.springframework.org/schema/p"
xsi:schemaLocation="http://www.springframework.org/schema/beans
http://www.springframework.org/schema/beans/spring-beans.xsd">
<bean id="myDataSource" class="org.apache.commons.dbcp.BasicDataSource"
destroy-method="close"
p:driverClassName="com.mysql.jdbc.Driver"
p:url="jdbc:mysql://localhost:3306/mydb"
p:username="root"
p:password="masterkaoli"/>
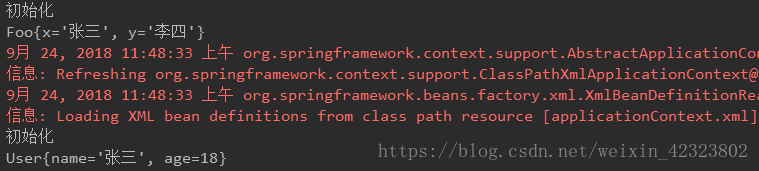
</beans>测试简单类的 构造注入和 setter注入:
    @Test
    public void test2(){
        ClassPathXmlApplicationContext context = new ClassPathXmlApplicationContext("applicationContext.xml");
        Foo foo = (Foo) context.getBean("foo");
        System.out.println(foo);
    }
    @Test
    public void test3(){
        ClassPathXmlApplicationContext context = new ClassPathXmlApplicationContext("applicationContext.xml");
        User user = (User) context.getBean("user");
        System.out.println(user);
    }
运行;
使用 p命名空间注入【完成对象注入】以及p-namespace缺点分析:
①p-namespace 如下,前2个 bean 都引用了最后一个 bean ,第一个bean <property name="spouse" ref="jane"/> 的创建,name=“spouse” ,引用了 Jane;
第二个bean中, p:spouse-ref="jane" ,spouse作为属性名,-ref 代表引用外来的 jane ,在声明属性引用的格式上和 ref 冲突。但是优点是 书写简洁了;
 <bean name="john-classic" class="com.example.Person">
        <property name="name" value="John Doe"/>
        <property name="spouse" ref="jane"/>
    </bean>

    <bean name="john-modern"
        class="com.example.Person"
        p:name="John Doe"
        p:spouse-ref="jane"/>

    <bean name="jane" class="com.example.Person">
        <property name="name" value="Jane Doe"/>
    </bean>
②对象注入实例如下:
beans:
package bean;

/**
 * @auther SyntacticSugar
 * @data 2018/9/24 0024下午 12:10
 */
public class Car {
    private String name;
    private float price;

    public void setName(String name) {
        this.name = name;
    }

    public void setPrice(float price) {
        this.price = price;
    }

    @Override
    public String toString() {
        return "Car{" +
                "name='" + name + '\'' +
                ", price=" + price +
                '}';
    }
}
package bean;

/**
 * @auther SyntacticSugar
 * @data 2018/9/24 0024下午 12:14
 */
public class Buyer {
    private  String name;
    private  Car car;

    public void setName(String name) {
        this.name = name;
    }

    public void setCar(Car car) {
        this.car = car;
    }

    @Override
    public String toString() {
        return "Buyer{" +
                "name='" + name + '\'' +
                ", car=" + car +
                '}';
    }
}
xml配置,注意约束;
    <bean id="car" class="bean.Car" p:name="玛莎拉蒂" p:price="50000"></bean>
    <bean id="buyer" class="bean.Buyer" p:name="张总" p:car-ref="car"></bean>
测试类;
    @Test
    public void test4(){
        ClassPathXmlApplicationContext context = new ClassPathXmlApplicationContext("applicationContext.xml");
        Buyer buyer = (Buyer) context.getBean("buyer");
        System.out.println(buyer);
    }
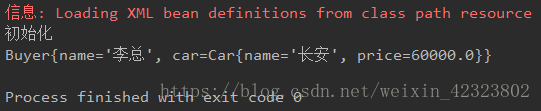
使用spel 注入,优点在于 #{ } 中可以 接收表达式 【注意点,‘ ’ 单引号代表string 字符串, 注入对象直接传入 简单类 id 】:
配置xml 文件:
  <!--spel注入-->
    <bean id="car2" class="bean.Car">
        <property name="name" value="#{'长安'}" />
        <property name="price" value="#{60000}" />
    </bean>
    <bean id="buyer2" class="bean.Buyer">
        <property name="name" value="#{'李总'}" />
        <property name="car" value="#{car2}" /><!--name就是引入的对象类-->
    </bean>
测试类:
    //使用SPEL 注入
    @Test
    public void test5(){
        ClassPathXmlApplicationContext context = new ClassPathXmlApplicationContext("applicationContext.xml");
        Car car2 = (Car) context.getBean("car2");
        System.out.println(car2);
    }
    @Test
    public void test6(){
        ClassPathXmlApplicationContext context = new ClassPathXmlApplicationContext("applicationContext.xml");
        Buyer buyer2 = (Buyer) context.getBean("buyer2");
        System.out.println(buyer2);
    }
运行:
集合的属性注入:<list/>,<set/>,<map/>,配置参考官网如下:
其中数组 的注入和 <list /> 是一致的;
<bean id="moreComplexObject" class="example.ComplexObject">
    <!-- results in a setAdminEmails(java.util.Properties) call -->
    <property name="adminEmails">
        <props>
            <prop key="administrator">[email protected]</prop>
            <prop key="support">[email protected]</prop>
            <prop key="development">[email protected]</prop>
        </props>
    </property>
    <!-- results in a setSomeList(java.util.List) call -->
    <property name="someList">
        <list>
            <value>a list element followed by a reference</value>
            <ref bean="myDataSource" />
        </list>
    </property>
    <!-- results in a setSomeMap(java.util.Map) call -->
    <property name="someMap">
        <map>
            <entry key="an entry" value="just some string"/>
            <entry key ="a ref" value-ref="myDataSource"/>
        </map>
    </property>
    <!-- results in a setSomeSet(java.util.Set) call -->
    <property name="someSet">
        <set>
            <value>just some string</value>
            <ref bean="myDataSource" />
        </set>
    </property>
</bean>
测试其中的 list<String> 属性注入:
  <!--list 属性注入-->
    <bean id="collectionDemo" class="bean.CollectionDemo">
        <property name="list">
            <list>
                <value>王宝强</value>
                <value>范冰冰</value>
                <value>赵丽颖</value>
                <value>柳岩</value>
            </list>
        </property>
    </bean>
bean类如下:
package bean;

import java.util.List;
/**
 * @auther SyntacticSugar
 * @data 2018/9/24 0024下午 3:29
 */
public class CollectionDemo {
    private List<String> list;
    //setter
    public void setList(List<String> list) {
        this.list = list;
    }
    @Override
    public String toString() {
        return "CollectionDemo{" +
                "list=" + list +
                '}';
    }
}
单元测试:
   @Test
    public void test7(){
        ClassPathXmlApplicationContext context = new ClassPathXmlApplicationContext("applicationContext.xml");
        CollectionDemo co = (CollectionDemo) context.getBean("collectionDemo");
        System.out.println(co);
    }
运行:

c-namespace 的XML注入,是基于构造函数依赖注入的【允许使用内联属性配置构造函数参数】;
<beans xmlns="http://www.springframework.org/schema/beans"
    xmlns:xsi="http://www.w3.org/2001/XMLSchema-instance"
    xmlns:c="http://www.springframework.org/schema/c"
    xsi:schemaLocation="http://www.springframework.org/schema/beans
        http://www.springframework.org/schema/beans/spring-beans.xsd">

    <bean id="bar" class="x.y.Bar"/>
    <bean id="baz" class="x.y.Baz"/>

    <!-- traditional declaration -->
    <bean id="foo" class="x.y.Foo">
        <constructor-arg ref="bar"/>
        <constructor-arg ref="baz"/>
        <constructor-arg value="[email protected]"/>
    </bean>

    <!-- c-namespace declaration -->
    <bean id="foo" class="x.y.Foo" c:bar-ref="bar" c:baz-ref="baz" c:email="[email protected]"/>

</beans>
使用Druid ,SpringTemplate&Spring框架实现CRUD;
分析步骤:
①配置pom.xml文件,jdbc.properties;
② 1,实体bean 类,和数据库中table一一对应;2,dao 层,daoImpl 类 ;3,service 层,serviceImpl类;4,配置applicationContext.xml;5,单元测试;
使用 maven 的 java 工程,项目结构如下:
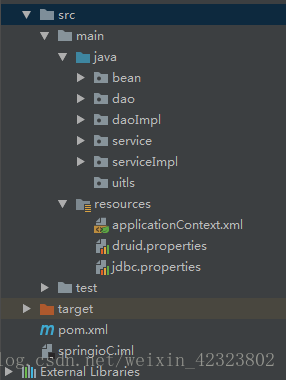
按照以上步骤开发:
实体bean类,请手动添加setter ,toString:
public class Account implements Serializable   {
    private Integer id;
    private String  name;
    private Float money;
dao层;
package dao;

import bean.Account;
import java.util.List;
/**
 * @auther SyntacticSugar
 * @data 2018/9/24 0024下午 5:48
 */
public interface AccountDao {
    //selectAccountById(integer id)
    //insertAccount()
    //updateAccount(Account account)
    //deleteAccountById(Integer id)
    //selectAll()

    Account selectAccountById(Integer id);
    int insertAccount(Account account);
    int  updateAccount(Account account);
    int deleteAccountById(Integer id);
    List<Account> selectAll();
}
daoImpl类:
package daoImpl;

import bean.Account;
import dao.AccountDao;
import org.springframework.jdbc.core.BeanPropertyRowMapper;
import org.springframework.jdbc.core.JdbcTemplate;

import java.util.List;
/**
 * @auther SyntacticSugar
 * @data 2018/9/24 0024下午 5:49
 */
public class AccountDaoImpl implements AccountDao {
    private JdbcTemplate template;
    //setter
    public void setTemplate(JdbcTemplate template) {
        this.template = template;
    }
    /**
     * 依据 id 来查询account
     * @param id
     * @return
     */
    @Override
    public Account selectAccountById(Integer id) {
        String sql = "select * from account where id=?";
        Account account = template.queryForObject(sql, new BeanPropertyRowMapper<Account>(Account.class), id);
        return account;
    }
    /**
     * 在account 中插入数据
     * @param account
     * @return
     */

    @Override
    public int insertAccount(Account account) {
        String sql = "insert into account values(null,?,?) ;";
        int insertCount = template.update(sql,
                account.getName(), account.getMoney());
        return insertCount;
    }
    /**
     * 更新 account
     * @param account
     * @return
     */
    @Override
    public int updateAccount(Account account) {
        String sql = "update  account set money= ?  where id= ?";
        int updateCount = template.update(sql,
                account.getMoney(), account.getId());
        return updateCount;
    }
    /**
     * 根据id  删除account
     * @param id
     * @return
     */
    @Override
    public int deleteAccountById(Integer id) {
        String sql = "delete  from account where id=?";
        int deleteCount = template.update(sql,  id);
        return deleteCount;
    }
    /**
     * 查询所有的 account
     * @return
     */
    @Override
    public List<Account> selectAll() {
        String sql = "select * from account";
        List<Account> list = template.query(sql, new BeanPropertyRowMapper<Account>(Account.class));
        return list;
    }
}
service层:
package service;

import bean.Account;
import java.util.List;
/**
 * @auther SyntacticSugar
 * @data 2018/9/24 0024下午 6:32
 */
public interface AccountService {

    Account searchingAccountById(Integer id);
    int saveAccount(Account account);
    int  changeAccount(Account account);
    int cleanAccountById(Integer id);
    List<Account> seeAll();
}
serviceImpl类:
package serviceImpl;

import bean.Account;
import dao.AccountDao;
import service.AccountService;

import java.util.List;

/**
 * @auther SyntacticSugar
 * @data 2018/9/24 0024下午 6:33
 * <p>
 * 使用 dao 调用 降低耦合
 */
public class AccountServiceImpl implements AccountService {

    private AccountDao accountDao;
    //setter
    public void setAccountDao(AccountDao accountDao) {
        this.accountDao = accountDao;
    }
    /**
     * 通过id   查询
     * @param id
     * @return
     */
    @Override
    public Account searchingAccountById(Integer id) {
        Account account = accountDao.selectAccountById(id);
        return account;
    }

    @Override
    public int saveAccount(Account account) {
        int insertAccount = accountDao.insertAccount(account);
        return insertAccount;
    }

    @Override
    public int changeAccount(Account account) {
        int updateAccount = accountDao.updateAccount(account);
        return updateAccount;
    }

    @Override
    public int cleanAccountById(Integer id) {
        int deleteAccountById = accountDao.deleteAccountById(id);
        return deleteAccountById;
    }

    @Override
    public List<Account> seeAll() {
        List<Account> accounts = accountDao.selectAll();
        return accounts;
    }
}
配置文件如下:
pom文件:
<?xml version="1.0" encoding="UTF-8"?>
<project xmlns="http://maven.apache.org/POM/4.0.0"
         xmlns:xsi="http://www.w3.org/2001/XMLSchema-instance"
         xsi:schemaLocation="http://maven.apache.org/POM/4.0.0 http://maven.apache.org/xsd/maven-4.0.0.xsd">
    <modelVersion>4.0.0</modelVersion>

    <groupId>20180924pm</groupId>
    <artifactId>springioC</artifactId>
    <version>1.0-SNAPSHOT</version>
<dependencies>
    <!--junit-->
    <dependency>
        <groupId>junit</groupId>
        <artifactId>junit</artifactId>
        <version>4.12</version>
        <scope>test</scope>
    </dependency>
    <!--springIOC相关-->
    <dependency>
        <groupId>org.springframework</groupId>
        <artifactId>spring-context</artifactId>
        <version>5.0.9.RELEASE</version>
    </dependency>
    <!--springjdbc相关-->
    <dependency>
        <groupId>org.springframework</groupId>
        <artifactId>spring-jdbc</artifactId>
        <version>5.0.9.RELEASE</version>
    </dependency>
    <!-- https://mvnrepository.com/artifact/mysql/mysql-connector-java -->
    <dependency>
        <groupId>mysql</groupId>
        <artifactId>mysql-connector-java</artifactId>
        <version>8.0.12</version>
    </dependency>
    <dependency>
        <groupId>com.alibaba</groupId>
        <artifactId>druid</artifactId>
        <version>1.1.11</version>
    </dependency>


</dependencies>
    <build>
        <plugins>
            <plugin>
                <groupId>org.apache.maven.plugins</groupId>
                <artifactId>maven-compiler-plugin</artifactId>
                <version>3.8.0</version>
                <configuration>
                    <source>1.9</source>
                    <target>1.9</target>
                </configuration>
            </plugin>
        </plugins>
    </build>

</project>
applicationContext.xml
<?xml version="1.0" encoding="UTF-8"?>
<beans xmlns="http://www.springframework.org/schema/beans"
       xmlns:xsi="http://www.w3.org/2001/XMLSchema-instance"
       xmlns:context="http://www.springframework.org/schema/context"
       xsi:schemaLocation="
        http://www.springframework.org/schema/beans
        http://www.springframework.org/schema/beans/spring-beans.xsd
        http://www.springframework.org/schema/context
        http://www.springframework.org/schema/context/spring-context.xsd">
    <!--加载  druid  配置文件-->
    <context:property-placeholder location="classpath:jdbc.properties" ignore-unresolvable="true"/>

    <bean id="accountService" class="serviceImpl.AccountServiceImpl">
        <property name="accountDao" ref="accountDao"></property>
        <!-- collaborators and configuration for this bean go here -->
    </bean>
    <bean id="accountDao" class="daoImpl.AccountDaoImpl">
        <property name="template" ref="jdbcTemplate"></property>
        <!-- collaborators and configuration for this bean go here -->
    </bean>
    <bean id="jdbcTemplate" class="org.springframework.jdbc.core.JdbcTemplate">
        <constructor-arg index="0" ref="dataSource"></constructor-arg>
        <!-- collaborators and configuration for this bean go here -->
    </bean>
    <bean id="dataSource" class="com.alibaba.druid.pool.DruidDataSource">
        <property name="driverClassName" value="${jdbc.driverClass}"/>
        <property name="url" value="${jdbc.url}"/>
        <property name="username" value="${jdbc.username}"/>
        <property name="password" value="${jdbc.password}"/>
        <!-- collaborators and configuration for this bean go here -->
    </bean>


    <!-- more bean definitions go here -->

</beans>
jdbc.properties
jdbc.driverClass=com.mysql.cj.jdbc.Driver
jdbc.url=jdbc:mysql://localhost:3306/test?serverTimezone=UTC&characterEncoding=UTF-8&useSSL=false
jdbc.username=root
jdbc.password=root
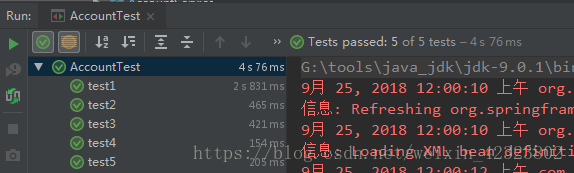
单元测试:
import bean.Account;
import org.junit.Before;
import org.junit.Test;
import org.springframework.context.support.ClassPathXmlApplicationContext;
import service.AccountService;
import java.util.List;
/**
* @auther SyntacticSugar
* @data 2018/9/24 0024下午 7:22
*/
public class AccountTest {
private AccountService accountService;
@Before
public void setUp() {
ClassPathXmlApplicationContext applicationContext = new ClassPathXmlApplicationContext("applicationContext.xml");
accountService = (AccountService) applicationContext.getBean("accountService");
}
// 增删改查
/**
* 查看所有账户
*/
@Test
public void test1(){
List<Account> accounts = accountService.seeAll();
accounts.stream().forEach(System.out::println);
}
/**
* 通过id 查看account
*/
@Test
public void test2(){
Account account = accountService.searchingAccountById(2);
System.out.println(account);
}
/**
* 保存账户
* 以下不一一进行键盘录入测试,直接数据写死
*/
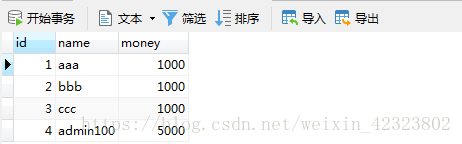
@Test
public void test3(){
Account account = new Account();
account.setName("admin100");
account.setMoney(5000f);
int saveAccount = accountService.saveAccount( account);
System.out.println(saveAccount);
}
@Test
public void test4(){
Account account = new Account();
account.setId(60);
account.setMoney(5000f);
int changeAccount = accountService.changeAccount(account);
System.out.println(changeAccount);
}
/**
* 通过 id 删除
*/
@Test
public void test5(){
int cleanAccountById = accountService.cleanAccountById(12);
System.out.println(cleanAccountById);
}
}