NAT模式:
一、实验原理

地址翻译实现虚拟服务器:
调度器接受到客户端的请求之后,根据调度算法,将客户端的的请求发送给服务器,服务器处理完请求,查看默认路由(NAT模式下需要将服务器的默认网关设置为
调度器),LB接受到响应包以后,将源IP进行修改,然后将响应数据发送给客户端。
原理详情:
1)客户端请求数据,然后将数据发送给LB;
2)LB 接受客户端的请求,根据调度算法将客户端的请求包的源IP和端口,修改为服务器,然后将这条连接信息保存在hash表中;
3)数据包经过服务器的处理,服务器的默认网关是LB,然后将相应数据发送给LB;
4)LB 收到服务器的响应包以后,根据hash表中的连接信息,将源IP改为LB自己,然后将数据发送给客户端。
注:NAT模式可以进行端口转发;从客户端到服务器只进行了DNAt(目的IP的转换),从服务器到客户端进行了SNAT的转换(源IP的转换),整个过程中服务器对于客户端来说时透明的,保证了服务器的私密性
二、实验部署:
(1)实验环境:
所有主机均为rhel6.5,selinux为disabled,防火墙是关闭的状态;

server1     Load Balancer(调度器) <添加2个网卡 eht0 eth1>
server2     Real Server
server3     Real Server
server4     Clients (充当客户端角色,进行访问测试)
(2)实验过程:
server1(LB):
[root@server1 ~]# cd /etc/sysconfig/network-scripts/
[root@server1 network-scripts]# vim ifcfg-eth1
    IPADDR=192.168.1.11
[root@server1 network-scripts]# /etc/init.d/network restart
[root@server1 network-scripts]# ipvsadm -C  ##清除策略
[root@server1 network-scripts]# ipvsadm -A -t 192.168.1.11:80 -s rr   ##轮叫调度算法;wrr 加权轮叫算法
[root@server1 network-scripts]# ipvsadm -a -t 192.68.1.11:80 -r 172.25.45.2:80 -m     ##如果是wrr,这里需要指定权,用法: -w [digit]
[root@server1 network-scripts]# ipvsadm -a -t 192.68.1.11:80 -r 172.25.45.3:80 -m
[root@server1 network-scripts]# ipvsadm -Ln  ##查看策略
IP Virtual Server version 1.2.1 (size=4096)
Prot LocalAddress:Port Scheduler Flags
  -> RemoteAddress:Port           Forward Weight ActiveConn InActConn
TCP  192.168.1.11:80 rr
  -> 172.25.45.2:80               Masq    1      0          0
  -> 172.25.45.3:80               Masq    1      0          0
[root@server1 network-scripts]# route -n   ##查看网关
Kernel IP routing table
Destination     Gateway         Genmask         Flags Metric Ref    Use Iface
172.25.45.0     0.0.0.0         255.255.255.0   U     0      0        0 eth0
192.168.1.0     0.0.0.0         255.255.255.0   U     0      0        0 eth1
169.254.0.0     0.0.0.0         255.255.0.0     U     1002   0        0 eth0
169.254.0.0     0.0.0.0         255.255.0.0     U     1003   0        0 eth1
0.0.0.0 192.168.1.11 0.0.0.0 UG 1 0 0 eth1 [root@server1 ~]# echo "1" > /proc/sys/net/ipv4/ip_forward ##开启ip转发,确保两块网卡的数据包是可以传送的;内核参数
[root@server1 ~]# cat /proc/sys/net/ipv4/ip_forward
1server2(RS):
[root@server2 ~]# cd /var/www/html
[root@server2 ~]# vim index.html
www.westos.org - server2
[root@server2 ~]# /etc/init.d/httpd start
[root@server2 network-scripts]# route add default gw 172.25.45.1   ##添加网关
[root@server2 network-scripts]# route -n
Kernel IP routing table
Destination     Gateway         Genmask         Flags Metric Ref    Use Iface
172.25.45.0     0.0.0.0         255.255.255.0   U     0      0        0 eth0
169.254.0.0     0.0.0.0         255.255.0.0     U     1002   0        0 eth0
0.0.0.0         172.25.45.1     0.0.0.0         UG    0      0        0 eth0
注:网关的添加方式有2种:
(1)如上的命令方式: route add default gw ip ##临时修改
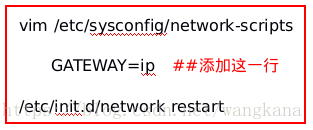
(2)文件修改(永久修改):
server3(RS):
[root@server3 ~]# cd /var/www/html
[root@server3 ~]# vim index.html
bbs.westos.org
[root@server3 ~]# /etc/init.d/httpd restart
[root@server3 network-scripts]# route add default gw 172.25.45.1
[root@server3 network-scripts]# route -n
Kernel IP routing table
Destination     Gateway         Genmask         Flags Metric Ref    Use Iface
172.25.45.0     0.0.0.0         255.255.255.0   U     0      0        0 eth0
169.254.0.0     0.0.0.0         255.255.0.0     U     1002   0        0 eth0
0.0.0.0         172.25.45.1     0.0.0.0         UG    0      0        0 eth0
server4(客户端测试):
[root@server4 network-scripts]# vim ifcfg-eth0
[root@server4 network-scripts]# /etc/init.d/network restart 先检查一下,是否可以ping通:

测试结果1(IP):

测试结果2(域名):
[root@server4 network-scripts]# vim /etc/hosts

问题:
客户端访问VIP测试时被拒,在真实服务器未添加网关,导致服务器网络无法连接调度器,从而服务器端无法接收请求;
| 所以说添加网关的意义: 客户端只知道192.168.1.11(调度器的VIP),通过访问它发送请求数据包,而调度器的真实IP和RS的RIP(172.25.45.100)不在同一个网段内;数据包不能到达真实后端服务器,所以我们需要设置在RS将LB的RIP设置为网关,让数据包可以到达真实服务器; |