1、SpringCloud 简介
Spring Cloud为开发人员提供了快速构建分布式系统中一些常见模式的工具(例如配置管理,服务发现,断路器,智能路由,微代理,控制总线)。使用Spring Cloud开发人员可以快速地支持实现这些模式的服务和应用程序。他们将在任何分布式环境中运行良好,包括开发人员自己的笔记本电脑,裸机数据中心,以及Cloud Foundry等托管平台。
Spring Cloud专注于提供良好的开箱即用经验的典型用例和可扩展性机制覆盖。具有如下特性:
-
分布式/版本化配置
-
服务注册和发现
-
路由
-
service - to - service调用
-
负载均衡
-
断路器
-
分布式消息传递
2、Eureka注册中心Server端创建
1、新建SpringBoot项目,如图

2、导入eureka的依赖,具体pom如下:
<?xml version="1.0" encoding="UTF-8"?>
<project xmlns="http://maven.apache.org/POM/4.0.0" xmlns:xsi="http://www.w3.org/2001/XMLSchema-instance"
	xsi:schemaLocation="http://maven.apache.org/POM/4.0.0 http://maven.apache.org/xsd/maven-4.0.0.xsd">
	<modelVersion>4.0.0</modelVersion>

	<groupId>com.test</groupId>
	<artifactId>eurekaserver</artifactId>
	<version>0.0.1-SNAPSHOT</version>
	<packaging>jar</packaging>

	<name>eurekaserver</name>
	<description>Demo project for Spring Boot</description>

	<parent>
		<groupId>org.springframework.boot</groupId>
		<artifactId>spring-boot-starter-parent</artifactId>
		<version>2.0.4.RELEASE</version>
		<relativePath/> <!-- lookup parent from repository -->
	</parent>

	<properties>
		<project.build.sourceEncoding>UTF-8</project.build.sourceEncoding>
		<project.reporting.outputEncoding>UTF-8</project.reporting.outputEncoding>
		<java.version>1.8</java.version>
		<spring-cloud.version>Finchley.SR1</spring-cloud.version>
	</properties>

	<dependencies>
		<dependency>
			<groupId>org.springframework.cloud</groupId>
			<artifactId>spring-cloud-starter-netflix-eureka-server</artifactId>
		</dependency>

		<dependency>
			<groupId>org.springframework.boot</groupId>
			<artifactId>spring-boot-starter-test</artifactId>
			<scope>test</scope>
		</dependency>
	</dependencies>

	<dependencyManagement>
		<dependencies>
			<dependency>
				<groupId>org.springframework.cloud</groupId>
				<artifactId>spring-cloud-dependencies</artifactId>
				<version>${spring-cloud.version}</version>
				<type>pom</type>
				<scope>import</scope>
			</dependency>
		</dependencies>
	</dependencyManagement>

	<build>
		<plugins>
			<plugin>
				<groupId>org.springframework.boot</groupId>
				<artifactId>spring-boot-maven-plugin</artifactId>
			</plugin>
		</plugins>
	</build>


</project>
3、在应用启动类添加EurekaServer注解,这样在SpringBoot启动的时候,会启动EurekaServer注册中心
package com.test;

import org.springframework.boot.SpringApplication;
import org.springframework.boot.autoconfigure.SpringBootApplication;
import org.springframework.cloud.netflix.eureka.server.EnableEurekaServer;

@SpringBootApplication
@EnableEurekaServer
public class EurekaserverApplication {

	public static void main(String[] args) {
		SpringApplication.run(EurekaserverApplication.class, args);
	}
}
4、配置application.property或者application.yml。本人喜欢yml格式的,直观简单,但格式要求很严格。这个主要配置Eureka注册中心的参数信息,每一个Eureka Client注册后,都会向Server端发送心跳。而默认情况下Eureka Server本身也是一个Client,需要指定注册中心。配置如下:
server:
  port: 8761

eureka:
  instance:
    hostname: 127.0.0.1
  client:
    registerWithEureka: false
    fetchRegistry: false
    serviceUrl:
      defaultZone: http://${eureka.instance.hostname}:${server.port}/eureka/
其中 registerWithEureka: false fetchRegistry: false 表示自身是一个Eureka Server,是一个注册中心。
5、至此,配置完成,启动应用。
访问:http://localhost:8761
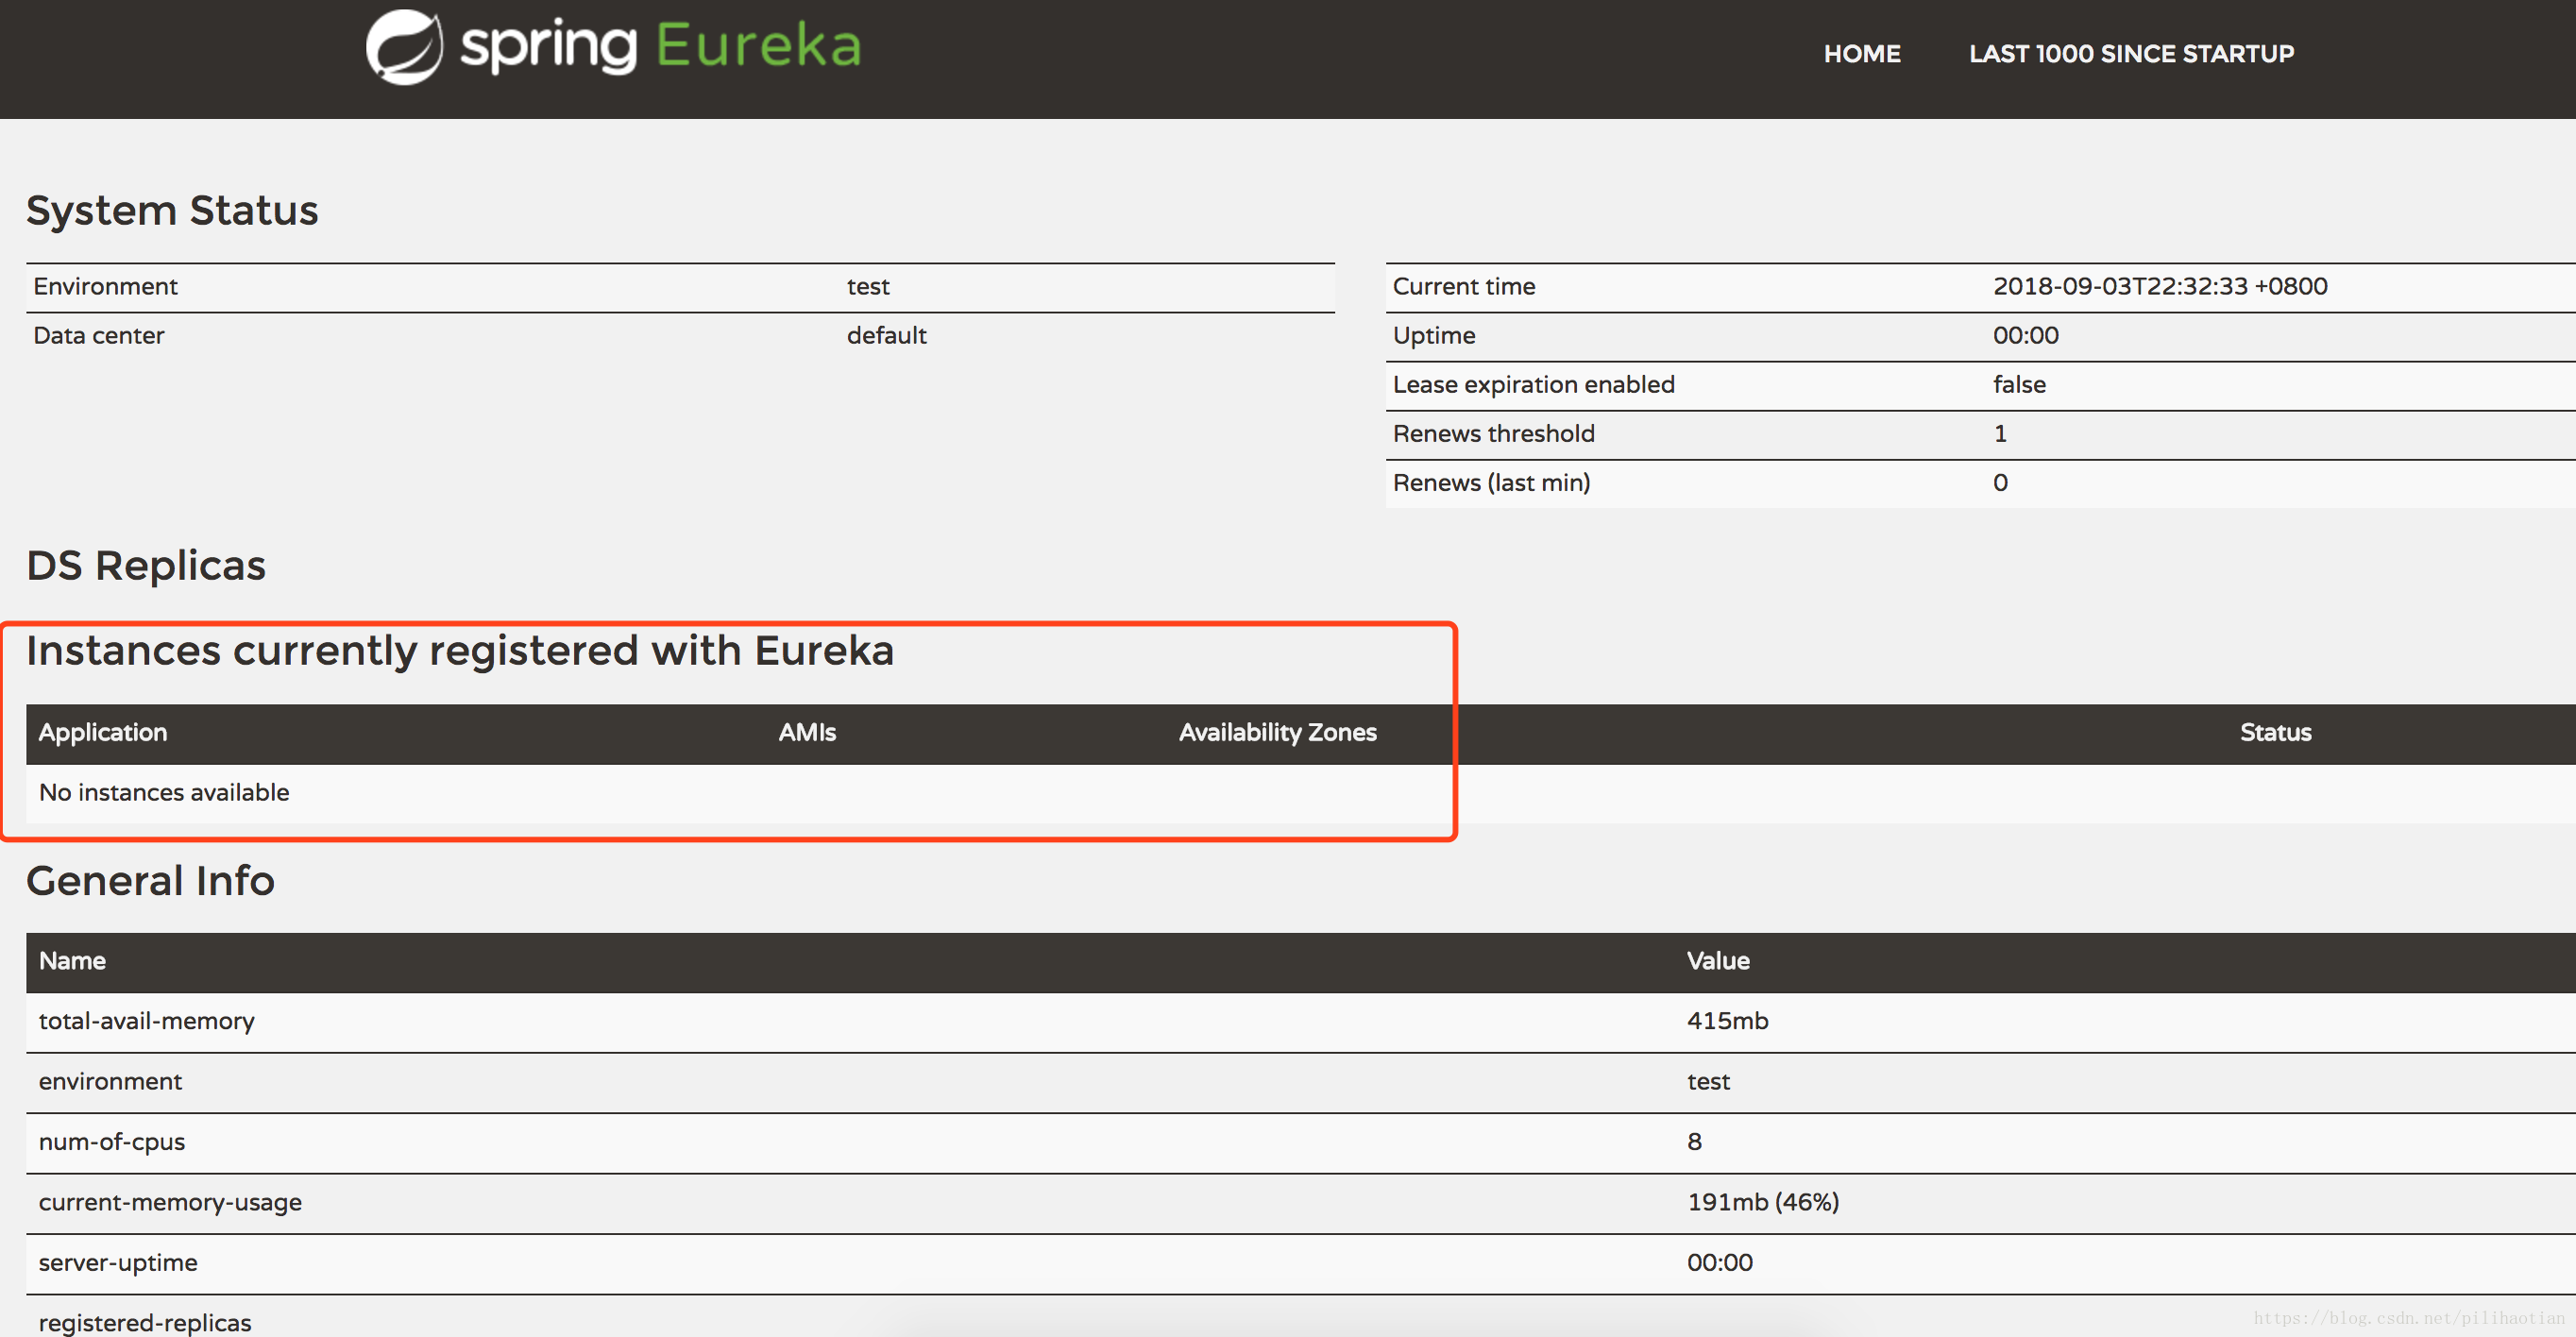
图为注册中心主界面,在这个界面可以查看注册的Eureka Client实例信息,因为目前没有Client注册,所以No instances available。
3、Eureka Client端创建并注册
1、新建SpringBoot项目,导入依赖,Pom文件和Server端一致。
2、在应用启动类添加EurekaClient注解,表示这是一个客户端,如下:
package com.test;

import org.springframework.boot.SpringApplication;
import org.springframework.boot.autoconfigure.SpringBootApplication;
import org.springframework.cloud.netflix.eureka.EnableEurekaClient;

@SpringBootApplication
@EnableEurekaClient
public class EurekaclientApplication {

	public static void main(String[] args) {
		SpringApplication.run(EurekaclientApplication.class, args);
	}
}
3、在配置文件中添加配置,将自身注册到指定的Eureka注册中心去。
eureka:
  client:
    serviceUrl:
      defaultZone: http://localhost:8761/eureka/
server:
  port: 8762
spring:
  application:
    name: MyEurekaClient
其中:defaultZone是注册中心的地址,application.name是应用名称,后续服务间调用一般是通过应用名称和应用地址来调用的。
4、启动应用
5、查看注册中心,发现这个实例注册进来了:

6、至此,服务的注册中心和实例注册基本完成。