##一、main()方法调用
#####1、从main方法入手
@SpringBootApplication
public class SpringBootHelloworldQuickApplication {

    public static void main(String[] args) {
        SpringApplication.run(SpringBootHelloworldQuickApplication.class, args);
    }
}
#####2、进入SpringApplication.run()方法
run()方法会调用如下的方法
public static ConfigurableApplicationContext run(Class<?>[] primarySources,
		String[] args) {
	return new SpringApplication(primarySources).run(args);
}
该方法分两步走:
(1)、创建SpringApplication对象
(2)、调用springApplicaiton对象的run()方法
##二、创建SpringApplication对象
#####1、进入SpringApplication()构造方法,创建对象
该方法最终会调用SpringApplication的构造方法。
public SpringApplication(ResourceLoader resourceLoader, Class<?>... primarySources) {

	//保存主配置类SpringBootHelloworldQuickApplication
	this.resourceLoader = resourceLoader;

	Assert.notNull(primarySources, "PrimarySources must not be null");
	this.primarySources = new LinkedHashSet<>(Arrays.asList(primarySources));

	//判断当前是否一个web应用,主要是判断是普通web应用、响应式web应用、非web应用
	this.webApplicationType = deduceWebApplicationType();

	//从类路径下找到META‐INF/spring.factories,找到其中配置的所有ApplicationContextInitializer,然后保存起来
	setInitializers((Collection) getSpringFactoriesInstances(ApplicationContextInitializer.class));

	//从类路径下找到ETA‐INF/spring.factories,找到其中配置的所有ApplicationListener,然后保存起来
	setListeners((Collection) getSpringFactoriesInstances(ApplicationListener.class));

	//从多个配置类中找到有main方法的主配置类
	this.mainApplicationClass = deduceMainApplicationClass();
}
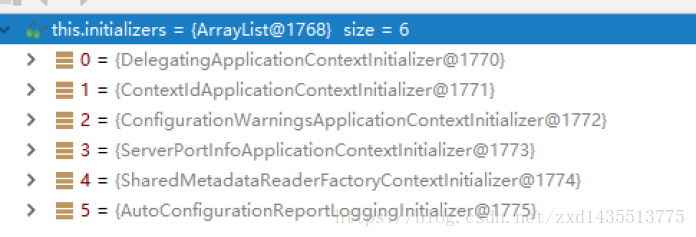
Debug调试获取到的ApplicationContextInitializer和ApplicationListener,启动时候会用到

#####2、进入deduceWebApplicationType()方法
private WebApplicationType deduceWebApplicationType() {
if (ClassUtils.isPresent(REACTIVE_WEB_ENVIRONMENT_CLASS, null)
&& !ClassUtils.isPresent(MVC_WEB_ENVIRONMENT_CLASS, null)
&& !ClassUtils.isPresent(JERSEY_WEB_ENVIRONMENT_CLASS, null)) {
return WebApplicationType.REACTIVE;
}
for (String className : WEB_ENVIRONMENT_CLASSES) {
if (!ClassUtils.isPresent(className, null)) {
return WebApplicationType.NONE;
}
}
return WebApplicationType.SERVLET;
}
#####3、进入getSpringFactoriesInstances()方法
该方法内部,最终会调用loadSpringFactories()方法;
loadSpringFactories方法内部会加载META-INF/spring.factories文件,这里加载的文件不仅包含项目中的,还包换我们项目环境所依赖的jar包中的META-INF/spring.factories文件。
private static Map<String, List<String>> loadSpringFactories(@Nullable ClassLoader classLoader) {
	MultiValueMap<String, String> result = cache.get(classLoader);
	if (result != null) {
		return result;
	}

	try {
		//获取当前ClassLoader下的所有包含META-INF/spring.factories文件的URL路
		Enumeration<URL> urls = (classLoader != null ?
				classLoader.getResources(FACTORIES_RESOURCE_LOCATION) :
				ClassLoader.getSystemResources(FACTORIES_RESOURCE_LOCATION));


		result = new LinkedMultiValueMap<>();

    	//遍历所有的包含META-INF/spring.factories文件URL集合
		while (urls.hasMoreElements()) {
			URL url = urls.nextElement();
			UrlResource resource = new UrlResource(url);

        	//转换为Properties对象
			Properties properties = PropertiesLoaderUtils.loadProperties(resource);

			//遍历META-INF/spring.factories文件中的所有属性
			for (Map.Entry<?, ?> entry : properties.entrySet()) {
				//如果一个接口希望配置多个实现类,可以使用','进行分割,将当前Key对应的值转换为List
				List<String> factoryClassNames = Arrays.asList(
						StringUtils.commaDelimitedListToStringArray((String) entry.getValue()));

				//添加到返回对象中
				result.addAll((String) entry.getKey(), factoryClassNames);
			}
		}
		cache.put(classLoader, result);
		return result;
	}
	catch (IOException ex) {
		throw new IllegalArgumentException("Unable to load factories from location [" +
				FACTORIES_RESOURCE_LOCATION + "]", ex);
	}
}
#####4、进入deduceMainApplicationClass()方法
private Class<?> deduceMainApplicationClass() {
	try {
		StackTraceElement[] stackTrace = new RuntimeException().getStackTrace();
		for (StackTraceElement stackTraceElement : stackTrace) {
			if ("main".equals(stackTraceElement.getMethodName())) {
				return Class.forName(stackTraceElement.getClassName());
			}
		}
	}
	catch (ClassNotFoundException ex) {
		// Swallow and continue
	}
	return null;
}
##三、调用springApplicaiton对象的run()方法
调用run()方法代码入口
new SpringApplication(primarySources).run(args);
######1、run()方法调用
public ConfigurableApplicationContext run(String... args) {
	//创建一个用来方便的记录程序的运行时间的对象
	StopWatch stopWatch = new StopWatch();
	stopWatch.start();
	ConfigurableApplicationContext context = null;
	Collection<SpringBootExceptionReporter> exceptionReporters = new ArrayList<>();

	//设置系统属性java.awt.headless,默认为true,运行在没有显示器和键盘的环境。
	configureHeadlessProperty();

	//获取SpringApplicationRunListeners,从类路径下META‐INF/spring.factories
	SpringApplicationRunListeners listeners = getRunListeners(args);

	///回调所有的获取SpringApplicationRunListener.starting()方法
	listeners.starting();
	try {

		//封装命令行参数
		ApplicationArguments applicationArguments = new DefaultApplicationArguments(args);

		//创建并配置当前SpringBoot应用将要使用的Environment,
		//创建环境完成后回调SpringApplicationRunListener.environmentPrepared();
		//表示环境准备完成
		ConfigurableEnvironment environment = prepareEnvironment(listeners,applicationArguments);
		configureIgnoreBeanInfo(environment);

		//打印banner
		Banner printedBanner = printBanner(environment);

		//创建ApplicationContext,该过程和Spring创建容器启动过程一样
		context = createApplicationContext();

		//使用SpringFactoriesLoader在应用的classpath中查找并加载所有可用的SpringBootExceptionReporter
		exceptionReporters = getSpringFactoriesInstances(
				SpringBootExceptionReporter.class,
				new Class[] { ConfigurableApplicationContext.class }, context);

		//准备应用上下文[整个容器的创建与启动以及bean的注入功能]
		prepareContext(context, environment, listeners, applicationArguments,printedBanner);

		//刷新应用上下文[是实现spring-boot-starter-*的自动化配置的关键]
		refreshContext(context);

		//从ioc容器中获取所有的ApplicationRunner和CommandLineRunner进行回调,
		//ApplicationRunner先回调,CommandLineRunner再回调
		afterRefresh(context, applicationArguments);
		stopWatch.stop();
		if (this.logStartupInfo) {
			new StartupInfoLogger(this.mainApplicationClass)
					.logStarted(getApplicationLog(), stopWatch);
		}

		//启动应用程序中的所有监听器(创建SpringApplication对象过程中有获取到)
		listeners.started(context);

		//调用应用程序中所有CommandLineRunner.class和ApplicationRunner.class的实现类的run方法
		callRunners(context, applicationArguments);
	}
	catch (Throwable ex) {
		handleRunFailure(context, ex, exceptionReporters, listeners);
		throw new IllegalStateException(ex);
	}

	try {
		listeners.running(context);
	}
	catch (Throwable ex) {
		handleRunFailure(context, ex, exceptionReporters, null);
		throw new IllegalStateException(ex);
	}

	//整个SpringBoot应用启动完成以后返回启动的ioc容器;
	return context;
}
##4、总结
######从上面源码可以看出,SpringApplication的run方法主要执行以下逻辑:
(1)、创建一个用来方便的记录程序的运行时间的对象;
(2)、设置系统属性java.awt.headless,默认为true,运行在没有显示器和键盘的环境;
(3)、加载并启动一系列SpringApplicationRunListener对象;
(4)、创建并配置当前SpringBoot应用将要使用的Environment;
(5)、如果SpringApplication的showBanner属性被设置为true,则打印banner;
(6)、创建ApplicationContext;
(7)、使用SpringFactoriesLoader在应用的classpath中查找并加载所有可用的SpringBootExceptionReporter;
(8)、准备应用上下文[整个容器的创建与启动以及bean的注入功能];
*(9)、刷新应用上下文[是实现spring-boot-starter-的自动化配置的关键];
(10)、调用ApplicationContext的refresh()方法,完成IoC容器可用的最后一步操作;
(11)、启动应用程序中的所有监听器;
(12)、调用应用程序中所有CommandLineRunner.class和ApplicationRunner.class的实现类的run方法;
(13)、发布事件
##补充:
#####重要的事件回调机制
配置在META-INF/spring.factories
ApplicationContextInitializer
SpringApplicationRunListener
只需要放在ioc容器中
ApplicationRunner
CommandLineRunner