如果不想看安装引入和代码的讲解,可以直接拉到最后看完整代码。
你有一个 textarea 输入框,你妄想用它来输入代码,结果到头来发现太难受了,一没高亮,二没提示,三没法精细化控制。此时此刻不得不考虑集成一款代码编辑器来替换掉弱鸡的 textarea 了,这里我使用 ACE 编辑器。
说点废话啊,关于使用 Vue 集成 ACE,踩坑无数,搜到的资料比较零碎,大部分集中在引入方式和是否经过 WebPack 打包有关。这一块我搜到的资料基本没有派上用场,他喵的都是我自己摸索出来的。而且我不想用别人封装过的(例如:vue2-ace-editor 或者 brace),我就是想自己摸索摸索。
一、安装
在项目根目录运行以下命令安装 ACE,会自动写入到 package.json 的依赖中,这种方式在 ACE 编辑器 1.3.2 版本之后才可以使用。
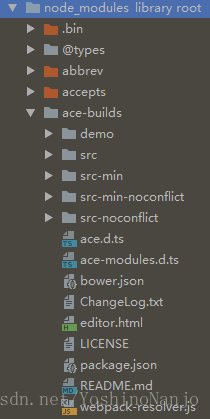
npm install ace-builds --save-dev安装完的效果,可以看到有 4 个版本 ACE,分别是 src、src-min、src-min-noconflict、src-noconflict,这里统一使用最后一个,即 src-noconflict 版本:
二、集成
在 Vue 项目的预编译入口文件 main.js 中引入 ACE 模块:
import ace from 'ace-builds'

Vue.use(ace)
创建一个 Vue 组件,将来只需引用该组件即可正常使用 ACE 编辑器了。先看一下 HTML 代码段:
<template>
  <div class="ace-container">
    <!-- 官方文档中使用 id,这里禁止使用,在后期打包后容易出现问题,使用 ref 或者 DOM 就行 -->
    <div class="ace-editor" ref="ace"></div>
  </div>
</template>
还需要在 mounted 钩子中初始化好这个 ACE 编辑器:
<script>
  import ace from 'ace-builds'
  import 'ace-builds/webpack-resolver' // 在 WebPack 环境中使用必须要导入
  import 'ace-builds/src-noconflict/theme-monokai' // 默认设置的主题
  import 'ace-builds/src-noconflict/mode-javascript' // 默认设置的语言模式

  export default {
    mounted () {
      this.aceEditor = ace.edit(this.$refs.ace, {
        maxLines: 20, // 最大行数,超过会自动出现滚动条
        minLines: 10, // 最小行数,还未到最大行数时,编辑器会自动伸缩大小
        fontSize: 14, // 编辑器内字体大小
        theme: this.themePath, // 默认设置的主题
        mode: this.modePath, // 默认设置的语言模式
        tabSize: 4 // 制表符设置为 4 个空格大小
      })
    },
    data () {
      return {
        aceEditor: null,
        themePath: 'ace/theme/monokai', // 不导入 webpack-resolver,该模块路径会报错
        modePath: 'ace/mode/javascript' // 同上
      }
    }
  }
</script>
关于导入“webpack-resolver”,ACE 官方是这么说的:

其实这样子算是把 ACE 组件写好了,只是是最简单的版本,那怎么用呢?我这里使用全局导入。我在项目中的 components 目录中创建一个文件“install.js”,该文件专门用来管理安装自定义的组件。
// 这个就是自己写的 ACE 组件
import ACE from './packages/dynamic-form/custom-ace.vue'

export default {
  install: function (Vue, options) {
    // 引号中的字符串就是之后的组件标签名,即 <ace></ace>
    Vue.component('ace', ACE)
  }
}
在 main.js 中挂载到全局:
import ace from 'ace-builds'
import componentsInstall from './components/install'

Vue.use(ace)
Vue.use(componentsInstall)
在需要用到的地方就可以这么写:
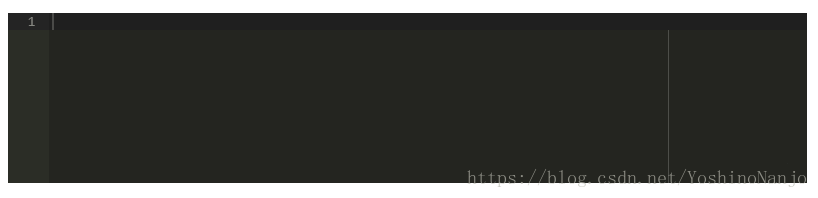
<ace></ace>看看效果如何:
三、进阶
我在 ACE 官网中发现了内置小书签的编辑器,传送门。当点击右下角的小书签时,会弹出一个蒙层,可以选择各种各样的属性配置,比如选择编辑器的语言模式,主题,是否换行,字体大小等等。如何使用的,这里我给一个别人写好的链接:传送门。不过我这里情况不太一样,不能使用这种方式,前面那个人的方式其实就是官方的,运行时动态创建一个 <script> 元素,把蒙层里的代码都放置在该元素下;我这边使用了 WebPack 打包,打包后如果使用这种方式是根本不起作用的。因此我只能自己实现一个蒙层。
扩展上文的 HTML 代码,写一个小书签:
<template>
  <div class="ace-container">
    <div class="ace-editor" ref="ace"></div>

    <!-- toggleConfigPanel:打开/关闭蒙层 -->
    <div class="bookmarklet" @click="toggleConfigPanel"></div>
  </div>
</template>
CSS 样式:
<style lang='scss' scoped>
.ace-container {
position: relative;
.bookmarklet {
position: absolute;
right: 0;
bottom: 0;
width: 20px;
height: 20px;
z-index: 2;
cursor: pointer;
border-width: 9px;
border-style: solid;
border-color: lightblue gray gray rgb(206, 173, 230);
border-image: initial;
}
}
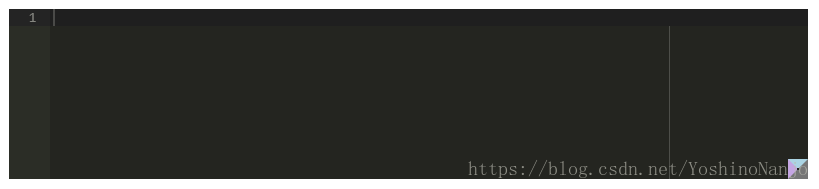
</style>看下效果,你会发现和官方的是一模一样的,哈哈,CSS 样式后面 4 个我就是从官方那里抄过来的,当然是一样的了:
这个小书签的点击事件“toggleConfigPanel”,记得先定义一个变量 toggle,用来表示打开/关闭:
toggleConfigPanel () {
    this.toggle = !this.toggle
}
接下来写一个自定义蒙层,继续扩展 HTML 代码,蒙层中放置两个属性,切换语言模式和是否换行,大家可以自行扩展:
<template>
  <div class="ace-container">
    <div class="ace-editor" ref="ace"></div>

    <div class="config-panel" v-show="toggle">
      <div>
        <div class="item">
          <label class="title">语言</label>
          <el-select class="value" v-model="modePath" @change="handleModelPathChange" size="mini" value-key="name">
            <el-option v-for="mode in modeArray"
                       :key="mode.name"
                       :label="mode.name"
                       :value="mode.path">
            </el-option>
          </el-select>
        </div>

        <div class="item">
          <label class="title">换行</label>
          <el-select class="value" v-model="wrap" @change="handleWrapChange" size="mini" value-key="name">
            <el-option v-for="wrap in wrapArray"
                       :key="wrap.name"
                       :label="wrap.name"
                       :value="wrap.value">
            </el-option>
          </el-select>
        </div>
      </div>
    </div>

    <!-- toggleConfigPanel:打开/关闭蒙层 -->
    <div class="bookmarklet" @click="toggleConfigPanel"></div>
  </div>
</template>
config-panel 的 CSS 代码:
.config-panel {
    position: absolute;
    right: 0;
    bottom: 0;
    width: 50%;
    height: 100%;
    overflow: scroll;
    box-shadow: grey -5px 2px 3px;
    background-color: rgba(255, 255, 255, 0.5);
    z-index: 1;

    .item {
        margin: 10px auto;
        text-align: center;

        .title {
            color: white;
            margin: 0 10px;
            font-size: 14px;
        }
    }
}
语言模式和换行需要事先定义好数组,再去 data 函数中定义变量:
const wrapArray = [{
    name: '开启',
    value: true
}, {
    name: '关闭',
    value: false
}]

const modeArray = [{
    name: 'JavaScript',
    path: 'ace/mode/javascript'
}, {
    name: 'HTML',
    path: 'ace/mode/html'
}, {
    name: 'CSS',
    path: 'ace/mode/css'
}, {
    name: 'SCSS',
    path: 'ace/mode/scss'
}, {
    name: 'Json',
    path: 'ace/mode/json'
}, {
    name: 'Java',
    path: 'ace/mode/java'
}, {
    name: 'Text',
    path: 'ace/mode/text'
}]
实现 change 事件,使得修改属性生效:
handleModelPathChange (modelPath) {
this.aceEditor.getSession().setMode(modelPath)
},
handleWrapChange (wrap) {
this.aceEditor.getSession().setUseWrapMode(wrap)
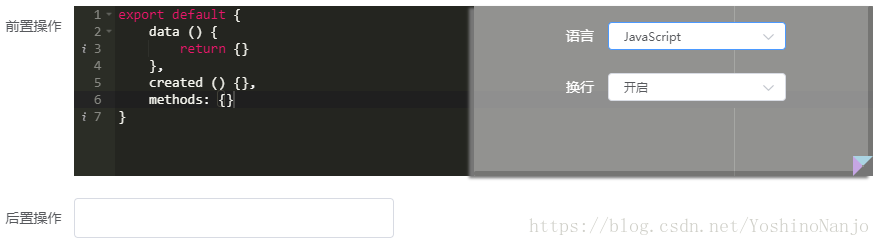
}看下效果,当切换不同语言的时候,高亮规则将自动修改:
完成上述代码之后,你不禁会想,既然能输入代码了,能不能加上自动提示?是可以的,官方支持了。
上文中支持了 7 种语言,具体能支持什么语言,在你项目的 “node_modules” → “ace-builds” → “src-conflict” → 所有以 “mode-” 开头的 js 文件都写了,可以自行对语言数组进行扩展。题外话,所有以 “theme-” 开头的表示当前能用的主题,“ext-” 开头的表示一些扩展工具。在 “src-conflict” 中有一个名字叫做 “snippets” 的目录,该目录定义所有语言的自动提示规则,这就是我们想要的。
在代码中导入 7 种语言的自动提示规则:
import 'ace-builds/src-noconflict/snippets/javascript'
import 'ace-builds/src-noconflict/snippets/html'
import 'ace-builds/src-noconflict/snippets/css'
import 'ace-builds/src-noconflict/snippets/scss'
import 'ace-builds/src-noconflict/snippets/json'
import 'ace-builds/src-noconflict/snippets/java'
import 'ace-builds/src-noconflict/snippets/text'
在 mounted 钩子中添加激活自动提示的代码:
this.aceEditor.setOptions({
    enableSnippets: true,
    enableLiveAutocompletion: true,
    enableBasicAutocompletion: true
})
出乎你想象,到这里就可以了,我们看下效果:
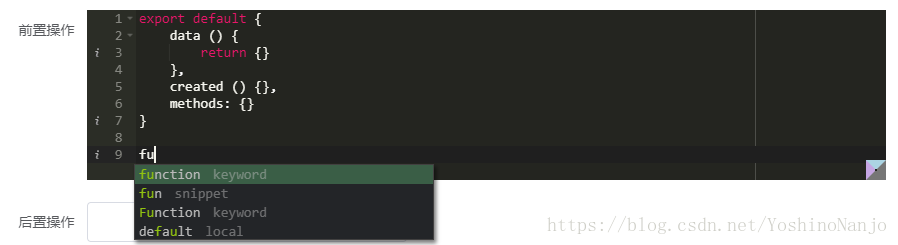
如果你切换成 Java 语言,输入 “System”,你也能看到自动提示。
上文也说了,我们在需要用到的地方使用 <ace> 标签就可以展示该编辑器了,但是光展示没有用啊,我们要获取到其中的值,接下来就所说如何实时获取值。
首先我们在 mounted 钩子中添加绑定事件的代码:
// 绑定一个 change 事件,调用 change 方法
this.aceEditor.getSession().on('change', this.change)
change 方法:
change () {
    this.$emit('input', this.aceEditor.getSession().getValue())
}
修改 <ace> 标签如下所示,记得先去定义一个 content 变量:
<ace v-model="content"></ace>自定义的 ACE 组件内部就可以利用 props 来获取上文的 content 值:
props: {
    value: String
}
修改 mounted 钩子中初始化 ACE 编辑器的方法:
// 外界的 content 值到这里就是 value 值,默认必须为 '',不得为 null、undefined,否则编辑器报错
this.aceEditor = ace.edit(this.$refs.ace, {
    maxLines: 20,
    minLines: 10,
    fontSize: 14,
    value: this.value ? this.value : '',
    theme: this.themePath,
    mode: this.modePath,
    wrap: this.wrap,
    tabSize: 4
})
好了,到此为止就都完成了,既能高亮、又能自动提示、还能获取并派发值,一个能满足最基本使用的编辑器就集成好了,如果想深入,官方的 API 文档中详细着呢,大家自行研究。如果大家不想看上面那些跳来跳去的代码,我把自定义的 ACE 组件代码完整贴出来。
四、完整代码
<template>
  <div class="ace-container">
    <div class="ace-editor" ref="ace"></div>

    <div class="config-panel" v-show="toggle">
      <div>
        <div class="item">
          <label class="title">语言</label>
          <el-select class="value" v-model="modePath" @change="handleModelPathChange" size="mini" value-key="name">
            <el-option v-for="mode in modeArray"
                       :key="mode.name"
                       :label="mode.name"
                       :value="mode.path">
            </el-option>
          </el-select>
        </div>

        <div class="item">
          <label class="title">换行</label>
          <el-select class="value" v-model="wrap" @change="handleWrapChange" size="mini" value-key="name">
            <el-option v-for="wrap in wrapArray"
                       :key="wrap.name"
                       :label="wrap.name"
                       :value="wrap.value">
            </el-option>
          </el-select>
        </div>
      </div>
    </div>

    <div class="bookmarklet" @click="toggleConfigPanel"></div>
  </div>
</template>

<script>
  import ace from 'ace-builds'
  import 'ace-builds/src-noconflict/snippets/javascript'
  import 'ace-builds/src-noconflict/snippets/html'
  import 'ace-builds/src-noconflict/snippets/css'
  import 'ace-builds/src-noconflict/snippets/scss'
  import 'ace-builds/src-noconflict/snippets/json'
  import 'ace-builds/src-noconflict/snippets/java'
  import 'ace-builds/src-noconflict/snippets/text'
  import 'ace-builds/webpack-resolver'
  import 'ace-builds/src-noconflict/ext-language_tools'
  import 'ace-builds/src-noconflict/theme-monokai'
  import 'ace-builds/src-noconflict/mode-javascript'

  // const themeArray = [{
  //   name: 'monokai',
  //   path: 'ace/theme/monokai'
  // }]

  const wrapArray = [{
    name: '开启',
    value: true
  }, {
    name: '关闭',
    value: false
  }]

  const modeArray = [{
    name: 'JavaScript',
    path: 'ace/mode/javascript'
  }, {
    name: 'HTML',
    path: 'ace/mode/html'
  }, {
    name: 'CSS',
    path: 'ace/mode/css'
  }, {
    name: 'SCSS',
    path: 'ace/mode/scss'
  }, {
    name: 'Json',
    path: 'ace/mode/json'
  }, {
    name: 'Java',
    path: 'ace/mode/java'
  }, {
    name: 'Text',
    path: 'ace/mode/text'
  }]

  export default {
    props: {
      value: String
    },
    mounted () {
      this.aceEditor = ace.edit(this.$refs.ace, {
        maxLines: 20,
        minLines: 10,
        fontSize: 14,
        value: this.value ? this.value : '',
        theme: this.themePath,
        mode: this.modePath,
        wrap: this.wrap,
        tabSize: 4
      })
      // 激活自动提示
      this.aceEditor.setOptions({
        enableSnippets: true,
        enableLiveAutocompletion: true,
        enableBasicAutocompletion: true
      })
      this.aceEditor.getSession().on('change', this.change)
    },
    data () {
      return {
        aceEditor: null,
        toggle: false,
        wrap: true,
        themePath: 'ace/theme/monokai',
        modePath: 'ace/mode/javascript',
        modeArray: modeArray,
        wrapArray: wrapArray
      }
    },
    methods: {
      toggleConfigPanel () {
        this.toggle = !this.toggle
      },
      change () {
        this.$emit('input', this.aceEditor.getSession().getValue())
      },
      handleModelPathChange (modelPath) {
        this.aceEditor.getSession().setMode(modelPath)
      },
      handleWrapChange (wrap) {
        this.aceEditor.getSession().setUseWrapMode(wrap)
      }
    }
  }
</script>

<style lang='scss' scoped>
  .ace-container {
    position: relative;

    .config-panel {
      position: absolute;
      right: 0;
      bottom: 0;
      width: 50%;
      height: 100%;
      overflow: scroll;
      box-shadow: grey -5px 2px 3px;
      background-color: rgba(255, 255, 255, 0.5);
      z-index: 1;

      .item {
        margin: 10px auto;
        text-align: center;

        .title {
          color: white;
          margin: 0 10px;
          font-size: 14px;
        }
      }
    }

    .bookmarklet {
      position: absolute;
      right: 0;
      bottom: 0;
      width: 20px;
      height: 20px;
      z-index: 2;
      cursor: pointer;
      border-width: 9px;
      border-style: solid;
      border-color: lightblue gray gray rgb(206, 173, 230);
      border-image: initial;
    }
  }
</style>