首先附上官网的安装链接:http://caffe.berkeleyvision.org/install_apt.html
环境说明:我的系统版本为 ubantu16.04 ,只使用CPU
一、安装相关依赖包
sudo apt-get install -y libatlas-base-dev libprotobuf-dev libleveldb-dev libsnappy-dev libopencv-dev libboost-all-dev libhdf5-serial-dev libgflags-dev libgoogle-glog-dev liblmdb-dev protobuf-compiler
sudo apt-get install -y python-numpy python-scipy python-matplotlib python-sklearn python-skimage python-h5py python-protobuf python-leveldb python-networkx python-nose python-pandas python-gflags Cython ipython
二、下载caffe-master
git clone https://github.com/BVLC/caffe.git如果网速比较慢,也可以自己去github上下载,然后解压即可,记得解压后讲caffe-master重命名为caffe。
unzip caffe-master.zip
mv caffe-master caffe
三、安装opencv
参考我的另外一篇博客
四.安装caffe
cd ~/caffe
cp Makefile.config.example Makefile.config
mkdir build
cd buildcmake -DCMAKE_BUILD_TYPE=Release -DCPU_ONLY=ON -D CMAKE_INSTALL_PREFIX=/usr/local ..
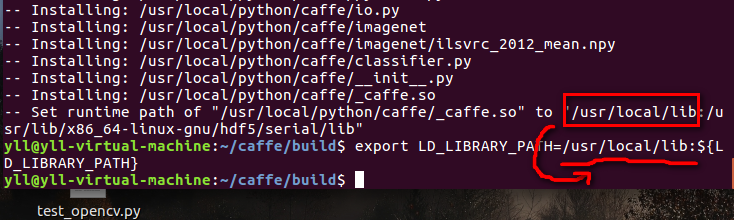
sudo make installexport LD_LIBRARY_PATH=[caffe_path]/build/install/lib:${LD_LIBRARY_PATH}
在mkdir build之前,编辑一下配置文件,将CUP_ONLY=1前面的#删掉,然后保存,执行后面的过程。然后静静的等着他安装玩就可以了。到此caffe安装完毕。
五、测试
make test
make runtest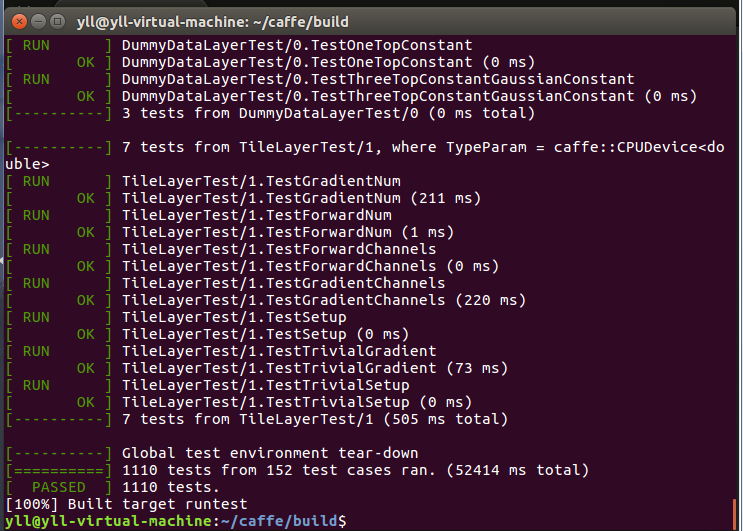
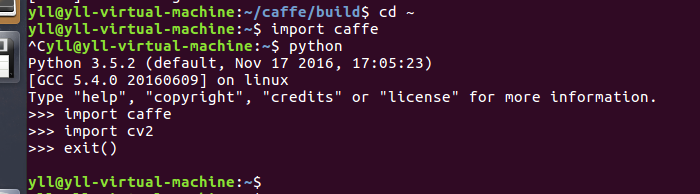
最后在python里导入测试