对话框是提示用户做出决定或输入额外事件的小窗口。对话框不会填充屏幕,通常用于需要用户采取行动才能继续执行的模式事件。
Dialog类是对话框的基类,我们可以使用Dialog来构建一个对话框。但Android建议避免直接使用Dialog,而应该使用其子类。下面是一些Dialog的子类实现:
AlertDialog 一个可以显示标题,可选项列表或自定义布局,最多还可以显示三个按钮的对话框。
DatePickerDialog或TimerPickerDialog 一个带有允许用户选择日期或时间的预定义UI的对话框。
构建一个简单的提醒对话框
AlertDialog.Builder builder = new AlertDialog.Builder(this);
builder.setTitle("我是标题").setMessage("我是内容")
       .setPositiveButton("确定", new DialogInterface.OnClickListener() {
              @Override
              public void onClick(DialogInterface dialog, int which) {
                   // User clicked OK button
                   }
              })
        .setNegativeButton("取消", new DialogInterface.OnClickListener(){
               @Override
               public void onClick(DialogInterface dialog, int which) {
                    // User cancelled the dialog
                    }
                });
          AlertDialog dialog = builder.create();
          dialog.show();
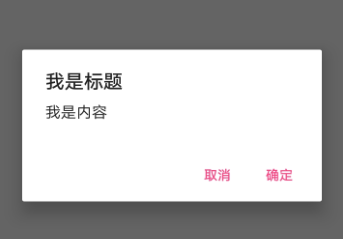
上面的对话框包括三个区域,
1标题区域,这是一个可选项,只应在内容区域被详细消息,列表,或自定义布局占据时使用。如果显示的是一条简单的消息或问题,则不需要标题。
2内容区域,它可以显示消息,列表,或其他自定义的布局。
3操作按钮,一个对话框中最多只允许存在三个操作按钮。
构建一个单选列表对话框
final String[] colors = new String[]{"黄色","红色","绿色",};
AlertDialog.Builder builder = new AlertDialog.Builder(this);
builder.setTitle("选择颜色")
    .setItems(colors, new DialogInterface.OnClickListener() {
        @Override
        public void onClick(DialogInterface dialog, int which) {
            //colors[which]
        }
    });
AlertDialog dialog = builder.create();
dialog.show();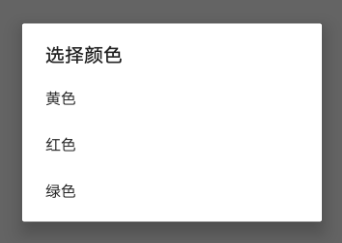
使用setItems()方法创建一个包含标题和列表的对话框,默认状态下,触摸列表会清除对话框。也可以使用setAdapter()指定一个列表,这样的话可以使用ListAdapter以动态数据支持列表。如果使用ListAdapter,请使用Loader加载器,以便内容以异步的方式进行加载。下面代码演示一个使用ListAdapter加载最近联系人的Dialog,数据加载使用Loader。要访问最近联系人,必须包括权限READ_CONTACTS,6.0以上注意动态权限的申请。
final SimpleCursorAdapter mAdapter = new SimpleCursorAdapter(
                        this, android.R.layout.simple_list_item_1, null,
                        new String[]{ContactsContract.Contacts.DISPLAY_NAME},
                        new int[]{android.R.id.text1}, 0);
                AlertDialog.Builder builder = new AlertDialog.Builder(this);
                builder.setTitle("选择联系人")
                        .setAdapter(mAdapter, new DialogInterface.OnClickListener() {
                            @Override
                            public void onClick(DialogInterface dialog, int which) {
                                Cursor cursor = (Cursor) mAdapter.getItem(which);
                                String name = cursor.getString(cursor.getColumnIndex(ContactsContract.Contacts.DISPLAY_NAME));
                                Toast.makeText(MainActivity.this, name, Toast.LENGTH_SHORT).show();
                            }
                        });
                AlertDialog dialog = builder.create();
                dialog.show();
                getLoaderManager().initLoader(0, null, new LoaderManager.LoaderCallbacks<Cursor>() {
                    @Override
                    public Loader<Cursor> onCreateLoader(int id, Bundle args) {
                        return new CursorLoader(MainActivity.this,
                                ContactsContract.Contacts.CONTENT_URI,
                                new String[]{ContactsContract.Contacts._ID,ContactsContract.Contacts.DISPLAY_NAME},
                                null,null,null);
                    }

                    @Override
                    public void onLoadFinished(Loader<Cursor> loader, Cursor data) {
                        mAdapter.swapCursor(data);
                    }

                    @Override
                    public void onLoaderReset(Loader<Cursor> loader) {
                        mAdapter.swapCursor(null);
                    }
                });
构建永久性的单选多选对话啊框
上面的单选对话框默认在触摸列表后清除,要想添加永久性的单选或多选可以分别使用setSingleChoiceItems()或setMultiChoiceItems()方法。setSingleChoiceItems()方法中的第二个参数表示表示默认选中,如果不希望默认选中可传入-1。
AlertDialog.Builder builder = new AlertDialog.Builder(this);
                final String[] colors = new String[]{"Red", "Green", "Blue"};
                builder.setTitle("选择喜欢的颜色")
                        .setSingleChoiceItems(colors, 0, new DialogInterface.OnClickListener() {
                            @Override
                            public void onClick(DialogInterface dialog, int which) {
                               color = colors[which];
                            }
                        })
                        .setPositiveButton("确定", new DialogInterface.OnClickListener() {
                            @Override
                            public void onClick(DialogInterface dialog, int which) {
                                Toast.makeText(MainActivity.this, color, Toast.LENGTH_SHORT).show();
                            }
                        })
                        .setNegativeButton("取消", new DialogInterface.OnClickListener() {
                            @Override
                            public void onClick(DialogInterface dialog, int which) {

                            }
                        });
                AlertDialog dialog = builder.create();
                dialog.show();
mSelectedItems = new ArrayList();
                AlertDialog.Builder builder = new AlertDialog.Builder(this);
                final String[] colors = new String[]{"Red", "Green", "Blue"};
                builder.setTitle("选择喜欢的颜色")
                        .setMultiChoiceItems(colors, null, new DialogInterface.OnMultiChoiceClickListener() {
                            @Override
                            public void onClick(DialogInterface dialog, int which, boolean isChecked) {
                                if (isChecked) {
                                    // If the user checked the item, add it to the selected items
                                    mSelectedItems.add(colors[which]);
                                } else if (mSelectedItems.contains(colors[which])) {
                                    // Else, if the item is already in the array, remove it
                                    mSelectedItems.remove(colors[which]);
                                }
                            }
                        })
                        .setPositiveButton("确定", new DialogInterface.OnClickListener() {
                            @Override
                            public void onClick(DialogInterface dialog, int which) {

                            }
                        })
                        .setNegativeButton("取消", new DialogInterface.OnClickListener() {
                            @Override
                            public void onClick(DialogInterface dialog, int which) {

                            }
                        });
                AlertDialog dialog = builder.create();
                dialog.show();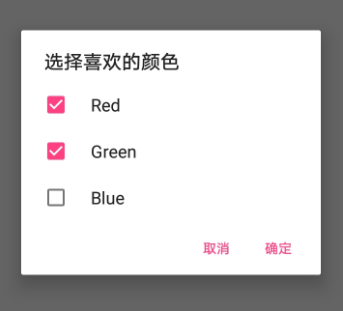
构建自定义布局的对话框
构建自定义布局的对话框需要创建一个布局,在调用setView将其添加到AlertDialog。
res/layout./dialog_signin.xml
<LinearLayout xmlns:android="http://schemas.android.com/apk/res/android"
    android:orientation="vertical"
    android:layout_width="wrap_content"
    android:layout_height="wrap_content">

    <ImageView
        android:src="@drawable/ic_launcher"
        android:layout_width="match_parent"
        android:layout_height="64dp"
        android:scaleType="center"
        android:background="#FFFFBB33"
        android:contentDescription="@string/app_name" />
    <EditText
        android:id="@+id/username"
        android:inputType="textEmailAddress"
        android:layout_width="match_parent"
        android:layout_height="wrap_content"
        android:layout_marginTop="16dp"
        android:layout_marginLeft="4dp"
        android:layout_marginRight="4dp"
        android:layout_marginBottom="4dp"
        android:hint="username" />
    <EditText
        android:id="@+id/password"
        android:inputType="textPassword"
        android:layout_width="match_parent"
        android:layout_height="wrap_content"
        android:layout_marginTop="4dp"
        android:layout_marginLeft="4dp"
        android:layout_marginRight="4dp"
        android:layout_marginBottom="16dp"
        android:fontFamily="sans-serif"
        android:hint="password"/>

</LinearLayout>
AlertDialog.Builder builder = new AlertDialog.Builder(this);
View view = getLayoutInflater().inflate(R.layout.dialog_signin, null);
builder.setView(view)
.setPositiveButton("确定", new DialogInterface.OnClickListener() {
@Override
public void onClick(DialogInterface dialog, int which) {
}
})
.setNegativeButton("取消", new DialogInterface.OnClickListener() {
@Override
public void onClick(DialogInterface dialog, int which) {
}
});
AlertDialog dialog = builder.create();
dialog.show();
使用DialogFragment
DialogFragment时Android3.0添加的。谷歌建议应该将DialogFragment用于对话框的容器。DialogFragment提供了创建对话框和管理器外观所需的所有控件,而不用去调用Dialog对象上的方法。使用DialogFragment能正确处理其生命周期的事件。如屏幕旋转时。
DialogFragment的使用也很简单,只需继承DialogFragment并实现onCreateDialog()方法。
public class MyDialogFragment extends DialogFragment {

    @Override
    public Dialog onCreateDialog(Bundle savedInstanceState) {
        AlertDialog.Builder builder = new AlertDialog.Builder(getActivity());
        builder.setMessage("我的DialogFragment")
                .setPositiveButton("确定", new DialogInterface.OnClickListener() {
                    @Override
                    public void onClick(DialogInterface dialog, int which) {

                    }
                })
                .setNegativeButton("取消", new DialogInterface.OnClickListener() {
                    @Override
                    public void onClick(DialogInterface dialog, int which) {

                    }
                });
        return builder.create();
    }
}
然后获取此类的实例并调用show()方法,并传递一个FragmentManager和一个标记名称,该名称是系统在必要时用于恢复该片段的唯一标志。
该调用cancel()还是dismiss()
这两个方法都可以用来清除对话框。系统会在用户触摸某个对话框列表项时清除对话框,但是使用单选按钮和复选按钮时除外,我们应该通过调用dismiss()方法手动清除对话框,如果需要在对话框消失时做一些特定的操作,可以在我们自己DialogFragment中实现onDismiss()方法。
取消对话框是一个特殊事件,它表示用户显示离开对话框,而不完成任务。如用户点击了返回按钮,触摸了对话框外面的区域,或者我们自己显示的调用了cancel()(例如响应对话框中的取消按钮),就会发生这种状况。
系统会在调用了onCancel()回调事件时立即调用onDismiss(). 而调用dismiss(),系统会回调onDismiss()而不会调用onCancel(). 因此,当用户在对话框中按确定按钮时,应该调用dismiss()方法清除对话框。