环境准备
操作系统CentOS 6.9
Haproxy+keepalived(h1) 192.168.20.135
Haproxy+keepalived(h2) 192.168.20.136
Mysql主 192.168.20.139
Mysql备 192.168.20.138
以上四台都用虚拟机测试,全部关闭防火墙service iptables stop.
yum安装MySQ并配置主主复制
两台MySQL分别执行:yum -y install mysql-server
MySQL(m1)修改配置文件
Vim /etc/my.cnf
#[mysqld]下添加
server-id = 1
auto_increment_offset = 1
log-bin = mysql-bin
auto-increment-increment = 1
skip-name-resolve
binlog-ignore = mysql   #忽略mysql和information_schema
binlog-ignore = information_schema
重启MySQL:service mysqld restart
MySQL(m2)修改配置文件
Vim /etc/my.cnf
#[mysqld]下添加
server-id = 2
auto_increment_offset = 2
log-bin = mysql-bin
auto-increment-increment = 2
skip-name-resolve
binlog-ignore = mysql #忽略mysql和information_schema
binlog-ignore = information_schema
重启MySQL:service mysqld restart
注:二都只有server-id不同和 auto-increment- offset不同
MySQL(m1)创建授权复制用户
mysql> grant replication slave on *.* to 'repuser'@'192.168.20.139' identified by '123456';
Query OK, 0 rows affected (0.00 sec)
mysql>FLUSH PRIVILEGES;
MySQL(m2)创建授权复制用户
mysql> grant replication slave on *.* to 'repuser'@'192.168.20.138' identified by '123456';
Query OK, 0 rows affected (0.00 sec)
mysql>FLUSH PRIVILEGES;
MySQL(m1)查看master状态
mysql> show master status;
+------------------+----------+--------------+------------------+
| File | Position | Binlog_Do_DB | Binlog_Ignore_DB |
+------------------+----------+--------------+------------------+
| mysql-bin.000007 | 311 | | |
+------------------+----------+--------------+------------------+
1 row in set (0.00 sec)
MySQL(m2)查看master状态
mysql> show master status;
+------------------+----------+--------------+------------------+
| File | Position | Binlog_Do_DB | Binlog_Ignore_DB |
+------------------+----------+--------------+------------------+
| mysql-bin.000007 | 106 | | |
+------------------+----------+--------------+------------------+
1 row in set (0.00 sec)
MySQL(m1)执行同步命令
mysql> change master to master_host='192.168.20.139',master_port=3306,master_user='repuser',master_password='123456',master_log_file='mysql-bin.000007',master_log_pos=106;
Query OK, 0 rows affected (0.14 sec)
mysql> stop slave;
Query OK, 0 rows affected (2.02 sec)
mysql> start slave;
Query OK, 0 rows affected (0.00 sec)
MySQL(m2)执行同步命令
mysql> change master to master_host='192.168.20.138',master_port=3306,master_user='repuser',master_password='123456',master_log_file='mysql-bin.000007',master_log_pos=311;
Query OK, 0 rows affected (0.14 sec)
mysql> stop slave;
Query OK, 0 rows affected (2.02 sec)
mysql> start slave;
Query OK, 0 rows affected (0.00 sec)
主主同步测试
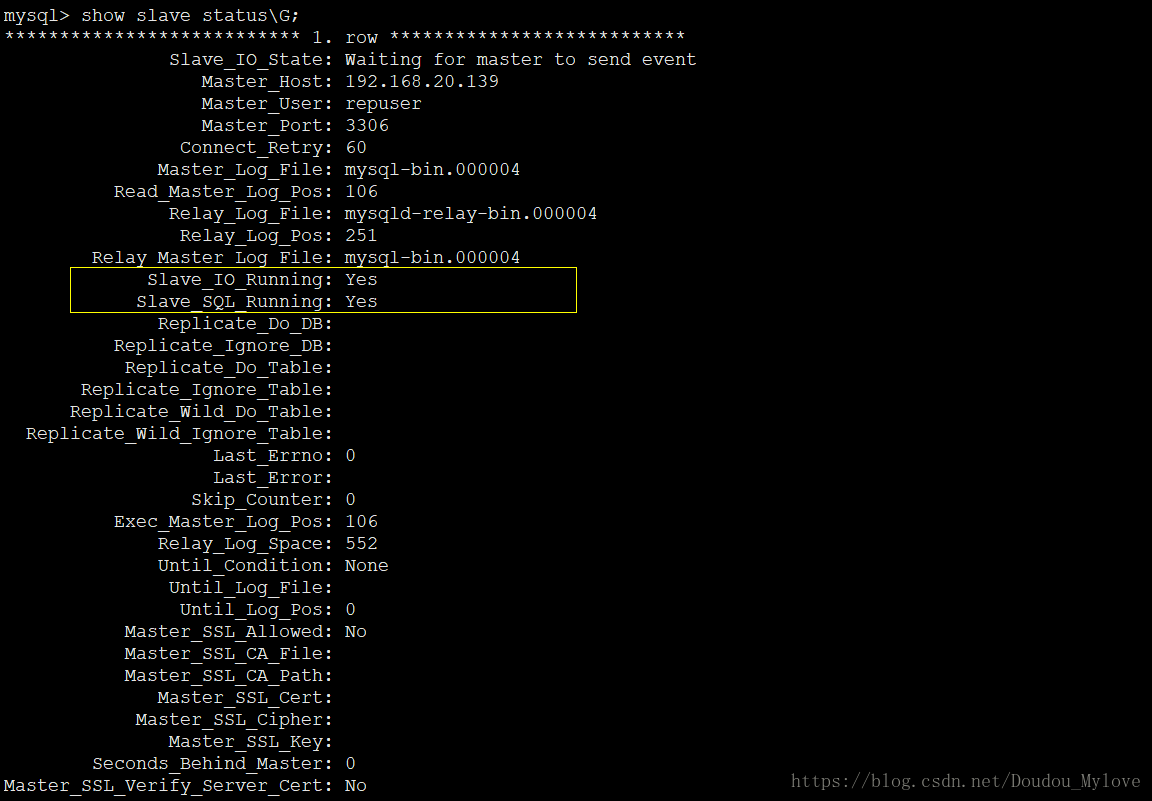
查看slave状态:show slave status\G
当Slave_IO_Running和Slave_SQL_Running均为Yes时,表示同步成功。
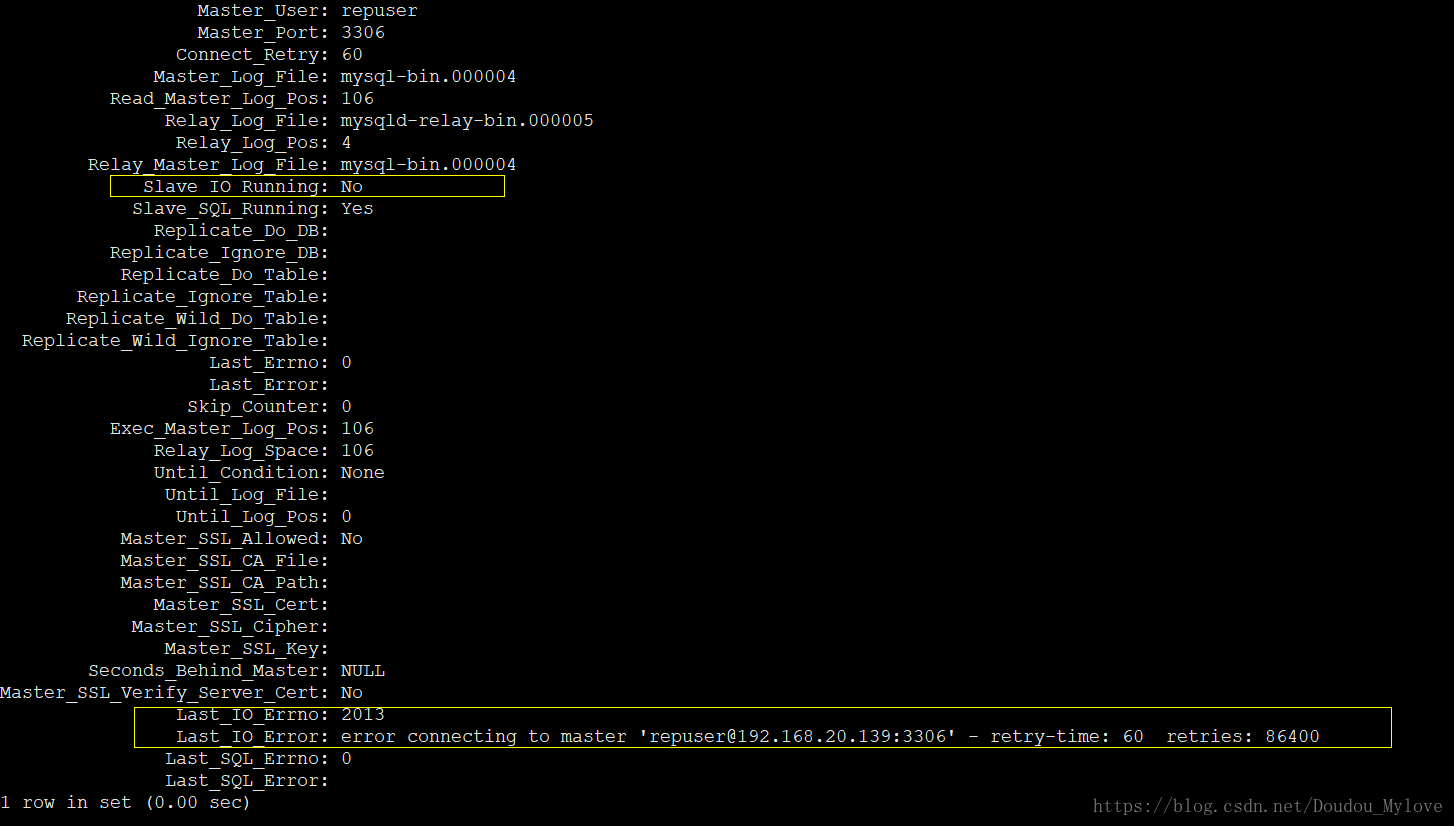
小记:有一次正好虚拟机不小心关机了,重新打开再次看出slave状态的时候发现如下报错,最后查到是防火墙随着虚拟机重启后自己又开启了,service iptables stop把防火墙关掉重新起MySQL就好.
H1和h2用Yum安装haproxy
Yum -y install haproxy
配置haproxy
Vim /etc/haproxy/haproxy.cfg
#默认的defaults模块以上不动,以下部分替换成如下内容,两台haproxy配置一致.
listen mysql_proxy
bind 0.0.0.0:3306
mode tcp
balance source #定义负载均衡算法
server mysqldb1 192.168.20.139:3306 weight 1 check inter 1s rise 2 fall 2 #master mysql
server mysqldb2 192.168.20.138:3306 weight 2 check inter 1s rise 2 fall 2 backup #slave mysql
listen stats #监控
mode http
bind 0.0.0.0:8888 #web监控登录端口
stats enable
stats uri /dbs #we监控端登录地址http:ip:8888/dbs
stats realm haproxy\ statistics
stats auth admin:admin #web监控登端录用户和密码修改日志系统
Vim /etc/rsyslog.conf
#在centos6.x系统中,系统日志的配置文件原来的/etc/syslog.conf已经变为/etc/rsyslog.conf

###Provides UDP syslog reception               //去掉下面两行注释,开启UDP监听

$ModLoad imudp
$UDPServerRun 514

local2.* /var/log/haproxy.log           #添加此行
修改/etc/sysconfig/syslog
vim/etc/sysconfig/rsyslog,添加如下内容:
SYSLOGD_OPTIONS=”-c 2 -r -m 0″

#注释:-c 2 使用兼容模式,默认是 -c 5,-r开启远程日志,-m 0标记时间戳。单位是分钟,为0时,表示禁用该功能
两台haproxy都修改.
service rsyslog restart
两台都启动haproxy
/etc/init.d/haproxy start
打开网页查看haproxy监控mysql的情况
http://192.168.20.136:8888/dbs
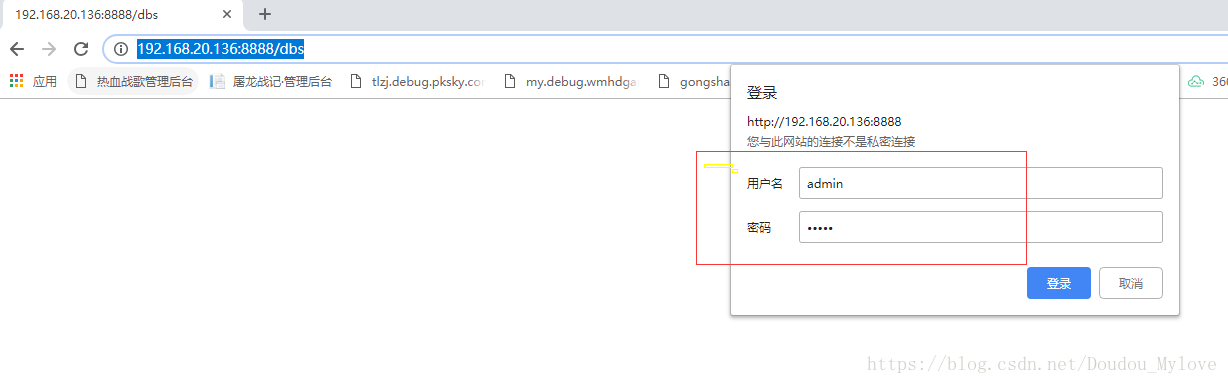

测试关掉一台MySQL这边监控页面就会即时改变颜色提示其down掉.
两台haproxy安装keepalived
Yum -y install keepalived
配置keepalived
Vim /etc/keepalived/keepalived.conf
! Configuration File for keepalived

global_defs {
notification_email {          # 忽略
     [email protected]
     [email protected]
     [email protected]
   }
   notification_email_from [email protected]
   smtp_server 172.0.0.1
   smtp_connect_timeout 30
   router_id LVS_DEVEL
}

vrrp_script chk_haproxy {
    script "/etc/keepalived/chk.sh"     # 检查haproxy的脚本
    interval 2                          # 每两秒检查一次
}

vrrp_instance VI_1 {
    state BACKUP                        # 定义为BACKUP节点
    nopreempt                           # 开启不抢占,另一个不写
    interface eth0
    virtual_router_id 51
    priority 100          # 开启了不抢占,所以此处优先级必须高于另一台,另一个写99
    advert_int 1

    authentication {
        auth_type PASS
        auth_pass 1111
    }

    virtual_ipaddress {
        192.168.20.140                  # 配置VIP
    }

    track_script {
        chk_haproxy                     # 调用检查脚本
    }

    notify_backup "/etc/init.d/haproxy restart"
    notify_fault "/etc/init.d/haproxy stop"

}
注意:Master和Backup不同的地方只有nopreempt和priority两处.
此处两台主机均配置为BACKUP,因此哪台先运行keepalived,VIP就在哪台上
在两台机器上创建chk.sh文件:
vim /etc/keepalived/chk.sh
#!/bin/bash

if [ $(ps -C haproxy --no-header | wc -l) -eq 0 ]; then
       /etc/init.d/keepalived stop
fi
chmod +x /etc/keepalived/chk.sh
两台haproxy启动keepalived
/etc/init.d/Keepalievd start
测试mysql负载均衡
即根据haproxy反向代理相应的策略用VIP访问MySQL.
MySQL(m1)创建一个没有权限的用户
CREATE USER 'haproxy'@'%' IDENTIFIED BY '';
Flush privileges;
然后找一台别的不相干的服务器192.168.20.133用VIP连接mysql;
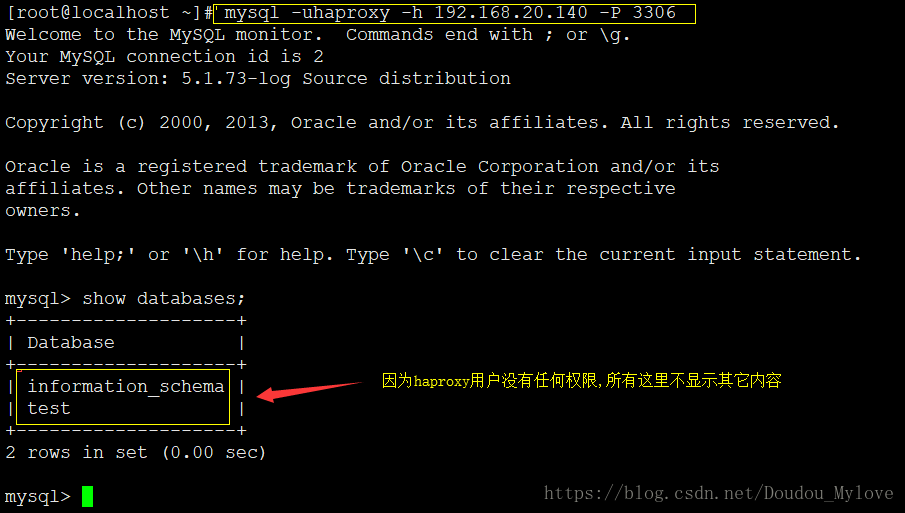
关闭其中一台MySQL依然可以连接,
关闭其中一台haproxy同样可以连接;
即搭建成功.
下面忽略
#tcpdump -nn -i ens33 vrrp # 抓包查看