版权声明:未经本人允许严禁转载 https://blog.csdn.net/WanJiaBaoBao/article/details/83340392
搭建说明
- 已关闭防火墙和selinux;
- 本次只写将nginx、mysql、php分别部署到三台服务器之后的配置;
- 将zabbix安装到nignx服务器中来验证mysql与php是否连接;
- 本次安装除了mysql采用二进制安装,其余全是源码编译安装;
- 本次编译除了php与zabbix编译需修改参数,其他编译或安装详情请参照LNMP架构搭建,所需包下载地址也请参照LNMP架构搭建;
- 本次搭建所用到的地址如下表:
| 安装内容 | IP地址 |
|---|---|
| nginx、zabbix | 192.168.91.128 |
| mysql | 192.168.91.129 |
| php | 192.168.91.130 |
配置
192.168.91.128服务器安装nginx配置
- nginx编译请参照LNMP架构搭建
- 在地址为192.168.91.128这台服务器中,修改/usr/local/nginx/conf/nginx.conf配置文件
[root@localhost ~]# vim /usr/local/nginx/conf/nginx.conf
http {
    server {
        listen       80;
        server_name  localhost;		##注:若想用域名访问,请修改localhost
            location / {
            root   html;
            index  index.php index.html index.htm;		##注:添加index.php
            }
    }
        location ~ \.php$ {
            root           html;		##注:网页文件存放目录,在本机的/usr/local/nginx/html/目录下
            fastcgi_pass   192.168.91.130:9000;		##注:修改为php服务器地址
            fastcgi_index  index.php;
            fastcgi_param  SCRIPT_FILENAME  /var/www/$fastcgi_script_name;		##注:将$/scripts修改为根目录(192.168.91.130服务器的存放网页文件的目录)
            include        fastcgi_params;
        }
}
- 检查配置文件是否有误
[root@localhost nginx]# nginx -t
nginx: the configuration file /usr/local/nginx/conf/nginx.conf syntax is ok
nginx: configuration file /usr/local/nginx/conf/nginx.conf test is successful
- 启动服务并查看端口
[root@localhost nginx]# nginx
[root@localhost nginx]# ss -ntl
State       Recv-Q Send-Q               Local Address:Port                 Peer Address:Port
LISTEN      0      128                              *:80                              *:*
- 在存放网页的目录中创建index.php文件(与配置文件中的“root”项对应)
[root@localhost nginx]# cat > html/index.php << EOF
> <?php
>     phpinfo();
> ?>
> EOF
192.168.91.130服务器安装php配置
- 安装php所需的依赖包
[root@localhost ~]# yum -y install libxml2-devel openssl-devel bzip2-devel libcurl-devel libjpeg-devel libpng-devel freetype-devel gmp-devel libmcrypt-devel readline-devel libxslt-devel mhash-devel
- 编译php
./configure --prefix=/usr/local/php7 \
--with-curl \
--with-freetype-dir \
--with-gd \
--with-gettext \
--with-iconv-dir \
--with-kerberos \
--with-libdir=lib64 \
--with-libxml-dir=/usr \
--with-mysqli=mysqlnd \     ##路径修改为mysqlnd
--with-openssl \
--with-pcre-regex \
--with-pdo-mysql=mysqlnd \    ##修改为mysqlnd
--with-pdo-sqlite \
--with-pear \
--with-jpeg-dir \
--with-png-dir \
--with-xmlrpc \
--with-xsl \
--with-zlib \
--with-config-file-path=/etc \
--with-config-file-scan-dir=/etc/php.d \
--with-bz2 \
--enable-fpm \
--enable-bcmath \
--enable-libxml \
--enable-inline-optimization \
--enable-mbregex \
--enable-mbstring \
--enable-opcache \
--enable-pcntl \
--enable-shmop \
--enable-soap \
--enable-sockets \
--enable-sysvsem \
--enable-xml \
--enable-zip
[root@localhost php-7.2.10]# make -j 2 && make install
- 编译完成后,配置过程请参照LNMP架构搭建
- 配置完成后,配置/usr/local/php7/etc/php-fpm.d/www.conf配置文件,修改如下内容:
[root@localhost ~]# vim /usr/local/php7/etc/php-fpm.d/www.conf
listen = 192.168.91.130:9000		##注:监听的IP地址改为服务器的IP地址,端口为9000
listen.allowed_clients = 192.168.91.128		##注:允许192.168.91.128这台服务器访问
- 在192.168.91.130服务器上创建/var/www/根目录
[root@localhost ~]# mkdir /var/www
- 在创建的目录中创建index.php文件,文件的内容如下:
[root@localhost ~]# cat > /var/www/index.php << EOF
> <?php
>     phpinfo();
> ?>
> EOF
- 启动php-fpm服务,并查看套接字
[root@localhost php-7.2.10]# service php-fpm start
Starting php-fpm  done
[root@localhost php-7.2.10]# ss -ntl
State       Recv-Q Send-Q               Local Address:Port                 Peer Address:Port
LISTEN      0      128                 192.168.91.130:9000                            *:*
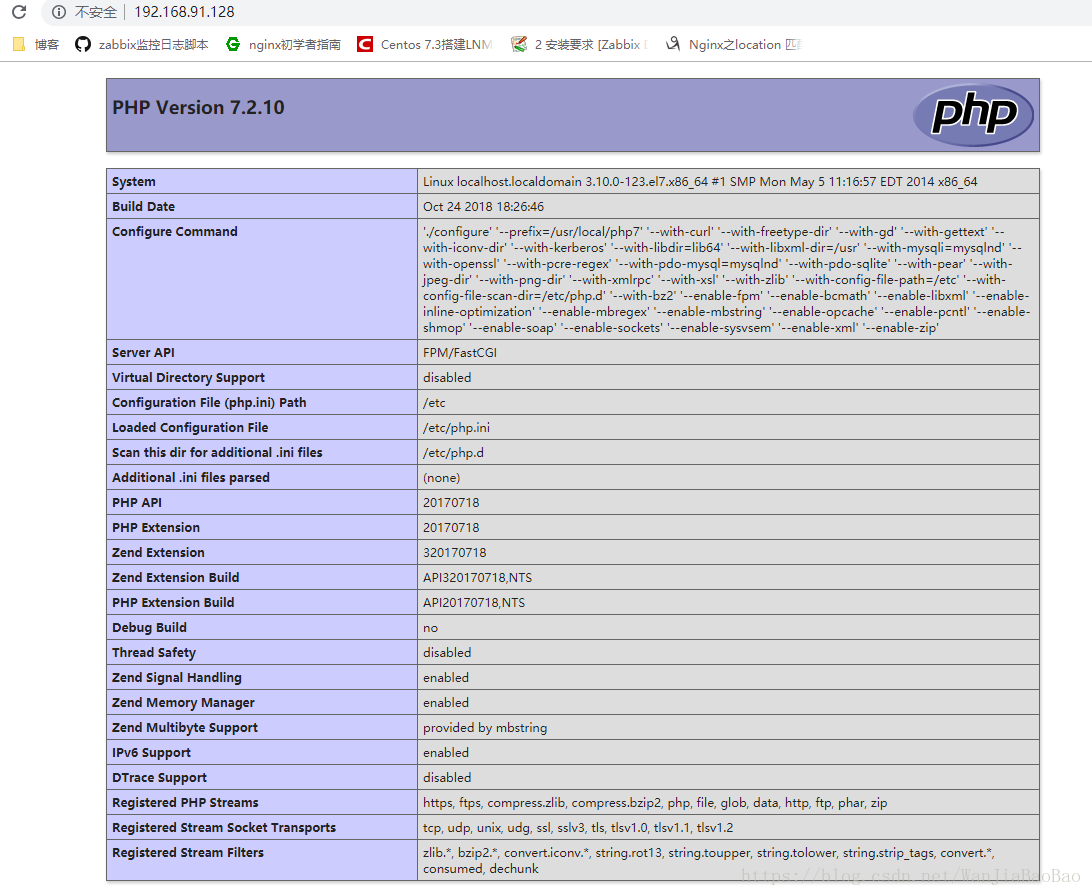
- 打开浏览器,输入nginx服务器地址,看能否出现测试页面
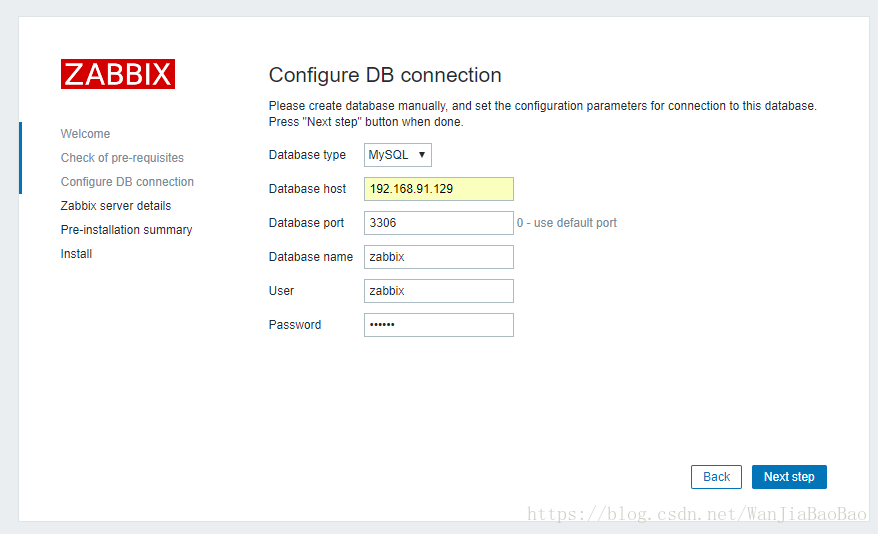
192.168.91.129服务器配置
- 二进制安装mysql请参照LNMP架构搭建
- 登录数据库,创建zabbix用户,创建zabbix数据库,并授权zabbix允许zabbix
##注:修改密码
mysql> set password=password('123456');
Query OK, 0 rows affected, 1 warning (0.00 sec)

##注:创建zabbix数据库
mysql> create database zabbix character set utf8 collate utf8_bin;
Query OK, 1 row affected (0.01 sec)

##注:给zabbix用户授权,允许zabbix用户通过192.168.91.128进行登录并访问zabbix数据库
mysql> grant all on zabbix.* to [email protected] identified by '123456';
Query OK, 0 rows affected, 1 warning (0.00 sec)

##注:给zabbix用户授权,允许zabbix用户通过192.168.91.102进行登录访问zabbix数据库
mysql> grant all on zabbix.* to [email protected] identified by '123456';
Query OK, 0 rows affected, 1 warning (0.00 sec)

## 注:刷新权限
mysql> flush privileges;
Query OK, 0 rows affected (0.00 sec)
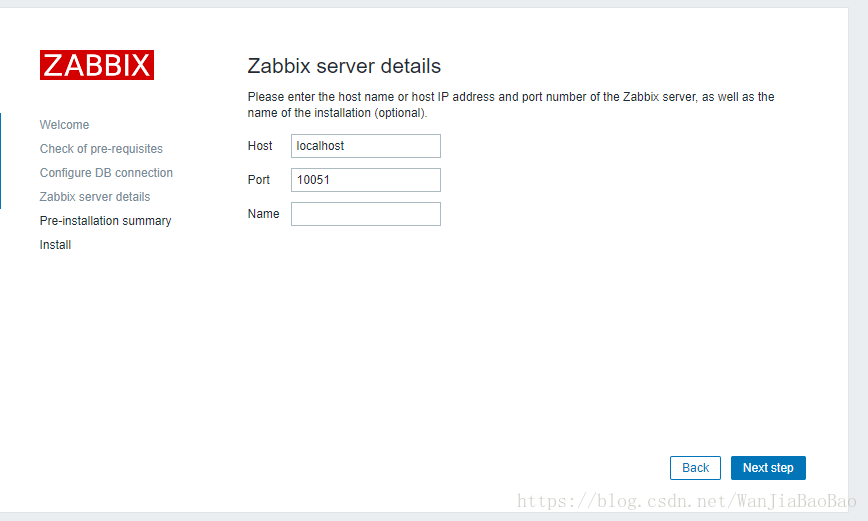
192.168.91.128服务器上安装zabbix
- 创建zabbix用户和组
[root@localhost ~]# groupadd -r zabbix
[root@localhost ~]# useradd -r -M -s /sbin/nolgin -g zabbix zabbix
- 安装zabbix编译所需的依赖包
[root@localhost ~]# yum -y install net-snmp-devel libevent-devel mariadb mariadb-devel libxml2-devel libcurl-devel
- 编译安装zabbix
[root@localhost zabbix-3.4.14]# ./configure --enable-server \
--enable-agent \
--with-mysql \
--with-net-snmp-devel \
--with-libcurl \
--with-libxml2
[root@localhost zabbix-3.4.14]# make install
- 将zabbix中自带的三个mysql表导入到zabbix数据库中(注意先后顺序)
[root@localhost ~]# cd zabbix-3.4.14/database/mysql/
[root@localhost mysql]# mysql -uzabbix -p123456 -h192.168.91.129 zabbix < schema.sql
[root@localhost mysql]# mysql -uzabbix -p123456 -h192.168.91.129 zabbix < images.sql
[root@localhost mysql]# mysql -uzabbix -p123456 -h192.168.91.129 zabbix < data.sql
- 修改/usr/local/etc/zabbix_server.conf配置文件
[root@localhost ~]# vim /usr/local/etc/zabbix_server.conf
# DBHost=localhost
DBHost=192.168.91.129    ##数据库的IP地址或主机名

# DBName=
DBName=zabbix      ##数据库的名字

# DBUser=
DBUser=zabbix       ##登录数据库的用户

# DBPassword=
DBPassword=123456     ##登录数据库的密码
- 将zabbix网页所需要的*.php文件拷贝到/usr/local/nginx/html网页主页面下
[root@localhost zabbix-3.4.14]# cp -a frontends/php/* /usr/local/nginx/html/
cp: overwrite ‘/usr/local/nginx/html/index.php’? y
- 启动zabbix_server和zabbix_agentd服务
[root@localhost zabbix-3.4.14]# zabbix_server
[root@localhost zabbix-3.4.14]# zabbix_agentd
[root@localhost zabbix-3.4.14]# ss -ntl
State       Recv-Q Send-Q               Local Address:Port                 Peer Address:Port
LISTEN      0      128                              *:10050                           *:*
LISTEN      0      128                              *:10051                           *:*
- 将/root/zabbix-3.4.14/frontends/php/目录下的所有文件打包压缩并传输到php服务器上
[root@localhost zabbix-3.4.14]# tar -Jcf php.tar.xz frontends/php/*
[root@localhost zabbix-3.4.14]# ll php.tar.xz
-rw-r--r--. 1 root root 3139992 Oct 24 19:12 php.tar.xz
[root@localhost zabbix-3.4.14]# scp php.tar.xz [email protected]:/var/www/ && rm -rf php.tar.xz
[email protected]'s password:
ph.tar.xz
192.168.91.130服务器
- 将传输的打包文件进行解压,并下解压目录下的文件移动到/var/www目录下
[root@localhost ~]# cd /var/www
[root@localhost www]# ls
index.php  php.tar.xz
[root@localhost www]# tar -xf php.tar.xz && rm -rf php.tar.xz
[root@localhost www]# ls
frontends  index.php
[root@localhost www]# mv frontends/php/* . && rm -rf frontends/
mv: overwrite ‘./index.php’? y
- 修改/etc/php.ini配置文件参数,并重启服务
[root@localhost ~]# sed -ri 's/(post_max_size =).*/\1 16M/g' /etc/php.ini
[root@localhost ~]# sed -ri 's/(max_execution_time =).*/\1 300/g' /etc/php.ini
[root@localhost ~]# sed -ri 's/(max_input_time =).*/\1 300/g' /etc/php.ini
[root@localhost ~]# sed -i '/;date.timezone/a date.timezone = Asia/Shanghai' /etc/php.ini
[root@localhost ~]# service php-fpm restart
Gracefully shutting down php-fpm . done
Starting php-fpm  done
- 将/var/www/目录的权限设置为777
[root@localhost ~]# ll /var/www -d
drwxr-xr-x. 13 root root 4096 Oct 24 19:33 /var/www
[root@localhost ~]# chmod -R 777 /var/www/conf
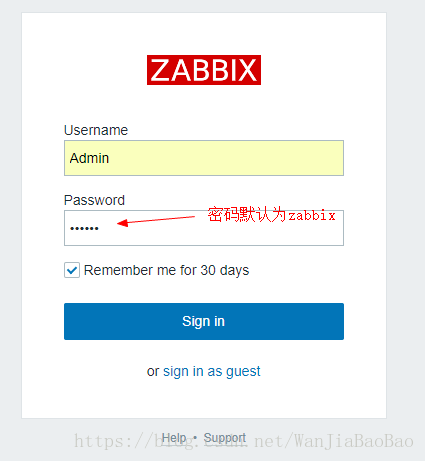
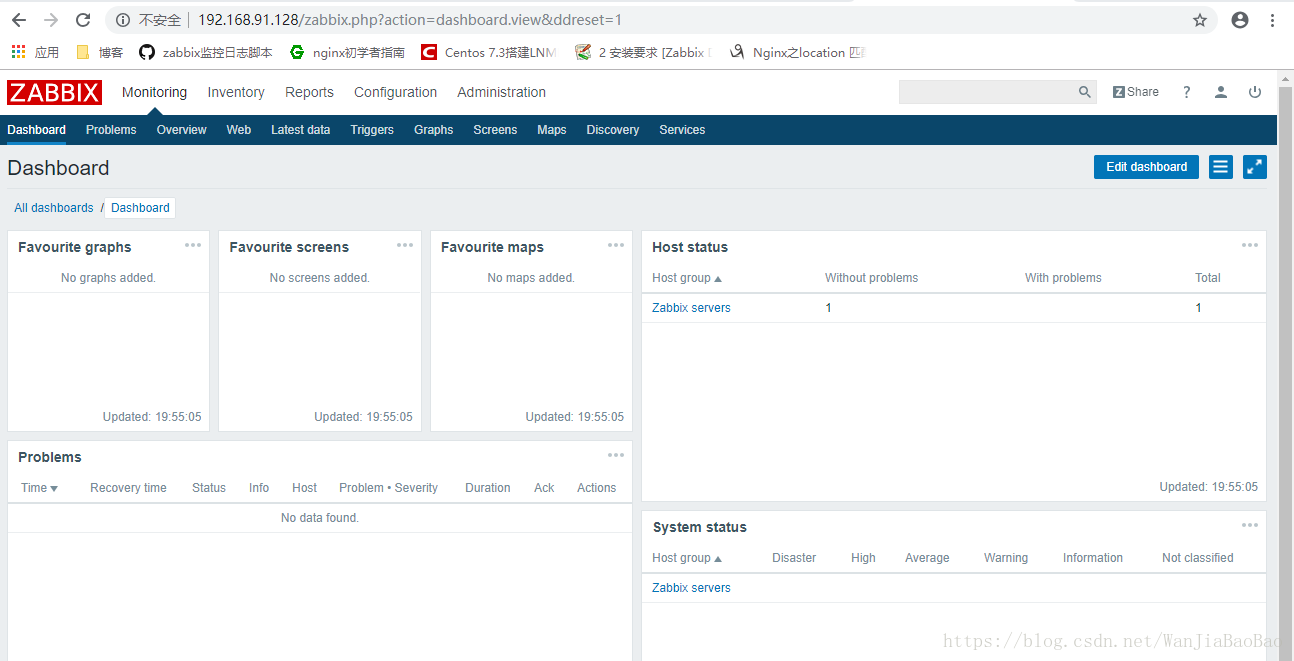
- 打开浏览器,输入nginx服务器的IP地址进行访问