本文中,首先会介绍模型保存与加载的过程与要点,然后通过一个实例完成VGG模型数据的探索与加载的小demo。
通过本文,可以学到如何用Tensorflow保存和加载模型。
模型保存
模型保存通过tf.train.Saver()对象实现。
def save():
    """
    模型保存
    :return:
    """
    # 创建两个随机tensor
    v1 = tf.Variable(tf.random_normal([2,2]),dtype=tf.float32,name='v1')
    v2 = tf.Variable(tf.random_normal([3,3]),dtype=tf.float32,name='v2')
    init = tf.global_variables_initializer()

    # session执行init,然后查看变量值,之后保存
    with tf.Session() as sess:
        sess.run(init)
        print('v1:',v1.eval())
        print('v2:',v2.eval())
        # 保存结果
        saver = tf.train.Saver()
        # 这里后缀名ckpt,表示checkpoint,这个可以任意
        save_path = saver.save(sess,'model/test.ckpt')
        print('model has saved to',save_path)
结果:
v1: [[-1.4035152 -1.0557857]
[-1.152436 1.3953137]]
v2: [[ 1.4133326 -0.6168347 -0.6764847 ]
[ 0.21250968 0.24249057 -0.25113624]
[-0.15002586 1.133885 -1.1900139 ]]
model has saved to model/test.ckpt

模型加载
接下来,我们加载刚才保存的模型,只要变量的值还是上面保存的变量值即证明保存和加载都是有效的。
def restore():
    """
    模型加载
    :return:
    """
    # 为了验证,这里设置0初始化
    v1 = tf.Variable(tf.zeros([2, 2]), dtype=tf.float32, name='v1')
    v2 = tf.Variable(tf.zeros([3, 3]), dtype=tf.float32, name='v2')
    saver = tf.train.Saver()

    with tf.Session() as sess:
        saver.restore(sess, 'model/test.ckpt')
        print("V1:", v1.eval())
        print("V2:", v2.eval())
        print("Model restored")
结果:
V1: [[-1.4035152 -1.0557857]
[-1.152436 1.3953137]]
V2: [[ 1.4133326 -0.6168347 -0.6764847 ]
[ 0.21250968 0.24249057 -0.25113624]
[-0.15002586 1.133885 -1.1900139 ]]
Model restored
对比模型保存中的变量值,可以看到,加载的变量值一样,证明保存与加载是有效的。
加载训练好的VGG模型
现在,我们来进行一个稍微复杂点的demo,加载预训练好的VGG模型参数,然后用它来进行MINIST数据集的分类任务。
模型加载的关键:需要知道模型是如何被保存的,知道存储的格式,才能正确恢复。这一点和字符编码的转换同理。一个模型通常会告诉你它对应的网络结构,模型存储的格式,最佳的是提供一个加载模型的脚本。若没有这些,你可能需要反复试数据,通过shape值判断模型恢复时加载出来的是什么。

推荐一个模型资源网址:http://www.vlfeat.org/matconvnet/models
模型下载地址:imagenage_vgg_19_mat
对应的网络模型结构:网络结构_vgg_19_svg

虽然vgg-19的模型结构是已知的,但是这个mat文件存放模型参数的格式我们是未知的,所以需要多次尝试,通过看类型、看shape等方式获取。这里为了方便,我采用ipython notebook进行mat数据的探索。(更为高效的方式是结合matlab,用matlab查看mat数据)
matlab:load('imagenet-vgg-verydeep-19.mat'),得到工作区有三个变量

其中classes是imageNet中的1000个类的对应标识和描述。这里暂且用不到。
第二个是layers:内部是42个元素,每个元素又是1x2的结构,分别是w权值和b偏置

第三个是normalization,输入图像做标准化的参数,224x224x3 double。之后我们的输入图片也应该根据这个参数做标准化,这个参数是什么意思?训练集的图像的均值。(输入图像是224x224的3通道图像)

接来下,我们用python代码解析这个mat数据,因为我们只知道层级关系,还不知道它们的类型,这个就需要代码尝试了,得到数据类型,维度,然后操作。
1、normalization数据
data = scipy.io.loadmat('imagenet-vgg-verydeep-19.mat')
print(type(data))
# <class 'dict'>
print(data.keys())
# dict_keys(['__header__', '__version__', '__globals__', 'layers', 'classes', 'normalization'])
print(type(data['normalization']))
# <class 'numpy.ndarray'>
print(data['normalization'].shape)
# (1, 1)
# .. 经过反复查看 type和shape,最终取得数据
print(data['normalization'][0][0][0].shape)
# (224, 224, 3)
normal_data = data['normalization'][0][0][0]
mean_pixel = np.mean(normal_data, axis=(0, 1))
print(mean_pixel)
# [123.68  116.779 103.939] (三个通道上的输入数据的均值)
2、classes数据
d = data['classes']
print(d[0][0][1].shape)    # (1, 1000)
print(type(d[0][0][1]))    # <class 'numpy.ndarray'>
print(d[0][0][1][0][0])    # ['tench, Tinca tinca']
# 通过反复调用上述函数,不断增加维度,结合matlab中预览到的数据内容,得出以下结论。
# d[0][0][1] 是类别的描述信息,即英文类别名
# d[0][0][0] 是类别的标识符。

lables = d[0][0][0][0]    # 1000 vector
descriptions = d[0][0][1][0] # 1000 vector这里需要注意print(type(d[0][0])),输出竟然是<class 'numpy.void'>,但恰恰就是第三维是labels和description的分界处(之前一直找不到description,只能找到labels)。
3、layers数据
d = data['layers']
print(d[0].shape)   # (43,)
print(type(d))   # <class 'numpy.ndarray'>
# 观察第二维的前几个值(如0、1、2、3),print(d[0][0~1~2~3]),可知第二维就是每层的参数
通过上述分析,可以加载上述数据进行模型的构建。完整的代码如下。(代码来自唐宇迪)
# @Desc : 加载预训练好的VGG模型参数,进行MINIST数据集分类任务
# 模型路径 :model/imagenet-vgg-verydeep-19.mat
import tensorflow as tf
import numpy as np
import scipy.io
import scipy.misc
import os
import matplotlib.pyplot as plt
# ----------加载模型--------------
# 一系列构建网络的辅助函数
def _conv_layer(input, weights, bias):
conv = tf.nn.conv2d(input, tf.constant(weights), strides=(1, 1, 1, 1), padding='SAME')
return tf.nn.bias_add(conv, bias)
def _pool_layer(input):
return tf.nn.max_pool(input, ksize=(1, 2, 2, 1), strides=(1, 2, 2, 1), padding='SAME')
def preprocess(image, mean_pixel):
return image - mean_pixel
def unprocess(image, mean_pixel):
return image + mean_pixel
def imread(path):
return scipy.misc.imread(path).astype(np.float)
def imsave(path, img):
img = np.clip(img, 0, 255).astype(np.uint8)
scipy.misc.imsave(path, img)
def vgg_net(model_path, input):
"""
加载模型,一次input在网络中的流动
:param model_path:vgg模型路径
:param input: 数据数据
:return:
"""
# vgg定义好的网络结构,只取了前面的35个step的参数,即提取特征图的部分,后面池化、全连接和softmax没有定义。
layers = (
'conv1_1', 'relu1_1', 'conv1_2', 'relu1_2', 'pool1',
'conv2_1', 'relu2_1', 'conv2_2', 'relu2_2', 'pool2',
'conv3_1', 'relu3_1', 'conv3_2', 'relu3_2', 'conv3_3',
'relu3_3', 'conv3_4', 'relu3_4', 'pool3',
'conv4_1', 'relu4_1', 'conv4_2', 'relu4_2', 'conv4_3',
'relu4_3', 'conv4_4', 'relu4_4', 'pool4',
'conv5_1', 'relu5_1', 'conv5_2', 'relu5_2', 'conv5_3',
'relu5_3', 'conv5_4', 'relu5_4'
)
# 加载mat格式的模型参数
data = scipy.io.loadmat(model_path)
# normalization
mean = data['normalization'][0][0][0]
mean_pixel = np.mean(mean, axis=(0, 1))
# class labels
# lables = data['classes'][0][0][0][0]
# names = data['classes'][0][0][1][0]
# wights and bias
weights = data['layers'][0]
# construct net
net = {}
current = input
for i, name in enumerate(layers):
kind = name[:4]
if kind == 'conv':
kernels, bias = weights[i][0][0][0][0]
# 参数顺序转换
# matconvnet: weights are [width, height, in_channels, out_channels]
# tensorflow: weights are [height, width, in_channels, out_channels]
kernels = np.transpose(kernels, (1, 0, 2, 3))
bias = bias.reshape(-1)
current = _conv_layer(current, kernels, bias)
elif kind == 'relu':
current = tf.nn.relu(current)
elif kind == 'pool':
current = _pool_layer(current)
# 保存该层处理的结果(也就是特征图)
net[name] = current
assert len(net) == len(layers)
return net, mean_pixel, layers
print('---------- VGG ready --------------')
if __name__ == '__main__':
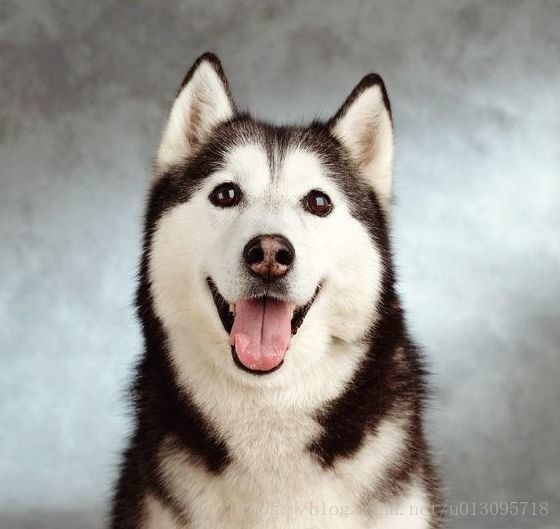
image_path = 'data/dog.jpg'
vgg_path = 'model/imagenet-vgg-verydeep-19.mat'
input_image = imread(image_path)
shape = (1, input_image.shape[0], input_image.shape[1], input_image.shape[2])
with tf.Session() as sess:
image = tf.placeholder('float', shape=shape)
nets, mean_pixel, all_layers = vgg_net(vgg_path, image)
input_image_pre = np.array([preprocess(input_image, mean_pixel)])
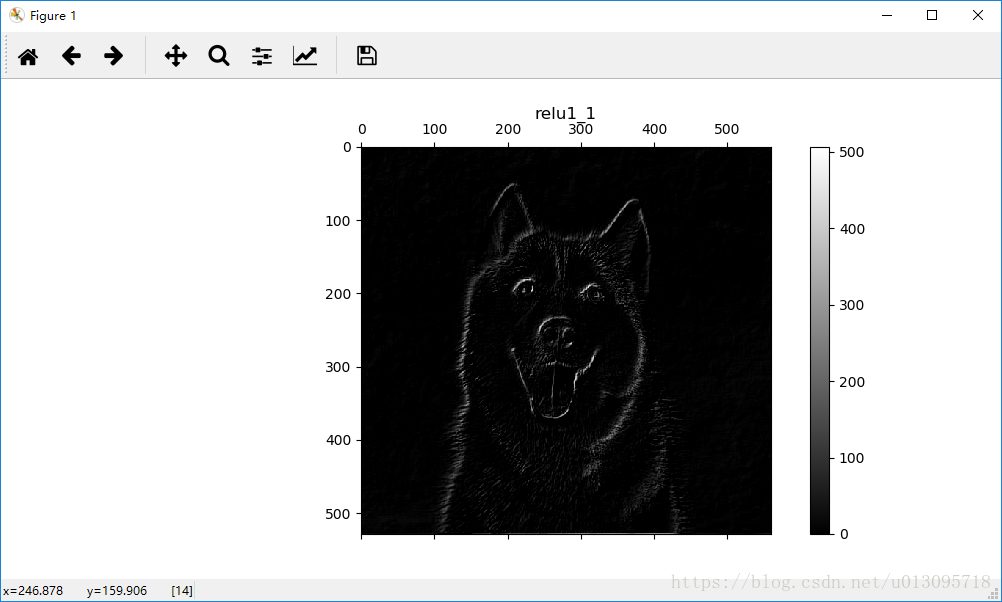
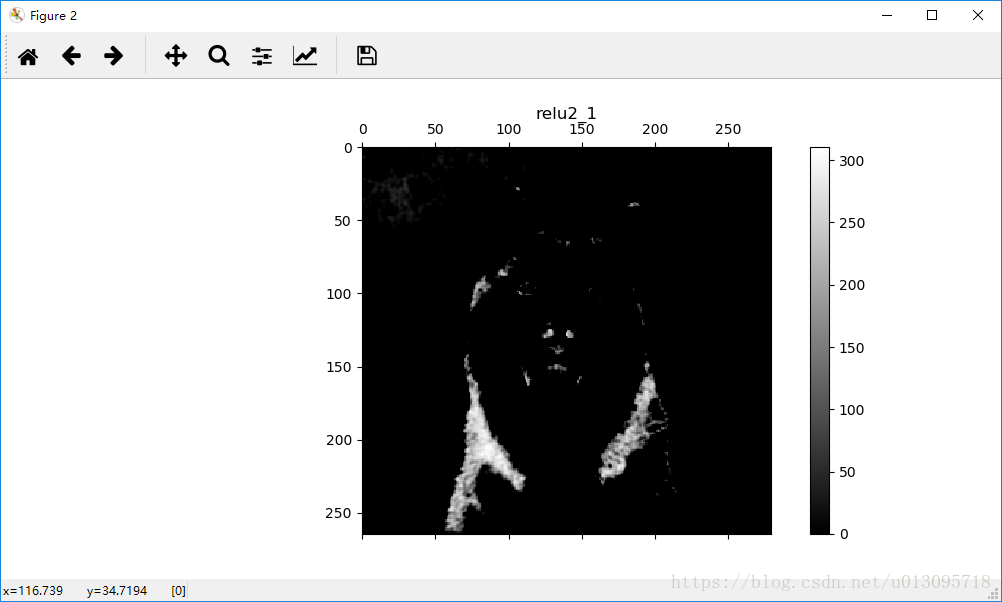
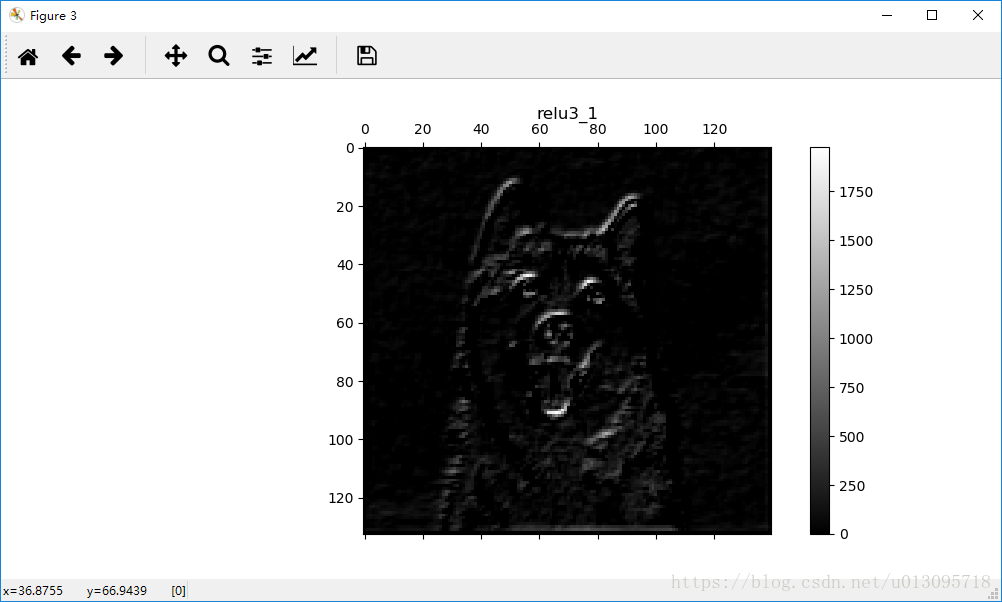
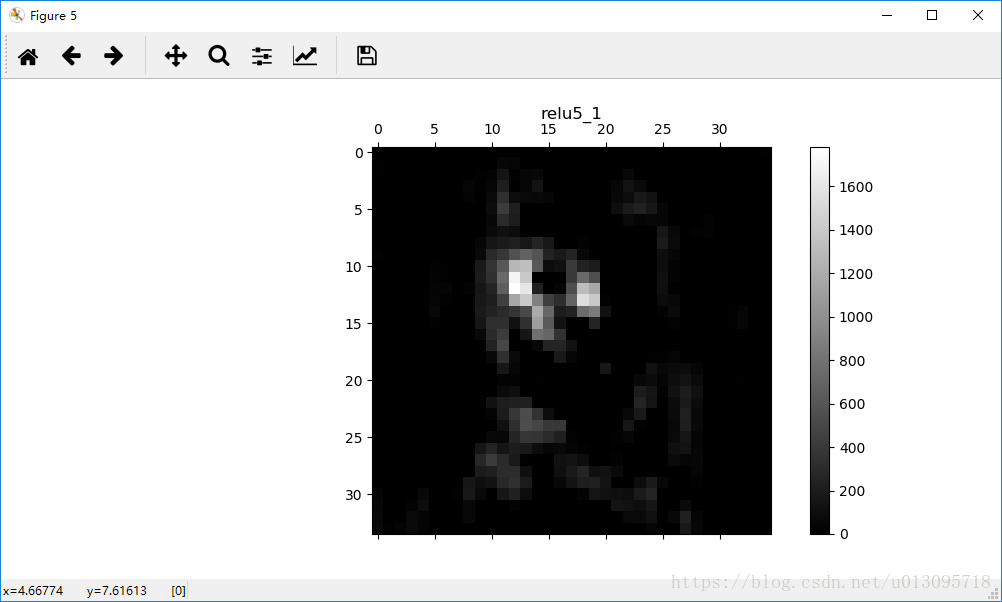
layers = ('relu1_1', 'relu2_1', 'relu3_1', 'relu4_1', 'relu5_1', 'relu3_4')
for i, layer in enumerate(layers):
print("[%d/%d] %s" % (i + 1, len(layers), layer))
features = nets[layer].eval(feed_dict={image: input_image_pre})
print(" Type of 'features' is ", type(features))
print(" Shape of 'features' is %s" % (features.shape,))
plt.figure(i + 1, figsize=(10, 5))
plt.matshow(features[0, :, :, 0], cmap='gray', fignum=i + 1)
plt.title("" + layer)
plt.colorbar()
plt.show()
原图
选取6个特征图输出:

