本文使用intellij idea搭建Maven3多模块项目,并进行配置相关配置,以实现项目的构建打包。
项目结构
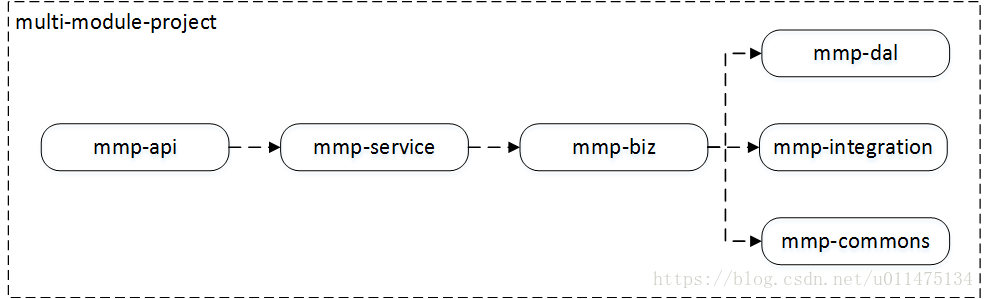
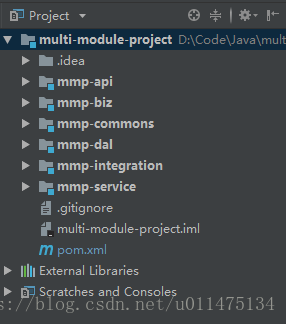
multi-module-project是我们的项目名称,其中包含多个模块:
mmp-dal模块:数据访问层,提供对原始数据(主要指数据库)的操作mmp-integration模块:提供对第三方服务的调用mmp-commons模块:提供工具类、常量定义等公共服务mmp-biz模块:使用以上模块完成相关业务mmp-service模块:对业务模块相应接口进行包装,并进行入参与返回值判断mmp-api模块:提供对外服务的接口
搭建项目
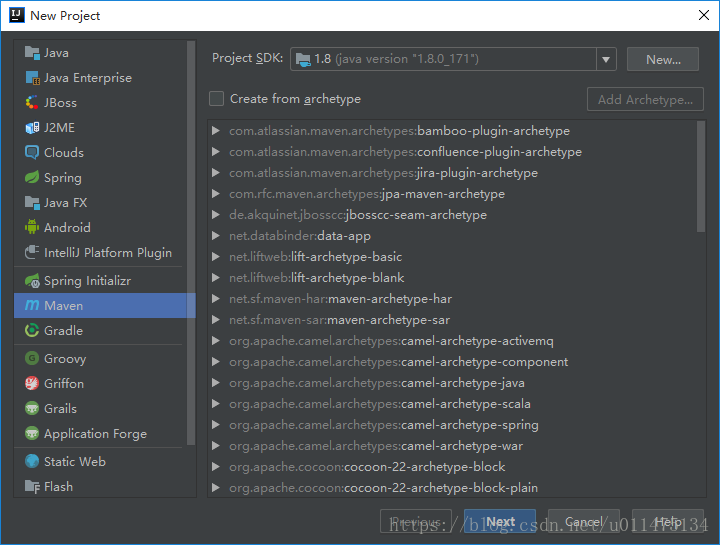
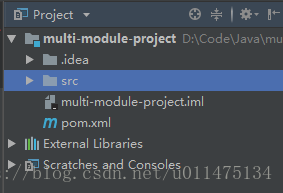
新建项目,选择Maven,不要勾选Create from archetype。
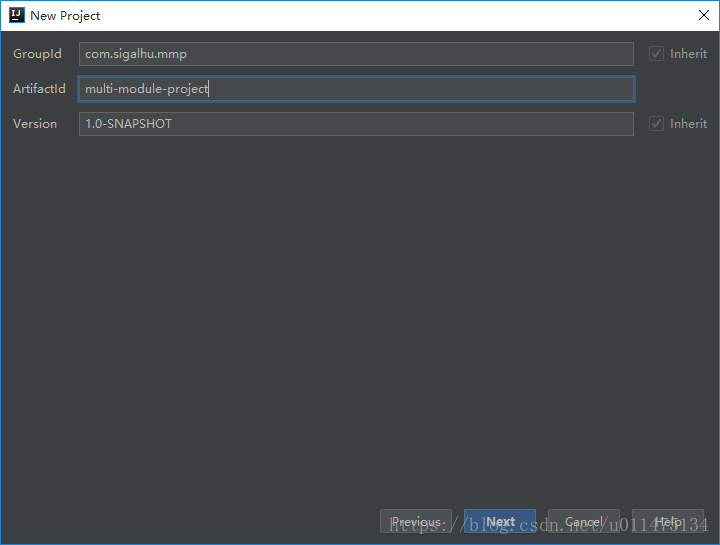
填写GroupId、ArtifactId与Version。
GroupId定义了项目属于哪个组,一般和项目所在的组织或公司存在关联ArtifactId定义了当前Maven项目在组中唯一的IDVersion指定了项目当前的版本,SNAPSHOT意为快照,说明该项目还处于开发中,是不稳定版本
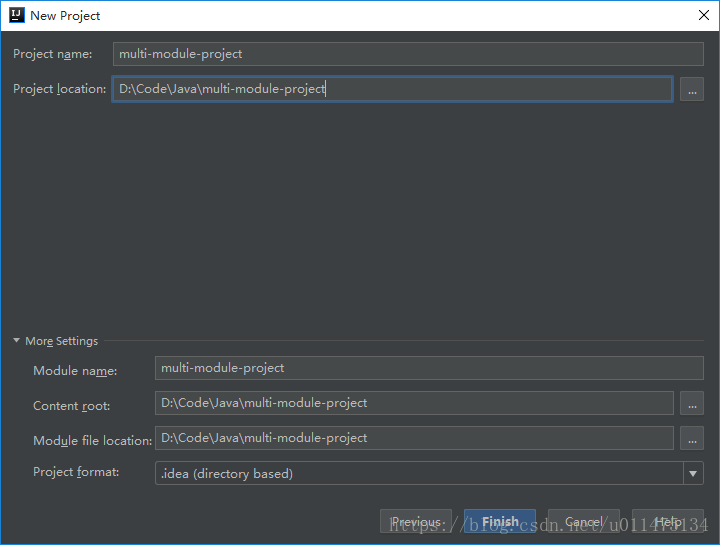
下面的Project name与Project location默认是没有-的,这里我们为了与前面ArtifactId一致,将-加上。
由于multi-module-project为聚合项目,因此我们删除src文件夹。
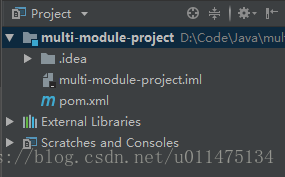
接下来我们给该项目添加模块。
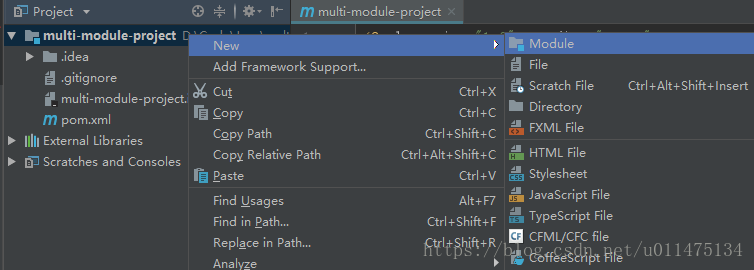
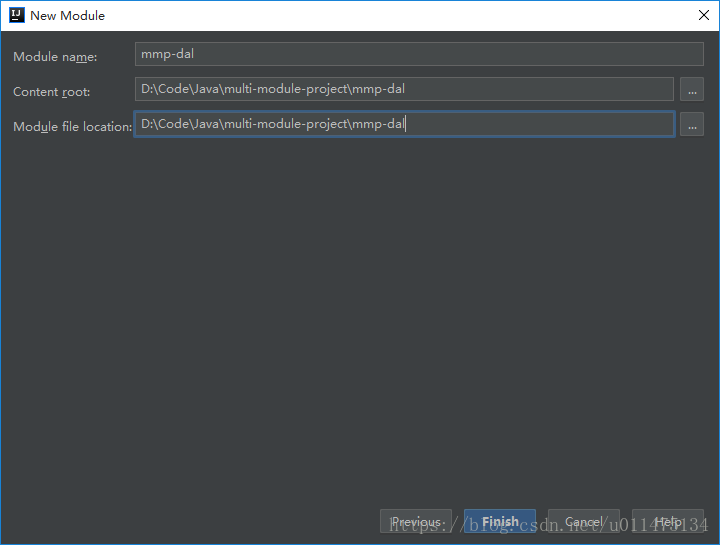
首先添加mmp-dal模块。
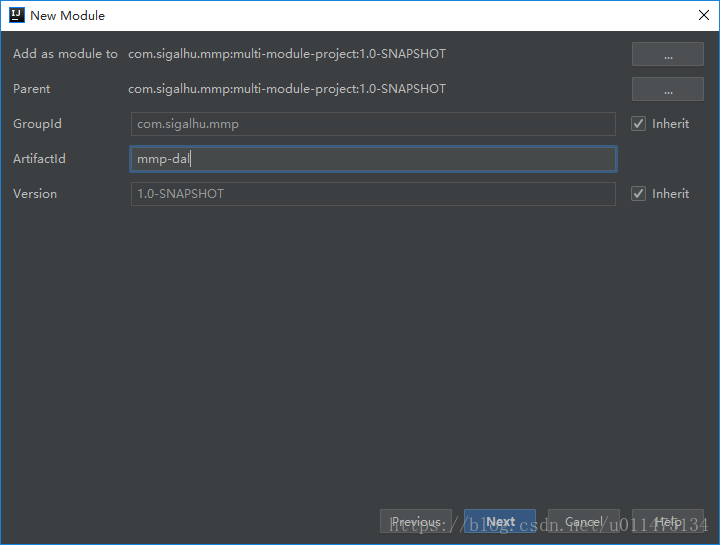
和上面一样,这里我们为了与前面ArtifactId一致,将-加上。
依次添加各个模块。
下面multi-module-project的POM配置是idea自动生成的,其中的注释解释了各个参数的含义。
<?xml version="1.0" encoding="UTF-8"?>
<project xmlns="http://maven.apache.org/POM/4.0.0"
         xmlns:xsi="http://www.w3.org/2001/XMLSchema-instance"
         xsi:schemaLocation="http://maven.apache.org/POM/4.0.0 http://maven.apache.org/xsd/maven-4.0.0.xsd">
    <modelVersion>4.0.0</modelVersion>

    <!--groupId定义了项目属于哪个组,一般和项目所在的组织或公司存在关联-->
    <groupId>com.sigalhu.mmp</groupId>
    <!--artifactId定义了当前Maven项目在组中唯一的ID-->
    <artifactId>multi-module-project</artifactId>
    <!--packaging指定打包类型,pom表示该项目为聚合项目,不打包-->
    <packaging>pom</packaging>
    <!--version指定了项目当前的版本,SNAPSHOT意为快照,说明该项目还处于开发中,是不稳定版本-->
    <version>1.0-SNAPSHOT</version>

    <!--用户可以通过在一个打包方式为pom的Maven项目中声明任意数量的module来实现模块的聚合-->
    <!--在构建时,Maven按序读取POM,如果该POM没有依赖模块,那么就构建该模块,否则就先构建其依赖模块,
        如果该依赖还依赖于其他模块,则进一步先构建依赖的依赖-->
    <modules>
        <module>mmp-dal</module>
        <module>mmp-integration</module>
        <module>mmp-commons</module>
        <module>mmp-biz</module>
        <module>mmp-service</module>
        <module>mmp-api</module>
    </modules>
</project>下面mmp-dal的POM配置同样由idea自动生成,我们通过注释对各个参数进行说明。
<?xml version="1.0" encoding="UTF-8"?>
<project xmlns="http://maven.apache.org/POM/4.0.0"
         xmlns:xsi="http://www.w3.org/2001/XMLSchema-instance"
         xsi:schemaLocation="http://maven.apache.org/POM/4.0.0 http://maven.apache.org/xsd/maven-4.0.0.xsd">
    <!--使用parent声明父模块-->
    <parent>
        <artifactId>multi-module-project</artifactId>
        <groupId>com.sigalhu.mmp</groupId>
        <version>1.0-SNAPSHOT</version>
    </parent>
    <modelVersion>4.0.0</modelVersion>

    <!--子模块隐式地从父模块继承了groupId和version-->
    <!--artifactId定义了当前Maven项目在组中唯一的ID-->
    <artifactId>mmp-dal</artifactId>
</project>
配置依赖
项目搭建好后,我们先来配置一下测试依赖,在multi-module-project的POM中添加配置,这里由于篇幅所限,省略了之前已经提到的配置。
在配置依赖时,我们一般在父模块的dependencyManagement中进行声明,此时声明的依赖并未生效,同时在properties中定义一个表示版本号的Maven属性,并通过${...}加以引用,在以后当我们想要升级依赖的版本时,只需要修改properties就可以。
接下来,我们通过dependencies来引入项目依赖,由于junit的依赖信息已经在dependencyManagement中声明过了,所以我们只需要在dependencies中声明junit的groupId和artifactId,Maven就会找到在dependencyManagement中的对应声明并引用该依赖。
通过dependencies引入的依赖会作用于当前项目以及在modules中声明的子模块,这里所有子模块都要使用junit进行单元测试,因此在父模块中引用该依赖。
<project>
    ...
    <!--使用properties定义Maven属性-->
    <properties>
        <junit.version>4.12</junit.version>
    </properties>

    <!--dependencies下可包含多个dependency以声明项目的依赖-->
    <dependencies>
        <dependency>
            <groupId>junit</groupId>
            <artifactId>junit</artifactId>
        </dependency>
    </dependencies>

    <dependencyManagement>
        <dependencies>
            <!--测试-->
            <dependency>
                <!--定义当前Maven项目隶属的实际项目,一个实际项目往往会被划分成很多模块-->
                <groupId>junit</groupId>
                <!--定义实际项目中的一个Maven项目(模块),推荐使用实际项目名称作为artifactId的前缀-->
                <artifactId>junit</artifactId>
                <!--Maven运行时会将POM中所有${junit.version}替换成实际值-->
                <version>${junit.version}</version>
                <!--scope为依赖范围,test表示该依赖只对测试有效-->
                <scope>test</scope>
            </dependency>
        </dependencies>
    </dependencyManagement>
</project>根据最开始的项目结构,我们知道该项目各个子模块之间也是存在依赖关系的,首先在multi-module-project的POM中声明各个子模块,其中project.version是Maven的默认属性,表示当前项目的版本。
<project>
    ...
    <dependencyManagement>
        <dependencies>
            ...
            <dependency>
                <groupId>com.sigalhu.mmp</groupId>
                <artifactId>mmp-api</artifactId>
                <version>${project.version}</version>
            </dependency>
            <dependency>
                <groupId>com.sigalhu.mmp</groupId>
                <artifactId>mmp-biz</artifactId>
                <version>${project.version}</version>
            </dependency>
            <dependency>
                <groupId>com.sigalhu.mmp</groupId>
                <artifactId>mmp-commons</artifactId>
                <version>${project.version}</version>
            </dependency>
            <dependency>
                <groupId>com.sigalhu.mmp</groupId>
                <artifactId>mmp-dal</artifactId>
                <version>${project.version}</version>
            </dependency>
            <dependency>
                <groupId>com.sigalhu.mmp</groupId>
                <artifactId>mmp-integration</artifactId>
                <version>${project.version}</version>
            </dependency>
            <dependency>
                <groupId>com.sigalhu.mmp</groupId>
                <artifactId>mmp-service</artifactId>
                <version>${project.version}</version>
            </dependency>
        </dependencies>
    </dependencyManagement>
</project>mmp-biz模块依赖mmp-dal模块、mmp-integration模块与mmp-commons模块,因此在mmp-biz模块的POM中声明依赖。
<project>
    ...
    <dependencies>
        <dependency>
            <groupId>com.sigalhu.mmp</groupId>
            <artifactId>mmp-dal</artifactId>
        </dependency>
        <dependency>
            <groupId>com.sigalhu.mmp</groupId>
            <artifactId>mmp-integration</artifactId>
        </dependency>
        <dependency>
            <groupId>com.sigalhu.mmp</groupId>
            <artifactId>mmp-commons</artifactId>
        </dependency>
    </dependencies>
</project>同理,在mmp-service模块的POM中声明对mmp-biz模块的依赖。
<project>
    ...
    <dependencies>
        <dependency>
            <groupId>com.sigalhu.mmp</groupId>
            <artifactId>mmp-biz</artifactId>
        </dependency>
    </dependencies>
</project>在mmp-api模块的POM中声明对mmp-service模块的依赖。
<project>
    ...
    <dependencies>
        <dependency>
            <groupId>com.sigalhu.mmp</groupId>
            <artifactId>mmp-service</artifactId>
        </dependency>
    </dependencies>
</project>
打包配置
首先说一下思路,当我们完成开发后,需要将各个子模块打包,并与各个子模块的依赖、配置文件、启动脚本一起上传到服务器,以完成项目的部署。在这里,我们使用maven-dependency-plugin来拷贝各个模块的依赖,使用maven-assembly-plugin来对整个项目进行打包,而各子模块使用Maven默认配置进行打包。
依赖处理
为了降低耦合度,我们在multi-module-project下新建mmp-assembly模块以负责打包任务,新建模块流程同上,需要注意的是,根据前面说过的构建过程,必须把mmp-assembly模块放在modules的最后一个,让该模块最后构建,因为该模块是用来打包整个项目的。
<project>
    ...
    <modules>
        <module>mmp-dal</module>
        <module>mmp-integration</module>
        <module>mmp-commons</module>
        <module>mmp-biz</module>
        <module>mmp-service</module>
        <module>mmp-api</module>
        <module>mmp-assembly</module>
    </modules>
    ...
</project>我们先使用maven-dependency-plugin将各个子模块的依赖拷贝到mmp-assembly模块的打包路径,具体配置如下,我们在build的plugins下声明插件。
需要说明的是,maven-dependency-plugin和其他所有插件一样,都只作用于本模块,只是我们通过配置使得该插件与其他模块发生耦合,下面配置的意思是将本模块在dependencies下声明的除groupId为com.sigalhu.mmp的所有依赖拷贝到打包路径下的lib文件夹中。
<project>
    ...
    <!--此处是为了下面copy-libs拷贝该声明模块的依赖-->
    <dependencies>
        <dependency>
            <groupId>com.sigalhu.mmp</groupId>
            <artifactId>mmp-dal</artifactId>
        </dependency>
        <dependency>
            <groupId>com.sigalhu.mmp</groupId>
            <artifactId>mmp-integration</artifactId>
        </dependency>
        <dependency>
            <groupId>com.sigalhu.mmp</groupId>
            <artifactId>mmp-commons</artifactId>
        </dependency>
        <dependency>
            <groupId>com.sigalhu.mmp</groupId>
            <artifactId>mmp-biz</artifactId>
        </dependency>
        <dependency>
            <groupId>com.sigalhu.mmp</groupId>
            <artifactId>mmp-service</artifactId>
        </dependency>
        <dependency>
            <groupId>com.sigalhu.mmp</groupId>
            <artifactId>mmp-api</artifactId>
        </dependency>
    </dependencies>

    <build>
        <plugins>
            <plugin>
                <groupId>org.apache.maven.plugins</groupId>
                <artifactId>maven-dependency-plugin</artifactId>
                <version>2.8</version>
                <executions>
                    <execution>
                        <id>copy-libs</id>
                        <!--通过phase配置,将其绑定到process-resources生命周期阶段-->
                        <phase>process-resources</phase>
                        <goals>
                            <goal>copy-dependencies</goal>
                        </goals>
                        <configuration>
                            <!--排除本项目-->
                            <excludeGroupIds>com.sigalhu.mmp</excludeGroupIds>
                            <!--排除所有scope为test的依赖-->
                            <includeScope>compile</includeScope>
                            <!--依赖保存路径-->
                            <outputDirectory>${project.build.directory}/lib</outputDirectory>
                        </configuration>
                    </execution>
                </executions>
            </plugin>
        </plugins>
    </build>
</project>
子模块处理
我们通过配置maven-dependency-plugin将各个子模块的jar包拷贝到打包路径下的core文件夹下,我们在artifactItems下声明想要拷贝的模块,由于我们在multi-module-project的POM中将mmp-assembly模块放在modules的最后一个,因此当对mmp-assembly进行打包时,其他子模块必定已经打包完毕,即jar包必定存在。
<project>
    ...
    <build>
        <plugins>
            <plugin>
                <groupId>org.apache.maven.plugins</groupId>
                <artifactId>maven-dependency-plugin</artifactId>
                <version>2.8</version>
                <executions>
                    ...
                    <execution>
                        <id>copy-core</id>
                        <phase>package</phase>
                        <goals>
                            <goal>copy</goal>
                        </goals>
                        <configuration>
                            <artifactItems>
                                <artifactItem>
                                    <groupId>com.sigalhu.mmp</groupId>
                                    <artifactId>mmp-dal</artifactId>
                                </artifactItem>
                                <artifactItem>
                                    <groupId>com.sigalhu.mmp</groupId>
                                    <artifactId>mmp-integration</artifactId>
                                </artifactItem>
                                <artifactItem>
                                    <groupId>com.sigalhu.mmp</groupId>
                                    <artifactId>mmp-commons</artifactId>
                                </artifactItem>
                                <artifactItem>
                                    <groupId>com.sigalhu.mmp</groupId>
                                    <artifactId>mmp-biz</artifactId>
                                </artifactItem>
                                <artifactItem>
                                    <groupId>com.sigalhu.mmp</groupId>
                                    <artifactId>mmp-service</artifactId>
                                </artifactItem>
                                <artifactItem>
                                    <groupId>com.sigalhu.mmp</groupId>
                                    <artifactId>mmp-api</artifactId>
                                </artifactItem>
                            </artifactItems>
                            <outputDirectory>${project.build.directory}/core</outputDirectory>
                        </configuration>
                    </execution>
                </executions>
            </plugin>
        </plugins>
    </build>
</project>
配置文件处理
在实际开发中,我们一般都有不同的环境,例如测试环境、开发环境、稳定环境、预发环境、线上环境等,不同环境下,配置文件中的配置各不相同,例如数据库的配置,各个环境下所存取的数据库肯定不会是同一个。
在multi-module-project下新建settings文件夹,并在该文件夹下新建不同环境的配置文件。
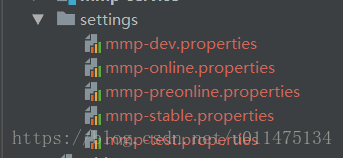
在各配置文件中,我们声明了一个属性用来表示不同的环境。
# mmp-test.properties
user.env=_test

# mmp-dev.properties
user.env=_dev

# mmp-stable.properties
user.env=_stable

# mmp-preonline.properties
user.env=_preonline

# mmp-online.properties
user.env=_online同时,我们将mmp-assembly模块的目录结构修改如下:
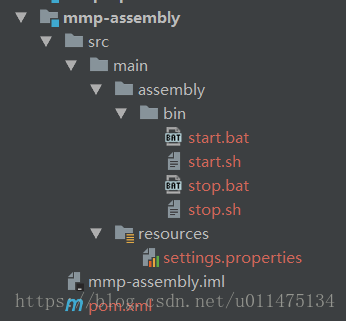
其中bin文件夹中是我们项目的启动脚本,resources文件夹中是我们项目的配置文件,可以看到该属性值是未定的,接下来我们将利用Maven的profile与filters来将下面配置文件的${…}替换为settings文件夹中配置文件的对应属性值。
# settings.properties
user.env=${user.env}在下面的配置中,我们将id为stable的profile设置为默认激活,当打包该项目时,如果我们没有指定profile,则filter下的${profile.name}的将会被替换为stable,此时mmp-assembly模块的settings.properties中的${…}会被替换为mmp-stable.properties中属性的值。
<project>
    ...
    <profiles>
        <profile>
            <id>test</id>
            <activation>
                <!--指定profile自动激活,如果POM中有任何一个profile通过以上其他任意一种方式被激活,所有默认激活配置都会失效-->
                <activeByDefault>false</activeByDefault>
            </activation>
            <!--设置属性值,通过激活不同的profile来实现相同属性,不同属性值的替换-->
            <properties>
                <profile.name>test</profile.name>
            </properties>
        </profile>

        <profile>
            <id>dev</id>
            <activation>
                <activeByDefault>false</activeByDefault>
            </activation>
            <properties>
                <profile.name>dev</profile.name>
            </properties>
        </profile>

        <profile>
            <id>stable</id>
            <activation>
                <activeByDefault>true</activeByDefault>
            </activation>
            <properties>
                <profile.name>stable</profile.name>
            </properties>
        </profile>

        <profile>
            <id>preonline</id>
            <activation>
                <activeByDefault>false</activeByDefault>
            </activation>
            <properties>
                <profile.name>preonline</profile.name>
            </properties>
        </profile>

        <profile>
            <id>online</id>
            <activation>
                <activeByDefault>false</activeByDefault>
            </activation>
            <properties>
                <profile.name>online</profile.name>
            </properties>
        </profile>
    </profiles>

    <build>
        <!--指明使用该属性文件作为resource/filtering属性值的来源-->
        <filters>
            <filter>../settings/mmp-${profile.name}.properties</filter>
        </filters>

        <!--设置资源目录,默认为src/main/resources-->
        <resources>
            <resource>
                <directory>src/main/resources</directory>
                <!--开启资源过滤,资源文件当中${…}符号会被替换为系统属性或者项目属性的值-->
                <filtering>true</filtering>
                <includes>
                    <include>*.properties</include>
                </includes>
            </resource>
        </resources>
        ...
    </build>
</project>
打包配置
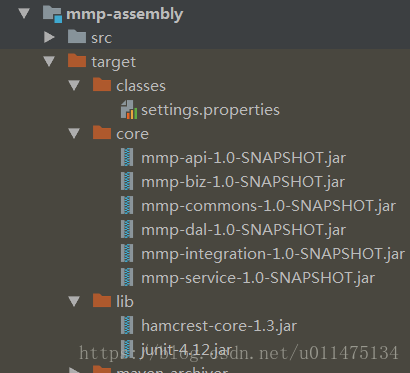
现在如果我们对项目执行package命令,可以看到如下图所示,配置文件、子模块还有依赖都位于各自文件夹下,这里为了便于理解,我们注释了junit的依赖范围,因此junit及其依赖会被拷贝到lib文件夹下。
下面我们使用maven-assembly-plugin将以上这些包和文件再加上启动脚本打包成zip压缩文件。
<project>
    ...
    <build>
        ...
        <plugins>
            ...
            <plugin>
                <groupId>org.apache.maven.plugins</groupId>
                <artifactId>maven-assembly-plugin</artifactId>
                <!--声明一个非快照版本,避免由于插件版本变化造成的构建不稳定性-->
                <version>2.5.3</version>
                <configuration>
                    <finalName>${project.artifactId}-${project.version}</finalName>
                    <descriptors>
                        <descriptor>src/main/assembly/assembly.xml</descriptor>
                    </descriptors>
                    <!--指定打包类型-->
                    <formats>
                        <format>zip</format>
                    </formats>
                    <!--是否在包名尾部追加assembly.xml中定义的assembly id-->
                    <appendAssemblyId>false</appendAssemblyId>
                    <!--打包文件保存路径,默认为target-->
                    <outputDirectory>target</outputDirectory>
                    <!--这样配置后,mvn deploy不会把assembly打的zip包上传到nexus-->
                    <attach>false</attach>
                </configuration>
                <!--executions下每个execution可以用来配置执行一个任务-->
                <executions>
                    <execution>
                        <!--通过phase配置,将其绑定到package生命周期阶段-->
                        <phase>package</phase>
                        <!--通过goals配置指定要执行的插件目标-->
                        <goals>
                            <goal>single</goal>
                        </goals>
                    </execution>
                </executions>
            </plugin>
        </plugins>
    </build>
</project>descriptors中指定的assembly.xml文件配置如下:
<?xml version='1.0' encoding='UTF-8'?>
<assembly>
    <id>assembly</id>
    <!--指定是否包含打包层目录,当值为true,文件被放在finalName目录下,否则直接放在包的根目录下-->
    <includeBaseDirectory>false</includeBaseDirectory>

    <!--指定要包含的文件集,可以定义多个fileSet-->
    <fileSets>
        <fileSet>
            <!--指定要包含的目录-->
            <directory>${project.build.directory}/classes</directory>
            <!--指定当前要包含的目录的目的地-->
            <outputDirectory>conf</outputDirectory>
        </fileSet>
        <fileSet>
            <directory>src/main/assembly/bin</directory>
            <outputDirectory>bin</outputDirectory>
        </fileSet>
        <fileSet>
            <directory>${project.build.directory}/lib</directory>
            <outputDirectory>lib</outputDirectory>
        </fileSet>
        <fileSet>
            <directory>${project.build.directory}/core</directory>
            <outputDirectory>core</outputDirectory>
        </fileSet>
    </fileSets>
</assembly>
构建项目
在idea中,我们可以在Profiles中勾选不同profile来针对不同环境进行打包,如果Profiles中没有我们定义的profile,可以点击下图左上角的Reimport All Maven Projects重新载入。
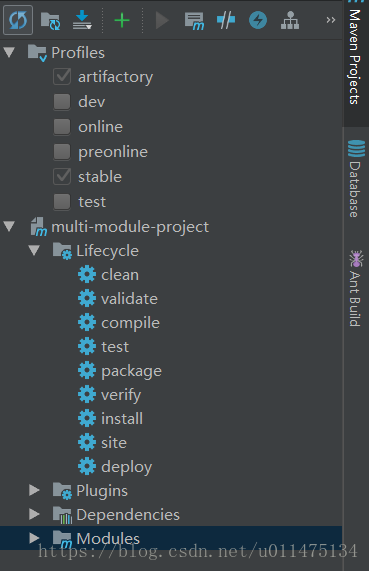
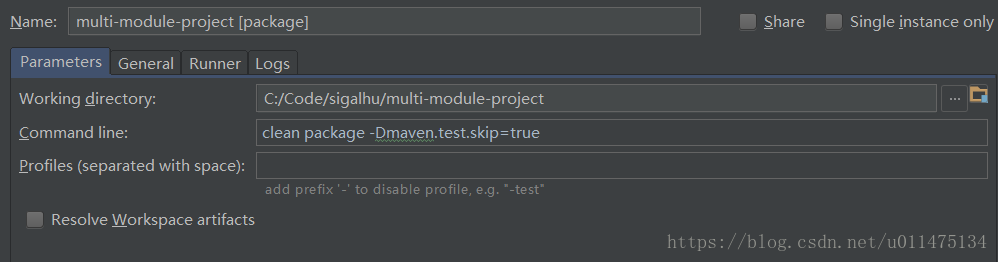
在构建项目时,我们先执行clean命令清除打包路径下的文件,然后执行package命令进行打包。
如果我们想要在构建时不执行测试代码,可以选中上图菜单栏的倒数第二个按钮来跳过测试,但需要注意的是,这种方法只会不执行测试代码,测试代码还是会被编译,我们可以通过自定义命令来跳过测试代码的编译与执行。
项目源码:https://github.com/SigalHu/multi-module-project
学习更多:https://github.com/SigalHu/java-service-exercises