信我,这次只讲技术!
实现效果(点击“更换手机号”,背景变暗,弹出输入框):
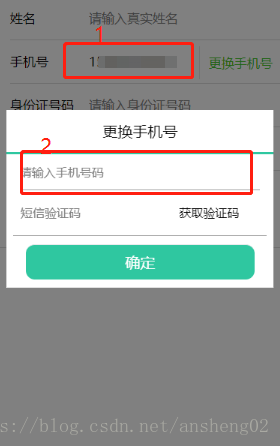
嗯,我懒,就用了上一篇文章小程序填坑之路--弹窗修改手机号后的更新(已解决)的图。
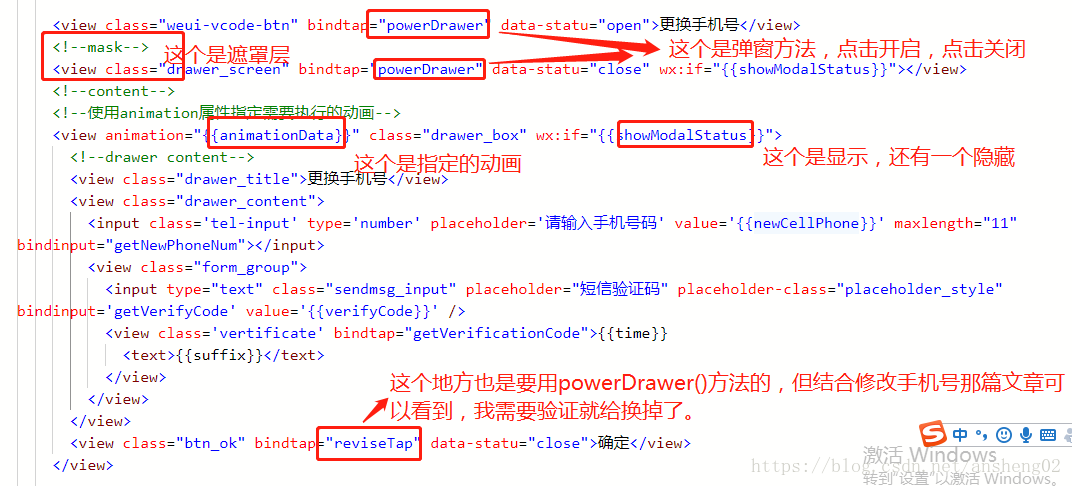
先上wxml的代码,
    <view class="weui-vcode-btn" bindtap="powerDrawer" data-statu="open">更换手机号</view>
    <!--mask-->
    <view class="drawer_screen" bindtap="powerDrawer" data-statu="close" wx:if="{{showModalStatus}}"></view>
    <!--content-->
    <!--使用animation属性指定需要执行的动画-->
    <view animation="{{animationData}}" class="drawer_box" wx:if="{{showModalStatus}}">
      <!--drawer content-->
      <view class="drawer_title">更换手机号</view>
      <view class="drawer_content">
        <input class='tel-input' type='number' placeholder='请输入手机号码' value='{{newCellPhone}}' maxlength="11" bindinput="getNewPhoneNum"></input>
        <view class="form_group">
          <input type="text" class="sendmsg_input" placeholder="短信验证码" placeholder-class="placeholder_style" bindinput='getVerifyCode' value='{{verifyCode}}' />
          <view class='vertificate' bindtap="getVerificationCode">{{time}}
            <text>{{suffix}}</text>
          </view>
        </view>
      </view>
      <view class="btn_ok" bindtap="reviseTap" data-statu="close">确定</view>
    </view>
这段代码一上来,我忽然觉得:嘿,这篇文章和弹窗修改手机号那个可以一起做,不过得先看这个。
本来想讲讲,发现,还不如截图,我直接上截图,代码一起上。
wxml讲完了,CSS没什么可以说的,先直接写上吧。
/*mask*/

.drawer_screen {
  width: 100%;
  height: 100%;
  position: fixed;
  top: 0;
  left: 0;
  z-index: 1000;
  background: #000;
  opacity: 0.5;
  overflow: hidden;
}

/*content*/

.drawer_box {
  width: 95%;
  overflow: hidden;
  position: fixed;
  top: 50%;
  left: 0;
  z-index: 1001;
  margin: -150px 50rpx 0 20rpx;
  background-color: #fff;
}

.drawer_title {
  padding: 15px;
  font: 20px "microsoft yahei";
  text-align: center;
  border-bottom: 3px solid #2fc7a0;
}

.drawer_content {
  overflow-y: scroll; /*超出父盒子高度可滚动*/
}

.drawer_content .title {
  font-size: 30rpx;
  text-align: left;
  color: #333;
  margin-top: -68rpx;
  display: block;
  padding: 0 20rpx;
}

.drawer_content .tel-input {
  height: 95rpx;
  border-bottom: 1px solid #a0a0a0;
  width: 90%;
  margin: 0 auto;
  color: #333;
  text-align: left;
  font-size: 32rpx;
}

.btn_ok {
  padding: 10px;
  font: 20px "microsoft yahei";
  text-align: center;
  border-top: 1px solid #e8e8ea;
  color: #fff;
  background-color: #2fc7a0;
  width: 80%;
  margin: 22rpx auto;
  border-radius: 25rpx;
}

.form_group {
  display: flex;
  flex-direction: row;
  justify-content: space-between;
  width: 95%;
  margin: 0 auto;
  text-align: left;
}

.form_group input, .form_group picker {
  width: 676rpx;
  border-bottom: 1px solid #a0a0a0;
  height: 121rpx;
  padding-left: 20rpx;
  font-family: PingFangSC-Regular;
  font-size: 32rpx;
  letter-spacing: 0;
  line-height: 121rpx;
}

.form_group .sendmsg_input {
  width: 348rpx;
  color: #333;
}

.form_group .vertificate {
  width: 326rpx;
  border-bottom: 1px solid #a0a0a0;
  height: 121rpx;
  padding-left: 20rpx;
  font-family: PingFangSC-Regular;
  font-size: 32rpx;
  letter-spacing: 0;
  line-height: 121rpx;
  text-align: center;
}

.vertificate text {
  color: gray;
}
JS上有注释,很容易理解,写上代码吧,在代码里进行讲解。
  //更换手机号
  powerDrawer: function(e) {
    //var that = this;
    var currentStatu = e.currentTarget.dataset.statu;
    this.util(currentStatu)
  },

  util: function(currentStatu) {
    /* 动画部分 */
    // 第1步:创建动画实例
    var animation = wx.createAnimation({
      duration: 200, //动画时长
      timingFunction: "linear", //线性
      delay: 0 //0则不延迟
    });

    // 第2步:这个动画实例赋给当前的动画实例
    this.animation = animation;

    // 第3步:执行第一组动画
    animation.opacity(0).rotateX(-100).step();

    // 第4步:导出动画对象赋给数据对象储存
    this.setData({
      animationData: animation.export()
    })

    // 第5步:设置定时器到指定时候后,执行第二组动画
    setTimeout(function() {
      // 执行第二组动画
      animation.opacity(1).rotateX(0).step();
      // 给数据对象储存的第一组动画,更替为执行完第二组动画的动画对象
      this.setData({
        animationData: animation
      })

      //关闭
      if (currentStatu == "close") {
        this.setData({
          showModalStatus: false
        });
      }
    }.bind(this), 200)

    // 显示
    if (currentStatu == "open") {
      this.setData({
        showModalStatus: true
      });
    }
  },
我忽然觉得这样并不算我自己写,原作者我不知道在哪里找了,这是我从网上找下来的代码。不过自己进行了二次开发修改,却也没怎么动。先这样吧,这篇还不算我原创呢。
说什么讲技术,嗯,女生说的话,有时候是假的呢~~~