注:这里用到的是本地测试,所以后面的URL网址并没有使用https。
你需要做的几件小事:
- 页面
- php
- mysql
关于页面,直接贴代码。具体自己去看。效果图最后放出来。
需要指出的是,这里用到form表单。
bindsubmit代表事件绑定函数,在js中处理form表单触发的事件。
那么事件又是如何被触发的呢?
form表单中有一个formType 属性,当值为submit时,点击formType所在的组件就可以触发form提交事件,在js中进行事件处理。
<form bindsubmit='formSubmit' bindreset='formReset'>
  <view class="container">
    <view class="login-icon">
      <image class="login-img" src="图片地址"></image>
    </view>
    <view class="login-from">

      <!--账号-->
      <view class="inputView">
        <image class="nameImage" src="/images/name.png"></image>
        <label class="loginLab">账号</label>
        <input class="inputText" name="zhanghao" placeholder="请输入账号" />
      </view>
      <view class="line"></view>

      <!--密码-->
      <view class="inputView">
        <image class="keyImage" src="/images/key.png"></image>
        <label class="loginLab">密码</label>
        <input class="inputText" name="mima" password="true" placeholder="请输入密码" />
      </view>

      <!--登录按钮-->
      <view class="loginBtnView">
        <button class="loginBtn" type="primary" size="{{primarySize}}" loading="{{loading}}" plain="{{plain}}" disabled="{{disabled}}" form-type='submit'>登录</button>
      </view>

    </view>
  </view>
</form>
page{
height: 100%;
}
.container {
height: 100%;
display: flex;
flex-direction: column;
padding: 0;
box-sizing: border-box;
background-color: #f2f2f2
}
/*登录图片*/
.login-icon{
flex: none;
}
.login-img{
width: 750rpx;
}
/*表单内容*/
.login-from {
margin-top: 20px;
flex: auto;
height:100%;
}
.inputView {
background-color: #fff;
line-height: 44px;
}
/*输入框*/
.nameImage, .keyImage {
margin-left: 22px;
width: 14px;
height: 14px
}
.loginLab {
margin: 15px 15px 15px 10px;
color: #545454;
font-size: 14px
}
.inputText {
flex: block;
float: right;
text-align: right;
margin-right: 22px;
margin-top: 11px;
color: #cccccc;
font-size: 14px
}
.line {
width: 100%;
height: 1px;
background-color: #cccccc;
margin-top: 1px;
}
/*按钮*/
.loginBtnView {
width: 100%;
height: auto;
background-color: #f2f2f2;
margin-top: 0px;
margin-bottom: 0px;
padding-bottom: 0px;
}
.loginBtn {
width: 80%;
margin-top: 15px;
}
接下来才是重点。
function函数中的(e)或者(res)代表提交的结果。比如formSubmit: function(e)提交的来自表单的结果,success:function(res)提交的来自php访问成功返回数据的结果。
在wx.request中设置URL以及变量提交方式等。data{}用来传值变量。
如果访问网址成功执行success函数,失败则执行else中的代码。
// pages/login/login.js

Page({
  data: {
  },

  formSubmit: function(e) {

    if (e.detail.value.zhanghao.length == 0 || e.detail.value.mima.length == 0) {
      wx.showToast({
        title: '账户或密码为空!',
        icon: 'loading',
        duration: 1500
      })
      setTimeout(function() {
        wx.hideToast()
      }, 2000)
    } else {
      wx.request({
        url: 'http://localhost/wechatlogin.php',
        method: 'GET',
        header: {
          'content-type': 'application/json'
        },
        data:{
          num:e.detail.value.zhanghao,
          pass:e.detail.value.mima
        },
        success:function(res){
          console.log(res.data);
          console.log("账号:" + res.data.num + "密码:" + res.data.pass);
          console.log("输入账号为:" + e.detail.value.zhanghao + "输入密码为:" + e.detail.value.mima);

          if(res.data.num==e.detail.value.zhanghao||res.data.pass==e.detail.value.mima){

            //如果输入结果符合查询结果,将要执行的代码(我这里直接跳转了一个页面)
            wx.reLaunch({
              url: '../posts/post',
            })
          }else{
            wx.showToast({
              title: '账户或密码错误!',
              icon:'loading',
              duration:1500
            })
            setTimeout(function(){
              wx.hideToast()
            },2000)
          }
        }
      })
    }
  }
})
访问成功以后才可以执行PHP文件代码。
其中GET的数据就是从wx.request下的data{}中传递过来的变量。
mysqli_fetch_assoc返回的是以数据库表的字段为索引的关联数组,但是很需要注意的是,在输出这段数组之前,有其他输出就一定要记得换行,不然得到的就是一个组合在一起的字符串而不是数组。数组的正确输出形式(JSON):

为什么是注明是JSON类型的?
小程序只接收JSON文件,所以还要转成JSON文件。 使用json_encode将返回的数组操作就ok啦。此时将得到的数组输出就是上面的样子。
那么这个数据在哪里呢?在success函数的res中。通过 res.data.索引 就可以得到想要的数据库查询内容。
然后参考上面的js代码完成登录功能吧!
<?php
//设置编码utf—8
header('Content-type:text/html;charset=utf-8');
$num = $_GET['num'];
$pass = $_GET['pass'];
$con = new mysqli("localhost","root","123","demo");
//定义sql语句
$sql = "select number as num,password as pass,username from user where number='$num' and password='$pass'";
//发送sql语句
$result = mysqli_query($con,$sql)
or die("SQL语句执行失败!");
if ($res = mysqli_fetch_assoc($result)) {
$json=json_encode($res);
echo "$json";
}else{
echo "账号或者密码错误";
}
mysqli_close($con);
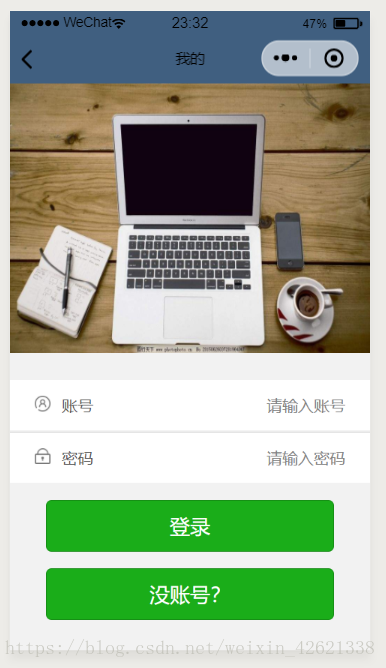
?>效果图:
(上述代码我删除掉了注册功能,所以没有第二个按钮。注册的思路也很简单。这里点击按钮跳转注册页面,信息填写提交表单,后台php处理数据库,完成后返回执行success函数)